1.主要是为了解决远端使用长连接访问服务器时,对后台服务器做高可用配置的问题,在此做简单测试。使用keepalived的目的是将部署在不同IP上的后台服务整合,对外提供同一个虚拟IP,当后台主节点服务器挂掉后,虚拟IP自动漂移到从节点上,保证服务的高可用性
1.操作系统:CentOS 7.6
2.keepalived主机:172.17.0.201
3.keepalived从机:172.17.0.206
4.虚拟IP:172.17.0.220
2.电脑优化
3.keepalived安装
主从都安装
yum install -y openssl openssl-devel keepalived
4.主机配置:
vi /etc/keepalived/keepalived.conf
! Configuration File for keepalived

global_defs {
    notification_email
        [email protected]
        [email protected]
        [email protected]
    }
    notification_email_from [email protected]
    smtp_server 192.168.200.1
    smtp_connect_timeout 30
    router_id LVS_DEVEL1
}

vrrp_instance VI_1 {
    state MASTER
    interface ens192                              #网卡名称-可用ifconfig查看
    virtual_router_id 51
    priority 100
    advert_int 1
    authentication {
        auth_type PASS
        auth_pass 1111
    }
    virtual_ipaddress {
        172.17.0.220
    }
}

virtual_server 172.17.0.220 80 {
    delay_loop 6
    lb_algo rr
    lb_kind NAT
    nat_mask 255.255.255.0
    persistence_timeout 50
    protocol HTTP
    real_server 172.17.0.201 80 {
        weight 1
        inhibit_on_failure
        HTTP_GET {
                url {
                    path /
                    status_code 200
                }
                connect_timeout 3
                nb_get_retry 3
                delay_before_retry 3
        }
   }

    real_server 172.17.0.206 80 {
        weight 1
        inhibit_on_failure
        HTTP_GET {
                url {
                    path /
                    status_code 200
                }
                connect_timeout 3
                nb_get_retry 3
                delay_before_retry 3
        }
  }
}
5.从机配置
vi /etc/keepalived/keepalived.conf
! Configuration File for keepalived

global_defs {
    notification_email
        [email protected]
        [email protected]
        [email protected]
    }
    notification_email_from [email protected]
    smtp_server 192.168.200.1
    smtp_connect_timeout 30
    router_id LVS_DEVEL1
}

vrrp_instance VI_1 {
    state BACKUP
    interface ens192                              #网卡名称-可用ifconfig查看
    virtual_router_id 51
    priority 50
    advert_int 1
    authentication {
        auth_type PASS
        auth_pass 1111
    }
    virtual_ipaddress {
        172.17.0.220
    }
}

virtual_server 172.17.0.220 80 {
    delay_loop 6
    lb_algo rr
    lb_kind NAT
    nat_mask 255.255.255.0
    persistence_timeout 50
    protocol HTTP
    real_server 172.17.0.201 80 {
        weight 1
        inhibit_on_failure
        HTTP_GET {
                url {
                    path /
                    status_code 200
                }
                connect_timeout 3
                nb_get_retry 3
                delay_before_retry 3
        }
   }

    real_server 172.17.0.206 80 {
        weight 1
        inhibit_on_failure
        HTTP_GET {
                url {
                    path /
                    status_code 200
                }
                connect_timeout 3
                nb_get_retry 3
                delay_before_retry 3
        }
  }
}
6.启动服务
systemctl start keepalived.service
7.加入开机启动
systemctl enable keepalived.service
8.验证
当从其他电脑不停的ping 虚拟IP 172.17.0.220
1>查看电脑网卡信息
ip addr
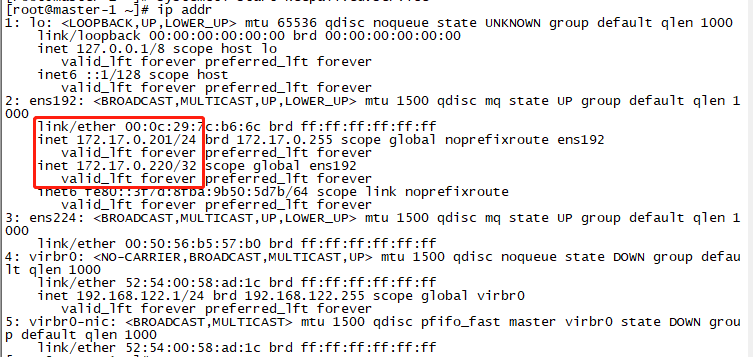
主机网卡信息
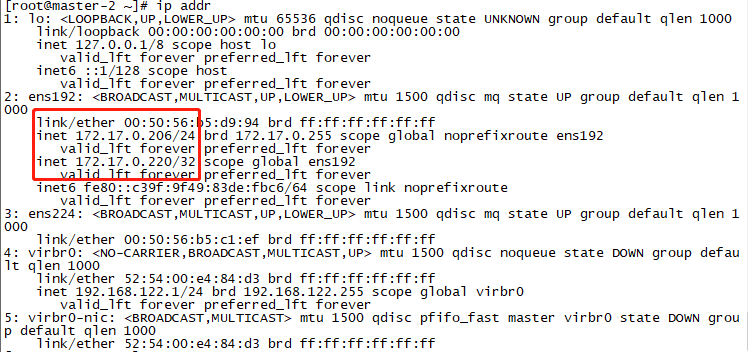
从机网卡信息
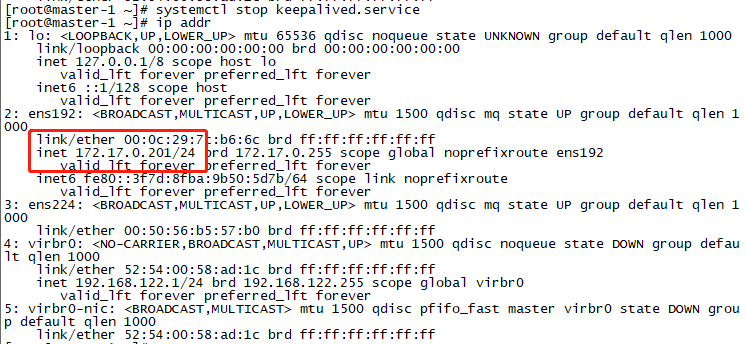
2>关闭主机keepalived服务
systemctl stop keepalived.service
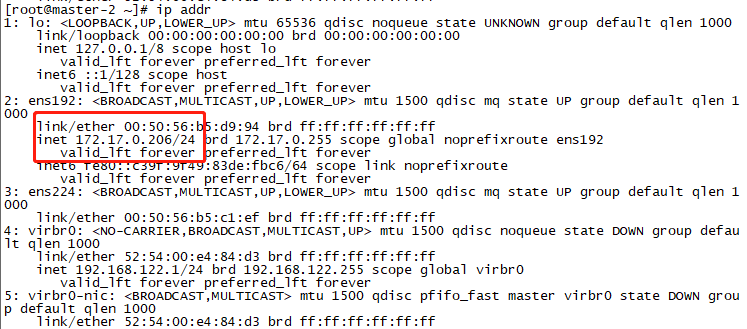
主机网卡信息
从机网卡信息