安装企业版Oracle数据库需要安装两部分:Oracle Grid,Oracle Database 两部分软件
以Oracle 12C为例。
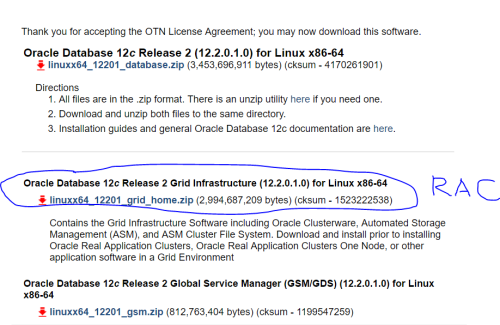
Oracle官方网站下载grid 安装包:
http://www.oracle.com/technetwork/database/enterprise-edition/downloads/oracle12c-linux-12201-3608234.html
安装前准备。
oracle rac作为集群软件,在安装之前需要对各个要安装的服务器进行集群配置,以下操作需要在三台server上面依次完成:
1) IP地址划分
本次以三台服务器为集群节点为例,划分ip地址如下(关于oracle rac ip地址分类介绍请看这里):
Public ip:
192.168.0.10
192.168.0.11
192.168.0.12
Private ip:
192.168.1.10
192.168.1.11
192.168.1.12
Virtual ip:
192.168.0.13
192.168.0.14
192.168.0.15
Scan ip:
192.168.0.16
所以在三台服务器(test-4,test-5,test-6)上面/etc/hosts的配置如下(在一台server上面配置好了以后直接拷贝到另外两台机器):
127.0.0.1 localhost localhost.localdomain localhost4 localhost4.localdomain4
::1 localhost localhost.localdomain localhost6 localhost6.localdomain6
192.168.0.10 test-4 test-4.localdomain
192.168.0.13 test-4-vip
192.168.0.11 test-5 test-5.localdomain
192.168.0.14 test-5-vip
192.168.0.12 test-6 test-6.localdomain
192.168.0.15 test-6-vip
192.168.0.16 scan4 scan4.localdomain
192.168.1.10 test-4-priv
192.168.1.11 test-5-priv
192.168.1.12 test-6-priv
从这份配置中可以看到每个ip对应的host。public ip和private ip在安装之前需要ifconfig配置完成,virtual ip,scan ip不需要ifconfig配置。

## 2)创建新用户(grid,oracle)和组(oinstall,dba,asmadmin,asmdba,asmoper,oper),以其中一台 test-5上的操作为例:
```python
[root@test-5 ~]# groupadd -g 501 oinstall
[root@test-5 ~]# groupadd -g 502 dba
[root@test-5 ~]# groupadd -g 504 asmadmin
[root@test-5 ~]# groupadd -g 506 asmdba
[root@test-5 ~]# groupadd -g 507 asmoper
[root@test-5 ~]# useradd -u 5001 -g oinstall -G dba,asmadmin,asmdba,asmoper -d /home/grid -s /bin/bash -c "grid" grid
[root@test-5 ~]# su - grid
[grid@test-5 ~]$ id grid
uid=5001(grid) gid=501(oinstall) groups=501(oinstall),502(dba),504(asmadmin),506(asmdba),507(asmoper)
[root@test-5 ~]# groupadd -g 503 oper
[root@test-5 ~]# useradd -u 5002 -g oinstall -G dba,oper,asmdba -d /home/oracle -s /bin/bash -c "oracle" oracle
[root@test-5 ~]# su - oracle
[oracle@test-5 ~]$ id oracle
uid=5002(oracle) gid=501(oinstall) groups=501(oinstall),502(dba),506(asmdba),503(oper
3)修改系统 linux limits文件 /etc/security/limits.conf
cp /etc/security/limits.conf /etc/security/limits.conf.bak
echo "oracle soft nproc 2047" >>/etc/security/limits.conf
echo "oracle hard nproc 16384" >>/etc/security/limits.conf
echo "oracle soft nofile 1024" >>/etc/security/limits.conf
echo "oracle hard nofile 65536" >>/etc/security/limits.conf
echo "grid soft nproc 2047" >>/etc/security/limits.conf
echo "grid hard nproc 16384" >>/etc/security/limits.conf
echo "grid soft nofile 1024" >>/etc/security/limits.conf
echo "grid hard nofile 65536" >>/etc/security/limits.conf
4)修改/etc/profile
cp /etc/profile /etc/profile.bak
echo 'if [ $USER = "oracle" ]||[ $USER = "grid" ]; then' >>  /etc/profile
echo 'if [ $SHELL = "/bin/ksh" ]; then' >> /etc/profile
echo 'ulimit -p 16384' >> /etc/profile
echo 'ulimit -n 65536' >> /etc/profile
echo 'else' >> /etc/profile
echo 'ulimit -u 16384 -n 65536' >> /etc/profile
echo 'fi' >> /etc/profile
echo 'fi' >> /etc/profile
5)在三个节点分别运行以下命令:
cp /etc/sysctl.conf /etc/sysctl.conf.bak
echo "fs.aio-max-nr = 1048576" >> /etc/sysctl.conf
echo "fs.file-max = 6815744" >> /etc/sysctl.conf
echo "kernel.shmall = 2097152" >> /etc/sysctl.conf
echo "kernel.shmmax = 1054472192" >> /etc/sysctl.conf
echo "kernel.shmmni = 4096" >> /etc/sysctl.conf
echo "kernel.sem = 250 32000 100 128" >> /etc/sysctl.conf
echo "net.ipv4.ip_local_port_range = 9000 65500" >> /etc/sysctl.conf
echo "net.core.rmem_default = 262144" >> /etc/sysctl.conf
echo "net.core.rmem_max = 4194304" >> /etc/sysctl.conf
echo "net.core.wmem_default = 262144" >> /etc/sysctl.conf
echo "net.core.wmem_max = 1048586" >> /etc/sysctl.conf
echo "net.ipv4.tcp_wmem = 262144 262144 262144" >> /etc/sysctl.conf
echo "net.ipv4.tcp_rmem = 4194304 4194304 4194304" >> /etc/sysctl.conf
sysctl -p
6)grid用户的 .bash_profile:
# .bash_profile

# Get the aliases and functions
if [ -f ~/.bashrc ]; then
        . ~/.bashrc
fi

# User specific environment and startup programs

TMP=/tmp; export TMP
TMPDIR=$TMP; export TMPDIR
#node1 :ORACLE_SID=+ASM1 ; node2 : ORACLE_SID=+ASM2 : node3: ORACLE_SID=+ASM3
ORACLE_SID=+ASM1; export ORACLE_SID
ORACLE_BASE=/u01/app/grid/; export ORACLE_BASE
ORACLE_HOME=/u01/app/grid_home; export ORACLE_HOME
NLS_DATE_FORMAT="yyyy-mm-dd HH24:MI:SS"; export NLS_DATE_FORMAT
THREADS_FLAG=native; export THREADS_FLAG
PATH=$ORACLE_HOME/bin:$PATH; export PATH
THREADS_FLAG=native; export THREADS_FLAG
PATH=$ORACLE_HOME/bin:$PATH; export PATH
umask 022
7)oracle用户的 .bash_profile(Oracle SID根据后面自己安装的数据库名字做相应改动,sqlplus根据这个环境变量决定连接哪个数据库实例):
# .bash_profile

# Get the aliases and functions
if [ -f ~/.bashrc ]; then
        . ~/.bashrc
fi

# User specific environment and startup programs

PATH=$PATH:$HOME/bin

export PATH
TMP=/tmp; export TMP
TMPDIR=$TMP; export TMPDIR
ORACLE_BASE=/u01/app/oracle/; export ORACLE_BASE
ORACLE_HOME=/u01/app/oracle_home; export ORACLE_HOME
#node1:ORACLE_SID=racdb1 , node2:ORACLE_SID=racdb2 , node3:ORACLE_SID=racdb3
ORACLE_SID=racdb1; export ORACLE_SID
ORACLE_TERM=xterm; export ORACLE_TERM
PATH=/usr/sbin:$PATH; export PATH
PATH=$ORACLE_HOME/bin:$PATH; export PATH
LD_LIBRARY_PATH=$ORACLE_HOME/lib:/lib:/usr/lib; export LD_LIBRARY_PATH
CLASSPATH=$ORACLE_HOME/JRE:$ORACLE_HOME/jlib:$ORACLE_HOME/rdbms/jlib; export CLASSPATH
NLS_DATE_FORMAT="yyyy-mm-dd HH24:MI:SS"; export NLS_DATE_FORMAT
NLS_LANG=AMERICAN_AMERICA.ZHS16GBK;export NLS_LANG
JAVA_HOME=/opt/jdk1.8.0_121; export JAVA_HOME
PATH=$JAVA_HOME/bin:$PATH; export PATH
umask 022
依次在三个host完成上面1)-7)的配置。
8)在三个节点上配置grid 用户和Oracle用户的无密码登陆,即三台host中从任何一台host上面用grid或者oracle用户都可以直接ssh到另外一台机器执行命令。以oracle和grid用户运行命令下面命令,以oracle用户为例,在test-5上
sed -i 's/UserKnownHostsFile \/dev\/null//g' /etc/ssh/ssh_config
sed -i 's/StrictHostKeyChecking no/StrictHostKeyChecking ask/g' /etc/ssh/ssh_config
ssh-keygen -N "" -f ~/.ssh/id_rsa
ssh-keygen -N "" -y -f ~/.ssh/id_rsa > ~/.ssh/id_rsa.pub
cat ~/.ssh/id_rsa.pub
把最后一步cat得到的公钥放到test-4,test-6的oracle用户~/.ssh/authorized_keys里面。在test-5上面运行:
ssh test-4 date
ssh test-6 date
来测试无密码登陆的配置。在test-4和test-6上面执行同样的步骤,把公钥放到另外两台host对应的authorized_keys里面。
9)创建文件夹和修改权限
mkdir -p /u01/app/grid
mkdir -p /u01/app/11.2.0/grid
mkdir -p /u01/app/oracle
chown -R oracle:oinstall /u01
chown -R grid:oinstall /u01/app/grid
chown -R grid:oinstall /u01/app/11.2.0
chmod -R 775 /u01
10)停止NTP服务
service ntpd stop
chkconfig ntpd off
rm -f /etc/ntp.conf
11)在/u01/app/grid_home下面解压缩下载到的grid安装包
解压缩后,执行runcluvfy.sh脚本做安装前的precheck 工作。
执行命令:
./runcluvfy.sh stage -pre crsinst -n test-4,test-5,test-6 -verbose经过前面1)-10)步的配置,precheck基本上都能通过,如果有其他不能通过的地方请参考具体信息进行修改。
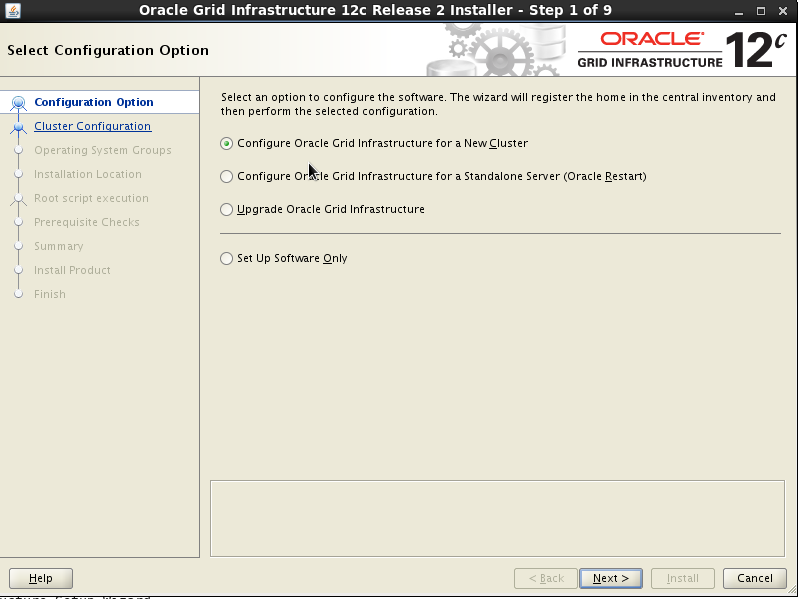
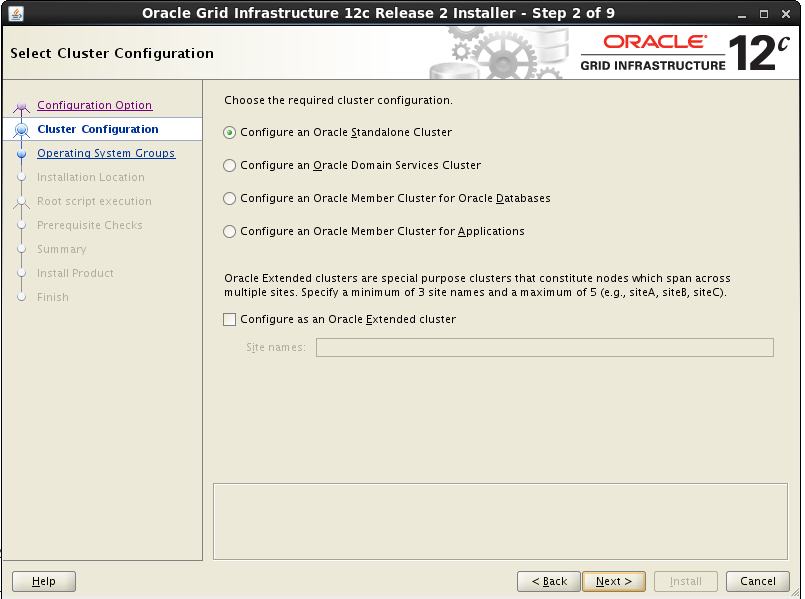
12)./gridSetup.sh安装grid。安装在图形界面下进行,各步截图如下:
选择安装grid infrastructure
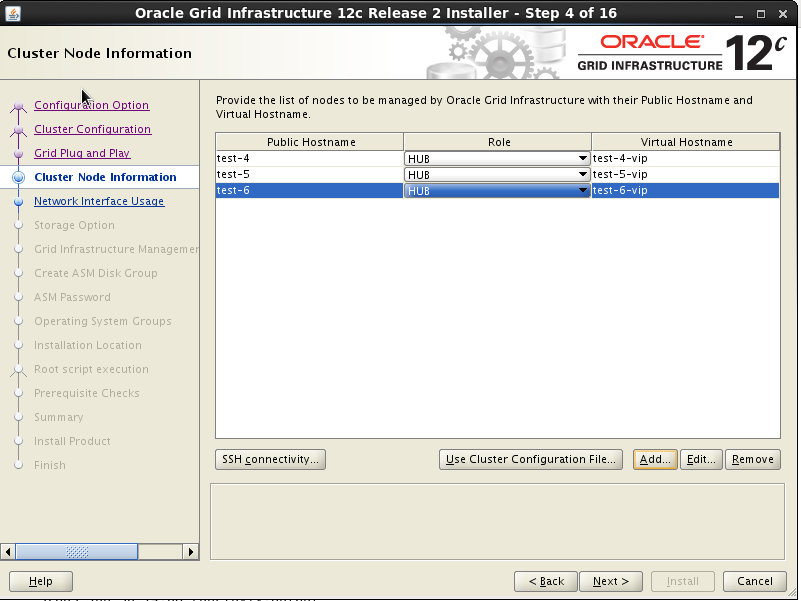
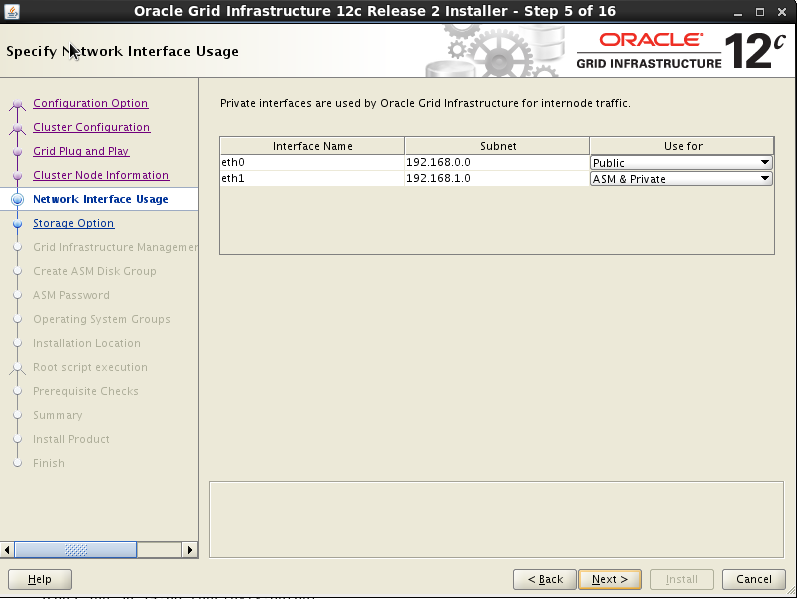
SCAN Name与/etc/hosts中保持一致

virtual hostname与/etc/hosts保持一致
使用192.168.0.0子网作为public 网段
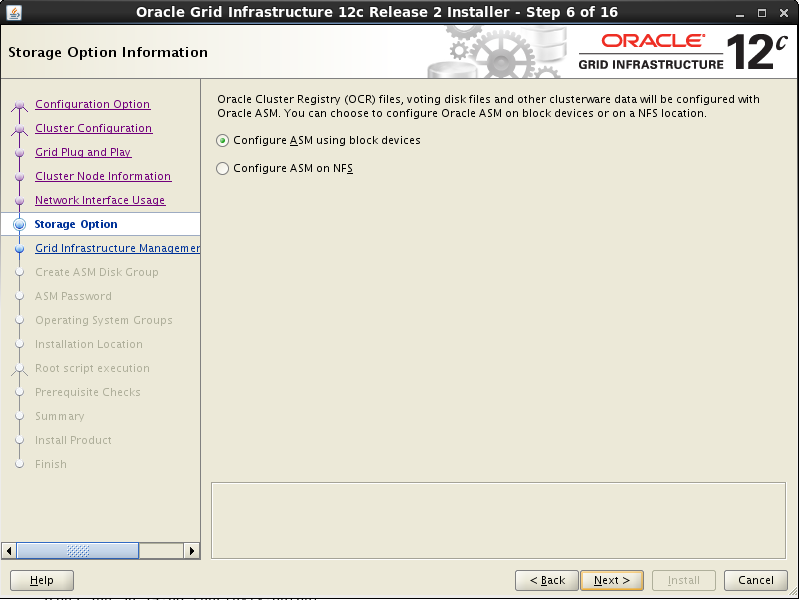
划分一个disk作为voting disk来使用,可以专门划分一个小容量磁盘作为OCR/voting disk来用

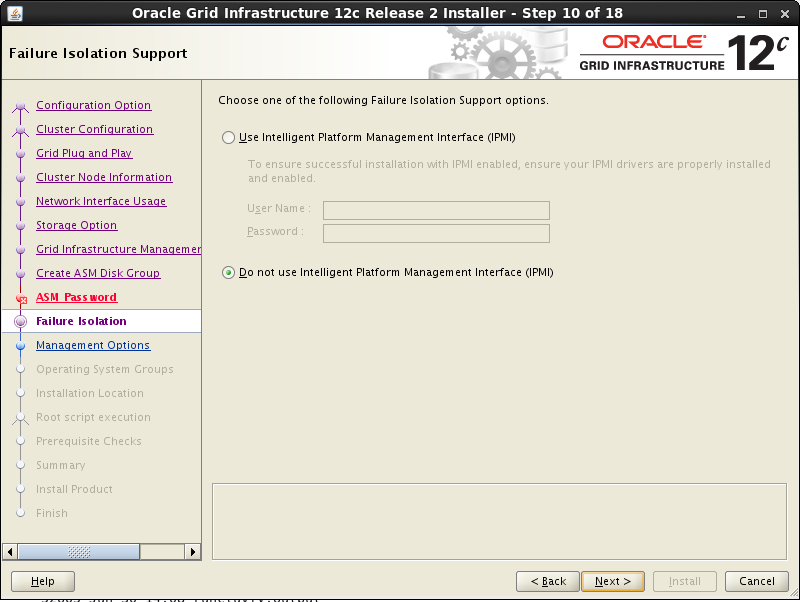
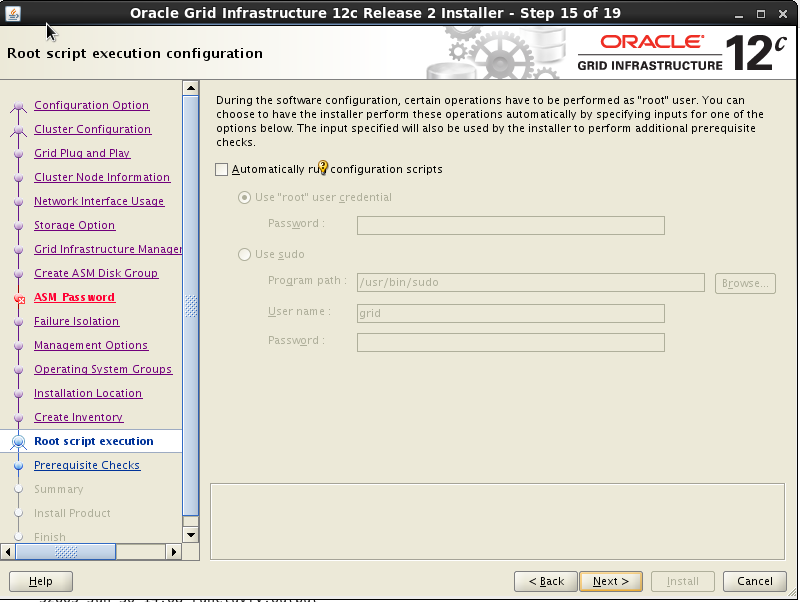
设置一个统一密码


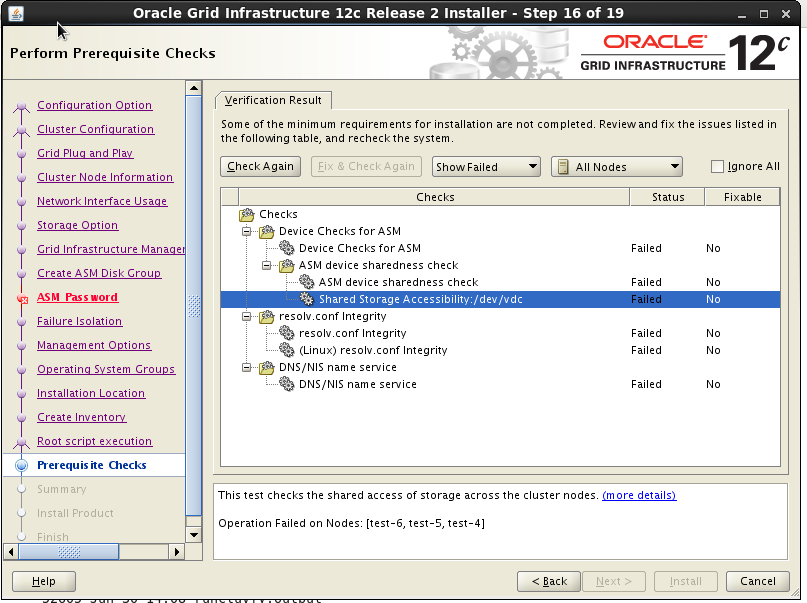
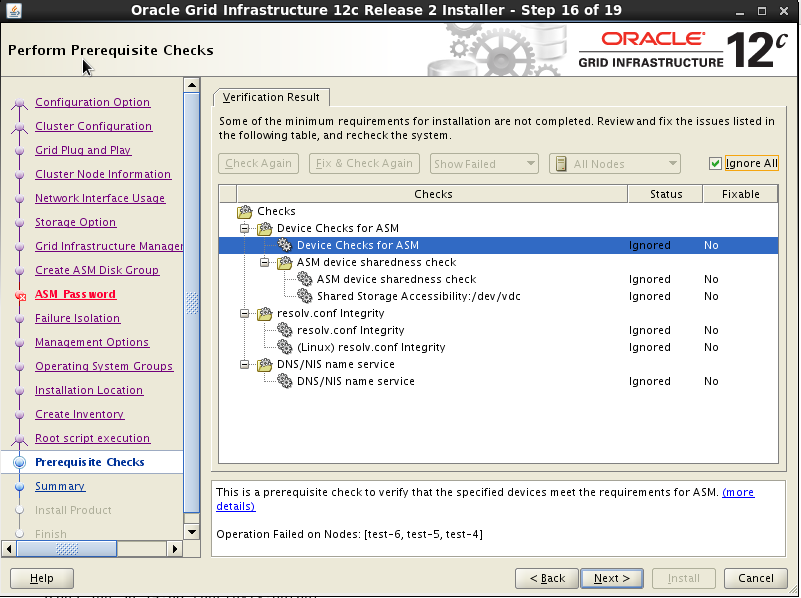
注意下面的检查中因为笔者用的disk driver是自己开发,所以这边识别不出来,用dd测试读写都没有问题,忽略这些报警。
开始安装,等待最后完成即可。
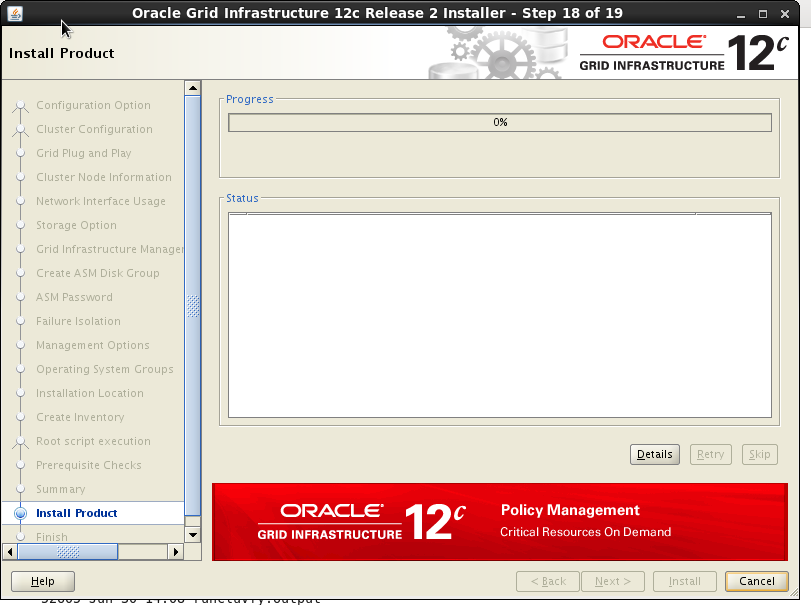
安装grid的过程比较繁琐,中间可能会遇到各种意想不到的问题,只要见招拆招即可。
13)使用asm图形界面管理diskgroup
运行asmca 命令,会看到Oracle12c的asm管理界面,在这个界面里面可以创建是,删除diskgroup,对diskgroup属性进行修改,设置diskgroup的sector size等,相比命令行,非常方便。如果底层disk sector size是4k,可以直接指定diskgroup sector size为4k以提高数据库性能。