1、修改A主机的keepalived和HAProxy的配置文件
修改A主机的keepalived配置文件
修改A主机的haproxy配置文件
global
maxconn 100000
chroot /usr/local/haproxy
stats socket /var/lib/haproxy/haproxy.sock1 mode 600 level admin  process 1
stats socket /var/lib/haproxy/haproxy.sock2 mode 600 level admin  process 2
user haproxy
group haproxy
daemon
nbproc 2
cpu-map 1 0
cpu-map 2 1
#cpu-map 3 2
#cpu-map 4 3
pidfile  /run/haproxy.pid
log 127.0.0.1 local3 info

defaults
option http-keep-alive
option  forwardfor
maxconn 100000
mode http
timeout connect 300000ms
timeout client  300000ms
timeout server  300000ms


listen stats
        bind :9527
        stats enable
        stats hide-version
        stats uri /haproxy-status
        stats realm HAPorxy\Stats\Page
        stats auth haadmin:123456
        stats auth admin:123456
        stats refresh 30s
        stats admin if TRUE

listen  web_port
         bind 0.0.0.0:80
         mode http
         log global
         server web1  127.0.0.1:80  check inter 3000 fall 2 rise 5


#官网业务访问入口=====================================
listen WEB_PORT_80
        bind 192.168.37.100:80
        mode tcp
        server web1 192.168.37.27:80 check inter 3000 fall 3 rise 5
        server web2 192.168.37.37:80 check inter 3000 fall 3 rise 5

listen MySQL_PORT
        bind 192.168.37.100:3306  在haproxy中监测数据库状态
        mode tcp
        server web1 192.168.37.47:3306 cookie web-47 check inter 3000 fall 3 rise 5
2、修改B主机的Keepalived和HAProxy配置文件
global
maxconn 100000
chroot /usr/local/haproxy
stats socket /var/lib/haproxy/haproxy.sock1 mode 600 level admin  process 1
stats socket /var/lib/haproxy/haproxy.sock2 mode 600 level admin  process 2
user haproxy
group haproxy
daemon
nbproc 2
cpu-map 1 0
cpu-map 2 1
#cpu-map 3 2
#cpu-map 4 3
pidfile  /run/haproxy.pid
log 127.0.0.1 local3 info

defaults
option http-keep-alive
option  forwardfor
maxconn 100000
mode http
timeout connect 300000ms
timeout client  300000ms
timeout server  300000ms


listen stats
        bind :9527
        stats enable
        stats hide-version
        stats uri /haproxy-status
        stats realm HAPorxy\Stats\Page
        stats auth haadmin:123456
        stats auth admin:123456
        stats refresh 30s
        stats admin if TRUE

listen  web_port
         bind 0.0.0.0:80
         mode http
         log global
         server web1  127.0.0.1:80  check inter 3000 fall 2 rise 5


#官网业务访问入口=====================================
listen WEB_PORT_80
        bind 192.168.37.100:80
        mode tcp
        server web1 192.168.37.27:80 check inter 3000 fall 3 rise 5
        server web2 192.168.37.37:80 check inter 3000 fall 3 rise 5

listen MySQL_PORT
        bind 192.168.37.100:3306
        mode tcp
        server web1 192.168.37.47:3306 cookie web-47 check inter 3000 fall 3 rise 5
3、在C主机编译安装nginx软件(1.14.2版本)
官网下载地址:http://nginx.org/en/download.html
[root@centos27src]#tar -xvf nginx-1.14.2.tar.gz
2、安装nginx相关的依赖包
yum install -y vim lrzsz tree screen psmisc lsof tcpdump wget ntpdate \
gcc gcc-c++ glibc glibc-devel pcre pcre-devel openssl openssl-devel systemd-devel \
net-tools iotop bc zip unzip zlib-devel bash-completion nfs-utils automake libxml2 \
libxml2-devel libxslt libxslt-devel perl perl-ExtUtils-Embed
3、然后切换到nginx目录下,指定源码编译安装的路径
 ./configure --prefix=/apps/nginx \
 --user=www \
 --group=www \
 --with-http_ssl_module \
 --with-http_v2_module \
 --with-http_realip_module \
 --with-http_stub_status_module \
 --with-http_gzip_static_module \
 --with-pcre \
 --with-stream \
 --with-stream_ssl_module \
 --with-stream_realip_module
4、最后进行make编译
[[email protected]]#make -j 2 && make install
5、创建一个nginx调用目录
[[email protected]]#mkdir /data/nginx/wordpress  -p
[[email protected]]#vim  /data/nginx/wordpress/index.php   创建一个index.php测试页面
<?php
    phpinfo();
?>
6、创建一个server目录,配置nginx文件,指定nginx测试页面路径,调用include函数
[root@centos27server]#cd /apps/nginx/conf
[root@centos27conf]#mkdir server
[root@centos27conf]#vim test.conf
配置nginx文件:vim test.conf
server {
        listen 80;
        server_name www.magedu.net;
     location / {
        root /data/nginx/wordpress;
        index index.php index.html index.htm;
     }


location ~ \.php$ {
        root /data/nginx/wordpress;
        fastcgi_pass 127.0.0.1:9000;
        fastcgi_index index.php;
        fastcgi_param SCRIPT_FILENAME $document_root$fastcgi_script_name;
        include fastcgi_params;
        }
}
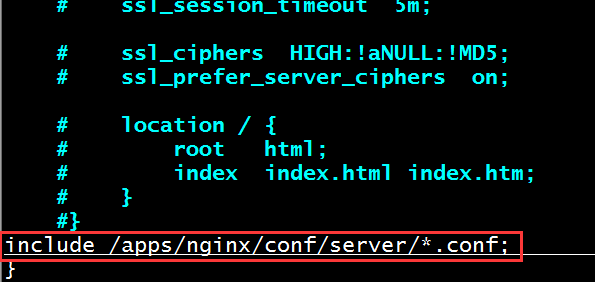
在nginx主配置文件中调用test.conf配置文件
[root@centos27conf]#vim /apps/nginx/conf/nginx.conf
user  www;   用户名称和php名称一致
include /apps/nginx/conf/server/*.conf;
}
7、检查nginx语法是否正确,成功后就启动nginx服务
[root@centos27conf]#/apps/nginx/sbin/nginx -t
nginx: the configuration file /apps/nginx/conf/nginx.conf syntax is ok
nginx: configuration file /apps/nginx/conf/nginx.conf test is successful   已经OK,成功
[root@centos27conf]#/apps/nginx/sbin/nginx   启动nginx服务
4、在C主机编译安装php软件(5.0以上版本)
1、在C主机解压php压缩包并安装相关的依赖包
[[email protected]]#cd /usr/local/src
[[email protected]]#tar -vxf php-7.1.30.tar.gz
[[email protected]]#cd php-7.1.30/
安装相关依赖包
[root@centos7 ~]# yum -y install wget vim pcre pcre-devel openssl openssl-devel libicudevel gcc gcc-c++ autoconf libjpeg libjpeg-devel libpng libpng-devel freetype \
freetype-devel libxml2 libxml2-devel zlib zlib-devel glibc glibc-devel glib2 glib2-devel ncurses ncurses-devel curl curl-devel krb5-devel libidn libidn-devel openldap \
openldap-devel nss_ldap jemalloc-devel cmake boost-devel bison automake libevent  libevent-devel gd gd-devel libtool* libmcrypt libmcrypt-devel mcrypt mhash libxslt \
libxslt-devel readline readline-devel gmp gmp-devel libcurl libcurl-devel openjpeg-devel
2、切换到解压后的php目录下,进行源码编译
./configure --prefix=/apps/php --enable-fpm --with-fpmuser=www --with-fpm-group=www --with-pear --with-curl --with-png-dir --with-free-type-dir --with-iconv --with-mhash --with-zlib --with-xmlrpc --with-xsl --with-openssl
3、指定安装包路径
[[email protected]]#make -j 2 && make install
4、进入php的www程序目录,并将里边的用户名和组名修改为www。
[[email protected]]#cd /apps/php/etc/php-fpm.d
[[email protected]]#cp www.conf.default www.conf
[[email protected]]#vim  www.conf   修改启动用户账号
user  www
group  www
5、创建一个系统账号,复制php.ini-production文件到配置文件目录下,并起名为php.ini
[[email protected]]#useradd  www -u 2019 -s /sbin/nologin  此UID要和D主机的php程序的用户名及UID要一致。
[root@centos27etc]#cp /usr/local/src/php-7.1.30/php.ini-production  /apps/php/etc/php.ini
6、切换到配置文件目录下,将php默认主程序改名。
[root@centos27etc]#cd /apps/php/etc
[root@centos27etc]#cp php-fpm.conf.default  php-fpm.conf
7、启动php-fpm程序
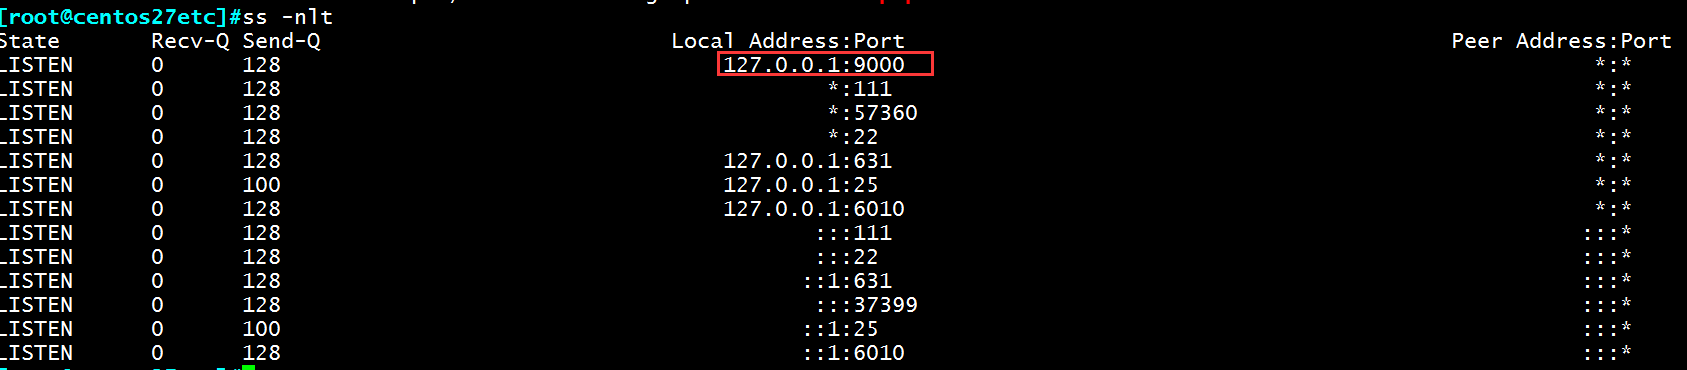
[root@centos27etc]#/apps/php/sbin/php-fpm -c /apps/php/etc/php.ini
查看php状态,此时php的9000端口已经打开。
在C主机开始配置wordpress文件
1、将wordpress包下载下来并存放在指定的目录
[root@centos27wordpress]#cd /data/nginx/wordpress
[root@centos27wordpress]#rz
2、解压wordpress压缩包,并将wordpress目录、压缩包及之前测试的index.php文件移动到其他地方
[root@centos27wordpress]#mv index.php wordpress-5.0.1-zh_CN.tar.gz  /opt/  将测试的文件及压缩包移动到opt目录
[root@centos27wordpress]#ls
wordpress
[root@centos27wordpress]#mv wordpress/* .  将wordpress目录移动到当前目录
[root@centos27wordpress]#ls
index.php    wordpress        wp-blog-header.php    wp-content   wp-links-opml.php  wp-mail.php      wp-trackback.php
license.txt  wp-activate.php  wp-comments-post.php  wp-cron.php  wp-load.php        wp-settings.php  xmlrpc.php
readme.html  wp-admin         wp-config-sample.php  wp-includes  wp-login.php       wp-signup.php
[root@centos27wordpress]#mv wordpress /opt  将wordpress空目录移走
3、将wordpress配置文件进行修改,关联到数据库。
[root@centos27wordpress]#cp wp-config-sample.php wp-config.php
修改wordpress配置文件,关联到数据库
[root@centos27wordpress]#vim wp-config.php
define('DB_NAME', 'wordpress');

/** MySQL数据库用户名 */
define('DB_USER', 'wordpress');

/** MySQL数据库密码 */
define('DB_PASSWORD', 'centos');

/** MySQL主机 */
define('DB_HOST', '192.168.37.100'); 写上VIP的地址。

/** 创建数据表时默认的文字编码 */
define('DB_CHARSET', 'utf8');
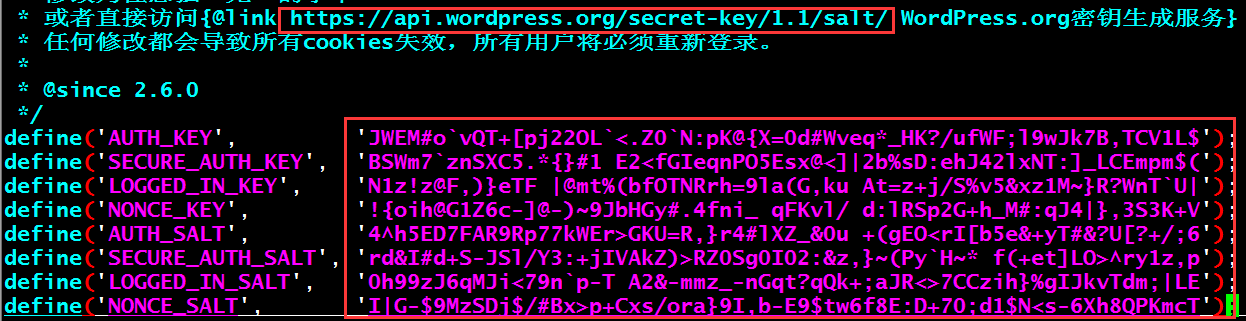
访问以下网站生成随机数,将数据路内容修改也可以。
5、在D主机编译安装nginx软件
官网下载地址:http://nginx.org/en/download.html
[root@centos27src]#tar -xvf nginx-1.14.2.tar.gz
2、安装nginx相关的依赖包
yum install -y vim lrzsz tree screen psmisc lsof tcpdump wget ntpdate \
gcc gcc-c++ glibc glibc-devel pcre pcre-devel openssl openssl-devel systemd-devel \
net-tools iotop bc zip unzip zlib-devel bash-completion nfs-utils automake libxml2 \
libxml2-devel libxslt libxslt-devel perl perl-ExtUtils-Embed
3、然后切换到nginx目录下,指定源码编译安装的路径
 ./configure --prefix=/apps/nginx \
 --user=www \
 --group=www \
 --with-http_ssl_module \
 --with-http_v2_module \
 --with-http_realip_module \
 --with-http_stub_status_module \
 --with-http_gzip_static_module \
 --with-pcre \
 --with-stream \
 --with-stream_ssl_module \
 --with-stream_realip_module
4、最后进行make编译
[[email protected]]#make -j 2 && make install
5、创建一个nginx调用目录
[[email protected]]#mkdir /data/nginx/wordpress  -p
[[email protected]]#vim  /data/nginx/wordpress/index.php   创建一个index.php测试页面
<?php
    phpinfo();
?>
6、创建一个server目录,配置nginx文件,指定nginx测试页面路径,调用include函数
[root@centos27server]#cd /apps/nginx/conf
[root@centos27conf]#mkdir server
[root@centos27conf]#vim test.conf
配置nginx文件:vim test.conf
server {
        listen 80;
        server_name www.magedu.net;
     location / {
        root /data/nginx/wordpress;
        index index.php index.html index.htm;
     }


location ~ \.php$ {
        root /data/nginx/wordpress;
        fastcgi_pass 127.0.0.1:9000;
        fastcgi_index index.php;
        fastcgi_param SCRIPT_FILENAME $document_root$fastcgi_script_name;
        include fastcgi_params;
        }
}
在nginx主配置文件中调用test.conf配置文件
[root@centos27conf]#vim /apps/nginx/conf/nginx.conf
user  www;   用户名称和php名称一致
include /apps/nginx/conf/server/*.conf;
}
7、检查nginx语法是否正确,成功后就启动nginx服务
[root@centos27conf]#/apps/nginx/sbin/nginx -t
nginx: the configuration file /apps/nginx/conf/nginx.conf syntax is ok
nginx: configuration file /apps/nginx/conf/nginx.conf test is successful  已经OK,成功
[root@centos27conf]#/apps/nginx/sbin/nginx   启动nginx服务
6、D主机编译安装php软件(5.0以上版本)
1、在D主机解压php压缩包并安装相关的依赖包
[[email protected]]#cd /usr/local/src
[[email protected]]#tar -vxf php-7.1.30.tar.gz
[[email protected]]#cd php-7.1.30/
安装相关依赖包
[root@centos7 ~]# yum -y install wget vim pcre pcre-devel openssl openssl-devel libicudevel gcc gcc-c++ autoconf libjpeg libjpeg-devel libpng libpng-devel freetype \
freetype-devel libxml2 libxml2-devel zlib zlib-devel glibc glibc-devel glib2 glib2-devel ncurses ncurses-devel curl curl-devel krb5-devel libidn libidn-devel openldap \
openldap-devel nss_ldap jemalloc-devel cmake boost-devel bison automake libevent  libevent-devel gd gd-devel libtool* libmcrypt libmcrypt-devel mcrypt mhash libxslt \
libxslt-devel readline readline-devel gmp gmp-devel libcurl libcurl-devel openjpeg-devel
2、切换到解压后的php目录下,进行源码编译
./configure --prefix=/apps/php --enable-fpm --with-fpmuser=www --with-fpm-group=www --with-pear --with-curl --with-png-dir --with-free-type-dir --with-iconv --with-mhash --with-zlib --with-xmlrpc --with-xsl --with-openssl
3、指定安装包路径
[[email protected]]#make -j 2 && make install

6、后端E主机编译安装二进制mysql数据库
执行此脚本可以编译安装完成二进制数据库。
[root@routersrc]#cd /usr/local/src   切换到此目录下
[root@routersrc]#tar -xvf mysql-5.6.34-onekey-install.tar.gz   解压数据库文件
[root@routersrc]#cat mysql-install.sh
#!/bin/bash
DIR=`pwd`
NAME="mysql-5.6.34-linux-glibc2.5-x86_64.tar.gz"
FULL_NAME=${DIR}/${NAME}
DATA_DIR="/data/mysql"

yum install vim gcc gcc-c++ wget autoconf  net-tools lrzsz iotop lsof iotop bash-completion -y
yum install curl policycoreutils openssh-server openssh-clients postfix -y

if [ -f ${FULL_NAME} ];then
    echo "安装文件存在"
else
    echo "安装文件不存在"
    exit 3
fi
if [ -h /usr/local/mysql ];then
    echo "Mysql 已经安装"
    exit 3
else
    tar xvf ${FULL_NAME}   -C /usr/local/src
    ln -sv /usr/local/src/mysql-5.6.34-linux-glibc2.5-x86_64  /usr/local/mysql
    if id  mysql;then
        echo "mysql 用户已经存在,跳过创建用户过程"
    fi
        useradd  mysql  -s /sbin/nologin
    if  id  mysql;then
    	chown  -R mysql.mysql  /usr/local/mysql/* -R
        if [ ! -d  /data/mysql ];then
            mkdir -pv /data/mysql && chown  -R mysql.mysql  /data   -R
            /usr/local/mysql/scripts/mysql_install_db  --user=mysql --datadir=/data/mysql  --basedir=/usr/local/mysql/
	    cp  /usr/local/src/mysql-5.6.34-linux-glibc2.5-x86_64/support-files/mysql.server /etc/init.d/mysqld
	    chmod a+x /etc/init.d/mysqld
 	    cp ${DIR}/my.cnf   /etc/my.cnf
	    ln -sv /usr/local/mysql/bin/mysql  /usr/bin/mysql
	    /etc/init.d/mysqld start
	else
            echo "MySQL数据目录已经存在,"
			exit 3
	fi
    fi
fi
执行安装数据库脚本:
[root@routersrc]#bash mysql-install.sh
创建数据库,并创建一个数据库用户名及授权
[root@routersrc]#mysql
Welcome to the MariaDB monitor.  Commands end with ; or \g.
Your MySQL connection id is 1
Server version: 5.6.34 MySQL Community Server (GPL)

Copyright (c) 2000, 2018, Oracle, MariaDB Corporation Ab and others.

Type 'help;' or '\h' for help. Type '\c' to clear the current input statement.

MySQL [(none)]> create  database wordpress;  创建数据库
Query OK, 1 row affected (0.00 sec)

MySQL [(none)]> grant all on wordpress.*  to "wordpress"@'192.168.37.%' identified by 'centos';  创建数据库名称
Query OK, 0 rows affected (0.01 sec)

MySQL [(none)]> flush privileges;  刷新数据库
Query OK, 0 rows affected (0.00 sec)
7、在后端E主机安装nfs共享包
1、安装nfs-utils包
[root@routersrc]#yum install nfs-utils -y
2、新建一个共享目录,并修改配置文件,将新建的目录共享出来,授予都写权限。
[root@routersrc]#mkdir /nfsdata/wordpress -p
修改配置文件,将目录共享
[root@routersrc]#vim /etc/exports
/nfsdata/wordpress *(insecure,rw,async,no_root_squash)  避免客户端连接此nfs共享的目录是存在端口大于1024而被拒绝,需要加上insecure选项
3、启动nfs服务器,并设置为开机启动
[root@routersrc]#systemctl start nfs   如果需要重启nfs,最好是重新加载,避免重启带来重新注册端口。
[root@routersrc]#systemctl enable  nfs
在E主机安装完成nfs之后,我们需要在A或B主机进行验证一下此nfs文件是否可以挂载,是否可以看到此目录。
在A主机安装nfs-utils包,然后挂载后端E主机的nfs路径,此时可以看到目录文件即可。
[root@centos7~]#yum install nfs-utils -y
[root@centos7~]#showmount -e  192.168.37.47  查看nfs共享的目录
Export list for 192.168.37.47:
/nfsdata/wordpress *    可以查看到nfs共享的目录

[root@centos7~]#mount -t nfs 192.168.37.47:/nfsdata/wordpress  /mnt/  测试挂载成功即可
[root@centos_17~]#umount /mnt   取消挂载