转载自https://blog.csdn.net/shusheng0007/article/details/79032807
为什么要做测试
撰写测试有以下好处:
确保开发出来的app功能是正确的
保证新增加的功能开发不会影响原来的功能,就是说新写的代码不会使原来正常工作的代码产生bug
当采用测试驱动开发模式时,测试有助于模块化和迭代化。
Android中的单元测试类型
Android中的单元测试有两种类型
本地单元测试:这种测试是运行在开发机器的JVM上的。存放在项目中app/src/test/java目录下,这些测试不能引用Android Framwork 的API。例如你要测试一个纯逻辑的函数,就可以使用本地单元测试。
仪表单元测试:这种测试是运行在真机或者模拟器中的,可以引用Android Framwork中的API.存放在项目中app/src/androidTest/java目录下。
为什么会出现这两种测试呢,因为Android编译后的字节码是针对移动设备优化的,它需要运行在特殊的JAVA虚拟机上Dalvik或者ART (Android Runtime),是不能直接运行在JVM上的。所以涉及到Android Framwork 依赖的函数如果不采用特殊的技术(稍后介绍),就需要使用 仪表单元测试,仪表单元测试需要安装两个完整的APKS到真机或者模拟器上,然后分别启动一个context,速度相比于本地单元测试那不是慢了一点两点。
那么我们当然希望可以尽可能的使用本地单元测试,如果单元测试没有对Android的依赖,或者只是一些简单的引用使用第一种方法。这种场景下对Android的依赖可以使用Mockito来产生。还有我们可以使用开源库Robolectric来让Android代码可以运行在通用的JVM上。
接下来将介绍如何完成上述的两种单元测
假设我有一个算数计算类Calculator(google sample里面的例子),本类包括的加减乘除四个方法。
package com.ss007.androidunittestsample;

import static com.google.common.base.Preconditions.checkArgument;

/**
 * A simple calculator with a basic set of operations.
 */
public class Calculator {

    public enum Operator {ADD, SUB, DIV, MUL}

    /**
     * Addition operation
     */
    public double add(double firstOperand, double secondOperand) {
        return firstOperand + secondOperand;
    }

    /**
     * Substract operation
     */
    public double sub(double firstOperand, double secondOperand) {
        return firstOperand - secondOperand;
    }

    /**
     * Divide operation
     */
    public double div(double firstOperand, double secondOperand) {
        checkArgument(secondOperand != 0, "secondOperand must be != 0, you cannot divide by zero");
        return firstOperand / secondOperand;
    }

    /**
     * Multiply operation
     */
    public double mul(double firstOperand, double secondOperand) {
        return firstOperand * secondOperand;
    }
}
我们还有一个输入及结果展示界面

本地单元测试
由于Calculator类没有对Android的依赖,所以应当优先使用本地测试。
不依赖Android的本地测试
-
在模块级别的
build.gradle文件中添加相关库引用//本地单元测试依赖 testImplementation 'junit:junit:4.12' //Mockito framework 用来模拟Android框架依赖 testImplementation 'org.mockito:mockito-core:1.10.19'
2.在
app/src/test/java目录下建立测试文件CalculatorTest,也可以选中要测试的函数,然后按Ctr+Shift+T建立测试文件。private Calculator mCalculator; @Before public void setUp() throws Exception{ mCalculator = new Calculator(); } @Test public void div() throws Exception { double resultDiv = mCalculator.div(32d,2d); assertThat(resultDiv, is(equalTo(16d))); } @Test(expected = IllegalArgumentException.class) public void divDivideByZeroThrows() { mCalculator.div(32d,0d); }
例如我们要测试Calculator中的除法这个函数,我们就定义一个或者几个测试函数,主要依赖你要测试的情况,使用@Test来标记,方法里面写断言即可。由于我们在测试函数中使用到了Calculator的实例,所以需要在测试函数执行前,构建出这个实例,这些初始化的工作在setUp函数中完成,这个函数使用@Before标记。
就除法这个函数我们需要测试两种情况。第一正常情况下,除法计算是否正确。第二当除数为0的时候,我们是期望抛出合适的异常的,而不是崩溃。
运行单元测试
运行测试用例可以分为多个维度
单个测试函数,单个测试文件,单个目录下,测试Suite。
最简单的运行方式就是直接Android Studio中选中相应的地方,右键然后选择run...即可,以Suite的方式运行的话首先需要自己将测试文件组织成不同的suite,然后依照自己的需求来运行不同的suite,这种方式更加灵活。
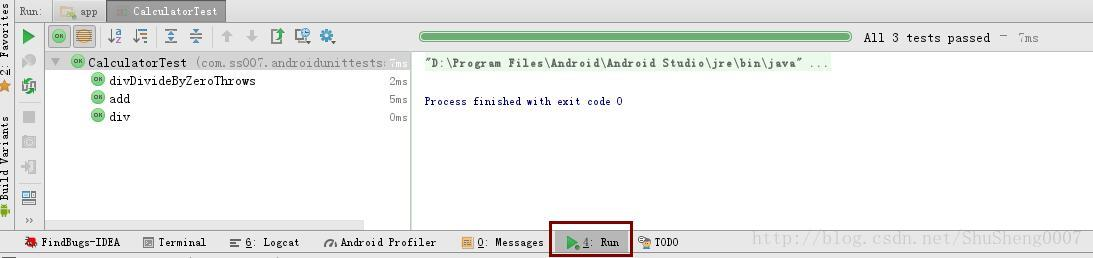
查看运行结果
运行结果在AS的Run窗口,如下图所示
依赖Android的本地测试
依赖Android的本地测试有两种处理方式
- 针对于简单场景,可以使用
Mockito来模拟Android的依赖,例如
@RunWith(MockitoJUnitRunner.class)
public class UnitTestSample {
private static final String FAKE_STRING = "HELLO WORLD";
    @Mock
    Context mMockContext;

    @Test
    public void readStringFromContext_LocalizedString() {
        // 定义R.string.hello_word返回"HELLO WORLD"
        when(mMockContext.getString(R.string.hello_word))
                .thenReturn(FAKE_STRING);
        //ClassUnderTest 我们要测试的类
        ClassUnderTest myObjectUnderTest = new ClassUnderTest(mMockContext);

        // ...when the string is returned from the object under test...
        String result = myObjectUnderTest.getHelloWorldString();

        // ...then the result should be the expected one.
        assertThat(result, is(FAKE_STRING));
    }
}
首先需要使用MockitoJUnitRunner这个类型的Runner,使用@RunWith(MockitoJUnitRunner.class)来标记测试类
然后使用@Mock标记来模拟一个Android依赖。例如Context
关于Mockito的详细使用可以参考Mockito API
针对复杂场景,可以使用开源库Robolectric,通过该库单元测试可以直接运行在JVM上,Robolectric在Android SDK 的类加载过程中对其进行了重写,使其可以运行在JVM上。
-
@RunWith(RobolectricTestRunner.class)
public class MyActivityTest {
  @Test
  public void clickingButton_shouldChangeResultsViewText() throws Exception {
    MyActivity activity = Robolectric.setupActivity(MyActivity.class);

    Button button = (Button) activity.findViewById(R.id.button);
    TextView results = (TextView) activity.findViewById(R.id.results);

    button.performClick();
    assertThat(results.getText().toString()).isEqualTo("Robolectric Rocks!");
   }
}
需要使用
RobolectricTestRunner这个类型的Runner关于更详细的使用请参考Robolectric
- 针对于简单场景,可以使用
为什么要做测试撰写测试有以下好处:
确保开发出来的app功能是正确的保证新增加的功能开发不会影响原来的功能,就是说新写的代码不会使原来正常工作的代码产生bug当采用测试驱动开发模式时,测试有助于模块化和迭代化。Android中的单元测试类型Android中的单元测试有两种类型
本地单元测试:这种测试是运行在开发机器的JVM上的。存放在项目中app/src/test/java目录下,这些测试不能引用Android Framwork 的API。例如你要测试一个纯逻辑的函数,就可以使用本地单元测试。仪表单元测试:这种测试是运行在真机或者模拟器中的,可以引用Android Framwork中的API.存放在项目中app/src/androidTest/java目录下。为什么会出现这两种测试呢,因为Android编译后的字节码是针对移动设备优化的,它需要运行在特殊的JAVA虚拟机上Dalvik或者ART (Android Runtime),是不能直接运行在JVM上的。所以涉及到Android Framwork 依赖的函数如果不采用特殊的技术(稍后介绍),就需要使用 仪表单元测试,仪表单元测试需要安装两个完整的APKS到真机或者模拟器上,然后分别启动一个context,速度相比于本地单元测试那不是慢了一点两点。
那么我们当然希望可以尽可能的使用本地单元测试,如果单元测试没有对Android的依赖,或者只是一些简单的引用使用第一种方法。这种场景下对Android的依赖可以使用Mockito来产生。还有我们可以使用开源库Robolectric来让Android代码可以运行在通用的JVM上。
接下来将介绍如何完成上述的两种单元测假设我有一个算数计算类Calculator(google sample里面的例子),本类包括的加减乘除四个方法。
package com.ss007.androidunittestsample;
import static com.google.common.base.Preconditions.checkArgument;
/** * A simple calculator with a basic set of operations. */public class Calculator {
public enum Operator {ADD, SUB, DIV, MUL}
/** * Addition operation */ public double add(double firstOperand, double secondOperand) { return firstOperand + secondOperand; }
/** * Substract operation */ public double sub(double firstOperand, double secondOperand) { return firstOperand - secondOperand; }
/** * Divide operation */ public double div(double firstOperand, double secondOperand) { checkArgument(secondOperand != 0, "secondOperand must be != 0, you cannot divide by zero"); return firstOperand / secondOperand; }
/** * Multiply operation */ public double mul(double firstOperand, double secondOperand) { return firstOperand * secondOperand; }}12345678910111213141516171819202122232425262728293031323334353637383940我们还有一个输入及结果展示界面
本地单元测试由于Calculator类没有对Android的依赖,所以应当优先使用本地测试。
不依赖Android的本地测试在模块级别的build.gradle文件中添加相关库引用
//本地单元测试依赖testImplementation 'junit:junit:4.12'//Mockito framework 用来模拟Android框架依赖testImplementation 'org.mockito:mockito-core:1.10.19'1234在app/src/test/java目录下建立测试文件CalculatorTest,也可以选中要测试的函数,然后按Ctr+Shift+T建立测试文件。
private Calculator mCalculator;
@Beforepublic void setUp() throws Exception{ mCalculator = new Calculator();}
@Testpublic void div() throws Exception { double resultDiv = mCalculator.div(32d,2d); assertThat(resultDiv, is(equalTo(16d)));}
@Test(expected = IllegalArgumentException.class) public void divDivideByZeroThrows() { mCalculator.div(32d,0d);}1234567891011121314151617例如我们要测试Calculator中的除法这个函数,我们就定义一个或者几个测试函数,主要依赖你要测试的情况,使用@Test来标记,方法里面写断言即可。由于我们在测试函数中使用到了Calculator的实例,所以需要在测试函数执行前,构建出这个实例,这些初始化的工作在setUp函数中完成,这个函数使用@Before标记。就除法这个函数我们需要测试两种情况。第一正常情况下,除法计算是否正确。第二当除数为0的时候,我们是期望抛出合适的异常的,而不是崩溃。
运行单元测试运行测试用例可以分为多个维度单个测试函数,单个测试文件,单个目录下,测试Suite。最简单的运行方式就是直接Android Studio中选中相应的地方,右键然后选择run...即可,以Suite的方式运行的话首先需要自己将测试文件组织成不同的suite,然后依照自己的需求来运行不同的suite,这种方式更加灵活。
查看运行结果运行结果在AS的Run窗口,如下图所示
依赖Android的本地测试依赖Android的本地测试有两种处理方式
针对于简单场景,可以使用Mockito来模拟Android的依赖,例如@RunWith(MockitoJUnitRunner.class)public class UnitTestSample {private static final String FAKE_STRING = "HELLO WORLD"; @Mock Context mMockContext;
@Test public void readStringFromContext_LocalizedString() { // 定义R.string.hello_word返回"HELLO WORLD" when(mMockContext.getString(R.string.hello_word)) .thenReturn(FAKE_STRING); //ClassUnderTest 我们要测试的类 ClassUnderTest myObjectUnderTest = new ClassUnderTest(mMockContext);
// ...when the string is returned from the object under test... String result = myObjectUnderTest.getHelloWorldString();
// ...then the result should be the expected one. assertThat(result, is(FAKE_STRING)); }}123456789101112131415161718192021首先需要使用MockitoJUnitRunner这个类型的Runner,使用@RunWith(MockitoJUnitRunner.class)来标记测试类然后使用@Mock标记来模拟一个Android依赖。例如Context
关于Mockito的详细使用可以参考Mockito API
针对复杂场景,可以使用开源库Robolectric,通过该库单元测试可以直接运行在JVM上,Robolectric在Android SDK 的类加载过程中对其进行了重写,使其可以运行在JVM上。@RunWith(RobolectricTestRunner.class)public class MyActivityTest { @Test public void clickingButton_shouldChangeResultsViewText() throws Exception { MyActivity activity = Robolectric.setupActivity(MyActivity.class);
Button button = (Button) activity.findViewById(R.id.button); TextView results = (TextView) activity.findViewById(R.id.results);
button.performClick(); assertThat(results.getText().toString()).isEqualTo("Robolectric Rocks!"); }}12345678910111213需要使用RobolectricTestRunner这个类型的Runner
关于更详细的使用请参考Robolectric
仪表测试在进行仪表测试之前,先使用Android SDK 管理器下载Android Testing Support Library,Google 为测试优化了这个支持库,测试运行更加快速。这个库包含了用于JUnit4测试的AndroidJUnitRunner以及用于UI测试的API(Espresso和UI Automator)。本文侧重使用Espresso
使用Espresso进行Android仪表单元测试Espresso是Android Testing Support Library中的一个测试框架,用来测试UI交互方面的功能。
Espresso中主要由3个主要组件构成
ViewMatchers:从当前View 层级中获取目标View的一组对象集合。这些对象会作为参数传递到onView函数中来返回目标UI元素。ViewActions:用来模拟用户操作,例如click等动作。这些对象会作为参数传入ViewInteraction.perform()中。ViewAssertions:用来判断目标View的状态是否正确。这些对象会作为参数传入ViewInteraction.check()方法中。
例如
onView(withId(R.id.my_view)) // withId(R.id.my_view) - ViewMatcher .perform(click()) // click() - ViewAction .check(matches(isDisplayed())); //matches(isDisplayed()) - ViewAssertion123配置Espresso在模块级别的build.gradle中添加如下依赖 // 仪表测试依赖 // Force usage of support annotations in the test app, since it is internally used by the runner module. androidTestImplementation 'com.android.support:support-annotations:' + rootProject.supportLibVersion; // Android JUnit Runner androidTestImplementation 'com.android.support.test:runner:' + rootProject.runnerVersion; // JUnit4 Rules androidTestImplementation 'com.android.support.test:rules:' + rootProject.rulesVersion; // Espresso core androidTestImplementation 'com.android.support.test.espresso:espresso-core:' + rootProject.espressoVersion; 123456789在android.defaultConfig里面添加testInstrumentationRunner "android.support.test.runner.AndroidJUnitRunner"
build.gradle 文件的配置完成后,大概像下面这样
apply plugin: 'com.android.application'
android { compileSdkVersion 26 defaultConfig { applicationId "com.ss007.androidunittestsample" minSdkVersion 18 targetSdkVersion 26 versionCode 1 versionName "1.0"
testInstrumentationRunner "android.support.test.runner.AndroidJUnitRunner" } buildTypes { release { minifyEnabled false proguardFiles getDefaultProguardFile('proguard-android.txt'), 'proguard-rules.pro' } }}
dependencies { implementation fileTree(dir: 'libs', include: ['*.jar']) // 仪表测试依赖 // Force usage of support annotations in the test app, since it is internally used by the runner module. androidTestImplementation 'com.android.support:support-annotations:' + rootProject.supportLibVersion; androidTestImplementation 'com.android.support.test:runner:' + rootProject.runnerVersion; androidTestImplementation 'com.android.support.test:rules:' + rootProject.rulesVersion; androidTestImplementation 'com.android.support.test.espresso:espresso-core:' + rootProject.espressoVersion; //本地单元测试依赖 testImplementation 'junit:junit:4.12'
compile 'com.android.support:support-annotations:' + rootProject.supportLibVersion; compile 'com.google.guava:guava:18.0' implementation 'com.android.support:appcompat-v7:26.1.0' implementation 'com.android.support.constraint:constraint-layout:1.0.2'}12345678910111213141516171819202122232425262728293031323334353637配置测试机器关闭设备动画,到开发者模式->开发者选项->绘图下面 关闭三个缩放动画。
编写测试代码例如我们要测试我们的加法函数,输入两个数,然后点击相加按钮。
@RunWith(AndroidJUnit4.class)//标记此类为Android JUnit4类@LargeTest//标记此类执行时间>1s,使用全平台资源public class CalculatorInstrumentationTest { @Rule//包括ActivityTestRule,里面提供了很多测试activity的函数,除此之外还有ServiceTestRule public ActivityTestRule<CalculatorActivity> mActivityRule = new ActivityTestRule<>( CalculatorActivity.class);
@Test public void typeOperandsAndPerformAddOperation() { performOperation(R.id.operation_add_btn, "16.0", "16.0", "32.0"); }
private void performOperation(int btnOperationResId, String operandOne, String operandTwo, String expectedResult) { //在两个 EditText 中输入操作数 onView(withId(R.id.operand_one_edit_text)).perform(typeText(operandOne), closeSoftKeyboard()); onView(withId(R.id.operand_two_edit_text)).perform(typeText(operandTwo), closeSoftKeyboard()); //点击操作按钮,例如相加按钮 onView(withId(btnOperationResId)).perform(click()); //判断结果是否与我们期望的一致 onView(withId(R.id.operation_result_text_view)) .check(matches(withText(expectedResult))); }}12345678910111213141516171819202122232425262728上面的代码完成了输入加数和被加数,然后点击求和按钮,检查结果是否正确的一套操作。
本文源代码下载地址 AndroidUnitTestDemo————————————————版权声明:本文为CSDN博主「ShuSheng007」的原创文章,遵循 CC 4.0 BY-SA 版权协议,转载请附上原文出处链接及本声明。原文链接:https://blog.csdn.net/shusheng0007/article/details/79032807