1.新建一个.net core2.1 基于 api 的工程,引用Microsoft.AspNetCore.Authentication.JwtBearer 包
2.新建一个Token的实体类,一个Jwt的基础类


 public class TokenModel
    {
        /// <summary>
        /// 用户Id
        /// </summary>
        public long userId { get; set; }
        /// <summary>
        /// 用户名
        /// </summary>
        public string userCode { get; set; }
        /// <summary>
        /// 手机
        /// </summary>
        public string phone { get; set; }
        /// <summary>
        /// 头像
        /// </summary>
        public string icon { get; set; }
        /// <summary>
        /// 昵称
        /// </summary>
        public string userName { get; set; }
        /// <summary>
        /// 身份
        /// </summary>
        public string sub { get; set; }
        /// <summary>
        /// 角色
        /// </summary>
        public string role { get; set; }
    }
 /// <summary>
    /// 基础配置
    /// </summary>
    public class JwtSettings
    {
        //token是谁颁发的
        public string Issuer { get; set; }
        //token可以给哪些客户端使用
        public string Audience { get; set; }
        //加密的key
        public string SecretKey { get; set; }
        //过期时间 单位:s
        public string ExpireTime { get; set; }
    }
3.在Appsetting.json中添加默认值
  "JwtSettings": {
    "Issuer": "NinaMua",
    "Audience": "http://localhost:5000",
    "SecretKey": "NinaMua'sSecretKeyMuaMuaMua",//16位字符以上
    "ExpireTime": "3600" //过期时间||单位:s
  }
4.新建一个类去把在appsetting设定的值变成一个可以全局引用的对象
public class AppSettingsInit
    {
        public static JwtSettings JwtSettings;

        /// <summary>
        /// 将配置项的值赋值给属性
        /// </summary>
        /// <param name="configuration"></param>
        public void Initial(IConfiguration configuration)
        {
            JwtSettings = new JwtSettings();
            JwtSettings.Audience = configuration["JwtSettings:Audience"];
            JwtSettings.Issuer = configuration["JwtSettings:Issuer"];
            JwtSettings.SecretKey = configuration["JwtSettings:SecretKey"];
            JwtSettings.ExpireTime = configuration["JwtSettings:ExpireTime"];


        }
    }
5.去新增一个JwtTokenHelper类
 public class JwtTokenHelper
    {
        public static JwtSecurityTokenHandler _jwt = new JwtSecurityTokenHandler();

        /// <summary>
        /// 颁发JWT字符串
        /// </summary>
        /// <param name="tokenModel"></param>
        /// <returns></returns>
        public static string IssueJwt(TokenModel tokenModel)
        {
            var encodedJwt = "";
            try
            {
                var claims = new Claim[]
                {
               new Claim(ClaimTypes.GivenName,tokenModel.userName),
               new Claim(ClaimTypes.Name,tokenModel.userCode),
               new Claim(ClaimTypes.Role,tokenModel.role),
               new Claim(ClaimTypes.MobilePhone,tokenModel.phone),
               new Claim(ClaimTypes.UserData,tokenModel.icon),
                };

                DateTime expTime = DateTime.Now.AddSeconds(Convert.ToDouble(AppSettingsInit.JwtSettings.ExpireTime));
                //秘钥
                var key = new SymmetricSecurityKey(Encoding.UTF8.GetBytes(AppSettingsInit.JwtSettings.SecretKey));
                var creds = new SigningCredentials(key, SecurityAlgorithms.HmacSha256);

                var jwt = new JwtSecurityToken(
                    issuer: AppSettingsInit.JwtSettings.Issuer,
                    audience: AppSettingsInit.JwtSettings.Audience,
                    claims: claims,
                    expires: expTime,//过期时间
                    signingCredentials: creds);

                encodedJwt = _jwt.WriteToken(jwt);
            }
            catch (Exception ex)
            {

            }
            if (encodedJwt != "")
                encodedJwt = $"{JwtBearerDefaults.AuthenticationScheme} {encodedJwt}";
            return encodedJwt;
        }

        /// <summary>
        /// 解析jwt字符串
        /// </summary>
        /// <param name="jwtStr"></param>
        /// <returns></returns>
        public static TokenModel SerializeJWT(string jwtStr)
        {
            var tm = new TokenModel();
            JwtSecurityToken jwtToken = _jwt.ReadJwtToken(jwtStr);

            try
            {
                jwtToken.Payload.TryGetValue("TokenModel", out object tokenModelObj);
                tm = JsonConvert.DeserializeObject<TokenModel>(tokenModelObj?.ToString());
            }
            catch (Exception)
            {
                // ignored
            }
            return tm;
        }
6.在startup.cs中的ConfigureServices注入依赖
  public void ConfigureServices(IServiceCollection services)
        {

            #region 配置登录授权
            services.AddAuthentication(options =>
            {
                options.DefaultAuthenticateScheme = JwtBearerDefaults.AuthenticationScheme;
                options.DefaultChallengeScheme = JwtBearerDefaults.AuthenticationScheme;

            }).AddJwtBearer(JwtBearerDefaults.AuthenticationScheme,
            (jwtBearerOptions) =>
            {
                jwtBearerOptions.TokenValidationParameters = new TokenValidationParameters
                {
                    //需要跟生成Token的信息保持一致
                    ValidateIssuerSigningKey = true,//验证全局秘匙||默认True
                    IssuerSigningKey = new SymmetricSecurityKey(System.Text.Encoding.UTF8.GetBytes(AppSettingsInit.JwtSettings.SecretKey)),
                    ValidateIssuer = true,//验证发布者||默认True
                    ValidIssuer = AppSettingsInit.JwtSettings.Issuer,
                    ValidateAudience = true,//验证访问者||默认True
                    ValidAudience = AppSettingsInit.JwtSettings.Audience,
                    ValidateLifetime = true,//验证生命周期||默认True
                    ClockSkew = TimeSpan.Zero

                };
            });

            #endregion


            services.AddMvc().SetCompatibilityVersion(CompatibilityVersion.Version_2_1);


            #region 配置Swagger
            services.AddSwaggerGen(c =>
            {
                #region 顶部基础信息

                c.SwaggerDoc("v1", new Info
                {
                    Version = "v1.1.0",
                    Title = "WebAPI",
                    Description = "API帮助文档",
                    TermsOfService = "None",
                    Contact = new Swashbuckle.AspNetCore.Swagger.Contact { Name = "NinaMua", Email = "[email protected]", Url = "http://www.cnblogs.com/NinaMua" }
                });
                #endregion

                #region 权限验证信息

                //添加一个必须的全局安全信息,和AddSecurityDefinition方法指定的方案名称要一致
                var security = new Dictionary<string, IEnumerable<string>> { { "Bearer", new string[] { } } };
                c.AddSecurityRequirement(security);

                c.AddSecurityDefinition("Bearer", new ApiKeyScheme
                {
                    Description = "格式|Bearer {token}",
                    Name = "Authorization",//jwt默认的参数名称
                    In = "header",//jwt默认在请求头中存放Authorization信息
                    Type = "apiKey"
                });

                #endregion

                #region 添加读取注释服务
                //添加对控制器的标签(描述)通过对SwaggerDocTag添加备注
                //c.DocumentFilter<SwaggerDocTag>();
                var basePath = AppDomain.CurrentDomain.BaseDirectory;

                var apiXmlPath = Path.Combine(basePath, "TestApi.xml");
                if (System.IO.File.Exists(apiXmlPath))
                    c.IncludeXmlComments(apiXmlPath, true);//控制器层注释(true表示显示控制器注释)

                var entityXmlPath = Path.Combine(basePath, "TestEntity.xml");
                if (System.IO.File.Exists(entityXmlPath))
                c.IncludeXmlComments(entityXmlPath);//实体类注释
                #endregion

            });
            #endregion

        }
7.在startup.cs中的Configure注入中间件
  // This method gets called by the runtime. Use this method to configure the HTTP request pipeline.
        public void Configure(IApplicationBuilder app, IHostingEnvironment env, ILoggerFactory loggerFactory)
        {
            if (env.IsDevelopment())
            {
                app.UseDeveloperExceptionPage();
            }
            else
            {
                app.UseHsts();
            }

            app.UseHttpsRedirection();
            app.UseAuthentication();//配置授权

            loggerFactory.AddNLog();//添加NLog
            env.ConfigureNLog("nlog.config");//读取Nlog配置文件

            #region Swagger
            app.UseSwagger();
            app.UseSwaggerUI(c =>
            {
                c.SwaggerEndpoint("/swagger/v1/swagger.json", "ApiHelp V1");
            });
            #endregion


            app.UseMvc();
        }
8.在api接口上加上权限认证[Authorize]
    [Route("api/")]
    public class LoginController : BaseApiController
    {

        public ILogger<LoginController> logger;
        /// <param name="_logger">日志</param>
        public LoginController(ILogger<LoginController> _logger)
        {
            logger = _logger;
        }

        /// <summary>
        /// 登录
        /// </summary>
        /// <returns></returns>
        [Route("Login")]
        [HttpGet]
        public ResponseMessage Login()
        {
            ///用户是否存在///
            TokenModel temp = new TokenModel();
            temp.userName = "系统管理员";
            temp.userCode = "system";
            temp.role = "Admin";
            temp.phone = "";
            temp.icon = "";
            var result = JwtTokenHelper.IssueJwt(temp);
            if (result != "")
                return Success(result);
            else
                return CustomizeResponse(100, "登录失败");
        }

        /// <summary>
        /// 退出
        /// </summary>
        /// <returns></returns>
        [HttpGet]
        [Route("SignOut")]
        [Authorize]
        public string Exit()
        {
            return "1111";
        }


    }
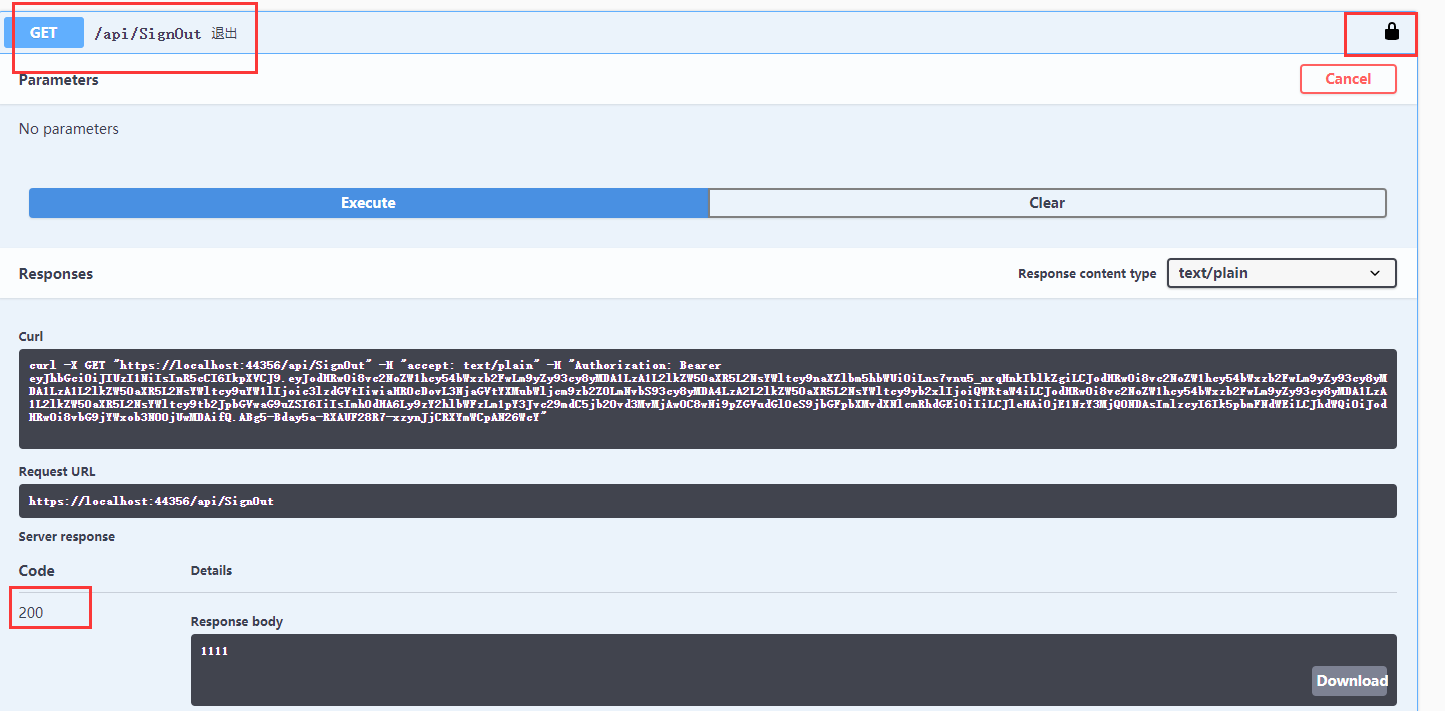
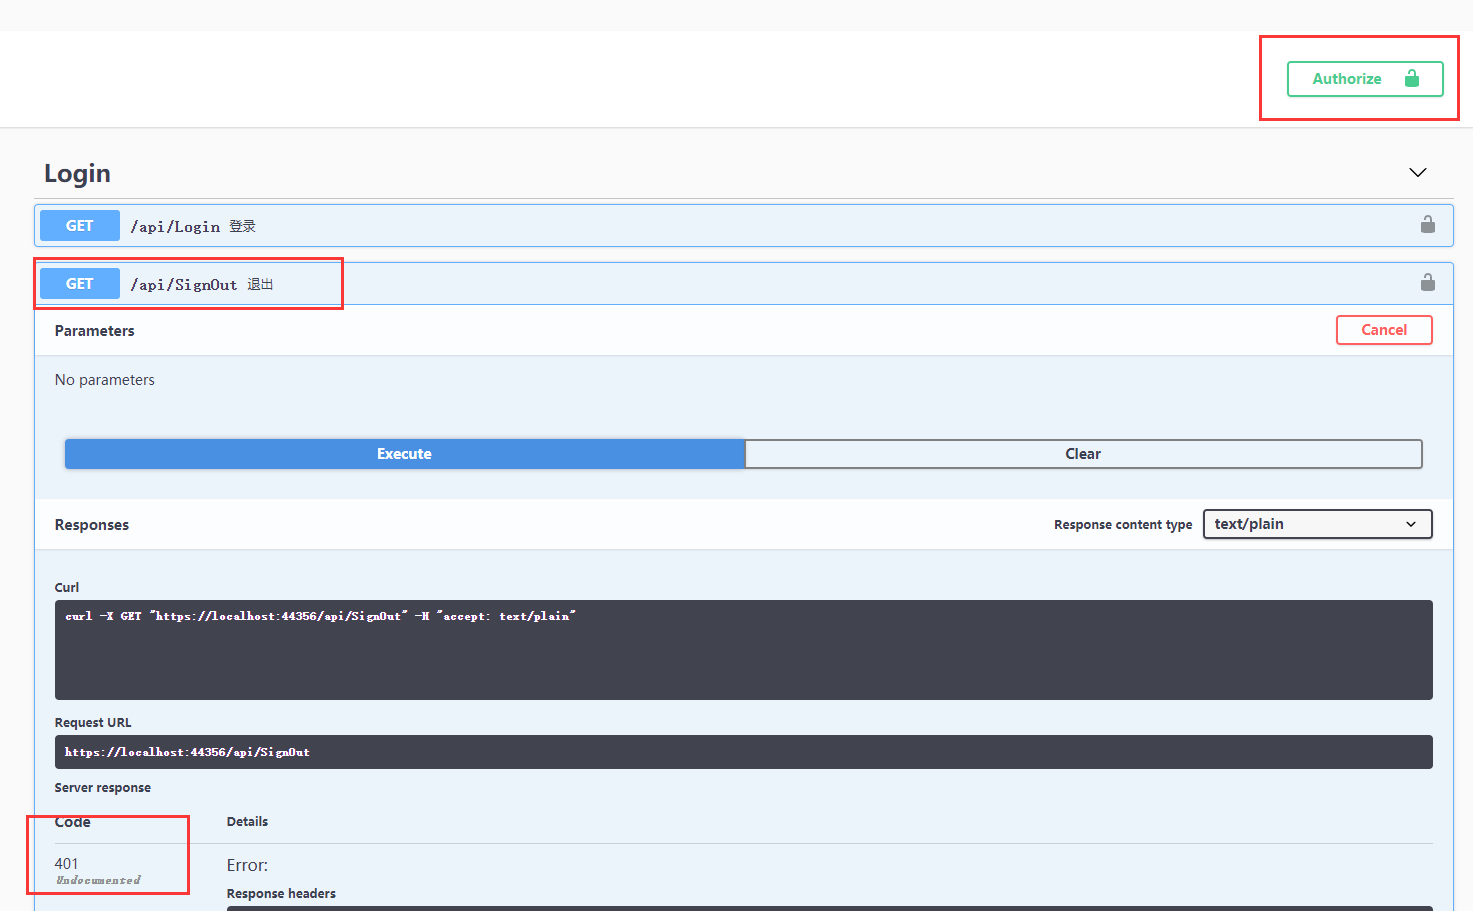
9.测试
在没有token的请求中~请求接口401
扫描二维码关注公众号,回复:
8240257 查看本文章

拿到token后放在全局之中