随着微服务、开放平台等概念的兴起,实践过程中 API 数量呈现爆发式增长,对外、对内如何治理?网关是针对这一系列疑问的部分回应,才疏学浅,只能留下一些烂笔头。
目前 API 网关实现比较多,Kong、Orange、Traefik、Tyk、Istio 等。Kong 就是其中一个开源的 API 网关实现,有社区支持,相对比较活跃,也有商业版本提供给企业客户。最近要在 k8s 中试用 Kong,所以接下来一段时间的博客主要就围绕 Kong 做一些记录。
本篇主要是参照了 官方安装文档 ,在本地安装的笔记。
OS:Ubuntu 19.04 Desktop x64
Kong:1.4.0
Postgresql:11.5
1、安装 Kong
Kong 支持很多种安装模式
这里用的 Ubuntu 下手工安装的方式,先下载 deb 包。因官网没有提供 Ubuntu-19.04 的包,所以下载了 Ubuntu-18.04 的 deb 包,后面跑起来也没发现有什么问题。
 $ sudo apt-get update
 $ sudo apt-get install openssl libpcre3 procps perl
 $ sudo dpkg -i <kong-download-path>/kong-1.4.0.bionic.amd64.deb
安装完后,相关目录分别是 /etc/kong、/usr/local/kong
# 这个 kong.conf 是我 cp 了 kong.conf.default 的一个修改版本
cq@ubuntu /etc/kong % ls
kong.conf  kong.conf.default
以上是默认配置文件模板,详细配置项此处还用不上,就不提前引入,增加本篇的理解难度了。

以上是程序的本体所在,因 Kong 是对 Openresty 的封装,而 Openresty 底下又是 Nginx。对 kong 标准配置文件的修改,会映射到这里的配置修改,如果你直接改这里,在重启或 reload 后可能会发现被 kong 的配置覆盖。
附:如果想用 APT 来安装,也有命令,搬运如下(国内的网有些时候让人很抓狂,官网一句命令的事儿,有可能需要你疯狂改源。。)
$ sudo apt-get update
$ sudo apt-get install -y apt-transport-https curl lsb-core
$ echo "deb https://kong.bintray.com/kong-deb `lsb_release -sc` main" | sudo tee -a /etc/apt/sources.list
$ curl -o bintray.key https://bintray.com/user/downloadSubjectPublicKey?username=bintray
$ sudo apt-key add bintray.key
$ sudo apt-get update
$ sudo apt-get install -y kong
2、数据库准备
Kong 提供两种模式,一种叫 db-less mode,就是不用数据库,配置全撸到配置文件里,启动时加载到内存,这是从1.1版本开始支持的模式。另一种就是使用数据库,多节点的情况下,这就是共享的配置中心,牵一发动全身,目前 kong 仅支持两种:PostgreSQL 9.5+ 和 Cassandra 3.x.x 。
关于 db-less mode,咱们后面单开一篇来学习,这里就用 pg 来做实验。
2.1 安装 PG
sudo apt install postgresql
安装完毕,默认会创建好组和用户。
cq@ubuntu /etc/kong % cat /etc/passwd|grep postgres
postgres:x:127:133:PostgreSQL administrator,,,:/var/lib/postgresql:/bin/bash
cq@ubuntu /etc/kong % cat /etc/group|grep postgres
ssl-cert:x:111:postgres
postgres:x:133:
使用管理员 postgres 登录后创建 kong 相关的数据库和用户。
sudo su - postgres
psql
postgres=# CREATE USER kong; CREATE DATABASE kong OWNER kong;
postgres=# ALTER USER kong WITH PASSWORD 'kong';
查看5432端口是否正常监听
netstat -tnlp | grep 5432
否则需要修改配置文件 /etc/postgresql/11/main/postgresql.conf
2.2 初始化数据库
拷贝一份 /etc/kong/kong.conf.default 为 kong.conf,在 kong.conf 中设置好连接 pg 数据库的参数。
#database = off
#decalrative_config = /home/cq/kong/kong-local-install/kong.yml

database = postgres             # Determines which of PostgreSQL or Cassandra
                                 # this node will use as its datastore.
                                 # Accepted values are `postgres`,
                                 # `cassandra`, and `off`.

pg_host = 127.0.0.1             # Host of the Postgres server.
pg_port = 5432                  # Port of the Postgres server.
#pg_timeout = 5000               # Defines the timeout (in ms), for connecting,
                                 # reading and writing.

pg_user = kong                  # Postgres user.
pg_password = kong                  # Postgres user's password.
pg_database = kong              # The database name to connect to.
初始化 kong 数据库
kong migrations bootstrap -c /etc/kong/kong.conf
3、启动 Kong
kong start -c /etc/kong/kong.conf
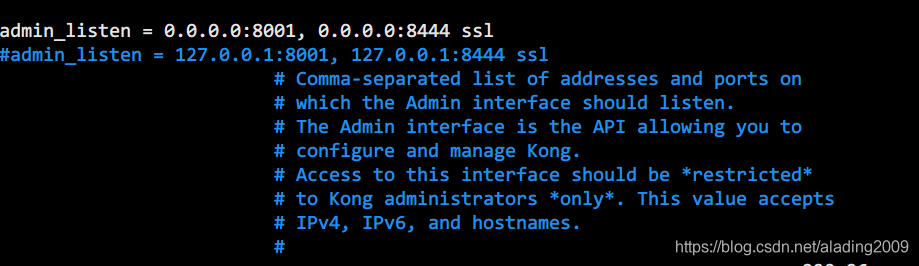
启动完毕就可以通过浏览器或者 curl 来访问 kong 了。kong 提供了4个端口供访问,两个 http,两个 https,流量代理端口为 8000/8443,管理端口为 8001/8444。
如果想远程访问管理端口,需要修改配置文件 /etc/kong/kong.conf 中相应配置,改完 kong reload 一把。
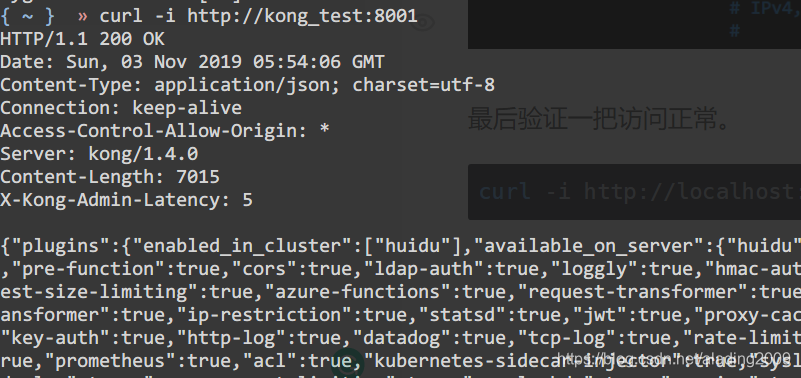
最后验证一把访问正常。
# 在 hosts 中对 kong_test 做了映射
curl -i http://kong_test:8001/
ps:近期学习 kong 的时候,也翻了一些网友的文章,感谢。