webpack现在已经成为前端很多的打包器。网上关于webpack的相关文章也是很多,本文主要是根据自己的学习步骤来记录的,进行简单的webpack实例的讲解.
(一)我们先从最简单的开始,步骤如下:
1.新建一个项目文件夹,此时文件夹没有任何东西。
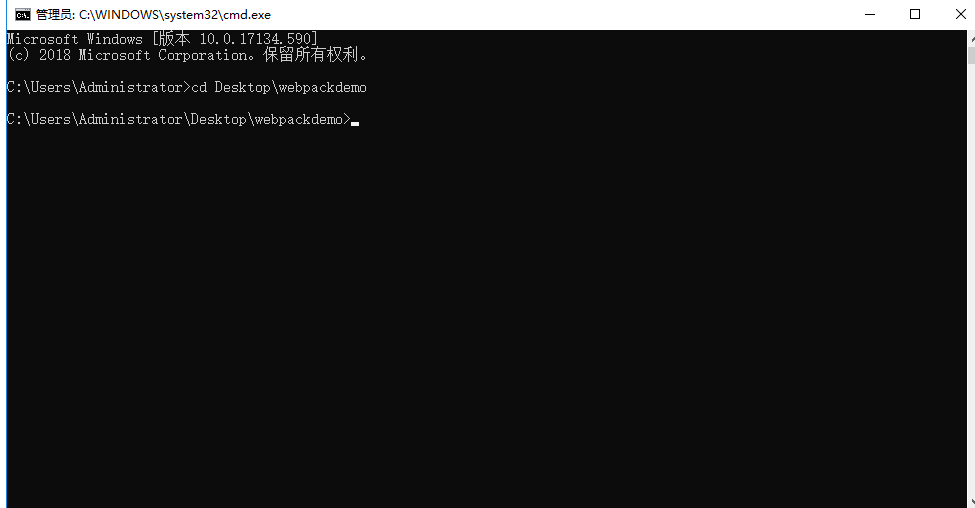
2.cmd--然后再将命令行切换到当前目录下,

由于我的Dome文件建立在桌面,所以当前目录如下
3.执行如下命令:
npm init -y(文件加下生成了一个package.json的文件,这个文件很重要,概括的说就是该文件包含了当前工程所需要的所有依赖关系)

文件夹内如下:

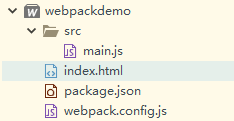
4.现在我们就在webpackDome文件内新建文件夹src,src文件夹下新建main.js,然后webpackDome下新建文件webpack.config.js和index.html
main.js
main.js
输入:document.write("hello world");

index.html
页面内容如下:
<!DOCTYPE html>
<html>
<head>
<meta charset="UTF-8">
<title></title>
<style>
body {
background-color: yellow;
}
</style>
</head>
<body>
<script src="dist/bundle.js"></script> (注: 这个js暂时不存在,不过我们可以先写这里)
</body>
</html>
1.webpack.config.js (配置文件下配置)
const path = require('path');
module.exports = {
entry:'./src/main.js',
output:{
path:path.resolve(__dirname,'dist'),
filename:'bundle.js'
}
}
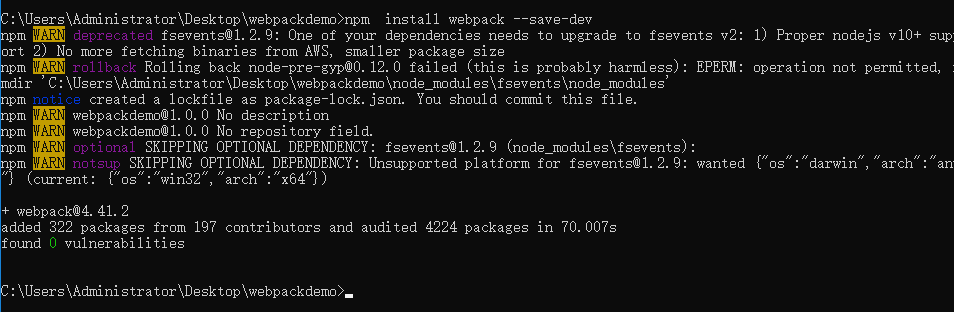
4.执行如下指令
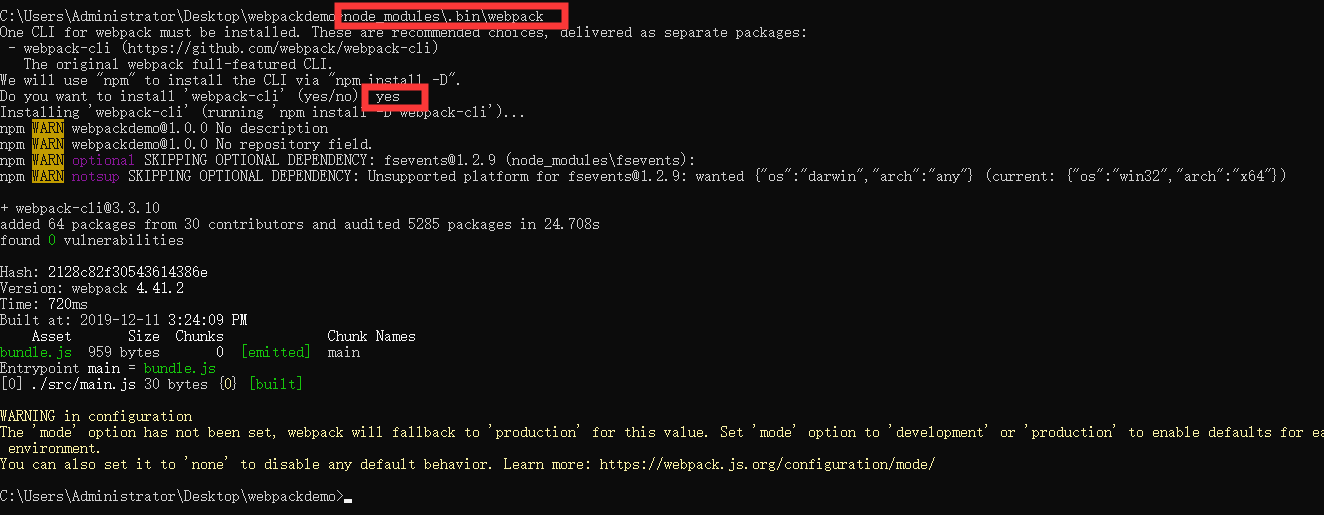
npm install webpack --save-dev
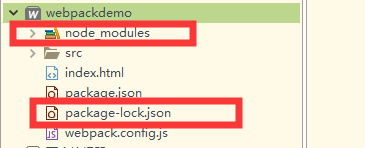
此时我们在回去看文件夹,发现里面多出2个,这个是正常的。
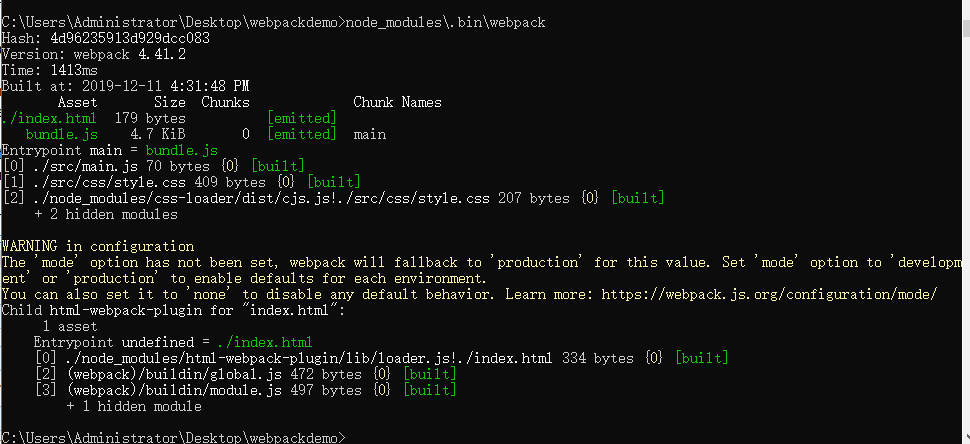
1.在输入这条打包命令后点击回车
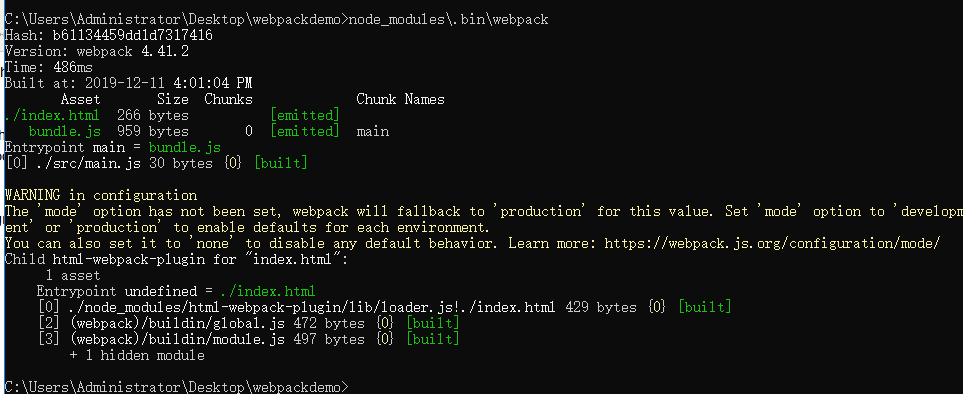
node_modules\.bin\webpack
命令执行成功后,你会发现webpack文件下多了一个dist文件夹,在dist文件夹中,多了一个bundle.js文件

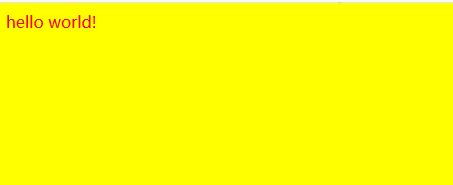
此时在浏览器中打开index.html文件,你将看到如下内容

如此,我们便完成了一个最简单的webpack实例。
(二)下面我们将在这个基础上,一步步的进行扩展!!
1)生成html 模板
1.首先我们要先使用webpack插件里的html-wbpack-plugin,操作如下:
输入命令:npm install --save-dev html-webpack-plugin

2.webpack.config.js
const path = require('path');
const HtmlWebpackPlugin = require('html-webpack-plugin');
module.exports = {
entry:'./src/main.js',
output:{
path:path.resolve(__dirname,'dist'),
filename:'bundle.js'
},
plugins:[
new HtmlWebpackPlugin({
filename:'./index.html',
template:'index.html'
})
]
}
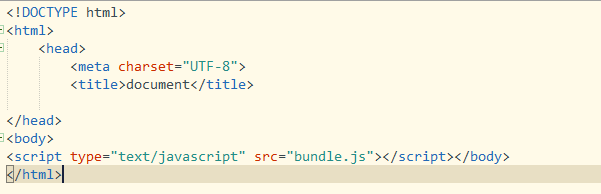
3.修改index.html,去掉bundle.js的引用
index.html
<!DOCTYPE html>
<html>
<head>
<meta charset="UTF-8">
<title>document</title>
<style>
body {
background-color: yellow;
}
</style>
</head>
<body>
</body>
</html>
4.执行指令
node_modules\.bin\webpack
在回去看dist目录下生成了以webpack/index.html为模板的index.html
2) CSS文件文件处理
1.在src下新建一个css文件夹,并新建一个css文件style.css
然后将index.html中的样式移入到style.css文件中,并做一点小修改
style.css
body {
background-color: yellow;
color:red;
}
2.修改main.js
import style from './css/style.css'
document.write("hello world!");
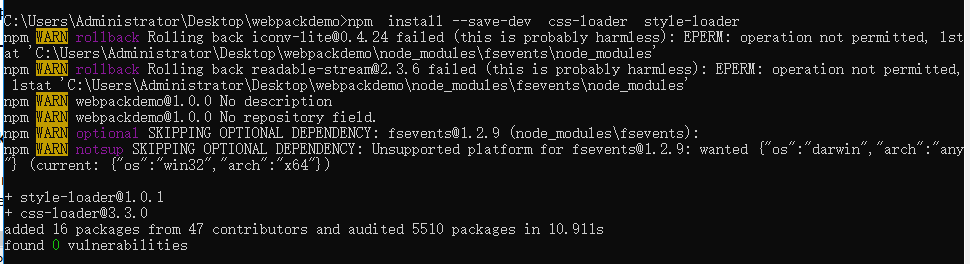
3.打包css文件需要使用css-loader,以及style-loader,需要使用npm进行安装
npm install --save-dev css-loader style-loader
进行webpack.config.js文件的配置
const path = require('path');
const HtmlWebpackPlugin = require('html-webpack-plugin');
module.exports = {
entry:'./src/main.js',
output:{
path:path.resolve(__dirname,'dist'),
filename:'bundle.js'
},
module: {
rules:[
{
test:/\.css$/,
use:['style-loader','css-loader']
}
]
},
plugins:[
new HtmlWebpackPlugin({
filename:'./index.html',
template:'index.html'
})
]
}
4.对css文件进行打包
node_modules\.bin\webpack
此时我们在浏览器中查看dist文件加下的index.html,结果如下
这时奇怪的地方来了,这里的index.html页面并没有引用任何的css文件,但是运行起来css却又被引用了的,这里就是为啥叫css打包了,因为样式文件在执行
node_modules\.bin\webpack这条命令后就已经被打包进了bundle.js脚本里面去了。大家可以在这个脚本里面搜索一下‘background-color’,一定会有。
3)加载图片打包
1.先在src目录下新建img文件夹,同时在该文件夹中放入一张图片test.jpg
修改style.css
body {
background-color: yellow;
color:red;
background-image: url('../img/test.jpg');
}
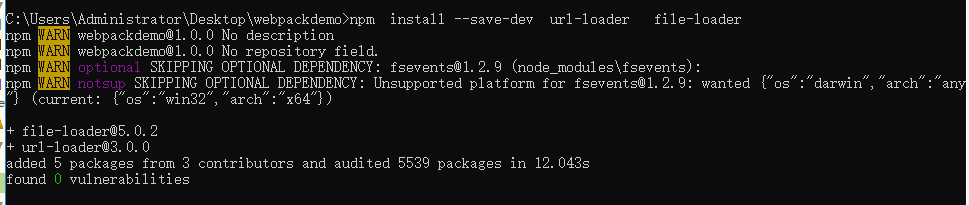
如果此时我们直接去进行打包,是会报错的。我们需要相应的加载器去加载图片,这里我们使用的是url-loader,file-loader来加载文件。
npm install --save-dev url-loader file-loader
2.更改配置文件
webpack.config.js
const path = require('path');
const HtmlWebpackPlugin = require('html-webpack-plugin');
module.exports = {
entry:'./src/main.js',
output:{
path:path.resolve(__dirname,'dist'),
filename:'bundle.js'
},
module: {
rules:[
{
test:/\.css$/,
use:['style-loader','css-loader']
},
{
test:/\.(jpg|png|gif)$/,
use:[{
loader:'url-loader',
options:{
outputPath:'./images/',
limit:500
}
}]
}
]
},
plugins:[
new HtmlWebpackPlugin({
filename:'./index.html',
template:'index.html'
})
]
}
3.添加图片后的css进行打包
node_modules\.bin\webpack
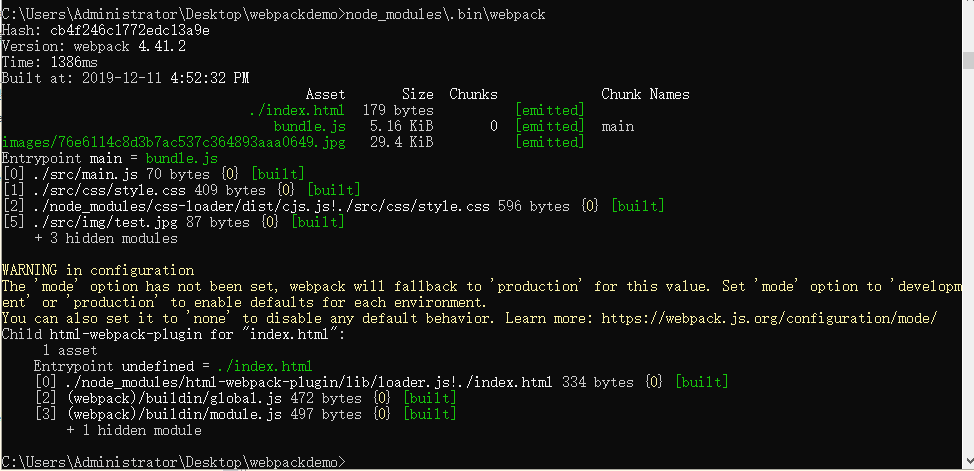
打包成功之后,我们就会发现在dist文件下多了一个images文件夹,浏览dist/index.html ,内容如下

4)css包和js包分离
1.使用webpack的插件extract-text-webpack-plugin
npm install --save-dev extract-text-webpack-plugin@next
2.配置webpack.config.js
const path = require('path');
const HtmlWebpackPlugin = require('html-webpack-plugin');
const ExtractTextPlugin = require('extract-text-webpack-plugin');
module.exports = {
entry:'./src/main.js',
output:{
path:path.resolve(__dirname,'dist'),
filename:'bundle.js'
},
module: {
rules:[
{
test:/\.css$/,
use:ExtractTextPlugin.extract({
fallback:'style-loader',
use:'css-loader'
})
},
{
test:/\.(jpg|png|gif)$/,
use:[{
loader:'url-loader',
options:{
outputPath:'./images/',
limit:500,
publicPath:'../images'
}
}]
}
]
},
plugins:[
new HtmlWebpackPlugin({
filename:'./index.html',
template:'index.html'
}),
new ExtractTextPlugin('css/[name].[hash:8].css')
]
}
3.命令行打包
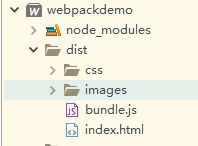
node_modules\.bin\webpack

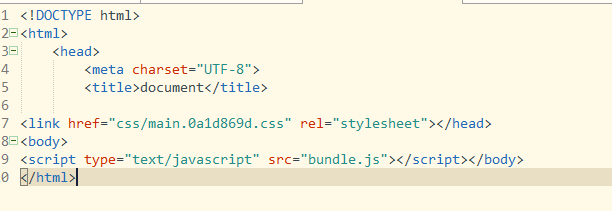
打包成功后返回webpack文件夹就能很明显的看到,dist文件夹下出现了一个css文件夹。内部就有css打包后的脚本
同时在去看dist文件下的index.html,也自动引用了css的打包脚本,如下图:
以上就是我研究webpack过程中写的一个小实例,我主要是根据https://blog.csdn.net/MessageBox_/article/details/81325034这个来研究的,里面的Dome步骤也是非常详细的,就是我自己写实例的过程中,在针对命令输入上面的使用是做了部分改进,这个上面的部分命令在我的dome中实战过程中报错较为明显的就是打包命令,不知道是不是配置方面略有不同的原因还是怎么的。

另外还有个webpack4基础入门网址,一开始我就是先看的这个https://www.cnblogs.com/Immortal-brother/p/8695179.html,需要的朋友也可以先看看。这个和上面一个比较来,更为基础,没用任何扩展,但是对基础使用上却更为详细,其中报考报错之后如果解决的也都一 一记录。
进行webpack.config.js文件的配置
const path = require('path');
const HtmlWebpackPlugin = require('html-webpack-plugin');
module.exports = {
entry:'./src/main.js',
output:{
path:path.resolve(__dirname,'dist'),
filename:'bundle.js'
},
module: {
rules:[
{
test:/\.css$/,
use:['style-loader','css-loader']
}
]
},
plugins:[
new HtmlWebpackPlugin({
filename:'./index.html',
template:'index.html'
})
]
}
————————————————
版权声明:本文为CSDN博主「izwell」的原创文章,遵循 CC 4.0 BY-SA 版权协议,转载请附上原文出处链接及本声明。
原文链接:https://blog.csdn.net/MessageBox_/article/details/81325034