通讯 | props | prop-types
组件通讯
Props: 组件无论是使用函数声明还是通过 class 声明,都决不能修改自身的 props
/* class  */
.parent-box {
  width: 700px;
  height: 300px;
  background-color: #eeeeee;
  border: 1px solid #ca46dd;
}
.child-box {
  width: 500px;
  height: 200px;
  background-color: #c4ee9f;
}
.grandchild-box {
  width: 300px;
  height: 100px;
  background-color: #c05b76;
}
1 - 使用function
const Demo = (props) => {
console.log(props)
return (
<div>
{props.info}
<p>姓名: {props.name}</p>
<p>年龄: {props.age}</p>
<div>喜欢的颜色:
{props.Colors.map( item =>
<li key={item}>{item}{item}</li>
)}
</div>
{props.func()}
</div>
)
};
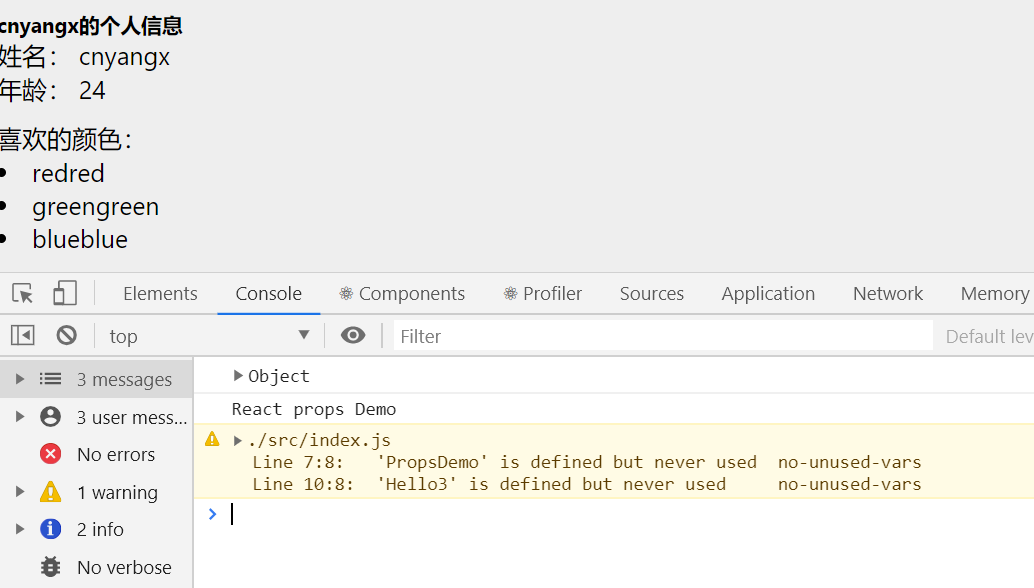
ReactDOM.render(
<Demo
info = { <h5>cnyangx的个人信息</h5> }
name="cnyangx"
age={24}
Colors={['red', 'green', 'blue']}
func={ () => console.log('React props Demo')} />,
document.getElementById('root'));
2 - 使用class
/**
注意: 使用类组件时,如果写了构造函数,应该将props传递给super(),否则,无法在构造函数中获取到props
*/
import React from 'react'
// class 组件
class PropsDemo extends React.Component{
constructor(props){
super(props);
}
render() {
return (
<div>
<h2>class 组件</h2>
{this.props.info}
<p>姓名: {this.props.name}</p>
<p>年龄: {this.props.age}</p>
<div>喜欢的颜色:
{this.props.Colors.map( item =>
<li key={item}>{item}{item}</li>
)}
</div>
{this.props.func()}
</div>
)
}
}
export default PropsDemo;
// 在页面中使用
ReactDOM.render(
<PropsDemo
info = { <h5>cnyangx的个人信息</h5> }
name="cnyangx"
age={24}
Colors={['red', 'green', 'blue']}
func={ () => console.log('React props Demo')} />,
document.getElementById('root'));
组件通讯的三种方式
(1)父组件传递数据给子组件
- 父组件提供要传递的state数据
- 给子组件标签添加属性,值为state中的数据
- 子组件中通过props接收父组件中传递的数据
class Parent extends React.Component {
state = {
user: 'cnyangx'
}
render() {
return (
<div className="parent-box" >
parent component:
<Child user={this.state.user}/>
</div>
);
}
}
const Child = (props) => {
return(
<div className="child-box">
child component: 传递过来的数据 user: {props.user}
</div>
)
};
ReactDOM.render(<Parent />, document.getElementById('root'));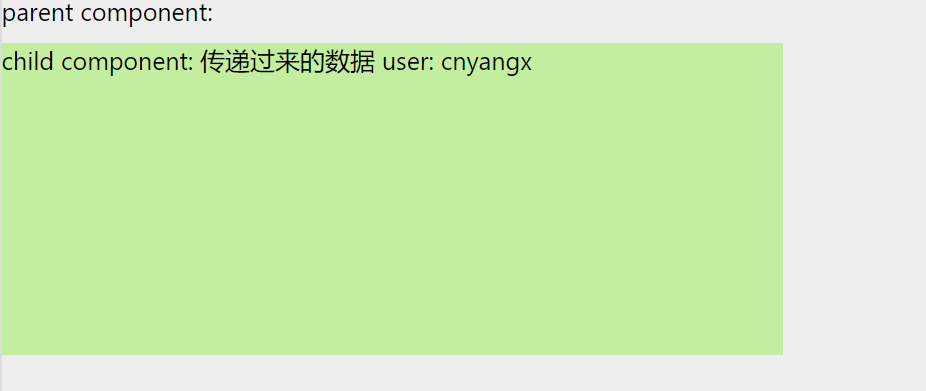
(2)子组件传递数据给父组件
- 利用回调函数,父组件提供回调,子组件调用,将要传递的数据作为回调函数的参数
- 父组件提供一个回调函数,用来接收数据
- 将该函数作为属性的值,传递给子组件
class Parent extends React.Component {
state = {
getmsg: ''
};
// 提供回调函数用来接收数据
getChildMsg = data => {
this.setState({
getmsg: data
});
console.log(data)
};
render() {
return (
<div className="parent-box" >
parent component: 组件传递过来的数据:{this.state.getmsg}
<Child getMsg = {this.getChildMsg}/>
</div>
);
}
}
class Child extends React.Component{
state = {
user: 'cnyangx'
};
handleClick = () => {
this.props.getMsg(this.state.user)
};
render() {
return(
<div className="child-box">
<button onClick={this.handleClick}>点我传递数据给父组件</button>
</div>
)
}
};
ReactDOM.render(<Parent />, document.getElementById('root'));
(3) 兄弟组件传递
- 将共享状态(数据)提升到最近的公共父组件中,由公共父组件管理这个状态
- 这个称为状态提升
- 公共父组件职责:
    1. 提供共享状态
    2.提供操作共享状态的方法
- 要通讯的子组件只需要通过props接收状态或操作状态的方法
// 父组件
class Counter extends React.Component {
// 共享的状态
state = {
count: 0
};
// 提供修改状态的方法
onIncrement = () => {
this.setState({
count: this.state.count + 1
})
};
render() {
return (
<div>
<Child1 count={this.state.count} />
<Child2 onIncrement={this.onIncrement}/>
</div>
)
}
}
const Child1 = (props) => {
return <h1>计数器:{props.count}</h1>
};
const Child2 = (props) => {
return <button onClick={() => props.onIncrement()}> child + 1 </button>
};
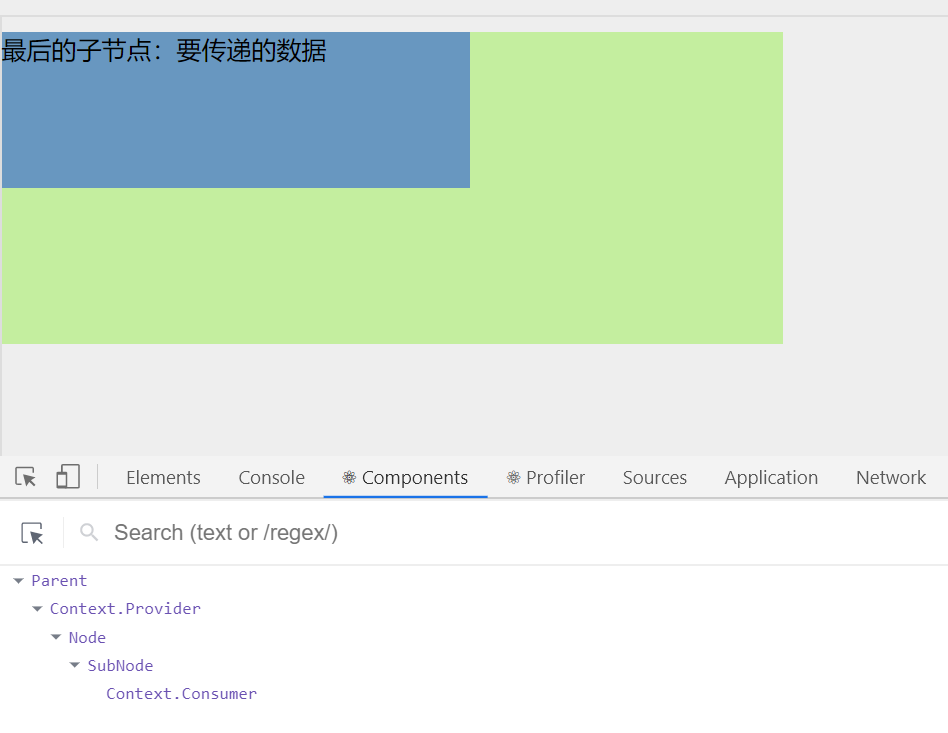
ReactDOM.render(<Counter />, document.getElementById('root'));Context -- 跨组件传递数据
// 1. 创建Context 得到两个组件
const { Provider, Consumer } = React.createContext();

// 2. 使用Provider组件作为父节点
class Parent extends React.Component {
    render() {
        return (
            // 3. 设置value属性,表示要传递的数据
            <Provider value="要传递的数据">
                <div className="parent-box">
                    <Node/>
                </div>
            </Provider>
        )
    }
}

const Node = props => {
    return (
        <div className="child-box">
            <SubNode/>
        </div>
    )
};
const SubNode = props => {
    return (
        <div className="grandchild-box">
            {/*// 4. 哪一层想要接收数据,就用Consumer进行包裹,在里面回调函数中的参数就是传递过来的值*/}
            <Consumer >
                { data => <span>最后的子节点:{data} </span>}
            </Consumer>
        </div>
    )
};
ReactDOM.render(<Parent />, document.getElementById('root'));
Props 探究
children属性
- children属性: 表示组件标签的子节点,当组件标签有子节点时,props就会有该属性
- children属性与普通的props一样,值可以使任意值(文本、react元素、组件、甚至是函数)
const Parent = (props) => {
    console.log(props);
    return (
        <div>parent
            {props.children}
        </div>
    )
};

ReactDOM.render(<Parent>
    <h1>children</h1>
    <p>txt</p>
</Parent>, document.getElementById('root'));
props校验
- 对于组件来说,props是外来的,无法保证组件使用者传入什么格式的数据,简单来说就是组件调用者可能不知道组件封装着需要什么样的数据
- 如果传入的数据不对,可能会导致报错
- 关键问题:组件的使用者不知道需要传递什么样的数据
- props校验:允许在创建组件的时候,指定props的类型、格式等
- 作用:捕获使用组件时因为props导致的错误,给出明确的错误提示,增加组件的健壮性
使用步骤
- 安装包
prop-types (yarn add prop-types | npm i props-types) - 导入prop-types 包
- 使用
组件名.propTypes={}来给组件的props添加校验规则 - 校验规则通过PropTypes对象来指定
// props 校验
const Verify = props => {
    const arr = props.colors;
    const lis = arr.map((item, index) => <li key={index}>{item}</li>);
    return (
        <ul>{lis}</ul>
    )
};

// 添加校验
Verify.propTypes = {
    colors: PropTypes.array
};
ReactDOM.render(<Verify colors={['blue', 'yellow', 'red']} />, document.getElementById('root'));
常见的约束规则
创建的类型:
array、bool、func、number、object、stringReact元素类型:
element必填项:
isRequired特定结构的对象:
shape({})- 更多的约束规则
// 添加props校验
// 属性 a 的类型:      数值(number)
// 属性 fn 的类型:     函数(func)并且为必填项
// 属性 tag 的类型:    React元素(element)
// 属性 filter 的类型: 对象({area: '上海', price: 1999})
Verify.propTypes = {
    colors: PropTypes.array,
    a: PropTypes.number,
    fn: PropTypes.func.isRequired,
    tag: PropTypes.element,
    filter: PropTypes.shape({
        area: PropTypes.string,
        price: PropTypes.number
    })
};
ReactDOM.render(<Verify colors={['blue', 'yellow', 'red']} />, document.getElementById('root'));
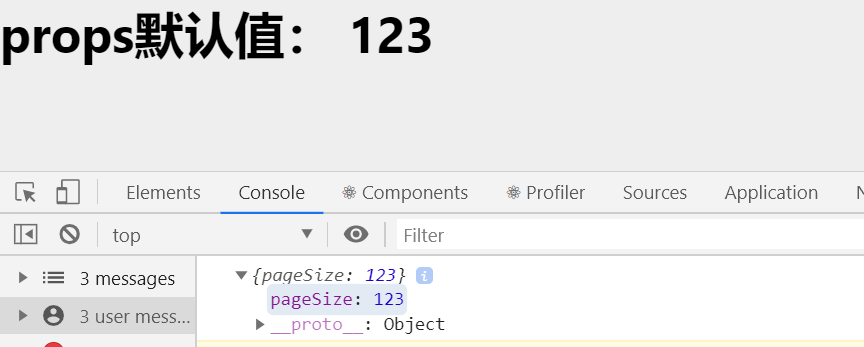
props的默认值
- 场景:分页组件 -> 每页显示条数
// props 默认值
const DefaultValue = props => {
    console.log(props);

    return (


        <div>
            <h1>props默认值: {props.pageSize}</h1>
        </div>
    )
};


DefaultValue.defaultProps = {
    pageSize: 123
};
ReactDOM.render(<DefaultValue  />, document.getElementById('root'));