Spring集合的注入
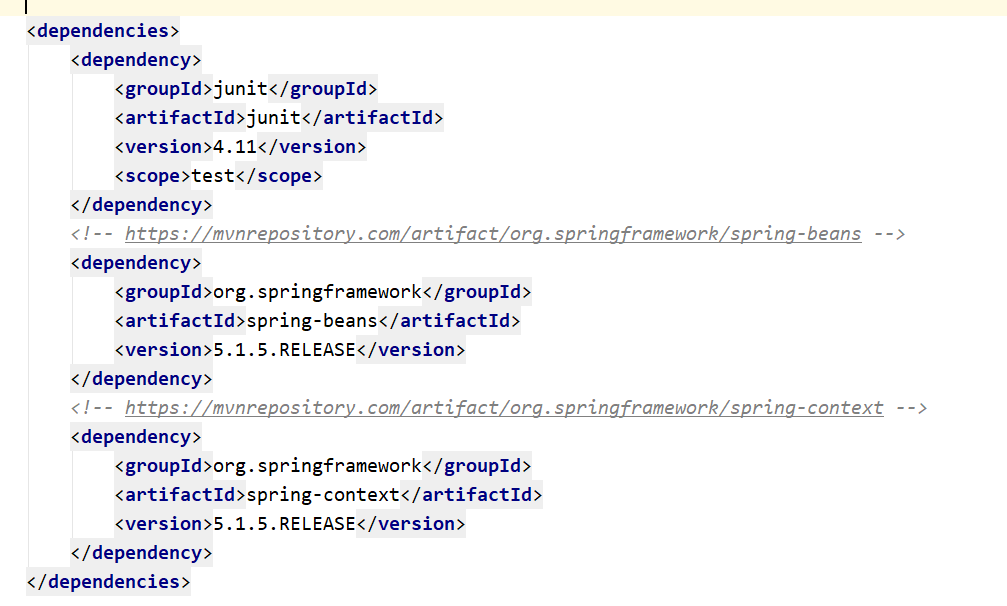
步骤一:导入依赖
步骤二:创建实体类

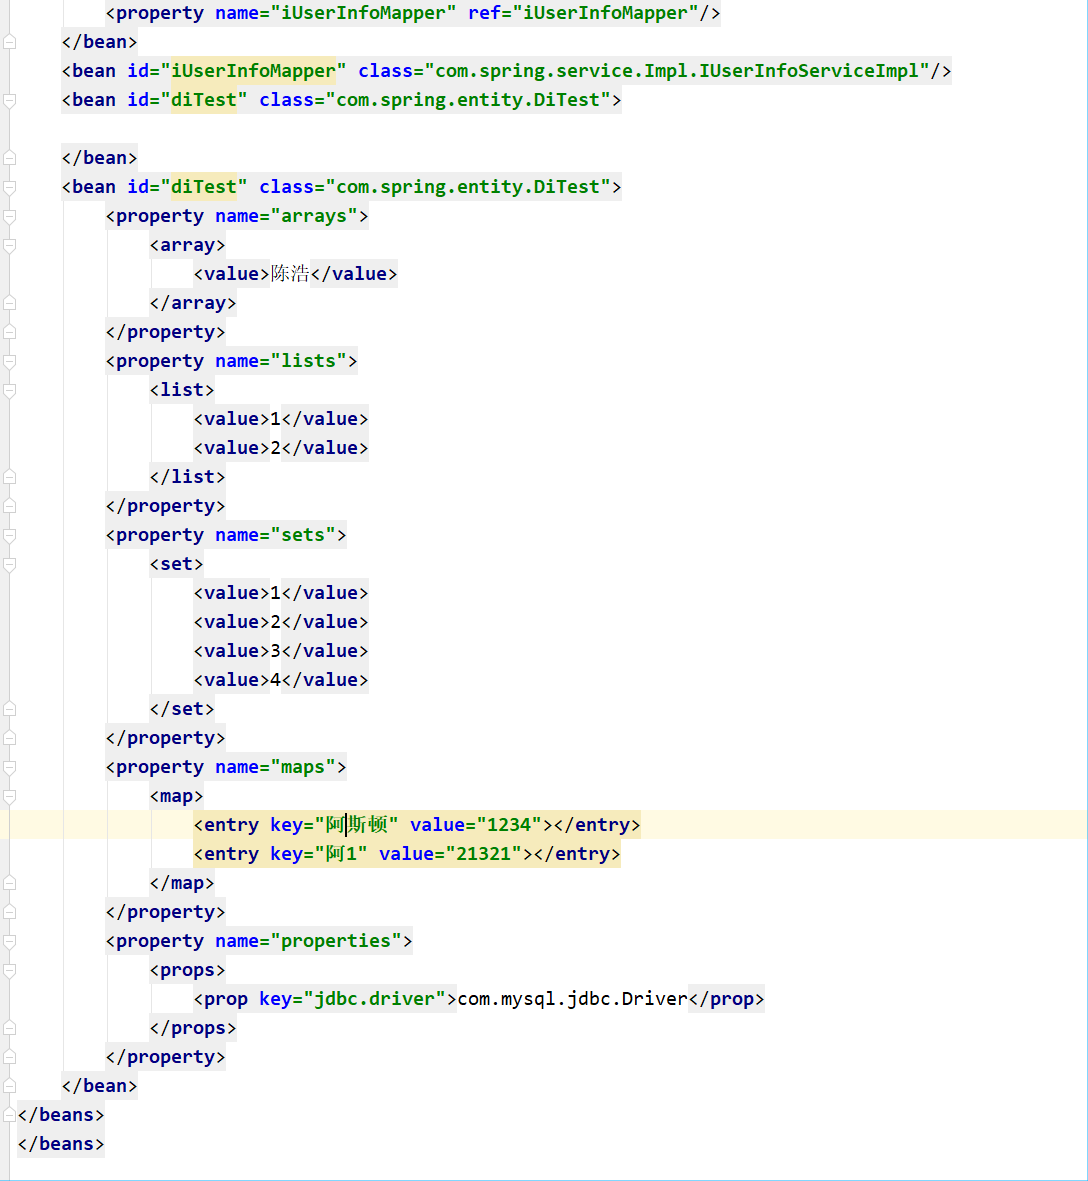
步骤三:创建大配置文件
步骤四:测试

域属性自动注入
byName与byType
步骤一:创建两个实体类
public class Student {
    private Integer stuid;
    private String stuName;
    private Teacher teacher;

    public Teacher getTeacher() {
        return teacher;
    }

    public void setTeacher(Teacher teacher) {
        this.teacher = teacher;
    }

    public Integer getStuid() {
        return stuid;
    }

    public void setStuid(Integer stuid) {
        this.stuid = stuid;
    }

    public String getStuName() {
        return stuName;
    }

    public void setStuName(String stuName) {
        this.stuName = stuName;
    }
}
public class Teacher {
    private Integer tid;
    private String tname;

    public Integer getTid() {
        return tid;
    }

    public void setTid(Integer tid) {
        this.tid = tid;
    }

    public String getTname() {
        return tname;
    }

    public void setTname(String tname) {
        this.tname = tname;
    }
}
步骤二:创建大配置文件(在bean节点中增加autowire属性,设值为byType)
要求:给Teacher赋值的bean节点的id与域属性的名字相同

<?xml version="1.0" encoding="UTF-8"?>
<beans xmlns="http://www.springframework.org/schema/beans"
       xmlns:xsi="http://www.w3.org/2001/XMLSchema-instance"
       xmlns:aop="http://www.springframework.org/schema/aop"
       xmlns:p="http://www.springframework.org/schema/p"
       xsi:schemaLocation="http://www.springframework.org/schema/beans
       http://www.springframework.org/schema/beans/spring-beans.xsd
       http://www.springframework.org/schema/aop
       http://www.springframework.org/schema/aop/spring-aop.xsd">

    <bean id="stuentity" class="com.SpringMckz.entity.Student" autowire="byName">
        <property name="stuid" value="14564"></property>
        <property name="stuName" value="陈浩"></property>
    </bean>
    <bean id="teacher" class="com.SpringMckz.entity.Teacher">
        <property name="tid" value="74894790"></property>
        <property name="tname" value="张三"></property>
    </bean>
</beans>
步骤四:测试(autowire="byName")
@Test
    public void testsentitu(){
        ApplicationContext atc=new ClassPathXmlApplicationContext("applicationContext.xml");
        Student sss = (Student)atc.getBean("stuentity");
        System.out.println(sss.getTeacher().getTid());
        System.out.println(sss.getTeacher().getTname());
    }
步骤五:测试(autowire="byType")
要求:保证域属性的类型与bean的类型一致,与其相兼容的类型也不可以
<?xml version="1.0" encoding="UTF-8"?>
<beans xmlns="http://www.springframework.org/schema/beans"
       xmlns:xsi="http://www.w3.org/2001/XMLSchema-instance"
       xmlns:aop="http://www.springframework.org/schema/aop"
       xmlns:p="http://www.springframework.org/schema/p"
       xsi:schemaLocation="http://www.springframework.org/schema/beans
       http://www.springframework.org/schema/beans/spring-beans.xsd
       http://www.springframework.org/schema/aop
       http://www.springframework.org/schema/aop/spring-aop.xsd">

    <bean id="stuentity" class="com.SpringMckz.entity.Student" autowire="byType">
        <property name="stuid" value="154847"></property>
        <property name="stuName" value="陈浩"></property>
    </bean>
    <bean id="teacher" class="com.SpringMckz.entity.Teacher">
        <property name="tid" value="484"></property>
        <property name="tname" value="沉默"></property>
    </bean>
</beans>
@Test
    public void testsentitu(){
        ApplicationContext atc=new ClassPathXmlApplicationContext("applicationContext.xml");
        Student sss = (Student)atc.getBean("stuentity");
        System.out.println(sss.getTeacher().getTid());
        System.out.println(sss.getTeacher().getTname());
    }