前提说明:
企业中,随着用户的增长,访问的数据量也越来越大,之前的环境已不足以支持日常的工作,随之也就出现了各种应用的瓶颈问题,既然问题出现了,我们就得想办法解决,一般的网站环境下,均会用到LAMP或者LNMP或者Tomcat等Web服务器,而对于我们网站环境的优化,除了对源代码优化,进行一些配置调优,Sql创建索引,增大内存和读写速度以外,我们还可以对环境架构进行优化和扩展。
因此,我们引用了LVS做代理服务器进行负载均衡,Nginx对站点实现动静分离,来加快网站的访问速度。
引入负载均衡技术后这里就有这么一个问题,首先说一下HTTP协议是无状态的,客户同时向一个服务器发起两次请求的时候,服务器是不知道这两次请求时来自同一个客户端的,我们可能会想到使用keepalive保持长连接,保持长连接是客户端与服务器建立一次连接以后可以在这个时间段内可以发起多次请求,并不是说建立两次连接,但很多时候,服务器是需要追踪用户信息的。比如说当你登陆某东的网站以后,你每刷新一次,就需要重新登陆一下用户,这样的话客户端的体验是很不好的,但是我们可以利用服务器上面httpd的cookie来解决这个问题。
cookie指的是每一个客户端访问我们服务器的资源的时候,如果之前访问过我们服务器的话那么客户端就有此前访问服务器的令牌,(只要没有删除),那么也没有关系,如果是第一次访问的话,服务器会生成一个令牌。因此每一个客户端都应该有一个唯一id标识,也就是cookie。
每一次客户端访问服务器的时候请求报文上面都有应该附带此cookie,以便让服务器能追踪到用户的身份。但是当此用户访问完服务器的资源以后,服务器端可以让你强制在本地生成这些之前访问过的资源或者信息,以便你下次在访问的时候,服务器端可以查看你之前在我里面都访问过什么东西。但是我们电脑上面都有一些打着安全名号的一些软件,比如什么安全卫视,什么管家。他们有着至高无上的权利,当你扫描文件的时候,就可以查到你之前访问过某些网站的资源,这些是非常不安全的,他会根据你之前访问的某些东西,会推送这些东西的大量广告。造成隐私泄露。是很不安全的。(但你在搜索引擎上面的关键词除外)。
但还有一种解决办法是比如你访问某东的一些东西的时候,某东也是会追踪用户访问的这些信息的,但是这些追踪的结果没有保存到客户端本地,而是在服务器上面。他会把每一个用户的cookie加一个k,并保留一个文件记录用户的各种浏览行为,这种行为在服务器端通常被成为session。用户的会话。
做过了web服务器群集和热备,web服务器坏了我们是不怕了,但是我们要知道,网站的数据有很多是存储在数据库里面的,例如注册的会员,发的文章,购物的订单等信息。当然我们可以给数据库做备份,但是如果每天00:00做一次备份,那么如果在23:59数据丢失了,那么就会丢失一天的数据,有没有一种方法能实现实时备份,就是说有数据产生就立即备份,答案当然是有,也就是Mysql主从复制。而Mysql读写分离是来提升数据库的并发负载能力和对数据读写的效率的。
不说那么多了,接下来就跟我来配置吧
首先是架构环境介绍:

| 服务器 | 操作系统版本 | 所需的安装包 | 安装的服务 | IP地址 |
|---|---|---|---|---|
| Lvs-master | CentOS Linux release 7.3.1611 (Core) | keepalived.x86_64 0:1.2.13-8.el7 ipvsadm.x86_64 0:1.27-7.el7 | Keepalived,ipvsadm.x86_64 | 192.168.10.101 |
| Lvs-Backup | CentOS Linux release 7.3.1611 (Core) | keepalived.x86_64 0:1.2.13-8.el7 ipvsadm.x86_64 0:1.27-7.el7 | Keepalived,ipvsadm.x86_64 | 192.168.10.102 |
| NT-1 | CentOS Linux release 7.3.1611 (Core) | nginx.x86_64 1:1.12.2-2.el7 apache-tomcat-9.0.8.tar phpredis-4.3.0 | Nginx Tomcat DNS | 192.168.10.103 |
| NT-2 | CentOS Linux release 7.3.1611 (Core) | nginx.x86_64 1:1.12.2-2.el7 apache-tomcat-9.0.8.tar phpredis-4.3.0 | Nginx Tomcat DNS | 192.168.10.104 |
| Mysql-master | CentOS Linux release 7.3.1611 (Core) | mysql-5.6.36.tar mha4mysql-node-0.57.tar | Mysql | 192.168.10.105 |
| Mysql-slave1 | CentOS Linux release 7.3.1611 (Core) | mysql-5.6.36.tar mha4mysql-node-0.57.tar | Mysql | 192.168.10.106 |
| Mysql-slave2 | CentOS Linux release 7.3.1611 (Core) | mysql-5.6.36.tar mha4mysql-node-0.57.tar | Mysql | 192.168.10.107 |
| Reids-master | CentOS Linux release 7.3.1611 (Core) | redis-5.0.5.tar | Redis | 192.168.10.108 |
| Reids-Slave | CentOS Linux release 7.3.1611 (Core) | redis-5.0.5.tar tomcat-redis-session-manager | Redis | 192.168.10.109 |
| MHA-Amoeba | CentOS Linux release 7.3.1611 (Core) | amoeba-mysql-binary-2.2.0.tar mha4mysql-manager-0.57.tar | MHA Amoeba | 192.168.10.110 |
| Gateway-server | CentOS Linux release 7.3.1611 (Core) | Iptables | Iptables | 192.168.10.111 |
本实验中:前端使用两台服务器配置Lvs+keepalived实现高可用负载均衡和动静分离;后端php动态服务器使用lnmp和Tomcat服务搭建,负责解析php动态资源和Java开发的网页;使用redis哨兵或集群,mysql使用mha主从复制和读写分离架构来实现。使用软件防火墙IPtables做网关服务器进行安全防护。
配置过程:在开始之前应在各各主机上面搭建好SSH免密登陆,一会做MHA需要用到
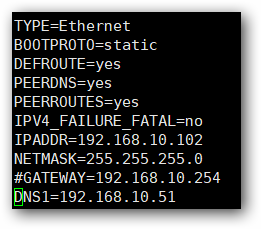
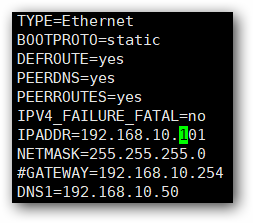
一、配置前的初始配置,配置好每台主机的ip地址,关闭防火墙和selinux,搭建DNS服务器(各主机间通信);这个步骤所有主机都操作,我这里只操作一台主机。
[root@Nginx-Tomcat1 /] systemctl stop firewalld
[root@Nginx-Tomcat1 /] setenforce 0
[root@Nginx-Tomcat1 /] systemctl disable firewalld
把一台服务器当作时间服务器
yum -y install ntp
如果可以直接访问互联网,就同步第三方时间服务器
ntpdate time.windows.com
ntpdate ntp1.aliyun.com
也可以自己搭建时间服务器
vim /etc/ntp.conf
#restrict 192.168.11.0 mask 255.255.255.0 nomodify notrap #允许访问的网段
server 127.127.1.0 #添加本机作为服务器
fudge 127.127.1.0 stratum 10 #将优先级改为最高
#在crontab 加入定时任务
crontab -e
0,30 * * * * ntpdate 192.168.10.101
#启动服务
systemctl start ntpd
systemctl enable ntpd
二:配置Nginx+Tomcat服务器,实现动态请求的解析(两台NT主机的操作一样。我这里是演示一台)
1.安装Nginx和Tomcat需要的软件包,在部署 Tomcat 之前必须安装好 jdk,因为 jdk 是 Tomcat 运行的必要环境。而 jdk 的安装也相对比较简单,版本有很多,这里我们选择 rpm 版本即可!打开 oracle 官网,JDK安装下载 该网页中会有 172 的大版本。根据所使用的计算机硬件配置,选择其中一个安装包,如图所示。选择基于 linux64 位 rpm 版本,必须选中 Accept License Agreement 再进行下载。

[root@Nginx-Tomcat /] yum -y install nginx php-fpm php-mbstring.x86_64 php-gd.x86_64 php-mysql.x86_64 php gcc*
2.下载完安装包后,将其上传到服务器/usr/src/目录系下,执行安装命令:
[root@Nginx-Tomcat1 src]# rpm -ivh jdk-8u171-linux-x64.rpm
[root@Nginx-Tomcat1 src]# rpm -qa | grep “jdk*”
[root@Nginx-Tomcat1 src]# rpm -qc jdk1.8
上面显示安装完成,jdk 安装目录在/usr/java/jdk1.8.0_171-amd64,设置 jdk 的环境变量,编辑/etc/profile 文件,增加如下内容:
[root@Nginx-Tomcat1 /] vim /etc/profile
export JAVA_HOME=/usr/java/jdk1.8.0_171-amd64
export CLASSPATH=$JAVA_HOME/lib/tools.jar:$JAVA_HOME/lib/dt.jar
export PATH=$JAVA_HOME/bin:$PATH
使环境变量生效:
[root@Nginx-Tomcat1 /]# source /etc/profile
3.安装Tomcat
[root@Nginx-Tomcat1 src]# tar zxvf apache-tomcat-9.0.8.tar.gz
[root@Nginx-Tomcat1 src]# mv apache-tomcat-9.0.8 /usr/local/tomcat
[root@Nginx-Tomcat1 tomcat]# /usr/local/tomcat/bin/startup.sh
三.配置Nginx服务器:
[root@Nginx-Tomcat1 /]# systemctl start nginx
[root@Nginx-Tomcat1 /]# mkdir /data/nginx/html -pv
[root@Nginx-Tomcat1 conf.d]# vim /etc/nginx/conf.d/ityun1.conf
server {
	listen 80 default_server;
	server_name www.ityun1.com;
	#rewrite /(.*)\.jsp$ https://www.ityunn.com/$1.jsp;
	#rewrite /(.*)$ https://www.ityunn.com/$1;
	location / {
		root /data/nginx/html;
		index index.php;
		}
	location ~* \.php$ {
		fastcgi_pass 192.168.10.103:9000;
		fastcgi_index index.php;
		fastcgi_param  SCRIPT_FILENAME        /data/nginx/html/$fastcgi_script_name;
		include fastcgi_params;
		}
	location ~ \.jsp$ {
		proxy_pass http://192.168.10.103:8080;
		}
	location ^~ /nginx_status {
		stub_status;
		auth_basic 'This is web status';
		auth_basic_user_file '/etc/nginx/.yonghu';
		}
	#location ~* \.(png|jpeg|swf)$ {
	#		valid_referers none block server_names *.ityunn.com ityunn.com www.ityunn.*;
	#		if ($invalid_referer) {
	#			return https://www.ityunn.com/daotu.jpg;
	#		}
	#	}
	error_page 404 /notfound.html;
			location ^~ /notfound.html {
			root /data/nginx/html;
		}
}
[root@Nginx-Tomcat1 /]# vim /etc/php-fpm.d/www.conf
 12 listen = 0.0.0.0:9000 开监听地址为任意。
 24 ;listen.allowed_clients = 127.0.0.1 把这一行注释
[root@Nginx-Tomcat1 /]# systemctl restart php-fpm
[root@Nginx-Tomcat1 /]# systemctl restart nginx
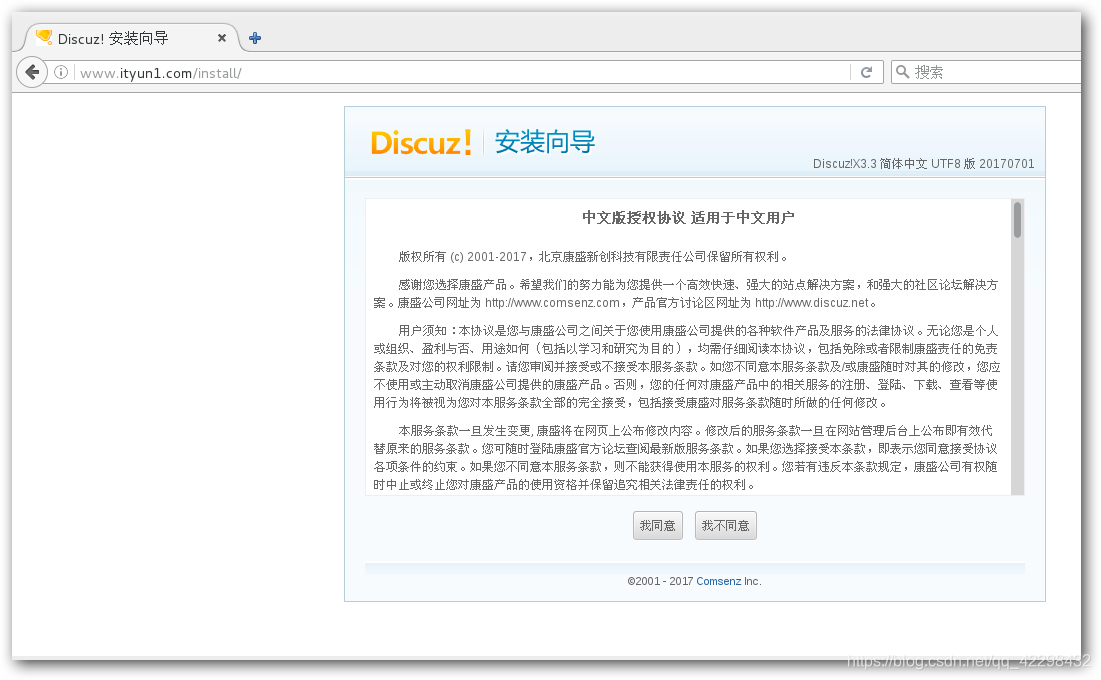
放一个网页源代码到网站目录下。
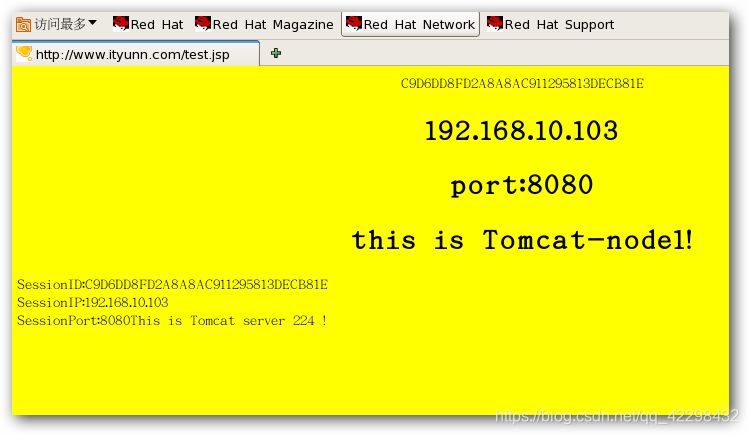
使用客户端指定DNS服务器,浏览器访问http://www.ityun1.com验证Nginx与php-fpm协同工作是否正常
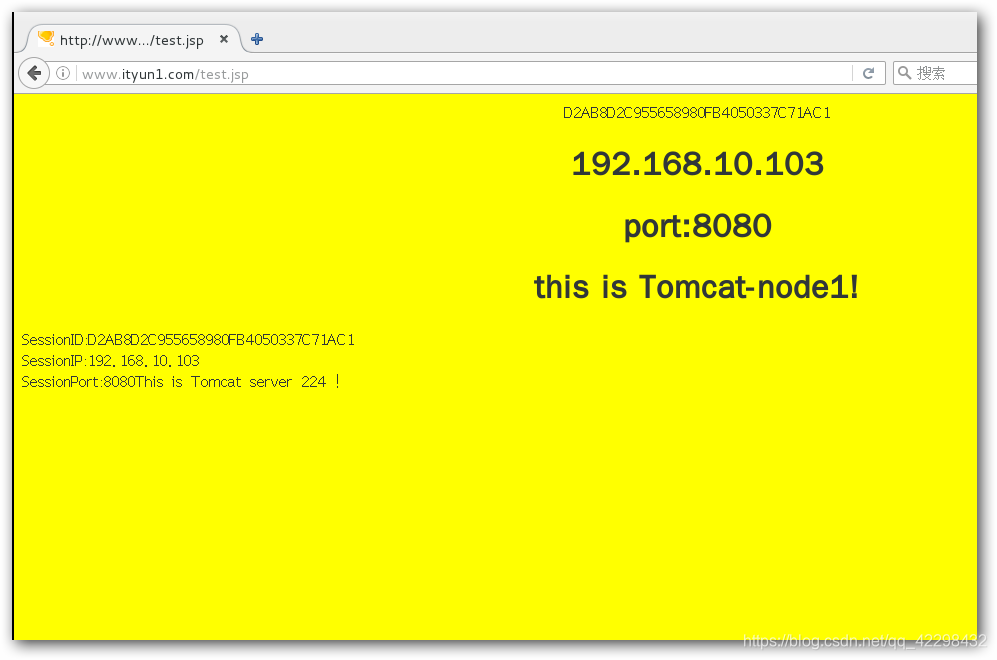
三. 配置Tomcat服务器:
[root@Nginx-Tomcat1 ROOT]# cd /usr/local/tomcat/webapps/ROOT/
[root@Nginx-Tomcat1 ROOT]# vim test.jsp
<html>
    <body bgcolor="yellow">
    <center>
    <%=  request.getSession().getId()  %>
    <h1>192.168.10.103</h1>
    <h1>port:8080</h1>
    <h1>this is Tomcat-node1! </h1>
    </center>
    </body></html>
 <%@ page contentType="text/html;charset=UTF-8" isELIgnored="false"%>
SessionID:<%=session.getId()%><BR>
SessionIP:<%=request.getServerName()%> <BR>
SessionPort:<%=request.getServerPort()%><%     out.println("This is Tomcat server 224 !");     %>
[root@Nginx-Tomcat1 /]# /usr/local/tomcat/bin/startup.sh
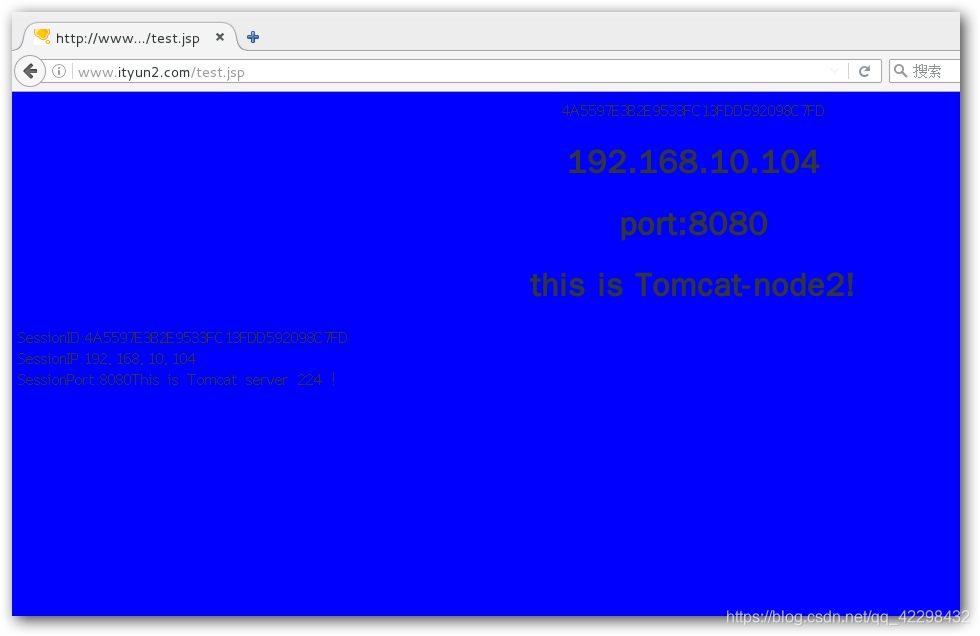
4.另一台动态服务器使用同样的步骤安装Nginx+php-fpm+Tomcat服务,并测试是否工作正常
LVS代理服务器配置
LVS-master配置:
1.安装LVS服务软件,安装Keepalived软件包
[root@LVS-master1 /]# yum -y install keepalived.x86_64 ipvsadm.x86_64
2.修改Keepalived主配置文件,设置负载均衡和高可用 (双主模型)
[root@LVS-master1 /]# vim /etc/keepalived/keepalived.conf
! Configuration File for keepalived

global_defs {
   notification_email {
    [email protected]
   }
   notification_email_from [email protected]
   smtp_server 127.0.0.1
   smtp_connect_timeout 30
   router_id LVS_1
}

vrrp_instance VI_1 {
    state MASTER
    interface eth0
    virtual_router_id 50
    priority 150
    advert_int 1
    authentication {
        auth_type PASS
        auth_pass 1111
    }
    virtual_ipaddress {
      192.168.10.50/24
    }
	notify_master "/etc/keepalived/notify.sh master"
	notify_backup "/etc/keepalived/notify.sh backup"
	notify_fault "/etc/keepalived/notify.sh fault"
}

virtual_server 192.168.10.50 80 {
    delay_loop 6
    lb_algo rr
    lb_kind DR
    nat_mask 255.255.255.0
    protocol TCP

    real_server 192.168.10.103 80 {
        weight 1
        TCP_CHECK {
        connect_timeout 8
        nb_get_retry 3
        delay_before_retry 3
        connect_port 80
        }
    }

    real_server 192.168.10.104 80 {
        weight 1
        TCP_CHECK {
        connect_timeout 8
        nb_get_retry 3
        delay_before_retry 3
        connect_port 80
        }
    }
}
#virtual_server 192.168.10.88 443 {
#    delay_loop 6
#    lb_algo rr
#    lb_kind DR
#    nat_mask 255.255.255.0
#    protocol TCP
#
#    real_server 192.168.10.103 443 {
#        weight 1
#        TCP_CHECK {
#        connect_timeout 8
#        nb_get_retry 3
#        delay_before_retry 3
#        connect_port 80
#        }
#    }
#
#    real_server 192.168.10.104 443 {
#        weight 1
#        TCP_CHECK {
#        connect_timeout 8
#        nb_get_retry 3
#        delay_before_retry 3
#        connect_port 80
#        }
#    }
#}

virtual_server 192.168.10.50 53 {
    delay_loop 3
    lb_algo rr
    lb_kind DR
    protocol UDP

    real_server 192.168.10.103 53 {
        weight 1
	MISC_CHECK {
	connect_timeout 8
        nb_get_retry 3
        delay_before_retry 3
        connect_port 53
        misc_path"/etc/keepalived/udp_check53.sh 192.168.10.103 53"
	}
	}
    real_server 192.168.10.104 53 {
        weight 1
	MISC_CHECK {
	connect_timeout 8
        nb_get_retry 3
        delay_before_retry 3
        connect_port 53
        misc_path"/etc/keepalived/udp_check53.sh 192.168.10.104 53"
		}

	}
}
vrrp_instance VI_2 {
    state BACKUP
    interface eth0
    virtual_router_id 51
    priority 100
    advert_int 1
    authentication {
        auth_type PASS
        auth_pass 1111
    }
    virtual_ipaddress {
      192.168.10.51/24
    }
	notify_master "/etc/keepalived/notify.sh master"
	notify_backup "/etc/keepalived/notify.sh backup"
	notify_fault "/etc/keepalived/notify.sh fault"
}

virtual_server 192.168.10.51 80 {
    delay_loop 6
    lb_algo rr
    lb_kind DR
    nat_mask 255.255.255.0
    protocol TCP

    real_server 192.168.10.103 80 {
        weight 1
        TCP_CHECK {
        connect_timeout 8
        nb_get_retry 3
        delay_before_retry 3
        connect_port 80
        }
    }

    real_server 192.168.10.104 80 {
        weight 1
        TCP_CHECK {
        connect_timeout 8
        nb_get_retry 3
        delay_before_retry 3
        connect_port 80
        }
    }
}
#virtual_server 192.168.10.89 443 {
#    delay_loop 6
#    lb_algo rr
#    lb_kind DR
#    nat_mask 255.255.255.0
#    protocol TCP
#
#    real_server 192.168.10.103 443 {
#        weight 1
#        TCP_CHECK {
#        connect_timeout 8
#        nb_get_retry 3
#        delay_before_retry 3
#        connect_port 80
#        }
#    }
#
#    real_server 192.168.10.104 443 {
#        weight 1
#        TCP_CHECK {
#        connect_timeout 8
#        nb_get_retry 3
#        delay_before_retry 3
#        connect_port 80
#        }
#    }
#}

virtual_server 192.168.10.89 53 {
    delay_loop 3
    lb_algo rr
    lb_kind DR
    protocol UDP

    real_server 192.168.10.103 53 {
        weight 1
	MISC_CHECK {
	connect_timeout 8
        nb_get_retry 3
        delay_before_retry 3
        connect_port 53
        misc_path"/etc/keepalived/udp_check53.sh 192.168.10.103 53"
	}
	}
    real_server 192.168.10.104 53 {
        weight 1
	MISC_CHECK {
	connect_timeout 8
        nb_get_retry 3
        delay_before_retry 3
        connect_port 53
        misc_path"/etc/keepalived/udp_check53.sh 192.168.10.104 53"
		}

	}
}
[root@LVS-master1 keepalived]# vim /etc/keepalived/notifi.sh
#!/bin/bash
				#
				contact='root@localhost'

				notify() {
					local mailsubject="$(hostname) to be $1, vip floating"
					local mailbody="$(date +'%F %T'): vrrp transition, $(hostname) changed to be $1"
					echo "$mailbody" | mail -s "$mailsubject" $contact
				}

				case $1 in
				master)
					notify master
					;;
				backup)
					notify backup
					;;
				fault)
					notify fault
					;;
				*)
					echo "Usage: $(basename $0) {master|backup|fault}"
					exit 1
					;;
				esac
[root@LVS-master1 keepalived]# vim /etc/keepalived/udp_check53.sh
#!/bin/bash
nc -u -w 1 $1 $2  < /dev/null
exit $?
~
LVS-slave配置:
1.安装LVS服务软件,安装Keepalived软件包
[root@LVS-master1 /]# yum -y install keepalived.x86_64 ipvsadm.x86_64
2.修改Keepalived主配置文件,设置负载均衡和高可用 (双主模型)
[root@LVS-master1 /]# vim /etc/keepalived/keepalived.conf
! Configuration File for keepalived

global_defs {
   notification_email {
    [email protected]
   }
   notification_email_from [email protected]
   smtp_server 127.0.0.1
   smtp_connect_timeout 30
   router_id LVS_1
}

vrrp_instance VI_1 {
    state BACKUP
    interface eth0
    virtual_router_id 50
    priority 100
    advert_int 1
    authentication {
        auth_type PASS
        auth_pass 1111
    }
    virtual_ipaddress {
      192.168.10.50/24
    }
	notify_master "/etc/keepalived/notify.sh master"
	notify_backup "/etc/keepalived/notify.sh backup"
	notify_fault "/etc/keepalived/notify.sh fault"
}

virtual_server 192.168.10.50 80 {
    delay_loop 6
    lb_algo rr
    lb_kind DR
    nat_mask 255.255.255.0
    protocol TCP

    real_server 192.168.10.103 80 {
        weight 1
        TCP_CHECK {
        connect_timeout 8
        nb_get_retry 3
        delay_before_retry 3
        connect_port 80
        }
    }

    real_server 192.168.10.104 80 {
        weight 1
        TCP_CHECK {
        connect_timeout 8
        nb_get_retry 3
        delay_before_retry 3
        connect_port 80
        }
    }
}
#virtual_server 192.168.10.50 443 {
#    delay_loop 6
#    lb_algo rr
#    lb_kind DR
#    nat_mask 255.255.255.0
#    protocol TCP
#
#    real_server 192.168.10.103 443 {
#        weight 1
#        TCP_CHECK {
#        connect_timeout 8
#        nb_get_retry 3
#        delay_before_retry 3
#        connect_port 80
#        }
#    }
#
#    real_server 192.168.10.104 443 {
#        weight 1
#        TCP_CHECK {
#        connect_timeout 8
#        nb_get_retry 3
#        delay_before_retry 3
#        connect_port 80
#        }
#    }
#}

virtual_server 192.168.10.50 53 {
    delay_loop 3
    lb_algo rr
    lb_kind DR
    protocol UDP

    real_server 192.168.10.103 53 {
        weight 1
	MISC_CHECK {
	connect_timeout 8
        nb_get_retry 3
        delay_before_retry 3
        connect_port 53
        misc_path"/etc/keepalived/udp_check53.sh 192.168.10.103 53"
	}
	}
    real_server 192.168.10.104 53 {
        weight 1
	MISC_CHECK {
	connect_timeout 8
        nb_get_retry 3
        delay_before_retry 3
        connect_port 53
        misc_path"/etc/keepalived/udp_check53.sh 192.168.10.104 53"
		}

	}
}
vrrp_instance VI_2 {
    state MASTER
    interface eth0
    virtual_router_id 51
    priority 150
    advert_int 1
    authentication {
        auth_type PASS
        auth_pass 1111
    }
    virtual_ipaddress {
      192.168.10.51/24
    }
	notify_master "/etc/keepalived/notify.sh master"
	notify_backup "/etc/keepalived/notify.sh backup"
	notify_fault "/etc/keepalived/notify.sh fault"
}

virtual_server 192.168.10.51 80 {
    delay_loop 6
    lb_algo rr
    lb_kind DR
    nat_mask 255.255.255.0
    protocol TCP

    real_server 192.168.10.103 80 {
        weight 1
        TCP_CHECK {
        connect_timeout 8
        nb_get_retry 3
        delay_before_retry 3
        connect_port 80
        }
    }

    real_server 192.168.10.104 80 {
        weight 1
        TCP_CHECK {
        connect_timeout 8
        nb_get_retry 3
        delay_before_retry 3
        connect_port 80
        }
    }
}
#virtual_server 192.168.10.51 443 {
#    delay_loop 6
#    lb_algo rr
#    lb_kind DR
#    nat_mask 255.255.255.0
#    protocol TCP
#
#    real_server 192.168.10.103 443 {
#        weight 1
#        TCP_CHECK {
#        connect_timeout 8
#        nb_get_retry 3
#        delay_before_retry 3
#        connect_port 80
#        }
#    }
#
#    real_server 192.168.10.104 443 {
#        weight 1
#        TCP_CHECK {
#        connect_timeout 8
#        nb_get_retry 3
#        delay_before_retry 3
#        connect_port 80
#        }
#    }
#}

virtual_server 192.168.10.51 53 {
    delay_loop 3
    lb_algo rr
    lb_kind DR
    protocol UDP

    real_server 192.168.10.103 53 {
        weight 1
	MISC_CHECK {
	connect_timeout 8
        nb_get_retry 3
        delay_before_retry 3
        connect_port 53
        misc_path"/etc/keepalived/udp_check53.sh 192.168.10.103 53"
	}
	}
    real_server 192.168.10.104 53 {
        weight 1
	MISC_CHECK {
	connect_timeout 8
        nb_get_retry 3
        delay_before_retry 3
        connect_port 53
        misc_path"/etc/keepalived/udp_check53.sh 192.168.10.104 53"
		}

	}
}
3.将Keepalived服务加入到开机自启并启动服务,通过ip addr命令查看vip是否配置成功
[root@LVS-master1 ~]# systemctl start keepalived
[root@LVS-master1 ~]# systemctl enable keepalived

4.修改LVS-master和LVS-slave的DNS地址为自己的VIP。
Nginx服务器配置:
1.编写Shell脚本,自动关闭ARP通知和ARP响应并指定回环接口为LVS的VIP地址来响应客户打。
[root@Nginx-Tomcat1 /]#chmod +x lvs_dr.sh
[root@Nginx-Tomcat1 /]# sh lvs_dr.sh start
#!/bin/bash
                                #
                                vip=192.168.10.50
                                mask='255.255.255.255'

                                case $1 in
                                start)
                                        echo 1 > /proc/sys/net/ipv4/conf/all/arp_ignore
                                        echo 1 > /proc/sys/net/ipv4/conf/lo/arp_ignore
                                        echo 2 > /proc/sys/net/ipv4/conf/all/arp_announce
                                        echo 2 > /proc/sys/net/ipv4/conf/lo/arp_announce

                                        ifconfig lo:0 $vip netmask $mask broadcast $vip up
                                        route add -host $vip dev lo:0
                                        ;;
                                stop)
                                        ifconfig lo:0 down

                                        echo 0 > /proc/sys/net/ipv4/conf/all/arp_ignore
                                        echo 0 > /proc/sys/net/ipv4/conf/lo/arp_ignore
                                        echo 0 > /proc/sys/net/ipv4/conf/all/arp_announce
                                        echo 0 > /proc/sys/net/ipv4/conf/lo/arp_announce

                                        ;;
                                *)
                                        echo "Usage $(basename $0) start|stop"
                                        exit 1
                                        ;;
                                esac
2.在两台Nginx服务器上面同时启动脚本。
**Mysql-master配置:
主从复制**
1.我因为时间原因我就不编译安装Mysql数据库了,我就使用yum安装一个mariadb数据库。(见谅)
[root@localhost /]# yum -y install mariadb-server.x86_64 gcc*
[root@mysql-master /]# vim /etc/my.cnf
- 在mysqld区域里面添加内容:
server-id=1
log-bin=mysql-bin-master
log-slave-updates=1
2.然后重启mariadb服务器
[root@mysql-master /]# systemctl restart mariadb
3.修改MySQL密码,登陆mysql创建同步用户,和root监控用户
[root@mysql-master /]# mysqladmin -uroot password ‘123’
[root@mysql-master /]# mysqladmin -uroot -p123
MariaDB [(none)]> show master status;
MariaDB [(none)]> grant replication slave on . to ‘zhangsan’@’%’ identified by ‘123’;
MariaDB [(none)]> grant all on . to ‘root’@’%’ identified by ‘123’;
MariaDB [(none)]> flush privileges;
Mysql-slave配置:
[root@localhost /]# yum -y install mariadb-server.x86_64 gcc*
[root@mysql-slave /]# vim /etc/my.cnf
- 在mysqld区域里面添加内容:
server-id=2
log-bin=mysql-bin-slave
log-slave-updates=1
2.然后重启mariadb服务器
[root@mysql-master /]# systemctl restart mariadb
3.修改MySQL密码,登陆mysql同步主的日志
[root@mysql-master /]# mysqladmin -uroot password ‘123’
[root@mysql-master /]# mysqladmin -uroot -p123
MariaDB [(none)]> change master to master_host=‘192.168.10.105’,master_user=‘zhangsan’,master_password=‘123’,master_log_file=‘mysql-bin-master.000002’,master_log_pos=1277;
MariaDB [(none)]> start slave;
MariaDB [(none)]> show slave status\G
- 如果查看到里面有 Slave_IO_Running: Yes
Slave_SQL_Running: Yes (说明从定向主已经成功了,可以进行同步)+
4.另一台从服务器指定同样的操作
MHA-Amoeba主机配置:
读写分离
首先,在此主机上面部署JAVA环境,软件包和步骤上面写的有
[root@localhost src]# mkdir /usr/local/amoeba
[root@localhost src]# tar zxvf amoeba-mysql-binary-2.2.0.tar.gz -C /usr/local/amoeba/
root@localhost src]# chmod -R 755 /usr/local/amoeba/
报错:
The stack size specified is too small, Specify at least 228k
Error: Could not create the Java Virtual Machine.
Error: A fatal exception has occurred. Program will exit.
解决方法:
cd /usr/local/amoeba/bin/
cp amoeba{,.bak}
vim amoeba
#修改
58 DEFAULT_OPTS="-server -Xms1024m -Xmx1024m -Xss256k"
/usr/local/amoeba/bin/amoeba
amoeba start|stop
#显示以上表示OK
[root@MHA-Amoeba conf]# vim /usr/local/amoeba/conf/amoeba.xml
30                                         <property name="user">amoeba</property>
31
32                                         <property name="password">123456</property>
...
115                 <property name="defaultPool">master</property>
116
117
118                 <property name="writePool">master</property>
119                 <property name="readPool">slaves</property>
[root@MHA-Amoeba conf]# vim /usr/local/amoeba/conf/dbServers.xml
30                                         <property name="user">amoeba</property>
 31
 32                                         <property name="password">123456</property>
...
115                 <property name="defaultPool">master</property>
116
117
118                 <property name="writePool">master</property>
119                 <property name="readPool">slaves</property>


vim dbServers.xml
 25                         <!-- mysql user -->
 26                         <property name="user">zhangsan</property> 张三用户是之前在MySQL主上面创建的用户
 27
 28                         <!--  mysql password -->
 29                         <property name="password">123</property>
...
 45         <dbServer name="master"  parent="abstractServer">
 46                 <factoryConfig>
 47                         <!-- mysql ip -->
 48                         <property name="ipAddress">192.168.10.105</property>
 49                 </factoryConfig>
 50         </dbServer>
 51
 52         <dbServer name="slave1"  parent="abstractServer">
 53                 <factoryConfig>
 54                         <!-- mysql ip -->
 55                         <property name="ipAddress">192.168.10.106</property>
 56                 </factoryConfig>
 57         </dbServer>
 58         <dbServer name="slave2"  parent="abstractServer">
 59                 <factoryConfig>
 60                         <!-- mysql ip -->
 61                         <property name="ipAddress">192.168.10.107</property>
 62                 </factoryConfig>
 63         </dbServer>
 64
 65         <dbServer name="slaves" virtual="true">
 66                 <poolConfig class="com.meidusa.amoeba.server.MultipleServerPool">
 67                         <!-- Load balancing strategy: 1=ROUNDROBIN , 2=WEIGHTBASED , 3=HA-->
 68                         <property name="loadbalance">1</property>
 69
 70                         <!-- Separated by commas,such as: server1,server2,server1 -->
 71                         <property name="poolNames">slave1,slave2</property>
 72                 </poolConfig>
以上有则修改,无则添加。
双主模式下两个master那么必须写两个主的IP地址,否则端口开启不了。
开启Amoeba,放在后台运行
[root@MHA-Amoeba /]# nohup /usr/local/amoeba/bin/amoeba start &
[root@MHA-Amoeba /]# ss -tnl
MHA-Amoeba主机配置:
配置MHA对MySQL集群进行高可用
1.配置相互间的免密登录,搭建一主二从Mysql集群,上面已经搭建过了。
cp .ssh/id_rsa.pub .ssh/authorized_keys
2.在MySQL主,从和MHA-Amoeba主机上面都要安装的依赖关系
yum -y localinstall /rpm/*.rpm
#或准备epel源
#yum -y install perl-DBD-MySQL perl-Config-Tiny perl-Log-Dispatch perl-Parallel-ForkManager perl-ExtUtils-CBuilder perl-ExtUtils-MakeMaker perl-CPAN
[root@mysql-master src]# tar zxvf mha4mysql-node-0.57.tar.gz
[root@mysql-master mha4mysql-node-0.57]# perl Makefile.PL && make && make install
3.在MHA-Amoeba主机上面安装的依赖包、
[root@MHA-Amoeba src]# tar zxvf mha4mysql-manager-0.57.tar.gz
[root@MHA-Amoeba src]# cd mha4mysql-manager-0.57/
[root@MHA-Amoeba mha4mysql-manager-0.57]# perl Makefile.PL && make && make install
配置MHA
1.建立配置文件目录[root@MHA-Amoeba /]# mkdir -p /etc/masterha
[root@MHA-Amoeba /]# mkdir -pv /var/log/masterha/app1
[root@MHA-Amoeba /]# cp -ra /usr/src/mha4mysql-manager-0.57/samples/scripts/ /usr/local/bin/
2.创建配置文件/etc/masterha/app1.cnf,内容如下:
[server default]
manager_log=/var/log/masterha/app1/manager.log
manager_workdir=/var/log/masterha/app1.log
master_binlog_dir=/var/lib/mysql/
master_ip_failover_script=/usr/local/bin/master_ip_failover
master_ip_online_change_script=/usr/local/bin/master_ip_online_change
password=123
ping_interval=1
remote_workdir=/tmp
repl_password=123
repl_user=zhangsan
secondary_check_script=/usr/local/bin/masterha_secondary_check -s 192.168.10.105 -s 192.168.10.106 --user=root --master_host=mysql-master --master_ip=192.168.10.105 --master_port=3306
shutdown_script=""
ssh_user=root
user=root

[server1]
hostname=192.168.10.105
port=3306

[server2]
candidate_master=1
check_repl_delay=0
hostname=192.168.10.106
port=3306

[server3]
hostname=192.168.10.107
port=3306
server default段是manager的一些基本配置参数,server1、server2、server3分别对应复制中的master、第一个slave、第二个slave。该文件的语法要求严格,变量值后不要有多余的空格。主要配置项说明如下。
manager_log:设置manager的日志文件。
manager_workdir:设置manager的工作目录。
master_binlog_dir:设置master保存binlog的位置,以便MHA可以找到master的日志,这里的也就是mysql的数据目录。
master_ip_failover_script:设置自动failover时候的切换脚本。
master_ip_online_change_script:设置手动切换时候的切换脚本。
password:设置mysql中root用户的密码。
ping_interval:设置监控主库,发送ping包的时间间隔,默认是3秒,尝试三次没有回应的时候自动进行railover。
remote_workdir:设置远端mysql在发生切换时binlog的保存位置。
repl_password:设置复制用户的密码。
repl_user:设置复制环境中的复制用户名
secondary_check_script:一旦MHA到hdp4的监控之间出现问题,MHA Manager将会尝试从hdp3登录到hdp4。
shutdown_script:设置故障发生后关闭故障主机脚本。该脚本的主要作用是关闭主机放在发生脑裂,这里没有使用。
ssh_user:设置ssh的登录用户名。
user:设置监控用户为root。
candidate_master:设置为候选master。设置该参数以后,发生主从切换以后将会将此从库提升为主库,即使这个主库不是集群中事件最新的slave。
check_repl_delay:默认情况下如果一个slave落后master 100M的relay logs的话,MHA将不会选择该slave作为一个新的
master,因为对于这个slave的恢复需要花费很长时间,通过设置check_repl_delay=0,MHA触发切换在选择一个新的master的时候将会忽略复制延时,这个参数对于设置了candidate_master=1的主机非常有用,因为这个候选主在切换的过程中一定是新的master。
3.设置复制中Slave的relay_log_purge参数
在两台从上用mysql用户执行
[root@mysql-slave1 /]# mysql -uroot -p123 -e ‘set global relay_log_purge=0’
注意,MHA在发生切换的过程中,从库的恢复过程中依赖于relay log的相关信息,所以这里要将relay log的自动清除设置为OFF,采用手动清除relay log的方式。默认情况下,从服务器上的中继日志会在SQL线程执行完毕后被自动
+删除。但是在MHA环境中,这些中继日志在恢复其他从服务器时可能会被用到,因此需要禁用中继日志的自动删除功能。定期清除中继日志需要考虑到复制延时的问题。在ext3的文件系统下,删除大的文件需要一定的时间,会导致严重的复制延时。为了避免复制延时,需要暂时为中继日志创建硬链接,因为在linux系统中通过硬链接删除大文件速度会很快。(在mysql数据库中,删除大表时,通常也采用建立硬链接的方式)
4.创建自动failover脚本
在MHA-Amoeba主机上创建/usr/local/bin/master_ip_failover文件,内容如下:
#!/usr/bin/env perl
use strict;
use warnings FATAL => 'all';
use Getopt::Long;
my (
    $command,          $ssh_user,        $orig_master_host, $orig_master_ip,
    $orig_master_port, $new_master_host, $new_master_ip,    $new_master_port
);
my $vip = '192.168.10.66';   #VIP漂移地址
my $key = '1';
my $ssh_start_vip = "/sbin/ifconfig eth0:$key $vip";
my $ssh_stop_vip = "/sbin/ifconfig eth0:$key down";
GetOptions(
    'command=s'          => \$command,
    'ssh_user=s'         => \$ssh_user,
    'orig_master_host=s' => \$orig_master_host,
    'orig_master_ip=s'   => \$orig_master_ip,
    'orig_master_port=i' => \$orig_master_port,
    'new_master_host=s'  => \$new_master_host,
    'new_master_ip=s'    => \$new_master_ip,
    'new_master_port=i'  => \$new_master_port,
);
exit &main();
sub main {
    print "\n\nIN SCRIPT TEST====$ssh_stop_vip==$ssh_start_vip===\n\n";
    if ( $command eq "stop" || $command eq "stopssh" ) {
        my $exit_code = 1;
        eval {
            print "Disabling the VIP on old master: $orig_master_host \n";
            &stop_vip();
            $exit_code = 0;
        };
        if ($@) {
            warn "Got Error: $@\n";
            exit $exit_code;
        }
        exit $exit_code;
    }
    elsif ( $command eq "start" ) {
        my $exit_code = 10;
        eval {
            print "Enabling the VIP - $vip on the new master - $new_master_host \n";
            &start_vip();
            $exit_code = 0;
        };
        if ($@) {
            warn $@;
            exit $exit_code;
        }
        exit $exit_code;
    }
    elsif ( $command eq "status" ) {
        print "Checking the Status of the script.. OK \n";
        exit 0;
    }
    else {
        &usage();
        exit 1;
    }
}
sub start_vip() {
    `ssh $ssh_user\@$new_master_host \" $ssh_start_vip \"`;
}
sub stop_vip() {
     return 0  unless  ($ssh_user);
    `ssh $ssh_user\@$orig_master_host \" $ssh_stop_vip \"`;
}
sub usage {
    print
    "Usage: master_ip_failover --command=start|stop|stopssh|status --orig_master_host=host --orig_master_ip=ip --orig_master_port=port --new_master_host=host --new_master_ip=ip --new_master_port=port\n";
}
注意脚本中VIP漂移的部分
5.创建手动failover脚本
在MHA-Amoeba主机上创建/usr/local/bin/master_ip_failover文件,内容如下:
#!/usr/bin/env perl

#  Copyright (C) 2011 DeNA Co.,Ltd.
#
#  This program is free software; you can redistribute it and/or modify
#  it under the terms of the GNU General Public License as published by
#  the Free Software Foundation; either version 2 of the License, or
#  (at your option) any later version.
#
#  This program is distributed in the hope that it will be useful,
#  but WITHOUT ANY WARRANTY; without even the implied warranty of
#  MERCHANTABILITY or FITNESS FOR A PARTICULAR PURPOSE.  See the
#  GNU General Public License for more details.
#
#  You should have received a copy of the GNU General Public License
#   along with this program; if not, write to the Free Software
#  Foundation, Inc.,
#  51 Franklin Street, Fifth Floor, Boston, MA  02110-1301  USA

## Note: This is a sample script and is not complete. Modify the script based on your environment.

use strict;
use warnings FATAL => 'all';

use Getopt::Long;
use MHA::DBHelper;
use MHA::NodeUtil;
use Time::HiRes qw( sleep gettimeofday tv_interval );
use Data::Dumper;

my $_tstart;
my $_running_interval = 0.1;
my (
  $command,              $orig_master_is_new_slave, $orig_master_host,
  $orig_master_ip,       $orig_master_port,         $orig_master_user,
  $orig_master_password, $orig_master_ssh_user,     $new_master_host,
  $new_master_ip,        $new_master_port,          $new_master_user,
  $new_master_password,  $new_master_ssh_user,
);

my $vip = '192.168.10.66';
my $key = "1";
my $ssh_start_vip = "/sbin/ifconfig eth0:$key $vip";
my $ssh_stop_vip = "/sbin/ifconfig eth0:$key down";
my $ssh_user = "root";
#my $new_master_password = "123";
#my $orig_master_password = "123";

GetOptions(
  'command=s'                => \$command,
  'orig_master_is_new_slave' => \$orig_master_is_new_slave,
  'orig_master_host=s'       => \$orig_master_host,
  'orig_master_ip=s'         => \$orig_master_ip,
  'orig_master_port=i'       => \$orig_master_port,
  'orig_master_user=s'       => \$orig_master_user,
  'orig_master_password=s'   => \$orig_master_password,
  'orig_master_ssh_user=s'   => \$orig_master_ssh_user,
  'new_master_host=s'        => \$new_master_host,
  'new_master_ip=s'          => \$new_master_ip,
  'new_master_port=i'        => \$new_master_port,
  'new_master_user=s'        => \$new_master_user,
  'new_master_password=s'    => \$new_master_password,
  'new_master_ssh_user=s'    => \$new_master_ssh_user,
);

exit &main();

sub current_time_us {
  my ( $sec, $microsec ) = gettimeofday();
  my $curdate = localtime($sec);
  return $curdate . " " . sprintf( "%06d", $microsec );
}

sub sleep_until {
  my $elapsed = tv_interval($_tstart);
  if ( $_running_interval > $elapsed ) {
    sleep( $_running_interval - $elapsed );
  }
}

sub get_threads_util {
  my $dbh                    = shift;
  my $my_connection_id       = shift;
  my $running_time_threshold = shift;
  my $type                   = shift;
  $running_time_threshold = 0 unless ($running_time_threshold);
  $type                   = 0 unless ($type);
  my @threads;

  my $sth = $dbh->prepare("SHOW PROCESSLIST");
  $sth->execute();

  while ( my $ref = $sth->fetchrow_hashref() ) {
    my $id         = $ref->{Id};
    my $user       = $ref->{User};
    my $host       = $ref->{Host};
    my $command    = $ref->{Command};
    my $state      = $ref->{State};
    my $query_time = $ref->{Time};
    my $info       = $ref->{Info};
    $info =~ s/^\s*(.*?)\s*$/$1/ if defined($info);
    next if ( $my_connection_id == $id );
    next if ( defined($query_time) && $query_time < $running_time_threshold );
    next if ( defined($command)    && $command eq "Binlog Dump" );
    next if ( defined($user)       && $user eq "system user" );
    next
      if ( defined($command)
      && $command eq "Sleep"
      && defined($query_time)
      && $query_time >= 1 );

    if ( $type >= 1 ) {
      next if ( defined($command) && $command eq "Sleep" );
      next if ( defined($command) && $command eq "Connect" );
    }

    if ( $type >= 2 ) {
      next if ( defined($info) && $info =~ m/^select/i );
      next if ( defined($info) && $info =~ m/^show/i );
    }

    push @threads, $ref;
  }
  return @threads;
}

sub main {
  if ( $command eq "stop" ) {
    ## Gracefully killing connections on the current master
    # 1. Set read_only= 1 on the new master
    # 2. DROP USER so that no app user can establish new connections
    # 3. Set read_only= 1 on the current master
    # 4. Kill current queries
    # * Any database access failure will result in script die.
    my $exit_code = 1;
    eval {
      ## Setting read_only=1 on the new master (to avoid accident)
      my $new_master_handler = new MHA::DBHelper();

      # args: hostname, port, user, password, raise_error(die_on_error)_or_not
      $new_master_handler->connect( $new_master_ip, $new_master_port,
        $new_master_user, $new_master_password, 1 );
      print current_time_us() . " Set read_only on the new master.. ";
      $new_master_handler->enable_read_only();
      if ( $new_master_handler->is_read_only() ) {
        print "ok.\n";
      }
      else {
        die "Failed!\n";
      }
      $new_master_handler->disconnect();

      # Connecting to the orig master, die if any database error happens
      my $orig_master_handler = new MHA::DBHelper();
      $orig_master_handler->connect( $orig_master_ip, $orig_master_port,
        $orig_master_user, $orig_master_password, 1 );

      ## Drop application user so that nobody can connect. Disabling per-session binlog beforehand
      $orig_master_handler->disable_log_bin_local();
      print current_time_us() . " Drpping app user on the orig master..\n";
      #FIXME_xxx_drop_app_user($orig_master_handler);

      ## Waiting for N * 100 milliseconds so that current connections can exit
      my $time_until_read_only = 15;
      $_tstart = [gettimeofday];
      my @threads = get_threads_util( $orig_master_handler->{dbh},
        $orig_master_handler->{connection_id} );
      while ( $time_until_read_only > 0 && $#threads >= 0 ) {
        if ( $time_until_read_only % 5 == 0 ) {
          printf
"%s Waiting all running %d threads are disconnected.. (max %d milliseconds)\n",
            current_time_us(), $#threads + 1, $time_until_read_only * 100;
          if ( $#threads < 5 ) {
            print Data::Dumper->new( [$_] )->Indent(0)->Terse(1)->Dump . "\n"
              foreach (@threads);
          }
        }
        sleep_until();
        $_tstart = [gettimeofday];
        $time_until_read_only--;
        @threads = get_threads_util( $orig_master_handler->{dbh},
          $orig_master_handler->{connection_id} );
      }

      ## Setting read_only=1 on the current master so that nobody(except SUPER) can write
      print current_time_us() . " Set read_only=1 on the orig master.. ";
      $orig_master_handler->enable_read_only();
      if ( $orig_master_handler->is_read_only() ) {
        print "ok.\n";
      }
      else {
        die "Failed!\n";
      }

      ## Waiting for M * 100 milliseconds so that current update queries can complete
      my $time_until_kill_threads = 5;
      @threads = get_threads_util( $orig_master_handler->{dbh},
        $orig_master_handler->{connection_id} );
      while ( $time_until_kill_threads > 0 && $#threads >= 0 ) {
        if ( $time_until_kill_threads % 5 == 0 ) {
          printf
"%s Waiting all running %d queries are disconnected.. (max %d milliseconds)\n",
            current_time_us(), $#threads + 1, $time_until_kill_threads * 100;
          if ( $#threads < 5 ) {
            print Data::Dumper->new( [$_] )->Indent(0)->Terse(1)->Dump . "\n"
              foreach (@threads);
          }
        }
        sleep_until();
        $_tstart = [gettimeofday];
        $time_until_kill_threads--;
        @threads = get_threads_util( $orig_master_handler->{dbh},
          $orig_master_handler->{connection_id} );
      }

      ## Terminating all threads
      print current_time_us() . " Killing all application threads..\n";
      $orig_master_handler->kill_threads(@threads) if ( $#threads >= 0 );
      print current_time_us() . " done.\n";
      $orig_master_handler->enable_log_bin_local();
      $orig_master_handler->disconnect();

      ## After finishing the script, MHA executes FLUSH TABLES WITH READ LOCK
      $exit_code = 0;
    };
    if ($@) {
      warn "Got Error: $@\n";
      exit $exit_code;
    }
    exit $exit_code;
  }
  elsif ( $command eq "start" ) {
    ## Activating master ip on the new master
    # 1. Create app user with write privileges
    # 2. Moving backup script if needed
    # 3. Register new master's ip to the catalog database

# We don't return error even though activating updatable accounts/ip failed so that we don't interrupt slaves' recovery.
# If exit code is 0 or 10, MHA does not abort
    my $exit_code = 10;
    eval {
      my $new_master_handler = new MHA::DBHelper();

      # args: hostname, port, user, password, raise_error_or_not
      $new_master_handler->connect( $new_master_ip, $new_master_port,
        $new_master_user, $new_master_password, 1 );

      ## Set read_only=0 on the new master
      $new_master_handler->disable_log_bin_local();
      print current_time_us() . " Set read_only=0 on the new master.\n";
      $new_master_handler->disable_read_only();

      ## Creating an app user on the new master
      print current_time_us() . " Creating app user on the new master..\n";
      FIXME_xxx_create_app_user($new_master_handler);
      $new_master_handler->enable_log_bin_local();
      $new_master_handler->disconnect();

      ## Update master ip on the catalog database, etc
      $exit_code = 0;
    };
    if ($@) {
      warn "Got Error: $@\n";
      exit $exit_code;
    }
    exit $exit_code;
  }
  elsif ( $command eq "status" ) {

    # do nothing
    exit 0;
  }
  else {
    &usage();
    exit 1;
  }
}

sub usage {
  print
"Usage: master_ip_online_change --command=start|stop|status --orig_master_host=host --orig_master_ip=ip --orig_master_port=port --new_master_host=host --new_master_ip=ip --new_master_port=port\n";
  die;
}
检查MHA配置
1.检测SSH配置
在MHA-Amoeba上用root用户操作
[root@MHA-Amoeba /]# masterha_check_ssh --conf=/etc/masterha/app1.cnf
2.检查整个复制环境状况
[root@MHA-Amoeba bin]# masterha_check_repl --conf=/etc/masterha/app1.cnf
3.查看MHA Manager的状态
[root@MHA-Amoeba /]# nohup masterha_manager --conf=/etc/masterha/app1.cnf --remove_dead_master_conf --ignore_last_failover < /dev/null > /var/log/masterha/app1/manager.log 2>&1 &
[root@MHA-Amoeba /]# masterha_check_status --conf=/etc/masterha/app1.cnf
app1 (pid:43694) is running(0:PING_OK), master:192.168.10.105
功能测试
1.初始绑定VIP
在Mysql-master主机上面用root用户执行:
[root@mysql-master /]# ip addr add 192.168.10.66 dev eth0 label eth0:1
测试方法有三种,我就使用自动切换模拟一下。
1.在slave1(192.168.10.106)上停到slave IO线程,模拟主从延时:
[root@mysql-slave1 /]# mysql -uroot -p123 -e ‘stop slave io_thread’
2.在master库(192.168.10.105)安装sysbench,进行sysbench数据生成,在sbtest库下生成sbtest表,共10w记录。
# 用root用户安装sysbench
yum install sysbench -y

# 用mysql用户建立sbtest 数据库
mysql -uroot -p123 -e "create database sbtest;"

# 用mysql用户执行sysbench生成数据
sysbench /usr/share/sysbench/tests/include/oltp_legacy/oltp.lua --mysql-host=127.0.0.1 --mysql-port=3306 --mysql-user=root --mysql-password=123 --oltp-test-mode=complex --oltp-tables-count=10 --oltp-table-size=10000 --threads=10 --time=120 --report-interval=10 --db-driver=mysql prepare
3.用root用户停止master的mysql服务。
[root@mysql-master /]# systemctl stop mariadb
4.验证VIP漂移、
这个时候VIP应该漂移到192.168.10.106的主机上面,并且之前在主上面创建的数据也应该有了,在另一台从上面查看指向主的IP已经是另一台从了,
[root@MHA-Amoeba /]# masterha_check_status --conf=/etc/masterha/app1.cnf
app1 (pid:47513) is running(0:PING_OK), master:192.168.10.106
Redis主从+sentinel(哨兵)+keepalived
实现的原理
在master和backup服务器分别安装哨兵和keepalived,master的优先级为100,backup的优先级为99,在salve服务器上配置vrrp_script检查脚本规则,检查slave当前的角色状态,一旦slave的redis角色状态为master,就把slave的优先级加2变为101,使其获得vip的权限;
当master的redis服务挂掉后,哨兵会将slave提升为新的master,slave检查角色状态为master时将优先级加2获得vip,当原来master的redis服务起来后哨兵将其作为slave加入到主从复制
当变为master的slave节点上redis服务挂掉后,哨兵会将redis的master设置为原来的master节点,vrrp_script检查自己的redis不是master时,将优先级减2变为99,原来的master优先级比slave优先级高,原来的master获得vip权限
以下操作主从服务器步骤一样,这里只安装一次。
一:安装Redis和哨兵服务
1.下载redis服务器软件包到服务器,解压后并编译安装,注意需要安装gcc编译器(主从步骤一样,这里只安装一次)
[root@database /]\# wget
[root@database /]\# tar xzvf redis-5.0.5.tar.gz
[root@database /]\# cd redis-5.0.5/
[root@database redis-5.0.5]\# make && make install
[root@database redis-5.0.5]\# ./utils/install_server.sh
Welcome to the redis service installer
This script will help you easily set up a running redis server

Please select the redis port for this instance: [6379]             ##输入要监听的端口(默认是6379)
Selecting default: 6379
Please select the redis config file name [/etc/redis/6379.conf]     ##指定配置文件路径
Selected default - /etc/redis/6379.conf
Please select the redis log file name [/var/log/redis_6379.log]     ##指定日志存放路径
Selected default - /var/log/redis_6379.log
Please select the data directory for this instance [/var/lib/redis/6379]     ##指定数据持久化存放目录
Selected default - /var/lib/redis/6379
Please select the redis executable path [/usr/local/bin/redis-server]         ##指定服务可执行文件存放路径
Selected config:
Port           : 6379
Config file    : /etc/redis/6379.conf
Log file       : /var/log/redis_6379.log
Data dir       : /var/lib/redis/6379
Executable     : /usr/local/bin/redis-server
Cli Executable : /usr/local/bin/redis-cli
Is this ok? Then press ENTER to go on or Ctrl-C to abort.
Copied /tmp/6379.conf => /etc/init.d/redis_6379
Installing service...
Successfully added to chkconfig!
Successfully added to runlevels 345!
Starting Redis server...
Installation successful!
2.修改redis配置文件,修改后台运行,监听所有地址,(其他参数按需求修改),重启redis服务。
[root@database /]\# vim /etc/redis/6379.conf
-----------------------------------------------------
bind 0.0.0.0
daemonize yes
3.启动redis服务,查看端口监听
[root@database /]\# /etc/init.d/redis_6379 start
[root@database /]\# netstat -anpt | grep redis
tcp        0      0 0.0.0.0:6379            0.0.0.0:*               LISTEN      11718/redis-server
4.复制哨兵的配置文件和启动文件到redis安装目录
[root@localhost /]\# cp redis-5.0.5/sentinel.conf /etc/redis/
[root@localhost /]\# cp redis-5.0.5/src/redis-sentinel /etc/redis/
二:设置redis主从复制,并配置哨兵监控
1.登陆slave-redis服务器,将master设置为192.168.10.109
root@slave /]# redis-cli
127.0.0.1:6379> SLAVEOF 192.168.10.109 6379  ##设置master为10.109
127.0.0.1:6379> INFO Replication
2.修改master和slave服务器的sentinel.conf配置文件(master和slave配置一致)
##修改master的哨兵文件
[root@master /]\# cd /etc/redis/
[root@master /]\# vim /etc/redis/sentinel.conf
port 26379
dir "/tmp"
sentinel monitor mymaster 192.168.10.109 6379 1 #(指定监控的master地址和端口号,1表示多个sentinel同意才进行主从切换)
sentinel down-after-milliseconds mymaster 4000 #(超过多少毫秒连接不到master认定为master死掉)
sentinel failover-timeout mymaster 18000 #(当主从切换多久后认为主从切换失败)
daemonize yes    #(后台运行)
logfile "/var/log/redis_sentinel.log"  #(日志文件保存路径)
[root@master redis]\# ./redis-sentinel sentinel.conf #
启动哨兵服务
[root@master redis]\# tail -f /var/log/redis_sentinel.log	 #查看运行日志
注意:sentinel可以有多个,但是服务器数量不能是偶数,否则查看日志会一直打印
三:配置keepalived实现高可用
1.使用yum方式安装keepalived软件包(master和slave都安装)
[root@localhost /]\# yum -y install keepalived
2.修改keepalived配置文件
Master配置文件内容
! Configuration File for keepalived

global_defs {
   notification_email {
        [email protected]
   }
   notification_email_from [email protected]
   smtp_server 127.0.0.1
   smtp_connect_timeout 30
   router_id redis-109  ##设备名称
}

vrrp_instance VI_redis {
    state MASTER  ##当前设备为master
    interface eth0 ##vip绑定的网卡
    virtual_router_id 50  ##备份组id,同一备份组要一致
    priority 100  ##优先级,优先级高的成为master
    advert_int 3  ##每多少秒进行一次健康检查
    authentication {
        auth_type PASS
        auth_pass redis
    }
    virtual_ipaddress {
        192.168.10.222 dev eth0 label eth0:1  ##vip地址并设置一个网卡别名
    }
}
BACKUP配置文件内容
! Configuration File for keepalived

global_defs {
   notification_email {
        [email protected]
   }
   notification_email_from [email protected]
   smtp_server 127.0.0.1
   smtp_connect_timeout 30
   router_id redis-110
}
vrrp_script chkmaster {
        script "/etc/keepalived/chkmaster.sh" #检查当前redis是否为master
        interval 3 #每3秒检查一次
        weight 2 #当本机为master检测结果返回1,将优先级加2
        fall 2  ##检测失败多少次就才认为是真的失败
        rise 1 ##检测成功1为就认为是成功的
        }

vrrp_instance VI_redis {
    state BACKUP
    interface eth0
    virtual_router_id 50
    priority 99
    advert_int 3
    authentication {
        auth_type PASS
        auth_pass redis
    }
    virtual_ipaddress {
        192.168.10.222 dev eth0 label eth0:1
    }
        track_script { ##调用状态检查
                chkmaster
        }
}
状态检查脚本内容
#!/bin/bash
STATUS=`/usr/local/bin/redis-cli info | grep role:master | wc -l`
echo $STATUS
if [ "$STATUS" -eq 0 ];then
    exit 1
else
    exit 0
fi
验证结果:
-
关闭master的redis服务程序,查看vip和redis主服务器切换到slave
-
开启master的redis服务程序,redis服务以slave身份加入到slave服务器中
-
关闭slave服务器的redis服务,查看vip和redis主服务器切换到master
-
开启slave的redis服务程序,redis服务以slave身份加入到master服务器中
遇到的一个主从不切换的坑
停掉master主从切换日志提示错误:

解决办法:
1)如果redis实例没有配置
protected-mode yes
bind 192.168.10.109
则在sentinel 配置文件加上
protected-mode no
即可
2)如果redis实例有配置
protected-mode yes
bind 192.168.10.109
则在sentinel 配置文件加上
protected-mode yes
bind 192.168.10.109
我是将redis配置文件和sentinel配置文件中都“protected-mode no”改为no重启服务解决了问题的
最后就是分别在Nginx和Tomcat中指定Redis服务器完成session会话共享
此步骤在两台tomcat服务器同样的操作,将打包对应版本的三个jar包上传到服务器/usr/src目录下,然后复制到tomcat根目录下的lib目录中,修改tomcat下的context.xml配置文件,添加redis配置项
[root@localhost /]\# cp commons-pool2-2.3.jar /usr/local/tomcat/lib/
[root@localhost /]\# cp tomcat-redis-session-manager-master-2.0.0.jar /usr/local/tomcat/lib/
[root@localhost /]\# cp jedis-2.7.3.jar /usr/local/tomcat/lib/
2.tomcat节点配置使用sentinels,将单节点tomcat配置文件中信息改为以下内容,重启tomcat服务即可(两个tomcat节点都操作)
[root@tomcat-node2 /]# egrep -v "^#|^$" /usr/local/tomcat/conf/context.xml
<?xml version="1.0" encoding="UTF-8"?>
<Context>
    <WatchedResource>WEB-INF/web.xml</WatchedResource>
    <WatchedResource>${catalina.base}/conf/web.xml</WatchedResource>
    <Valve className="com.naritech.nicole.gump.RedisSessionHandlerValve" />
    <Manager className="com.naritech.nicole.gump.RedisSessionManager"
     sentinels="192.168.10.109:26379"
     sentinelMaster="mymaster"
     maxInactiveInterval="60"
     />
</Context>
\#sentinels设置哨兵监听的ip和端口,可以有多个,使用逗号隔开
\#sentinelMaster设置sentinel配置文件中设置的master名称
\#maxInactiveInterval会话缓存到redis有效时长
注意:使用sentinel的时候将redis配置文件中protected-mode yes还有sentinel配置文件中protected-mode yes改为no;否则访问tomcat项目提示404;具体原因不知道为什么.
安装php-redis扩展插件(在Nginx-tomcat动态服务器上面安装,两台都要安装)
配置php动态服务器修改session缓存设置(默认session存在在php本地磁盘文件中)
①下载php-redis扩展插件包到httpd+php动态服务器本地目录
[root@Nginx-tomat1/]# wget https://pecl.php.net/get/redis-4.3.0.tgz
②安装php-redis,首先解压软件包,切换到解压后目录,使用phpize(由php软件包提供,如果没有请安装php)工具生成configure文件,编译并编译安装(安装完成模块在
/usr/lib64/php/modules目录下),(配置报错请安装gcc和php-devel)
[root@localhost /]# tar zxvf phpredis-4.3.0.tgz
[root@localhost /]# cd /redis-4.3.0/
[root@localhost redis-4.3.0]# phpize
Configuring for:
PHP Api Version: 20100412
Zend Module Api No: 20100525
Zend Extension Api No: 220100525
[root@localhost redis-4.3.0]# ./configure --with-php-config=/usr/bin/php-config
[root@localhost redis-4.3.0]# make && make install
See any operating system documentation about shared libraries for
more information, such as the ld(1) and ld.so(8) manual pages.
、----------------------------------------------------------------------
Build complete.
Don’t forget to run ‘make test’.
Installing shared extensions: /usr/lib64/php/modules/
③修改php-fpm和PHP的配置信息,使其支持redis模块,并指定session到redis服务的地址
[root@localhost /]# vim /etc/php.ini
--------------------------------添加和修改以下内容--------------------------------
extension_dir="/usr/lib64/php/modules/" ##默认没有在适当位置添加
extension=redis.so ##默认没有在适当位置添加
session.save_handler = redis ##默认有,查找修改为redis
session.save_path = “tcp://192.168.2.226:6379” ##默认有,查找修改为redis服务器地址和端口号[root@localhost /]# vim /etc/php-fpm.d/www.conf
php_value[session.save_handler] = redis (在最后两行)
php_value[session.save_path] = tcp://192.168.10.109:6379
④重启php-fpm服务,单独访问主机的info.php页面查看redis模块是否加载成功,session会话保存地址是否配置成功
[root@localhost /]# systemctl restart php-fpm
配置网关服务器
1.安装Iptables,配置规则,过虑规则
yum -y install iptables-services.x86_64
2.生成规则
[root@GATEWAY-iptables /]# iptables -t nat -I PREROUTING -d 172.16.10.10 -p udp --dport=53 -j DNAT --to-destination 192.168.10.50:53
[root@GATEWAY-iptables /]# iptables -t nat -I PREROUTING -d 172.16.10.10 -p tcp --dport=80 -j DNAT --to-destination 192.168.10.50:80
[root@GATEWAY-iptables /]# iptables -I INPUT -i eth0 -j REJECT
所有内网的网关都要指向网关服务器的DIP.
查看验证的结果


综合实验结果验证:
验证客户端请求负载均衡
①客户端一直刷新访问http://www.ityunn.com/test.jsp会提示第一次请求tomcat-node1处理,第二次请求tomcat-node2处理
验证LVS代理服务器高可用
①关闭nginx-master的nginx服务,客户端访http://www.ityunn.com/test.jsp正常访问,vip飘逸到nginx-slave上
②启动nginx-master的nginx服务,客户端访http://www.ityunn.com/test.jsp正常访问,vip重新回到nginx-master上
验证tomcat节点高可用
<①关闭两台tomcat服务器中的任意一台,客户端访问http://www.ityunn.com/test.jsp都可以正常访问站点
验证session缓存到redis
①客户端访问http://www.ityunn.com/test.jsp,显示的session可以在redis数据库中查询到
验证redis主从复制及高可用故障自动切换
①在redis-master中set数据,在redis-slave中可以查询到数据
②关闭redis-master的redis服务,客户端可正常访问http://www.ityunncom/test.jsp,sentinel将redis-slave提升为新master
③开启redis-master的redis服务,将以新的slave身份加入进来,并对master的数据进行同步,然后关闭redis-slave的redis服务,客户端访问http://www.ityunn.com/test.jsp可正常访问,sentinel将redis-master提升为新master
搭建环境的思路:
首先:
1.搭建后端的Nginx-Tomcat服务器,使用php-fpm模块使Nginx支持动态的PHP网页。并搭建一个DNS主从服务器。
2.然后在前端安装Keepalived 和 LVS软件,高可用Nginx和负载均衡Nginx和DNS。使用LVS-DR模式。
3.在后端使用上面写的脚本指定自己的回环地址来响应客户打并禁止ARP广播和通告。
4.在后端搭建Mysql主从复制,读写分离,并使用MHA进行高可用,
5.在搭建Redis主从+哨兵+Keepalvied进行高可用。
6.所有的内网地址的网关指向网关服务器的DIP地址.并在网关服务器上面安装Iptable过虑规则。开启路由转发。
7.客户端指向网关服务器的外网地址进行验证。
这次的实验就到这里,可能会有的多,看起来比较乱。抱歉!!!(尽力了。)