版权声明:本文为博主原创文章,遵循 CC 4.0 BY-SA 版权协议,转载请附上原文出处链接和本声明。
winsw官网地址:https://github.com/kohsuke/winsw
打包好的springboot jar文件可以直接通过java -jar XXX.jar命令在windows环境下运行,但是这样会出现一个cmd窗口,并且关闭后会退出程序,我们需要的是让它就像windows服务一样在后台运行,使用winsw便可实现。
一、下载winsw
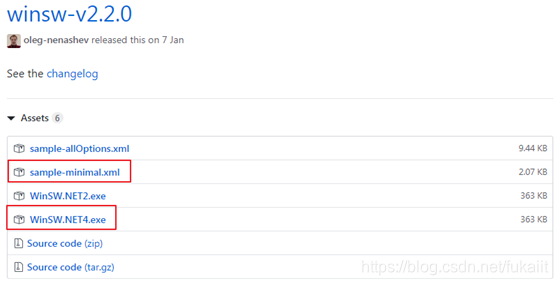
下载地址:https://github.com/kohsuke/winsw/releases
下载可执行文件exe和最简配置文件xml即可。
二、准备文件
把下载的exe和xml改成同名文件,放在一个文件夹中,与准备好的springboot jar放在一起,最终文件结构如下:
- winswtest
	-- winswtest.exe
	-- winswtest.xml
- winswtest-0.0.1-SNAPSHOT.jar
三、编写配置文件
<configuration>
  <!-- ID of the service. It should be unique accross the Windows system-->
  <id>winswtest</id>
  <!-- Display name of the service,在windows服务列表中显示的名称 -->
  <name>winsw测试</name>
  <!-- Service description -->
  <description>该服务用于winsw测试。启动服务后可访问http://localhost:8080/hello</description>
  <!-- Path to the executable, which should be started -->
  <!-- 在jre\bin文件夹下找到java.exe,复制一个为winswtest.exe,注意一定是jre中,非jdk中 -->
  <!-- 这里使用java.exe当然也可以,复制一个更名的原因是最终启动后进程列表中显示的名称与该名称相同,更名以便区分 -->
  <executable>D:\Program Files\Java\jre1.8\bin\winswtest</executable>
  <arguments>-jar ..\winswtest-0.0.1-SNAPSHOT.jar</arguments>
  <logmode>rotate</logmode>
</configuration>
更多配置参数请参考官网。
四、注册服务
1. 注册
在winswtest.exe所在路径下运行cmd,执行:
winswtest install

2. 验证
(1)运行后发现在winswtest.exe所在文件夹下生成winswtest.wrapper.log日志文件:
2019-06-07 08:56:09,815 DEBUG - Starting ServiceWrapper in the CLI mode
2019-06-07 08:56:12,452 INFO  - Installing the service with id 'winswtest'
2019-06-07 08:56:16,968 DEBUG - Completed. Exit code is 0
Exit code is 0表示已经执行成功。
(2)去服务中查看,发现已经添加相应服务

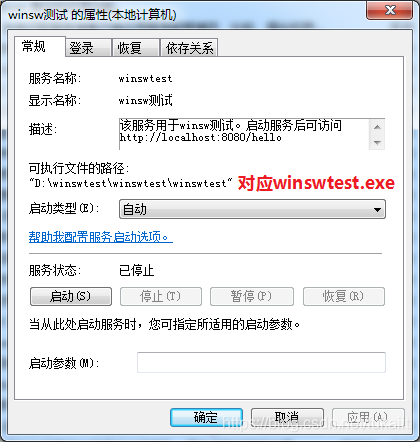
(3)启动服务,访问http://localhost:8080/hello验证

五、卸载服务
如需卸载服务,在winswtest.exe所在路径下运行cmd,执行:
winswtest uninstall
至此,完成windows服务注册,终于不再显示那个烦人的cmd窗口。