感谢原作者:https://blog.csdn.net/weixin_38416696/article/details/90205128
auto关键字及用法
A、auto关键字能做什么?
auto并没有让C++成为弱类型语言,也没有弱化变量什么,只是使用auto的时候,编译器根据上下文情况,确定auto变量的真正类型。
-
#include "stdafx.h"
-
#include <string>
-
#include <list>
-
#include <iostream>
-
-
using
namespace
std;
-
-
auto addTest(int a, int b) {
-
return a + b;
-
}
-
int main()
-
{
-
-
auto index =
10;
-
auto str =
"str";
-
auto ret = addTest(
1,
2);
-
cout << index << str << ret <<
endl;
-
-
system(
"pause");
-
return
0;
-
B、auto不能做什么?
auto作为函数返回值时,只能用于定义函数,不能用于声明函数
-
#include "stdafx.h"
-
#include <string>
-
#include <list>
-
#include <iostream>
-
-
using
namespace
std;
-
-
-
class Test {
-
public:
-
auto add(int a, int b);
-
// {
-
// return a + b;
-
// }
-
};
-
int main()
-
{
-
-
Test a;
-
a.add(
3,
4);
-
system(
"pause");
-
return
0;
-
}
-
![]()
但如果把实现写在头文件中,可以编译通过,因为编译器可以根据函数实现的返回值确定auto的真实类型。
-
#include "stdafx.h"
-
#include <string>
-
#include <list>
-
#include <iostream>
-
-
using
namespace
std;
-
-
-
class Test {
-
public:
-
auto add(int a, int b)
-
{
-
return a + b;
-
}
-
};
-
int main()
-
{
-
-
Test a;
-
a.add(
3,
4);
-
system(
"pause");
-
return
0;
-
}
nullptr关键字及用法
nullptr是为了解决原来C++中NULL的二义性问题而引进的一种新的类型,由于NULL实际上代表的是0,
-
void F(int a){
-
cout<<a<<
endl;
-
}
-
-
void F(int *p){
-
assert(p !=
NULL);
-
-
cout<< p <<
endl;
-
}
-
-
int main(){
-
-
int *p =
nullptr;
-
int *q =
NULL;
-
bool equal = ( p == q );
// equal的值为true,说明p和q都是空指针
-
int a =
nullptr;
// 编译失败,nullptr不能转型为int
-
F(
0);
// 在C++98中编译失败。有二义性。在C++11中调用F(int)
-
F(
nullptr);
-
-
return
0;
-
}
for循环语法
-
#include "stdafx.h"
-
#include <string>
-
#include <list>
-
#include <iostream>
-
#include <map>
-
using
namespace
std;
-
int main()
-
{
-
int numbers[] = {
1,
2,
3,
4,
5,
6};
-
for (
auto number : numbers)
-
cout << number <<
endl;
-
-
-
map<
string,
int>m{ {
"a",
1},{
"b",
2},{
"c",
3} };
-
for (
auto p : m)
-
cout << p.first <<
":" << p.second <<
endl;
-
-
system(
"pause");
-
return
0;
-
}
long long 类型
扩展精度浮点数,10位有效数字
列表初始化
以花括号初始化器列表
int static_arr[5] = { 1, 2, 3, 4 };
int static_arr2[]{ 1, 2, 3, 4 }; // 等号要以省略
int* dynamic_arr = new int[5]{ 1, 2, 3, 4 };
vector<int> stl_vec{ 1, 2, 3, 4 };
set<int> stl_set{ 1, 2, 3, 3 };
constexpr 变量
将变量声明为constexpr类型以便由编译器来验证变量的值是否是一个常量表达式;
声明为constexpr的变量一定是一个常量,而且必须用常量表达式来初始化,比如说下面的情况则是不正确的:
-
int t =
10;
-
constexpr
int q = t +
20;
-
cout <<
"q" << q <<
endl;
需要将t声明为 const 才是正确的;
一般来说,如果你认定变量是一个常量表达式,那就把它声明为constexpr类型;
std::array
std::array除了有传统数组支持随机访问、效率高、存储大小固定等特点外,还支持迭代器访问、获取容量、获得原始指针等高级功能.
-
#include "stdafx.h"
-
#include <string>
-
#include <list>
-
#include <iostream>
-
#include <map>
-
#include <array>
-
using
namespace
std;
-
int main()
-
{
-
array<
int, 4> arrayDemo = {
5,
6,
7,
8};
-
for (
auto itor : arrayDemo)
-
cout << itor <<
endl;
-
-
int arraySize =
sizeof(arrayDemo);
-
cout << arraySize <<
endl;
-
-
system(
"pause");
-
return
0;
-
}
std::forward_list
td::forward_list为C++ 11新增的线性表,与list区别在于它是单向链表。我们在学习数据结构的时候都知道,链表在对数据进行插入和删除是比顺序存储的线性表有优势,因此在插入和删除操作频繁的应用场景中,使用list和forward_list比使用array、vector和deque效率要高很多。
-
#include <forward_list>
-
-
using
namespace
std;
-
int main()
-
{
-
forward_list<
int> numbers = {
1,
2,
3,
4,
5};
-
for (
auto number : numbers)
-
cout << number <<
endl;
-
-
numbers.remove(
4);
-
for (
auto number : numbers)
-
cout << number <<
endl;
-
-
system(
"pause");
-
return
0;
-
}
std::unordered_map
std::unordered_map与std::map用法基本差不多,但STL在内部实现上有很大不同,std::map使用的数据结构为二叉树,而std::unordered_map内部是哈希表的实现方式,哈希map理论上查找效率为O(1)。但在存储效率上,哈希map需要增加哈希表的内存开销。
std::unordered_set
std::unordered_set的数据存储结构也是哈希表的方式结构,除此之外,std::unordered_set在插入时不会自动排序,这都是std::set表现不同的地方。
-
#include <list>
-
#include <iostream>
-
#include <map>
-
#include <array>
-
#include <forward_list>
-
#include <unordered_set>
-
#include <set>
-
using
namespace
std;
-
int main()
-
{
-
unordered_set<
int> unorder_set;
-
unorder_set.insert(
7);
-
unorder_set.insert(
5);
-
unorder_set.insert(
3);
-
unorder_set.insert(
4);
-
unorder_set.insert(
1);
-
for (
auto itor : unorder_set)
-
cout << itor <<
endl;
-
-
set<
int>
set;
-
set.insert(
7);
-
set.insert(
5);
-
set.insert(
3);
-
set.insert(
4);
-
set.insert(
1);
-
for (
auto itor :
set)
-
cout << itor <<
endl;
-
-
-
system(
"pause");
-
return
0;
-
}
cbegin和cend
begin():Return iterator to beginning (public member function )
cbegin():Return const_iterator to beginning (public member function )
后者返回的是一个不可修改的迭代器,前者可修改。
在C++11以前,C++的多线程编程均需依赖系统或第三方接口实现,一定程度上影响了代码的移植性。C++11中,引入了boost库中的多线程部分内容,形成C++标准,形成标准后的boost多线程编程部分接口基本没有变化,这样方便了以前使用boost接口开发的使用者切换使用C++标准接口,把容易把boost接口升级为C++接口。
我们通过如下几部分介绍C++11多线程方面的接口及使用方法。
std::thread
std::thread为C++11的线程类,使用方法和boost接口一样,非常方便,同时,C++11的std::thread解决了boost::thread中构成参数限制的问题.
-
#include <thread>
-
-
using
namespace
std;
-
void fun(int a) {
-
a++;
-
cout << a <<
endl;
-
}
-
-
int main()
-
{
-
int a =
0;
-
thread t(fun, a);
//创建一个线程 t,t 调用函数fun,a作为fun的参数
-
t.join();
//启动线程t,并阻塞主线程,等到线程t运行结束后,再继续运行主线程
-
-
system(
"pause");
-
return
0;
-
}
thread类当中的两个成员函数,join()和detach()。这两个成员的作用就像上面代码的注释那样,启动新生成的线程的,但是区别在于join()函数是启动子线程而阻塞主线程,当子线程运行结束后,才会继续运行主线程。相比之下,detach()函数的作用是启动子线程,并且让子线程和主线程分离,子线程和主线程各运行各的,虽然两个线程会因为共享内存池的原因在操作系统的层面发生发生阻塞等关系,但是在代码层次上,两个线程并不存在谁阻塞谁,很可能主线程已经运行结束了,子线程还在运行。
std::atomic
所谓的原子操作,取的就是“原子是最小的、不可分割的最小个体”的意义,它表示在多个线程访问同一个全局资源的时候,能够确保所有其他的线程都不在同一时间内访问相同的资源。也就是他确保了在同一时刻只有唯一的线程对这个资源进行访问。这有点类似互斥对象对共享资源的访问的保护,但是原子操作更加接近底层,因而效率更高。
在以往的C++标准中并没有对原子操作进行规定,我们往往是使用汇编语言,或者是借助第三方的线程库,例如intel的pthread来实现。在新标准C++11,引入了原子操作的概念,并通过这个新的头文件提供了多种原子操作数据类型,例如,atomic_bool,atomic_int等等,如果我们在多个线程中对这些类型的共享资源进行操作,编译器将保证这些操作都是原子性的,也就是说,确保任意时刻只有一个线程对这个资源进行访问,编译器将保证,多个线程访问这个共享资源的正确性。从而避免了锁的使用,提高了效率。
std::atomic对int, char, bool等数据结构进行原子性封装,在多线程环境中,对std::atomic对象的访问不会造成竞争-冒险。利用std::atomic可实现数据结构的无锁设计。
-
#include <thread>
-
#include <atomic>
-
using
namespace
std;
-
-
atomic_bool bIsReady =
false;
-
atomic_int iCount =
100;
-
void fun() {
-
if (!bIsReady) {
-
this_thread::yield();
-
}
-
while (iCount >
0)
-
{
-
printf(
"iCount:%d\r\n", iCount--);
-
}
-
}
-
-
int main()
-
{
-
list<thread> lstThread;
-
for (
int i =
0; i <
10; ++i) {
-
lstThread.push_back(thread(fun));
-
}
-
-
for (
auto &th : lstThread)
-
{
-
th.join();
-
}
-
-
system(
"pause");
-
return
0;
-
}
std::condition_variable
C++11中的std::condition_variable就像Linux下使用pthread_cond_wait和pthread_cond_signal一样,可以让线程休眠,直到被唤醒,再从新执行。线程等待在多线程编程中使用非常频繁,经常需要等待一些异步执行的条件的返回结果。
-
#include <set>
-
#include <thread>
-
#include <atomic>
-
#include <condition_variable>
-
#include <mutex>
-
using
namespace
std;
-
-
mutex mtx;
-
condition_variable cv;
-
bool ready =
false;
-
-
void print_id(int id) {
-
unique_lock<mutex> lck(mtx);
-
while (!ready)
-
cv.wait(lck);
-
-
cout <<
"thread" << id <<
endl;
-
}
-
-
void go() {
-
unique_lock<mutex> lck(mtx);
-
ready =
true;
-
cv.notify_all();
-
}
-
-
-
int main()
-
{
-
thread threads[
10];
-
for (
int i =
0; i <
10; ++i)
-
threads[i] = thread(print_id, i);
-
cout <<
"10 threads ready to race..." <<
endl;
-
-
go();
-
-
for (
auto &th : threads)
-
th.join();
-
-
system(
"pause");
-
return
0;
-
}
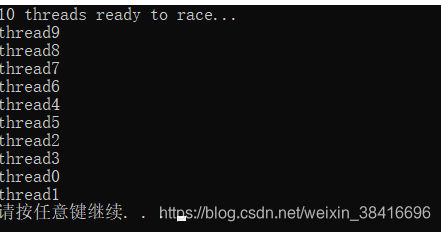
上面的代码,调用cv.wait(lck)的时候,线程将进入休眠,在调用go函数之前,10个线程都处于休眠状态,当cv.notify_all()运行后,休眠将结束,继续往下运行,最终输出如上结果。
在内存管理方面,C++11的std::auto_ptr基础上,移植了boost库中的智能指针的部分实现,如std::shared_ptr、std::weak_ptr等,当然,想boost::thread一样,C++11也修复了boost::make_shared中构造参数的限制问题。
什么是智能指针?网上已经有很多解释,个人觉得“智能指针”这个名词似乎起得过于“霸气”,很多初学者看到这个名词就觉得似乎很难。
简单地说,智能指针只是用对象去管理一个资源指针,同时用一个计数器计算当前指针引用对象的个数,当管理指针的对象增加或减少时,计数器也相应加1或减1,当最后一个指针管理对象销毁时,计数器为1,此时在销毁指针管理对象的同时,也把指针管理对象所管理的指针进行delete操作。
如下图所示,简单话了一下指针、智能指针对象和计数器之间的关系:

std::shared_ptr
std::shared_ptr包装了new操作符动态分别的内存,可以自由拷贝复制,基本上是使用最多的一个智能指针类型
-
// ConsoleApplication1.cpp : 定义控制台应用程序的入口点。
-
//
-
-
#include "stdafx.h"
-
#include <string>
-
#include <memory>
-
#include <iostream>
-
-
using
namespace
std;
-
-
class Test {
-
public:
-
Test()
-
{
-
cout <<
"Test()" <<
endl;
-
}
-
~Test()
-
{
-
cout <<
"~Test()" <<
endl;
-
}
-
};
-
-
int main()
-
{
-
shared_ptr<Test> p1 = make_shared<Test>();
-
cout <<
"1 ref" << p1.use_count() <<
endl;
-
-
shared_ptr<Test> p2 = p1;
-
cout <<
"2 ref" << p1.use_count() <<
endl;
-
-
cout <<
"3 ref" << p1.use_count() <<
endl;
-
-
system(
"pause");
-
return
0;
-
}
-
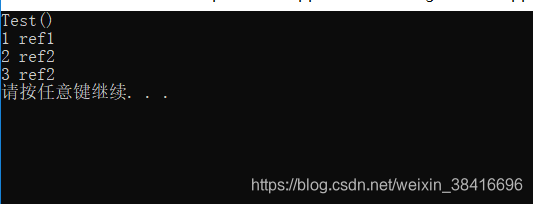
1、std::make_shared封装了new方法,boost::make_shared之前的原则是既然释放资源delete由智能指针负责,那么应该把new封装起来,否则会让人觉得自己调用了new,但没有调用delete,似乎与谁申请,谁释放的原则不符。C++也沿用了这一做法。
2、随着引用对象的增加std::shared_ptr<Test> p2 = p1,指针的引用计数有1变为2,当p2退出作用域后,p1的引用计数变回1,当main函数退出后,p1离开main函数的作用域,此时p1被销毁,当p1销毁时,检测到引用计数已经为1,就会在p1的析构函数中调用delete之前std::make_shared创建的指针。
std::weak_ptr
std::weak_ptr网上很多人说其实是为了解决std::shared_ptr在相互引用的情况下出现的问题而存在的,C++官网对这个只能指针的解释也不多,那就先甭管那么多了,让我们暂时完全接受这个观点。
std::weak_ptr有什么特点呢?与std::shared_ptr最大的差别是在赋值是,不会引起智能指针计数增加。
我们下面将继续如下两点:
1、std::shared_ptr相互引用会有什么后果;
2、std::weak_ptr如何解决第一点的问题。
A、std::shared_ptr相互引用的问题示例:
-
//示例代码1.0 http://www.cnblogs.com/feng-sc/p/5710724.html
-
#include <memory>
-
class TestB;
-
class TestA
-
{
-
public:
-
TestA()
-
{
-
std::
cout <<
"TestA()" <<
std::
endl;
-
}
-
void ReferTestB(std::shared_ptr<TestB> test_ptr)
-
{
-
m_TestB_Ptr = test_ptr;
-
}
-
~TestA()
-
{
-
std::
cout <<
"~TestA()" <<
std::
endl;
-
}
-
private:
-
std::
shared_ptr<TestB> m_TestB_Ptr;
//TestB的智能指针
-
};
-
-
class TestB
-
{
-
public:
-
TestB()
-
{
-
std::
cout <<
"TestB()" <<
std::
endl;
-
}
-
-
void ReferTestB(std::shared_ptr<TestA> test_ptr)
-
{
-
m_TestA_Ptr = test_ptr;
-
}
-
~TestB()
-
{
-
std::
cout <<
"~TestB()" <<
std::
endl;
-
}
-
std::
shared_ptr<TestA> m_TestA_Ptr;
//TestA的智能指针
-
};
-
-
-
int main()
-
{
-
std::
shared_ptr<TestA> ptr_a =
std::make_shared<TestA>();
-
std::
shared_ptr<TestB> ptr_b =
std::make_shared<TestB>();
-
ptr_a->ReferTestB(ptr_b);
-
ptr_b->ReferTestB(ptr_a);
-
return
0;
-
}
运行结果:

大家可以看到,上面代码中,我们创建了一个TestA和一个TestB的对象,但在整个main函数都运行完后,都没看到两个对象被析构,这是什么问题呢?
原来,智能指针ptr_a中引用了ptr_b,同样ptr_b中也引用了ptr_a,在main函数退出前,ptr_a和ptr_b的引用计数均为2,退出main函数后,引用计数均变为1,也就是相互引用。
这等效于说:
ptr_a对ptr_b说,哎,我说ptr_b,我现在的条件是,你先释放我,我才能释放你,这是天生的,造物者决定的,改不了。
ptr_b也对ptr_a说,我的条件也是一样,你先释放我,我才能释放你,怎么办?
是吧,大家都没错,相互引用导致的问题就是释放条件的冲突,最终也可能导致内存泄漏。
B、std::weak_ptr如何解决相互引用的问题
我们在上面的代码基础上使用std::weak_ptr进行修改:
-
//示例代码1.0 http://www.cnblogs.com/feng-sc/p/5710724.html
-
#include <memory>
-
class TestB;
-
class TestA
-
{
-
public:
-
TestA()
-
{
-
std::
cout <<
"TestA()" <<
std::
endl;
-
}
-
void ReferTestB(std::shared_ptr<TestB> test_ptr)
-
{
-
m_TestB_Ptr = test_ptr;
-
}
-
void TestWork()
-
{
-
std::
cout <<
"~TestA::TestWork()" <<
std::
endl;
-
}
-
~TestA()
-
{
-
std::
cout <<
"~TestA()" <<
std::
endl;
-
}
-
private:
-
std::weak_ptr<TestB> m_TestB_Ptr;
-
};
-
-
class TestB
-
{
-
public:
-
TestB()
-
{
-
std::
cout <<
"TestB()" <<
std::
endl;
-
}
-
-
void ReferTestB(std::shared_ptr<TestA> test_ptr)
-
{
-
m_TestA_Ptr = test_ptr;
-
}
-
void TestWork()
-
{
-
std::
cout <<
"~TestB::TestWork()" <<
std::
endl;
-
}
-
~TestB()
-
{
-
std::
shared_ptr<TestA> tmp = m_TestA_Ptr.lock();
-
tmp->TestWork();
-
std::
cout <<
"2 ref a:" << tmp.use_count() <<
std::
endl;
-
std::
cout <<
"~TestB()" <<
std::
endl;
-
}
-
std::weak_ptr<TestA> m_TestA_Ptr;
-
};
-
-
-
int main()
-
{
-
std::
shared_ptr<TestA> ptr_a =
std::make_shared<TestA>();
-
std::
shared_ptr<TestB> ptr_b =
std::make_shared<TestB>();
-
ptr_a->ReferTestB(ptr_b);
-
ptr_b->ReferTestB(ptr_a);
-
std::
cout <<
"1 ref a:" << ptr_a.use_count() <<
std::
endl;
-
std::
cout <<
"1 ref b:" << ptr_a.use_count() <<
std::
endl;
-
return
0;
-
}
运行结果:

由以上代码运行结果我们可以看到:
1、所有的对象最后都能正常释放,不会存在上一个例子中的内存没有释放的问题。
2、ptr_a 和ptr_b在main函数中退出前,引用计数均为1,也就是说,在TestA和TestB中对std::weak_ptr的相互引用,不会导致计数的增加。在TestB析构函数中,调用std::shared_ptr<TestA> tmp = m_TestA_Ptr.lock(),把std::weak_ptr类型转换成std::shared_ptr类型,然后对TestA对象进行调用。
std::function、std::bind封装可执行对象
std::bind和std::function也是从boost中移植进来的C++新标准,这两个语法使得封装可执行对象变得简单而易用。此外,std::bind和std::function也可以结合我们一下所说的lamda表达式一起使用,使得可执行对象的写法更加“花俏”。
此处省略很多字。。。。。。
lamda表达式
形式:
[capture](parameters) mutable ->return-type{statement}
1.[var]表示值传递方式捕捉变量var;
2.[=]表示值传递方式捕捉所有父作用域的变量(包括this);
3.[&var]表示引用传递捕捉变量var;
4.[&]表示引用传递方式捕捉所有父作用域的变量(包括this);
5.[this]表示值传递方式捕捉当前的this指针。
如:
-
#include "stdafx.h"
-
#include <string>
-
#include <memory>
-
#include <iostream>
-
#include <functional>
-
using
namespace
std;
-
-
-
int main()
-
{
-
auto add = [](
int a,
int b)->
int {
-
return a + b;
-
};
-
-
int ret = add(
1,
2);
-
cout <<
"ret" << ret <<
endl;
-
return
0;
-
}
-
如:
-
#include <iostream>
-
-
using
namespace
std;
-
-
int main()
-
{
-
auto func = [] () {
cout <<
"Hello world"; };
-
func();
// now call the function
-
}
如:
-
//Qt5 Lambda表达式
-
//这里需要注意 Lambda表达式是C++ 11 的内容,所以,需要再Pro项目文件中加入 CONFIG += C++ 11
-
-
QObject::connect(ui->pushButton_3,&QPushButton::clicked,[=](){qDebug()<<
"lambda 表达式";});
参考:https://www.cnblogs.com/mengfanrong/p/5230558.html
https://www.cnblogs.com/feng-sc/p/5710724.html