版权声明:本文为博主原创文章,遵循 CC 4.0 BY-SA 版权协议,转载请附上原文出处链接和本声明。
概述
目前行业内,常见的持久层框架有两种:Hibernate 和 MyBatis 。两者皆为持久层框架发展史中的佼佼者,且各有千秋。具体两者的对比,会在以后我的另一篇文章中介绍,敬请期待…
MyBatis的发育史
- 前期:各种配置文件繁琐,开发流程不够简化。
- 中期:配合generator 使用,可以自动生成entity 以及 Dao层接口及xml文件,但是配置依旧繁琐。
- 后期:经过官方团队的优化,支持了基于注解的方式开发,同时也能自动化管理配置文件了(优秀!)
- 大后期:这里就期待一下吧,大家可以自己发挥想象,也欢迎大家联系我一起探讨任何编程方面的问题。我相信它一定是朝着市场需求的方向奔的,官方放出新特性之时,就是这里增加新博文之日,哈哈哈…
整合Mybatis的两种方式
一、 基于注解方式
- 修改pom文件,增加MyBatis、MySQL驱动以及Druid连接池依赖包,具体pom文件如下:
    <dependencies>
        <dependency>
            <groupId>org.springframework.boot</groupId>
            <artifactId>spring-boot-starter-web</artifactId>
        </dependency>
        <!-- 集成MyBatis启动类 -->
        <dependency>
            <groupId>org.mybatis.spring.boot</groupId>
            <artifactId>mybatis-spring-boot-starter</artifactId>
            <version>2.0.0</version>
        </dependency>

        <!-- 添加mysql驱动 -->
        <dependency>
            <groupId>mysql</groupId>
            <artifactId>mysql-connector-java</artifactId>
            <scope>runtime</scope>
        </dependency>

        <!-- 添加mysql的连接池 -->
        <dependency>
            <groupId>com.alibaba</groupId>
            <artifactId>druid</artifactId>
            <version>1.1.10</version>
        </dependency>

        <dependency>
            <groupId>org.springframework.boot</groupId>
            <artifactId>spring-boot-starter-test</artifactId>
            <scope>test</scope>
        </dependency>
    </dependencies>
- 修改yml/properties配置文件,配置数据源信息,具体配置如下:
spring:
  #数据路基本信息配置
  datasource:
    url: jdbc:mysql://localhost:3306/test?useUnicode=true&characterEncoding=utf-8&zeroDateTimeBehavior=convertToNull
    username: root
    password: 12345678
    type: com.alibaba.druid.pool.DruidDataSource
    driver-class-name: com.mysql.cj.jdbc.Driver
- 建表,这里以UserInfo为例,建表语句如下:
    -- ----------------------------
    -- Table structure for user_info
    -- ----------------------------
    DROP TABLE IF EXISTS `user_info`;
    CREATE TABLE `user_info` (
      `id` int(11) NOT NULL AUTO_INCREMENT,
      `user_name` varchar(255) CHARACTER SET utf8 COLLATE utf8_general_ci DEFAULT NULL,
      `address` varchar(255) DEFAULT NULL,
      `add_time` timestamp NULL DEFAULT NULL,
      PRIMARY KEY (`id`) USING BTREE
    ) ENGINE=InnoDB DEFAULT CHARSET=utf8;

    SET FOREIGN_KEY_CHECKS = 1;
- 创建UserInfo实体类,代码如下:
/**
 * FileName: UserInfo
 * Author:   RollerRunning
 * Date:     2019/8/6 6:02 PM
 * Description:
 */
public class UserInfo implements Serializable {
    private Integer id;

    private String userName;

    private String address;

    private Date addTime;

    public Integer getId() {
        return id;
    }

    public void setId(Integer id) {
        this.id = id;
    }
    ......
}
- 开发Dao层Mapper接口,具体代码如下:
package com.example.demo.helloworld.dao;

import com.example.demo.helloworld.entity.UserInfo;
import org.apache.ibatis.annotations.*;

/**
 * FileName: UserDao
 * Author:   RollerRunning
 * Date:     2019/8/6 6:05 PM
 * Description:
 */
@Mapper
public interface UserDao {
    /**
     * @param userInfo
     * @return int
     * @description 新增用户
     **/
    @Insert("insert into user_info values(#{id}, #{userName}, #{address}, #{addTime})")
    int addUserInfo(UserInfo userInfo);

    /**
     * @param userInfo
     * @return int
     * @description 修改用户
     **/
    @Update("update user_info set user_name = #{userName}, address = #{address}, add_time = #{addTime} where id = #{id}")
    int update(UserInfo userInfo);

    /**
     * @param id
     * @return int
     * @description 删除用户
     **/
    @Delete("delete from user_info where id = #{id}")
    int delete(int id);

    /**
     * @param
     * @return java.util.List<com.example.demo.helloworld.entity.UserInfo>
     * @description 查询用户
     **/
    @Select("select id, user_name userName, address, add_time addTime from user_info where id = #{id}")
    UserInfo selectUser(Integer id);
}
注:在这里我只是介绍了最基本的CRUD操作,还有相关的动态SQL相关知识这里就不多介绍了,因为我个人不偏好基于注解的这种方式。在这里推荐一篇文章,大家可以作为参考。
6. 开发Service接口及其实现类,代码如下:
package com.example.demo.helloworld.service;

import com.example.demo.helloworld.entity.UserInfo;

import java.util.Date;

/**
 * FileName: UserService
 * Author:   zhengwei
 * Date:     2019/8/6 6:45 PM
 * Description:
 */
public interface UserService {
    /**
     * @param userName, address, addTime
     * @return int
     * @description 新增用户
     **/
    void addUser(String userName, String address, Date addTime);
    /**
     * @param id, userName, address, addTime
     * @return int
     * @description 修改用户
     **/
    void updateUser(Integer id, String userName, String address, Date addTime);

    /**
     * @param id
     * @return int
     * @description 删除用户
     **/
    void deleteUser(Integer id);

    /**
     * @param id
     * @return UserInfo
     * @description 查询用户
     **/
    UserInfo selectUser(Integer id);
}
package com.example.demo.helloworld.service.impl;

import com.example.demo.helloworld.dao.UserDao;
import com.example.demo.helloworld.entity.UserInfo;
import com.example.demo.helloworld.service.UserService;
import org.springframework.beans.factory.annotation.Autowired;
import org.springframework.stereotype.Service;

import java.util.Date;

/**
 * FileName: UserService
 * Author:   zhengwei
 * Date:     2019/8/6 6:28 PM
 * Description:
 */
@Service("userService")
public class UserServiceImpl implements UserService {
    @Autowired
    private UserDao userDao;

    /**
     * @param userName, address, addTime
     * @return void
     * @description 新增用户信息
     **/
    @Override
    public void addUser(String userName, String address, Date addTime) {
        //接收到用户信息,调用mapper
        UserInfo userInfo = new UserInfo();
        userInfo.setUserName(userName);
        userInfo.setAddress(address);
        userInfo.setAddTime(addTime);
        int add = userDao.addUserInfo(userInfo);
        System.out.println("插入用户信息返回的结果:" + add);
    }

    /**
     * @param id, userName, address, addTime
     * @return int
     * @description 修改用户
     **/
    @Override
    public void updateUser(Integer id, String userName, String address, Date addTime) {
        //接收到用户信息,调用mapper
        UserInfo userInfo = new UserInfo();
        userInfo.setId(id);
        userInfo.setUserName(userName);
        userInfo.setAddress(address);
        userInfo.setAddTime(addTime);
        int update = userDao.update(userInfo);
        System.out.println("更新用户信息返回的结果:" + update);
    }

    /**
     * @param id
     * @return
     * @description 删除用户
     **/
    @Override
    public void deleteUser(Integer id) {
        int delete = userDao.delete(id);
        System.out.println("更新用户信息返回的结果:" + delete);
    }

    /**
     * @param id
     * @return int
     * @description 查询用户
     **/
    @Override
    public UserInfo selectUser(Integer id) {
        UserInfo userInfo = userDao.selectUser(id);
        System.out.println("更新用户信息返回的结果:" + userInfo);
        return userInfo;
    }
}
- 编写Controller类,代码如下:
package com.example.demo.helloworld.controller;

import com.example.demo.helloworld.entity.UserInfo;
import com.example.demo.helloworld.service.UserService;
import org.springframework.beans.factory.annotation.Autowired;
import org.springframework.beans.factory.annotation.Value;
import org.springframework.context.annotation.PropertySource;
import org.springframework.web.bind.annotation.RequestMapping;
import org.springframework.web.bind.annotation.RestController;

import java.util.Date;

/**
 * FileName: HelloWorldController
 * Author:   RollerRunning
 */
@RestController
public class HelloWorldController {
    @Autowired
    private UserService userService;

    /**
     * @param userName, address, addTime
     * @return void
     * @description 新增用户信息
     **/
    @RequestMapping("add")
    public String hello(String userName, String address) {
        System.out.println("接收到前端传递的参数信息,userName=" + userName + ", address=" + address);
        userService.addUser(userName, address, new Date());
        return "success";
    }

    /**
     * @param id, userName, address, addTime
     * @return int
     * @description 修改用户
     **/
    @RequestMapping("update")
    public String update(Integer id, String userName, String address) {
        System.out.println("接收到前端传递的参数信息,id=" + id + ", userName=" + userName + ", address=" + address);
        userService.updateUser(id, userName, address, new Date());
        return "success";
    }

    /**
     * @param id
     * @return int
     * @description 删除用户
     **/
    @RequestMapping("delete")
    public String delete(Integer id) {
        System.out.println("接收到前端传递的参数信息,id=" + id);
        userService.deleteUser(id);
        return "success";
    }

    /**
     * @param id
     * @return int
     * @description 查询用户
     **/
    @RequestMapping("select")
    public UserInfo select(Integer id) {
        System.out.println("接收到前端传递的参数信息,id=" + id);
        UserInfo userInfo = userService.selectUser(id);
        return userInfo;
    }

}
以上就是本次Demo的全部代码,大家可以通过PostMan或者浏览器测试接口的正确性,如果有问题欢迎来撕本猿。
二、 基于配置文件方式
- 修改POM文件,内容与注解方式相同,这里不再赘述。
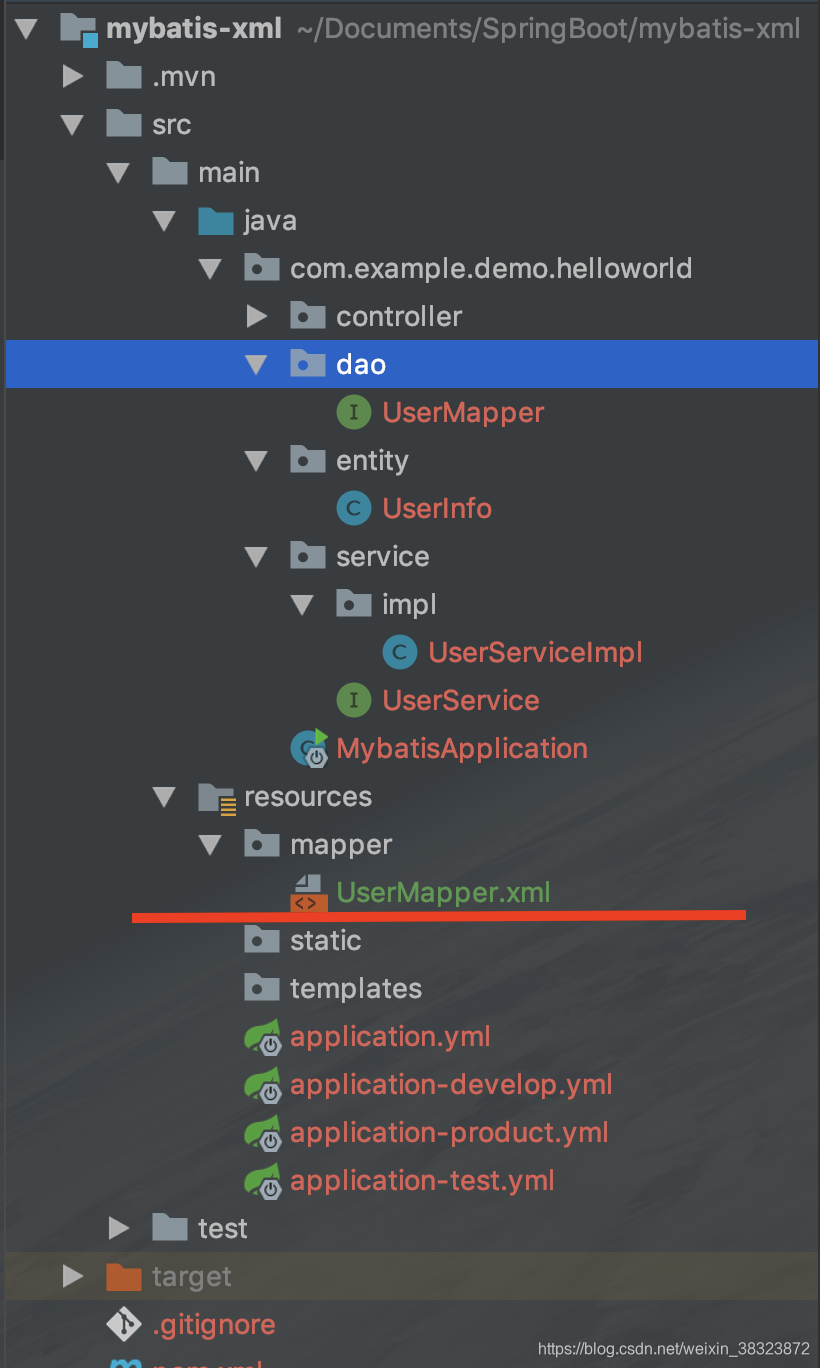
- 创建xxxMapper.xml的文件路径,我这里是放在了resources/mapper/xxxMapper.xml的路径
- 配置yml文件,代码如下:
#测试环境端口
server:
  port: 8082
spring:
  #数据路基本信息配置
  datasource:
    url: jdbc:mysql://localhost:3306/test?useUnicode=true&characterEncoding=utf-8&zeroDateTimeBehavior=convertToNull
    username: root
    password: 12345678
    type: com.alibaba.druid.pool.DruidDataSource
    driver-class-name: com.mysql.cj.jdbc.Driver
#MyBatis相关配置
mybatis:
  #指定映射文件的路径,这里我是放在了resources/mapper/xxxMapper.xml,其中*Mapper.xml使用通配符,扫描加载所有的Mapper文件
  mapper-locations: classpath:mapper/*Mapper.xml
  configuration:
    #开启懒加载
    lazy-loading-enabled: true
    #设置单个SQLSession查询的超时时间
    default-statement-timeout: 3
    .......
注:mybatis这里有很多配置,就不在demo中一一列举了,大家可以根据自己的需要,查阅官方文档来选择最适合自己项目优化目的的配置。大家也可以尝试把mybatis的配置项单独提出来一个文件,算是一个练习了。
4. 书写xxxxMapper.xml文件,代码如下:
<?xml version="1.0" encoding="UTF-8"?>
<!DOCTYPE mapper PUBLIC "-//mybatis.org//DTD Mapper 3.0//EN" "http://mybatis.org/dtd/mybatis-3-mapper.dtd" >

<mapper namespace="com.example.demo.helloworld.dao.UserMapper">

    <!--自定义数据库字段与实体类属性的映射关系-->
    <resultMap id="userResultMap" type="com.example.demo.helloworld.entity.UserInfo">
        <result column="id" property="id" jdbcType="INTEGER"/>
        <result column="user_name" property="userName" jdbcType="VARCHAR"/>
        <result column="address" property="address" jdbcType="VARCHAR"/>
        <result column="add_time" property="addTime" jdbcType="TIMESTAMP"/>
    </resultMap>

    <!--新增用户-->
    <insert id="addUserInfo" parameterType="com.example.demo.helloworld.entity.UserInfo">
        insert into user_info values(
          #{id},
          #{userName},
          #{address},
          #{addTime}
        )
    </insert>

    <!--更新用户-->
    <update id="update" parameterType="com.example.demo.helloworld.entity.UserInfo" >
        update user_info
        <set>
            <if test="userName != null">
                user_name=#{userName},
            </if>
            <if test="address != null">
                address=#{address},
            </if>
            <if test="addTime != null">
                add_time=#{addTime},
            </if>
        </set>
        <where>
            <if test="userId != null">
               user_id=#{userId}
            </if>
        </where>
    </update>

    <!--删除用户-->
    <delete id="delete" parameterType="Integer">
        delete from user_info where id=#{id}
    </delete>

    <!--查询用户-->
    <select id="selectUser" parameterType="Integer" resultMap="userResultMap">
        select id, user_name, address, add_time from user_info where id=#{id}
    </select>
</mapper>
- service层、controller层、entity等均与基于注解的方式相同,见上文即可。
- 使用测接口神器PostMan测试,完成!
总结
综合前面两种整合方式,各有千秋。就我个人是偏好第二种的,且是最常用到的,感觉这种写法,遇到长动态SQL不会显得代码很臃肿,也符合各司其职的思想。接口就做接口该做的,xml就负责SQL以及字段映射等操作。个人拙见,还欢迎各路大神来指教,感谢!
- 参考文献:
http://www.mybatis.cn/category/relation/
https://docs.spring.io/spring-boot/docs/current/reference/html/index.html - 源码地址:
https://github.com/zheng-weiwei/public/tree/master/mybatis ----基于注解
https://github.com/zheng-weiwei/public/tree/master/mybatis-xml ----基于XML