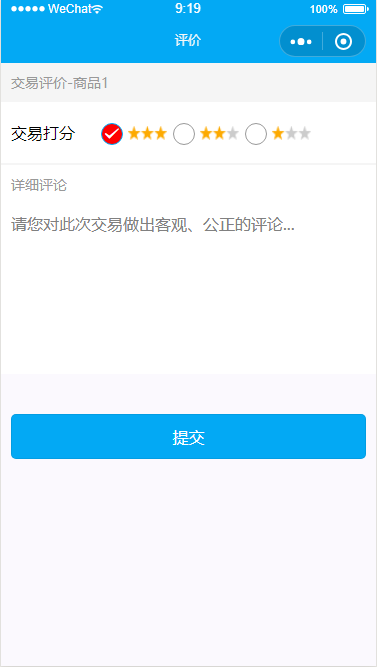
一、效果图
二、代码
/* 选中后的 背景样式 (红色背景 无边框 可根据UI需求自己修改) */

radio .wx-radio-input.wx-radio-input-checked {
  border-color: #03a9f4;
  background: #03a9f4;
}

/* 自定义样式.... */

radio .wx-radio-input {
  height: 40rpx;
  width: 40rpx;
  margin-top: -4rpx;
  border-radius: 50%;
  border: 2rpx solid #999;
  background: transparent;
}

/* 选中后的 对勾样式 (白色对勾 可根据UI需求自己修改) */

radio .wx-radio-input.wx-radio-input-checked::before {
  border-radius: 50%; /* 圆角 */
  width: 40rpx; /* 选中后对勾大小,不要超过背景的尺寸 */
  height: 40rpx; /* 选中后对勾大小,不要超过背景的尺寸 */
  line-height: 40rpx;
  text-align: center;
  font-size: 30rpx; /* 对勾大小 30rpx */
  color: #fff; /* 对勾颜色 白色 */
  background: #f00;
  transform: translate(-50%, -50%) scale(1);
  -webkit-transform: translate(-50%, -50%) scale(1);
}
<radio-group class="radio-group weui-input" bindchange="radioChange">
      <radio style="margin-right:10rpx;" class="radio" wx:for-items="{{items}}" wx:for-index="i" wx:key="name" value="{{item.name}}" checked="{{item.checked}}">
          <image style="display:inline-block; width:80rpx;height:30rpx;" src="https://www.boyuan.com/file/image/star{{3-i}}.gif"></image>
       </radio>
</radio-group>
const app = getApp();
Page({
  data: {
    items: [
      { name: '', value: '3', checked: 'true'},
      { name: '', value: '2' },
      { name: '', value: '1' }
    ]
  },
  onLoad: function (options) {
    this.setData({
      itemid: options.itemid
    })
  },
  onShow: function () {

  },
  radioChange: function (e) {
    console.log('radio发生change事件,携带value值为:', e.detail.value)
  }
})