版权声明:本文为博主原创文章,遵循 CC 4.0 BY-SA 版权协议,转载请附上原文出处链接和本声明。
七牛上传的几种使用方式
公司的文件图片什么的都是放在七牛上的,不同的项目,不同的后台,七牛上传方式也是出了好几种,简单记录一下,懒得废话,直接上代码了,23333
选择文件后js上传(vue版)

<input type="file" ref="file" @change="uploadFile">
import * as qiniu from 'qiniu-js'
uploadFile(e){
    let file = e.target.files[0];
    if(file.type !== 'image/jpeg' && file.type !== 'image/png'){
        this.$message.error('上传文件只能是  JPG或PNG 格式!');
        return ;
    }else if(file.size/1024 >= 200){
        this.$message.error('图片不能大于200KB');
        return ;
    }else{
        var config = {
            useCdnDomain: true,
            region: qiniu.region.z0
        };
        var putExtra = {
            fname: file,
            params: {},
            mimeType: ["image/png", "image/jpeg", "audio/mp3"]
        }
        let observe = {
            next (res) {
                console.log('当前上传进度,范围:0~100:' + res.total.percent);
            },
            error (err) {
                this.$message.error('上传错误')
            },
            complete (res) {
                //完成后的操作
                console.log(res)
            }
        };
        let observable = qiniu.upload(file, null, token, putExtra, config);  //token为后台接口返回的七牛上传token
        let subscription = observable.subscribe(observe);
    }
}
表单上传(配合element UI)
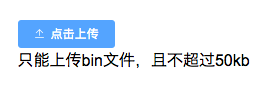
<el-upload action="https://upload.qiniup.com" :data="qiniuData" :before-upload="beforUpload" :on-success="uploadSuccess">
    <el-button size="mini" type="primary" icon="el-icon-upload2">点击上传</el-button>
    <div slot="tip" cl  ass="el-upload__tip">只能上传bin文件,且不超过50kb</div>
</el-upload>
    data(){
        return {
            qiniuData: {
                key: '',
                token: ''
            }
        }
    },
    methods: {
        beforUpload(file){
            this.qiniuData.key = file.name;
            return true;
        },
        uploadSuccess(res,file){
        console.log(res,file)
        },
    }
表单上传(配合antd)
this.state = {
token: '',
key: ''
}
componentDidMount() {
//请求后台接口获取上传token
}
beforeUpload = file => {
// console.log(file);
this.setState({
key: file.name
});
};
handleChange = ({ fileList }) => {
this.setState({ fileList });
};
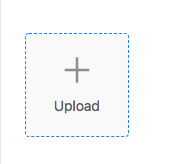
const uploadButton = (
<div>
<Icon type="plus" />
<div className="ant-upload-text">
{this.state.formImgType === 1 ? "(336*336px)" : "(1029*390px)"}
</div>
</div>
);
<Upload action="https://upload.qiniup.com" listType="picture-card" data={{
token: this.props.imgtoken,
key: this.state.key
}} fileList={fileList} beforeUpload={this.beforeUpload}
onPreview={this.handlePreview}
onChange={this.handleChange}
>
{(fileList.length >= 3) ? null
: uploadButton}
</Upload>