1、监管端点测试
引入依赖
<?xml version="1.0" encoding="UTF-8"?>
<project xmlns="http://maven.apache.org/POM/4.0.0" xmlns:xsi="http://www.w3.org/2001/XMLSchema-instance"
         xsi:schemaLocation="http://maven.apache.org/POM/4.0.0 https://maven.apache.org/xsd/maven-4.0.0.xsd">
    <modelVersion>4.0.0</modelVersion>
    <parent>
        <groupId>org.springframework.boot</groupId>
        <artifactId>spring-boot-starter-parent</artifactId>
        <version>2.1.9.RELEASE</version>
        <relativePath/> <!-- lookup parent from repository -->
    </parent>
    <groupId>com.example</groupId>
    <artifactId>springboot-08-actuator</artifactId>
    <version>0.0.1-SNAPSHOT</version>
    <name>springboot-08-actuator</name>
    <description>Demo project for Spring Boot</description>

    <properties>
        <java.version>1.8</java.version>
    </properties>

    <dependencies>
        <dependency>
            <groupId>org.springframework.boot</groupId>
            <artifactId>spring-boot-starter-actuator</artifactId>
        </dependency>
        <dependency>
            <groupId>org.springframework.boot</groupId>
            <artifactId>spring-boot-starter-web</artifactId>
        </dependency>

        <dependency>
            <groupId>org.springframework.boot</groupId>
            <artifactId>spring-boot-devtools</artifactId>
            <scope>runtime</scope>
            <optional>true</optional>
        </dependency>
        <dependency>
            <groupId>org.springframework.boot</groupId>
            <artifactId>spring-boot-starter-test</artifactId>
            <scope>test</scope>
        </dependency>
    </dependencies>

    <build>
        <plugins>
            <plugin>
                <groupId>org.springframework.boot</groupId>
                <artifactId>spring-boot-maven-plugin</artifactId>
            </plugin>
        </plugins>
    </build>

</project>
application.yml
server:
  port: 8080

# actuator监控
management:
  server:
    # 设置监控服务端口
    port: 8081
  endpoints:
    # 设置端点是否可用 默认只有shutdown可用
    enabled-by-default: true
    web:
      # 设置是否暴露端点 默认只有health和info可见
      exposure:
        # 包括所有端点
        include: "*" # 注意需要添加引号
        # 排除端点
        exclude: shutdown
Spring Boot内置端点(和1.x版本相比,不少端点名称发生改变)
官方链接:https://docs.spring.io/spring-boot/docs/2.2.0.RELEASE/reference/htmlsingle/#production-ready
每个端点可以启用或禁用。创建此控件是否终结点存在于应用程序上下文。要远程访问端点也必须通过JMX或HTTP公开。大多数应用程序选择HTTP,在那里随着/执行器的前缀端点的ID映射到URL。例如,默认情况下,/actuator/health.
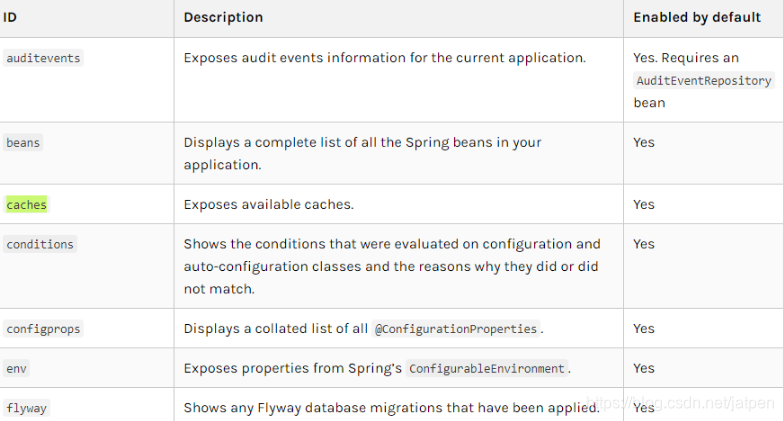
| 端点名 | 描述 |
|---|---|
| conditions | 所有自动配置信息 |
| auditevents | 审计事件 |
| beans | 所有Bean的信息 |
| configprops | 所有自动化配置属性 |
| threaddump | 线程状态信息 |
| env | 当前环境信息 |
| health | 应用健康状况 |
| info | 当前应用信息 |
| metrics | 应用的各项指标 |
| mappings | 应用@RequestMapping映射路径 |
| shutdown | 关闭当前应用(默认关闭) |
| httptrace | 追踪信息(最新的http请求) |
启动测试
例如浏览器输入:http://localhost:8081/actuator/configprops
运行结果:

2、定制端点信息
**启用端点:**默认情况下,启用除shutdown 之外的所有端点。要配置端点的启用,请使用其management.endpoint..enabled 属性。以下示例启用shutdown 端点:
management.endpoint.shutdown.enabled=true
如果您希望端点启用是选择加入而不是选择退出,请将management.endpoints.enabled-by-default 属性设置为false 并使用单个端点enabled 属性重新加入。以下示例启用info endpoint并禁用所有其他端点:
management.endpoints.enabled-by-default=false
management.endpoint.info.enabled=true
配置端点:端点自动缓存对不带任何参数的读取操作的响应。要配置端点缓存响应的时间量,请使用其cache.time-to-live 属性。以下示例将beans 端点缓存的生存时间设置为10秒:
management.endpoint.beans.cache.time-to-live=10s
更多内容请查看官方文档。
3、健康信息
您可以使用运行状况信息来检查正在运行的应用程序的状态。监视软件经常使用它来在生产系统出现故障时向某人发出警报。health 端点公开的信息取决于management.endpoint.health.show-details 属性,该属性可以使用以下值之一进行配置:
| never | 细节永远不会显示 |
|---|---|
| when-authorized | 详细信息仅向授权用户显示。可以使用management.endpoint.health.roles 配置授权角色 |
| always | 详细信息显示给所有用户 |
默认值为never 。当用户处于一个或多个端点的角色时,将被视为已获得授权。如果端点没有配置角色(默认值),则认为所有经过身份验证的用户都已获得授权。可以使用management.endpoint.health.roles 属性配置角色。
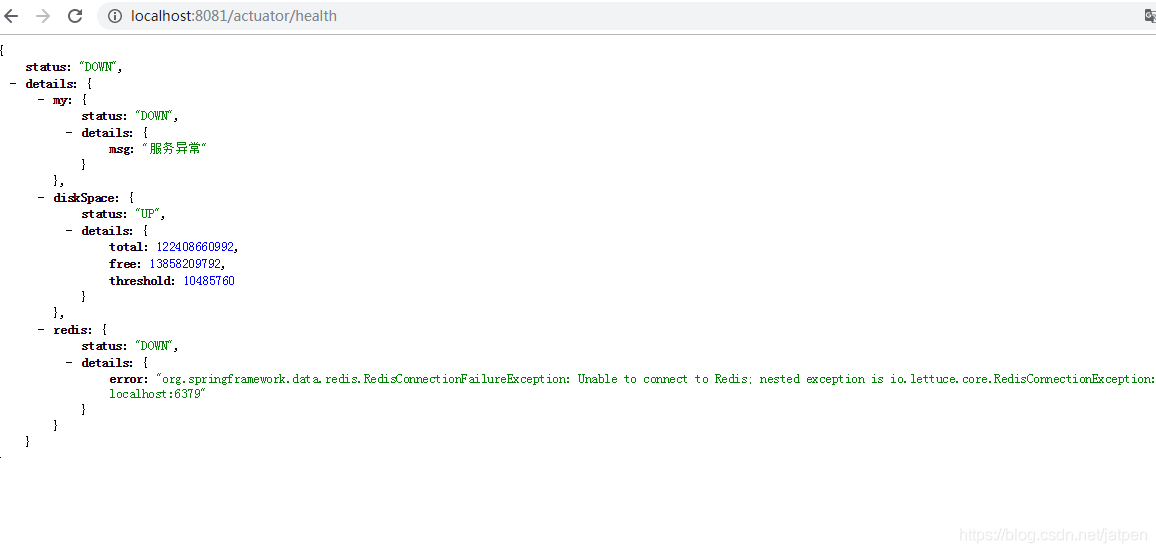
自定义健康指示器
package com.example.springboot08actuator.health;

import org.springframework.boot.actuate.health.Health;
import org.springframework.boot.actuate.health.HealthIndicator;
import org.springframework.stereotype.Component;

@Component
public class MyHealthIndicator implements HealthIndicator {
    @Override
    public Health health() {
        /*
        * 自定义健康
        *  Health.up().build() 代表健康
        * */

        return Health.down().withDetail("msg","服务异常").build();
    }
}
这里本地环境没有安装redis,启动程序查看健康信息: