版权声明:本文为博主原创文章,遵循 CC 4.0 BY-SA 版权协议,转载请附上原文出处链接和本声明。
SpringCloud添加Swagger
目录:
一.基本介绍
官方介绍:Swagger是一个规范且完整的框架,提供描述、生产、消费和可视化RESTful Web Service。
专业角度:Swagger是由庞大工具集合支撑的形式化规范。这个集合涵盖了从终端用户接口、底层代码库到商业API管理的方方面面。
二.如何使用
开发环境
- maven 3.5
- jdk 8+
- spring-boot 1.5.3
- spring-cloud Dalston.SR1
- fastjson 1.2.41
添加依赖
 <!-- Swagger核心包 start -->
 <dependency>
   <groupId>io.springfox</groupId>
   <artifactId>springfox-swagger2</artifactId>
   <version>2.6.1</version>
 </dependency>
 <dependency>
    <groupId>io.springfox</groupId>
    <artifactId>springfox-swagger-ui</artifactId>
    <version>2.6.1</version>
 </dependency>
<!-- Swagger核心包 end -->
application.yml中添加
#配置eureka获取服务地址
eureka:
  client:
    serviceUrl:
      defaultZone: http://localhost:1001/eureka/
  #配置Swagger相关信息
  instance:
      prefer-ip-address: true
      instanceId: ${spring.cloud.client.ipAddress}:${server.port}
      status-page-url:
      http://${spring.cloud.client.ipAddress}:${server.port}/swagger-ui.html
      # ${server.port}为该服务的端口号
添加配置
import org.springframework.context.annotation.Bean;
import org.springframework.context.annotation.Configuration;
import springfox.documentation.builders.ApiInfoBuilder;
import springfox.documentation.builders.PathSelectors;
import springfox.documentation.builders.RequestHandlerSelectors;
import springfox.documentation.service.ApiInfo;
import springfox.documentation.spi.DocumentationType;
import springfox.documentation.spring.web.plugins.Docket;
import springfox.documentation.swagger2.annotations.EnableSwagger2;

@Configuration
@EnableSwagger2
public class SwaggerConfig {
    @Bean
    public Docket userApi() {
        Docket docket = new Docket(DocumentationType.SWAGGER_2)
                .apiInfo(apiInfo())
                .select()
                .apis(RequestHandlerSelectors.basePackage("cn.zhangbox.eureka.provider.controller"))//过滤的接口
                .paths(PathSelectors.any())
                .build();
        return docket;
    }


    private ApiInfo apiInfo() {
        return new ApiInfoBuilder().title("eureka服务端提供者接口平台").description("服务相关数据接口")
                .termsOfServiceUrl("http://www.zhang.box.cn/").contact("技术开发部")
                .license("Licence Version 1.0").licenseUrl("#").version("1.0").build();
    }

}
配置详情解释:
通过@Configuration注解,让Spring-boot来加载该类配置。再通过@EnableSwagger2注解来启用Swagger2Configuration。再通过userApi函数创建Docket的Bean之后,apiInfo()用来创建该Api的基本信息(这些基本信息会展现在文档页面中)。
select() 函数返回一个 ApiSelectorBuilder 实例用来控制哪些接口暴露给Swagger2来展现。
一般采用指定扫描的包路径来定义。Swagger会扫描该包下所有Controller定义的API,并产生文档内容(除了被@ApiIgnore指定的请求)。
| 注解 | 作用 |
|---|---|
| @Api | 用在类上,说明该类的作用 |
| @ApiOperation | 用在方法上,说明方法的作用,标注在具体请求上,value和notes的作用差不多,都是对请求进行说明;tags则是对请求进行分类的,比如你有好几个controller,分别属于不同的功能模块,那这里我们就可以使用tags来区分了,看上去很有条理 |
| @ApiImplicitParams | 用在方法上包含一组参数说明 |
| @ApiImplicitParam | 用在@ApiImplicitParams注解中,指定一个请求参数的各个方面 |
| @ApiResponses | 用于表示一组响应 |
| @ApiResponse | 用在@ApiResponses中,一般用于表达一个错误的响应信息 |
| @ApiModel | 描述一个Model的信息(这种一般用在post创建的时候,使用@RequestBody这样的场景,请求参数无法使用@ApiImplicitParam注解进行描述的时候)表明这是一个被swagger框架管理的model,用于class上 |
| @ApiModelProperty | 这里顾名思义,描述一个model的属性,就是标注在被标注了@ApiModel的class的属性上,这里的value是对字段的描述,example是取值例子,注意这里的example很有用,对于前后端开发工程师理解文档起到了关键的作用,因为会在api文档页面上显示出这些取值来;这个注解还有一些字段取值,可以自己研究,举例说一个:position,表明字段在model中的顺序 |
配置需要解析的接口方法
import cn.zhangbox.eureka.provider.service.StudentService;
import cn.zhangbox.eureka.provider.entity.Student;
import com.alibaba.fastjson.JSON;
import io.swagger.annotations.Api;
import io.swagger.annotations.ApiParam;
import org.slf4j.Logger;
import org.slf4j.LoggerFactory;
import org.springframework.beans.factory.annotation.Autowired;
import org.springframework.stereotype.Controller;
import org.springframework.ui.ModelMap;
import org.springframework.web.bind.annotation.GetMapping;
import org.springframework.web.bind.annotation.RequestMapping;
import org.springframework.web.bind.annotation.RequestParam;
import org.springframework.web.bind.annotation.ResponseBody;
import java.util.List;
/**
* Created by zhangyuan on 2018/07/06
*/
@Controller
@RequestMapping("/student")
@Api(value = "eureka-provider", description = "学生查询接口")
public class StudentConteroller {
private static final Logger LOGGER = LoggerFactory.getLogger(StudentConteroller.class);
@Autowired
protected StudentService studentService;
/**
* 查询所有的学生信息
*
* @param sname
* @param age
* @param modelMap
* @return
*/
@ResponseBody
@GetMapping("/list")
public String list(
@ApiParam(value = "姓名") @RequestParam(required = false) String sname,
@ApiParam(value = "年龄") @RequestParam(required = false) Integer age,
ModelMap modelMap) {
String json = null;
try {
List<Student> studentList = studentService.getStudentList(sname, age);
modelMap.put("ren_code", "0");
modelMap.put("ren_msg", "查询成功");
modelMap.put("studentList", studentList);
json = JSON.toJSONString(modelMap);
} catch (Exception e) {
e.printStackTrace();
modelMap.put("ren_code", "0");
modelMap.put("ren_msg", "查询失败===>" + e);
LOGGER.error("查询失败===>" + e);
json = JSON.toJSONString(modelMap);
}
return json;
}
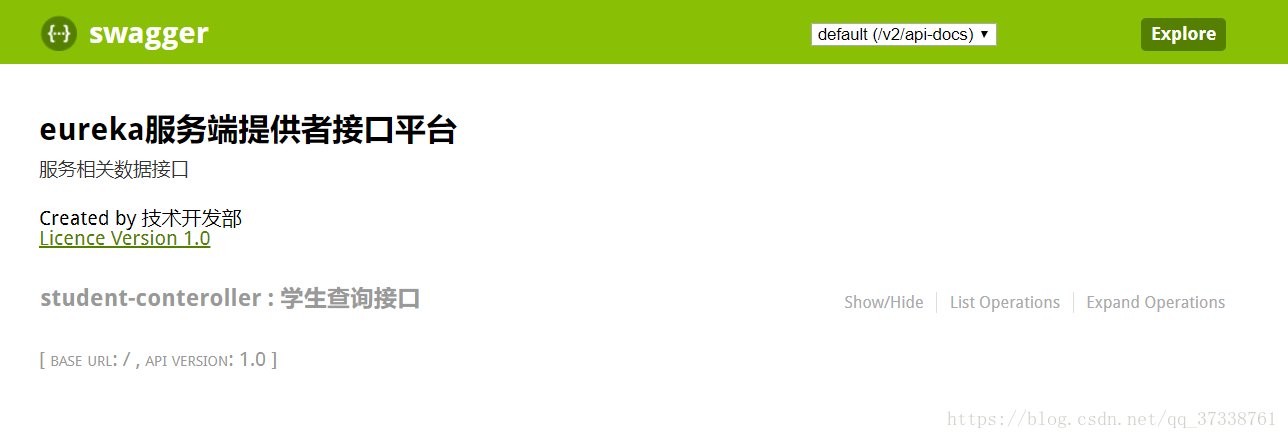
}启动项目,在浏览器访问
http://localhost:8080/swagger-ui.html
显示如图,整合成功!
项目地址:https://github.com/wqyuu/spring-cloud-eureka-demo