自制简单的mvvm框架
实现原理
- 用Object.defineProperty()实现数据代理,添加getter和setter方法。这样当数据发生改变时,setter方法就会执行
- 用fragment()对模板进行拷贝,保存到内存中。
- 用node.nodeType得到fragment在节点类型,再对模板中节点上指令进行解析,为节点添加对应的方法和数据,再把fragment放到页面上。
实现步骤
1. 实现mvvm
- 创建vm对象对data对象进数据代理
1.1 对传递来的data参数进行保存
1.2 对data中的key进行代理,这样实现vm.key来访问data中的数据
1.3 调用observe方法对保存在vm中的data中的所有数据进行数据代理,添加描述和getter和setter方法
2.getter方法被调用dep对象,对vm中的依赖进行管理,setter方法被调用时会调用Dep中的notify方法从而调用watcher中的update方法. - 数据代理完成后调用compile对模板进行编译(必须在在数据代理完成后进行)
class mvvm{
    constructor(options) {
        // 将选项对象保存到vm
        this.$options = options;
        // 将data对象保存到vm和data变量中
        this._data = this.$options.data
        // 实现data对象的数据代理
        this.observe(this._data);
        // 执行编译
        this.$compile = new Compile(options.el, this);
    }
    observe(value) {
        if (!this.isObject(value)) {
            return;
        }
        // 遍历value中所有的属性
        Object.keys(value).forEach(key => {
            // 为vue的data做属性代理
            this.proxyData(key);
            // 对指定属性实现响应式数据绑定
            this.defineReactive(value, key, value[key])
        });
    }
    proxyData(key) {
        Object.defineProperty(this, key, {
            configurable: false, // 不能再重新定义
            enumerable: true, // 可以枚举
            get() {
                // 当通过vm.属性名 读取属性值时自动调用
                return this._data[key];
            },
            set(newVal) {
                // 将最新的值保存到data中对应的属性上(实现代理写操作)
                this._data[key] = newVal;
            },
        });
    }
    defineReactive(obj, key, val) {
        // 创建与当前属性相对应的Dep对象
        let dep = new Dep();
        // 递归查找嵌套属性
        this.observe(val);
        let this_ = this;
        // 为data对象定义属性
        Object.defineProperty(obj, key, {
            configurable: false,
            enumerable: true,
            get() {
                // 建立dep与watcher的关系
                if (Dep.target) {
                    dep.depend();
                }
                console.log(dep.deps)
                return val;
            },
            set(newVal) {
                if (newVal === val) {
                    return;
                }
                val = newVal;
                // 新的值是object的话,进行监听
                this_.observe(newVal);
                // 通知watcher属性发生改变
                dep.notify()
            }
        })
    }
    isObject(obj) {
        return obj !== null && typeof obj === 'object'
    }
}
2. 实现comlile
- 获取页面中节点的
- 将节点中的子节点拷贝到fragment中
- 利用nodetype对fragment中的不同类型节点进行分门别类的解析操作,解析后调用更新方法进行数据替换或方法绑定
3.1 文本节点进行解析: 如果有{{ }}那么直接用textContent替换为对应数据
3.2 元素节点则对指令进行解析:
+v-html:利用innerHTML方法替换数据
+v-model:先为value赋值,再用addEventListener绑定方法,如果人为改变调用对应方法,
+@click:从vm中得到方法的内容,通过addEventListener绑定方法并重新绑定方法中this的指向。
3.3 对text,html,model等在替换数据或赋值后,要为当前使用的data数据添加一个Watcher订阅者方法,建立watcher和compile之间的桥梁,保存当前数据的key和回调方法(回调方法会调用节点更新的方法)。
// 扫描模板中所有依赖创建更新函数和watcher
class Compile {
    constructor(el, vm) {
        this.$vm = vm;
        this.$el = document.querySelector(el);
        if (this.$el) {
            // 将dom节点转换为Frament提高执行效率
            this.$fragment = this.node2Fragment(this.$el);
            // 编译fragment中所有层次子节点
            this.init()
            // 将生成的结果追加到el中
            this.$el.appendChild(this.$fragment)
        }
    }
    node2Fragment(el) {
        // 创建一个新的Fragment
        let fragment = document.createDocumentFragment();
        let child;
        // 将原生节点拷贝至fragment
        while ((child = el.firstChild)) {
            fragment.appendChild(child);
        }
        return fragment;
    }
    init() {
        // 编译fragment
        this.compileElement(this.$fragment)
    }
    compileElement(el) {
        let childNode = el.childNodes;

        Array.from(childNode).forEach(node => {
            if (this.isElementNode(node)) {
                // 元素节点要识别指令属性
                this.compile(node)
            } else if (this.isTextNode(node) && /\{\{(.*)\}\}/.test(node.textContent)) {
                // 文本节点,只关心{{xx}}格式
                this.compileText(node, RegExp.$1) // RegExp.$1 匹配上面正则分组的内容
            }
            // 遍历可能存在的子节点
            if (node.childNodes && node.childNodes.length) {
                // 递归调用实现所有层次节点的编译
                this.compileElement(node);
            }
        })
    }
    compile(node) {
        // 获取所有标签属性节点
        const nodeAttrs = node.attributes;
        // 遍历所有属性
        Array.from(nodeAttrs).forEach(attr => {
            // attr: v-on:click="onclick" 或 @click="onClick", v-text="test"
            // 属性名: v-on:click, v-text,@click
            const attrName = attr.name
            // 判断是否是指令属性
            if (this.isDirective(attrName)) {
                // 得到表达式(属性值): test,onClick,
                let exp = attr.value;
                // 判断是否是事件指令
                if (this.isEventDirective(attrName)) {
                    // 解析事件指令
                    let dir = attrName.indexOf("@") >= 0 ? attrName.substr(1) : attrName.substr(5);
                    this.eventHandler(node, this.$vm, exp, dir)
                } else {
                    let dir = attrName.substr(2);
                    // 解析普通指令
                    this[dir] && this[dir](node, this.$vm, exp)
                }
                // 移除指令属性
                node.removeAttribute(attrName);
            }
        })
    }
    compileText(node, exp) {
        this.text(node, this.$vm, exp.replace(/^\s+|\s+$/g, ''));
    }
    isElementNode(node) {
        return node.nodeType == 1; // 元素节点
    }
    isTextNode(node) {
        return node.nodeType == 3; // 文本节点
    }
    // 判断是否是指令
    isDirective(attr) {
        return /^v-|^@|^:/.test(attr);
    }
    // 判断是否是事件指令
    isEventDirective(dir) {
        return /^@|^v-on:/.test(dir);
    }
    // 解析v-text/{{}}
    text(node, vm, exp) {
        this.update(node, vm, exp, 'text')
    }
    // 解析v-html
    html(node, vm, exp) {
        this.update(node, vm, exp, 'html')
    }
    // 解析v-class
    class(node, vm, exp) {
        this.update(node, vm, exp, 'class')
    }
    // 解析v-mode
    model(node, vm, exp) {
        this.update(node, vm, exp, 'model')
        let val = this.getVMVal(vm, exp)
        node.addEventListener('input', e => {
            let newValue = e.target.value;
            if (val === newValue) {
                return;
            }
            this.setVmVal(vm, exp, newValue);
            val = newValue;
        })
    }
    // 得到表达式对应的value
    getVMVal(vm, exp) {
        let val = vm._data;
        exp = exp.split('.');
        exp.forEach(k => {
            val = val[k];
        });
        return val;
    }
    setVmVal(vm, exp, value) {
        let val = vm._data;
        exp = exp.split('.');
        exp.forEach((k, i) => {
            if (i < exp.length - 1) {
                val = val[k];
            } else {
                val[k] = value
            }
        })
    }
    // 事件处理
    eventHandler(node, vm, exp, dir) {
        let fn = vm.$options.methods && vm.$options.methods[exp];
        if (dir && fn) {
            // 1.绑定指定事件名和回调函数的DOM事件监听
            // 2.将回调函数中的this强制绑定为vm
            node.addEventListener(dir, fn.bind(vm), false)
        }
    }
    // 更新节点方法
    update(node, vm, exp, dir) {
        let updaterFn = this[dir + "Updater"];
        // 执行节点更新
        updaterFn && updaterFn(node, this.getVMVal(vm, exp));
        // 创建表达式对应的watcher对象
        new Watcher(vm, exp, (val, oldVal) => {
            // 当对应的属性值发生了变化时, 自动调用, 更新对应的节点
            updaterFn && updaterFn(node, val, oldVal);
        })
    }
    textUpdater(node, value) {
        node.textContent = typeof value == 'undefined' ? '' : value;
    }
    htmlUpdater(node, value) {
        node.innerHTML = typeof value == 'undefined' ? '' : value;
    }
    modelUpdater(node, value) {
        node.value = typeof value == 'undefined' ? '' : value;
    }
    classUpdater(node, value, oldValue) {
        let className = node.className;
        className = className.replace(oldValue, '').replace(/\s$/, '');
        let space = className && String(value) ? ' ' : '';
        node.className = className + space + value;
    }
}
3. 实现watcher
Watcher订阅者作为observe和compile之间通信的桥梁。
- comlile中添加的订阅者时会,触发数据代理的getter方法从而在dep中添加一个watcher订阅者,建立起watcher和observe的桥梁。
- 在数据代理的setter方法调用,会触发所有在dep依赖管理器中储存的watcher的updata方法,然后调用延迟get方法触发获取最新数据,触发回调,调用更新节点的方法从容而更新页面是的数据。
// Watcher: 订阅者:具体的更新执行者
class Watcher {
    constructor(vm, exp, callack) {
        this.vm = vm;
        this.exp = exp;
        this.cb = callack;
        this.depIds = {};
        this.value = this.get();
    }
    update() {
        // 得到最新的值
        let value = this.get();
        // 得到旧值
        let oldVal = this.value;
        // 如果不相同
        if (value !== oldVal) {
            this.value = value;
            // 调用回调函数更新对应的界面
            this.cb.call(this.vm, value, oldVal);
        }
    }
    addDep(dep) {
        if (!this.depIds.hasOwnProperty(dep.id)) {
            // 建立dep到wacther的关系
            dep.addDep(this)
            // 建立wacther到dep的关系
            this.depIds[dep.id] = dep;
        }
    }
    get() {
        Dep.target = this;
        // 获取当前表达式的值, 内部会导致属性的get()调用
        let value = this.getVMVal();
        Dep.target = null;
        return value;
    }
    getVMVal() {
        let exp = this.exp.split('.');
        let val = this.vm._data;
        exp.forEach(key => {
            val = val[key]
        })
        return val;
    }
}
4. 实现dep
Dep依赖管理器:负责将vm中的所有依赖收集管理,包括依赖添加和通知
var uid = 0;
// 依赖管理器:负责将vm中的所有依赖收集管理,包括依赖添加和通知
class Dep {
constructor() {
this.id = uid++;
this.deps = []; // 存放相关的所有watcher数组
}
addDep(dep) {
this.deps.push(dep)
}
depend() {
Dep.target.addDep(this);
}
notify() {
// 通知所有相关的watcher执行更新
this.deps.forEach(dep => {
dep.update();
})
}
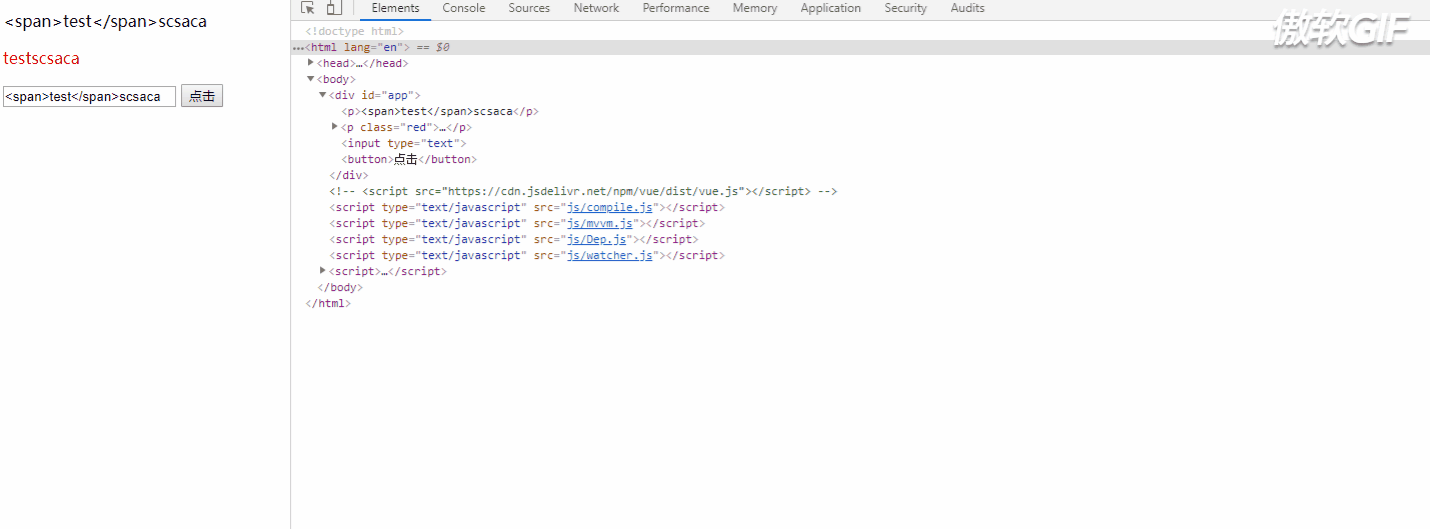
}测试:
<div id="app">
    <p>{{ msg }}</p>
    <p v-html="msg" v-class="red"></p>
    <input type="text" v-model="msg">
    <button @click="click">点击</button>
</div>
<!-- <script src="https://cdn.jsdelivr.net/npm/vue/dist/vue.js"></script> -->
<script type="text/javascript" src="js/compile.js"></script>
<script type="text/javascript" src="js/mvvm.js"></script>
<script type="text/javascript" src="js/Dep.js"></script>
<script type="text/javascript" src="js/watcher.js"></script>
<script>
        var vm = new mvvm({
            el: '#app',
            data: {
                msg: '<span>test</span>',
                red:'red'
            },
            methods: {
                click() {
                    alert('点击')
                }
            }
        })
</script>