1. paramiko模块的简单简单介绍
paramiko是一个用于做远程控制的模块,使用该模块可以对远程服务器进行命令或文件操作,值得一说的是,fabric和ansible内部的远程管理就是使用的paramiko来现实。
假设你已经在vm上搭建好了Ubuntu,现在安装这个模块 pip3 install paramiko ....等待安装完成r如果你的网速不够快的话可以使用国内的安装源 pip install paramiko -i https://pypi.tuna.tsinghua.edu.cn/simple
现在你已经安装这个模块成功了,在你Ubuntu中vim创建一个python文件就叫paramiko.py,然后用paramiko生成一个实例
1 import paramiko
2
3 ssh = paramiko.SSHClient() #
4 #ssh.set_missing_host_key_policy(paramiko.AutoAddPolicy())
5 ssh.connect('192.168.1.108', 22, 'alex', '123456')
6 stdin, stdout, stderr = ssh.exec_command('ifconfig') #stdin标准输入 stdout标准输出 stderr 标准错误

7 print (stdout.read().decode("utf-8"))
8 ssh.close();
然后用 python3 调用这个文件
python@ubuntu:~/Desktop/01_python$ python3 ssh_paramiko.py
ens33: flags=4163<UP,BROADCAST,RUNNING,MULTICAST>  mtu 1500
        inet 192.168.146.137  netmask 255.255.255.0  broadcast 192.168.146.255
        inet6 fe80::4b70:fb40:7a4:c087  prefixlen 64  scopeid 0x20<link>
        ether 00:0c:29:a9:86:20  txqueuelen 1000  (以太网)
        RX packets 6105  bytes 6070483 (6.0 MB)
        RX errors 0  dropped 0  overruns 0  frame 0
        TX packets 3832  bytes 388625 (388.6 KB)
        TX errors 0  dropped 0 overruns 0  carrier 0  collisions 0

lo: flags=73<UP,LOOPBACK,RUNNING>  mtu 65536
        inet 127.0.0.1  netmask 255.0.0.0
        inet6 ::1  prefixlen 128  scopeid 0x10<host>
        loop  txqueuelen 1000  (本地环回)
        RX packets 526  bytes 53778 (53.7 KB)
        RX errors 0  dropped 0  overruns 0  frame 0
        TX packets 526  bytes 53778 (53.7 KB)
        TX errors 0  dropped 0 overruns 0  carrier 0  collisions 0
此时我们发现paramiko这个模块已经连接192.168.146.137这台机器并执行了 ifconfig命令
但是我们发现,执行一次这个命令连接一次这个机器,我们需要一直连接这个机器,去交互
我们先找到这个paramiko这个模块
sudo find / -name paramiko
然后打开这个路径
/home/python/.local/lib/python3.6/site-packages/paramiko
python@ubuntu:~/.local/lib/python3.6/site-packages/paramiko$ ls
agent.py          file.py            pipe.py         sftp.py
auth_handler.py   hostkeys.py        pkey.py         sftp_server.py
ber.py            __init__.py        primes.py       sftp_si.py
buffered_pipe.py  kex_curve25519.py  proxy.py        ssh_exception.py
channel.py        kex_ecdh_nist.py   py3compat.py    ssh_gss.py
client.py         kex_gex.py         __pycache__     transport.py
common.py         kex_group14.py     rsakey.py       util.py
compress.py       kex_group16.py     server.py       _version.py
config.py         kex_group1.py      sftp_attr.py    _winapi.py
dsskey.py         kex_gss.py         sftp_client.py  win_pageant.py
ecdsakey.py       message.py         sftp_file.py
ed25519key.py     packet.py          sftp_handle.py
发现这个目录下没有一个叫demo的文件 那么我们去github取下载 https://github.com/paramiko/paramiko
下载安装之后找到demo.py去执行它


python@ubuntu:~/paramiko-master$ cd demos/
python@ubuntu:~/paramiko-master/demos$ ls
cmd.log         demo.log  demo_server.py  demo_simple.py  interactive.py  rforward.py   user_rsa_key
demo_keygen.py  demo.py   demo_sftp.py    forward.py      __pycache__     test_rsa.key  user_rsa_key.pub
python@ubuntu:~/paramiko-master/demos$ python3 demo.py
Hostname: 192.168.146.137
*** WARNING: Unknown host key!
Username [python]: python
Auth by (p)assword, (r)sa key, or (d)ss key? [p] p
Password for [email protected]:
*** Here we go!

Welcome to Ubuntu 18.10 (GNU/Linux 4.18.0-25-generic x86_64)

 * Documentation:  https://help.ubuntu.com
 * Management:     https://landscape.canonical.com
 * Support:        https://ubuntu.com/advantage


0 packages can be updated.
0 updates are security updates.

Your Ubuntu release is not supported anymore.
For upgrade information, please visit:
http://www.ubuntu.com/releaseendoflife

New release '19.04' available.
Run 'do-release-upgrade' to upgrade to it.

Last login: Wed Sep 25 22:02:09 2019 from 192.168.146.1
python@ubuntu:~$
此时我们就可以连上这台机器并可以执行命令
但是体验不是很友好
那么此时我们打开我们刚下载的paramiko这个文件 的demo.py看看它里面是怎么帮我们实现的


OK paramiko模块先说到这里
Next 放大招
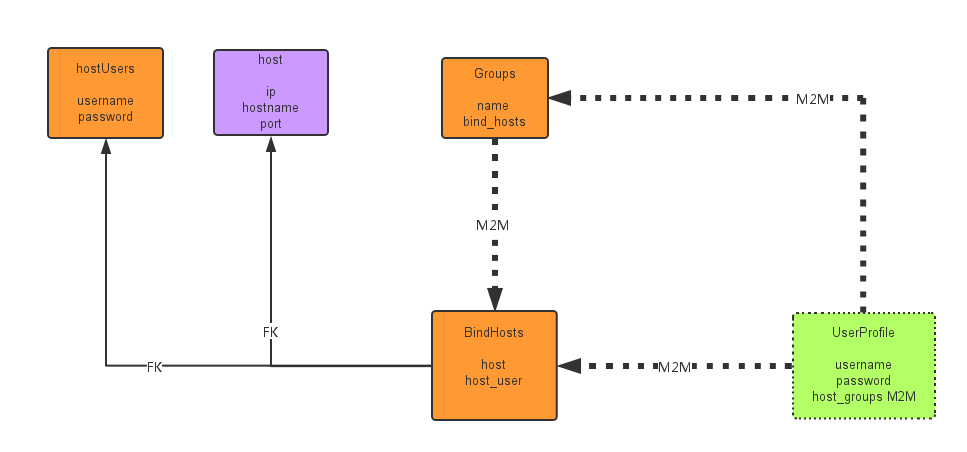
现在我们就用django开始设计堡垒机的表结构和前端页面建议搭建先看下开源的jumpserver堡垒机

大家创建完表结构,然后makemigrations migrate creatsuperuser 然后登陆 django后台成功之后
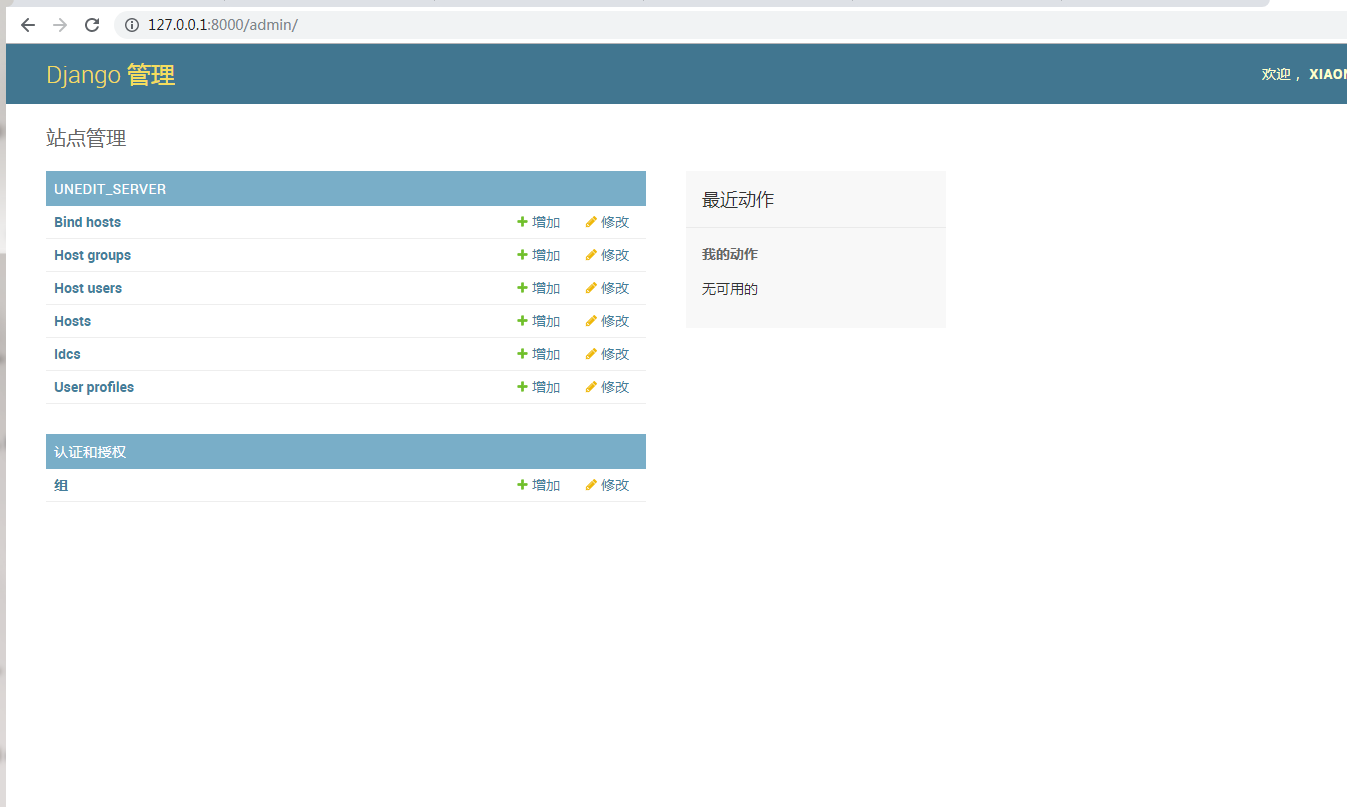
应该是这样的
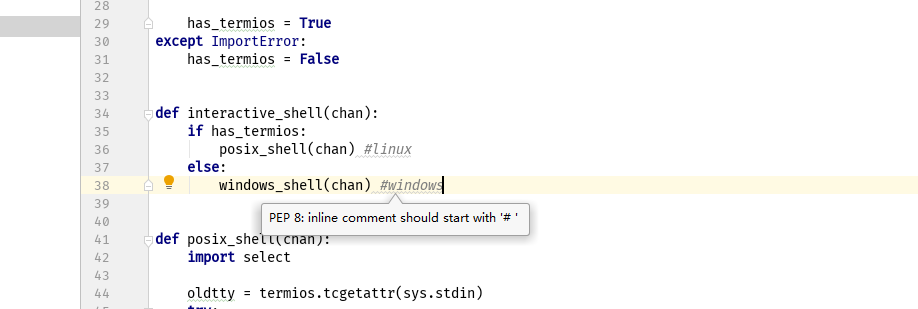
接下来我们创建一个backgend的python包用来放执行的脚本 然后创建一个python文件,来做堡垒机和主机之间的交互
代码如下
  1 #__user: xuening
  2 #__data: 2019/9/22 0022
  3
  4 import getpass,os  #getpass模块提供了平台无关的在命令行下输入密码的方法
  5 import subprocess
  6 # from unedit_server import models
  7 from django.contrib.auth import authenticate
  8
  9 class UserPortal(object):
 10     """用户命令行端交互入口"""
 11
 12     def __init__(self):
 13         self.user = None
 14
 15     def user_auth(self):
 16         """完成用户登录认证"""
 17         retry_auth = 0
 18         while retry_auth < 3:
 19             username = input("Username:").strip()
 20             if len(username) == 0:continue
 21             password = getpass.getpass("Passwrod:").strip()
 22             if len(password) == 0:
 23                 print("Password cont be null")
 24                 continue
 25             user = authenticate(username=username,password=password)
 26             if user :
 27                 self.user = user
 28                 print("Welcome login ...")
 29                 return
 30             else:
 31                 print("invalitd username or password!")
 32             retry_auth += 1
 33         else:
 34             exit("Too many attempts")
 35     def interactive(self):
 36         """交互函数"""
 37
 38         self.user_auth()
 39         if self.user: #用户认证成功
 40             exit_flag = False
 41             while not exit_flag:
 42                 # print(self.user.bind_hosts.select_related())
 43                 for index,host_group in enumerate(self.user.host_groups.all()):
 44                     print("%s, %s[%s]"%(index,host_group.name,host_group.bind_hosts.all().count())) # 打印用户管理的主机名称和,所属组的个数
 45
 46                 print("%s 未分组主机【%s】"%(index+1,self.user.bind_hosts.select_related().count()))
 47                 user_input = input("Choose group:").strip()
 48                 if len(user_input) == 0:continue
 49                 if user_input.isdigit():
 50                     user_input = int(user_input)
 51                     if user_input >= 0 and user_input < self.user.host_groups.all().count():
 52                         selected_hostgroup = self.user.host_groups.all()[user_input]  # 选择分组
 53                     elif user_input == self.user.host_groups.all().count(): # 选中了未分组的那组主机
 54                         selected_hostgroup =self.user
 55                     else:
 56                         print("invilid host group")
 57                         continue
 58                 while True:
 59                     for index,bind_host in enumerate(selected_hostgroup.bind_hosts.all()):
 60                         print("%s  %s  IP:%s  POrt:%s,IDC:%s"%(index,bind_host.host.hostname,
 61                                         bind_host.host.ip_addr,
 62                                         bind_host.host.port,
 63                                         bind_host.host.idc)) # 打印分组里主机的所有
 64
 65                     user_input2 = input("Choose host:").strip() # 选择主机
 66                     if user_input2.isdigit():
 67                         user_input2 = int(user_input)
 68                         if user_input2 >= 0 and user_input2 < selected_hostgroup.bind_hosts.all().count():
 69                             selected_hosthosts =  selected_hostgroup.bind_hosts.all()[user_input2]
 70                             print("login host",selected_hosthosts)
 71                             login_cmd = 'sshpass  -p {password} ssh {user}@{ip_addr}  -o "StrictHostKeyChecking no"'.format(password=selected_hosthosts.host_user.password,
 72                                                                                                                             user=selected_hosthosts.host_user.username,
 73                                                                                                                             ip_addr=selected_hosthosts.host.ip_addr)
 74                             ''' 去数据库取出主机的密码 用户名  IP地址
 75                             -o "StrictHostKeyChecking no" 因为这个程序是调用ssh登录到远程主机,
 76                             当使用ssh登录时,需要输入yes or no ,但是在python脚本中没法输入yes
 77                             和no,所以 -o "StrictHostKeyChecking no"
 78                             这个命令就可以直接输入yes
 79                             sshpass 是直接帮助输入密码的 但是需要在堡垒机中安装  它  sshpass -p 密码 ssh -p 1000 [email protected]
 80
 81
 82                             '''
 83
 84                             print(login_cmd)
 85                             ssh_instance = subprocess.run(login_cmd, shell=True) # 通过 subprocess命令 去 登录,切换到要管理的那台主机
 86                             """subprocess模块 命令处理
 87                                 这里直接给出大佬的文章 他的文章已经足够入门 其他可参看文档
 88
 89                                 Python标准库06 子进程 (subprocess包)另外给出代码
 90                                 1 import subprocess
 91                                 2
 92                                 3 res = subprocess.Popen("dir", shell=True, stdout=subprocess.PIPE)  # 使用shell解释dir程序并使用管道将结果写入标准输出stdout
 93                                 4 print(res.stdout.read().decode('gbk'))  # 使用read()方法从stdout读出结果 该方法也适用stdin和stderr"""
 94                             print("------------logout---------")
 95                     elif user_input2 == "b":
 96                         break
 97
 98
 99
100 if __name__ == '__main__':
101     os.environ.setdefault('DJANGO_SETTINGS_MODULE', 'Eat_bee_dung.settings') #配置堡垒机的django环境
102     import django
103     django.setup()
104
105     from unedit_server import models
106
107
108     protal = UserPortal()
109     protal.interactive()
110
111
112     # 简单说下这个程序的运行流程  首先把我们写好的程序拷入到堡垒机中 然后运行他  然后运维人员先登录到堡垒机,
113     # 然后去查看他的有权限管理的主机 当用户选择了他管理的主机,然后堡垒机直接去连接那台主机
114     # 然后再去操作他
一定记得要现在堡垒机中安装sshpass软件 https://sourceforge.net/projects/sshpass/
现在我们将我们写好的软件复制到堡垒机中,
大家会发现一个问题 就是我们可以通过堡垒机登录到我们的主机上,但是我们也可以操作堡垒机,那我们如何限制运维人员不能操作堡垒机呢
我拿我虚拟机上的Ubuntu演示
首先找到当前用户目录下的 etc/passwd 文件 然后打开它 然后找到要修改的用户
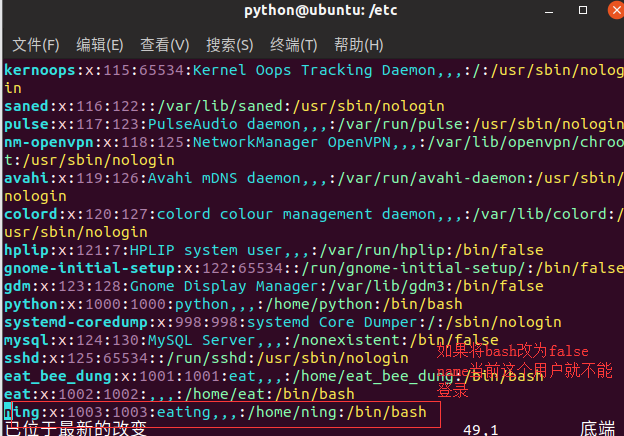
所以我们这个时候可以先创建一个堡垒机专用的账户,让运维人员通过只能通过这个用户去堡垒机,而且运维人员还不能在这个用户上去干别的事情
好 此刻你已经在你的虚拟机上重新创建了一个新用户
然后打开用户目录下的 .bashrc

.bashrc 文件是用户环境变量配置文件 当用户登录时 默认执行的一些操作都在这个文件里面配置
那么 我们可以修改 . bashrc 文件 让它 去执行我们让它执行的操作
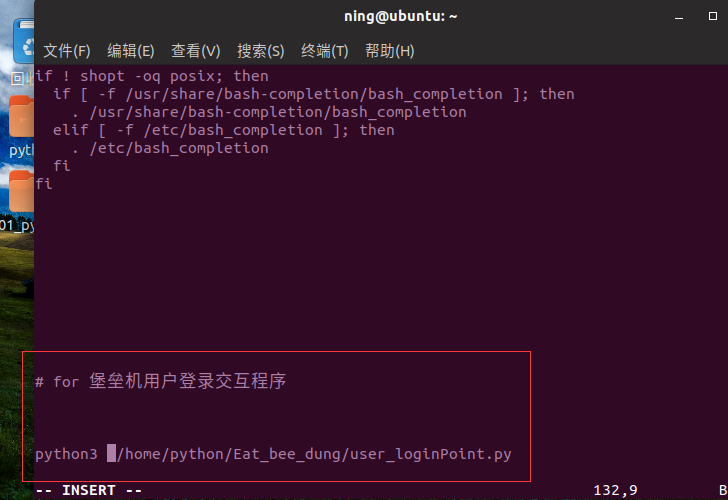
我们将这条指令插入到 .bashrc 文件 保存退出 ok
然后你去登录你这个堡垒机账户 就会默认执行我们用户登录交互程序
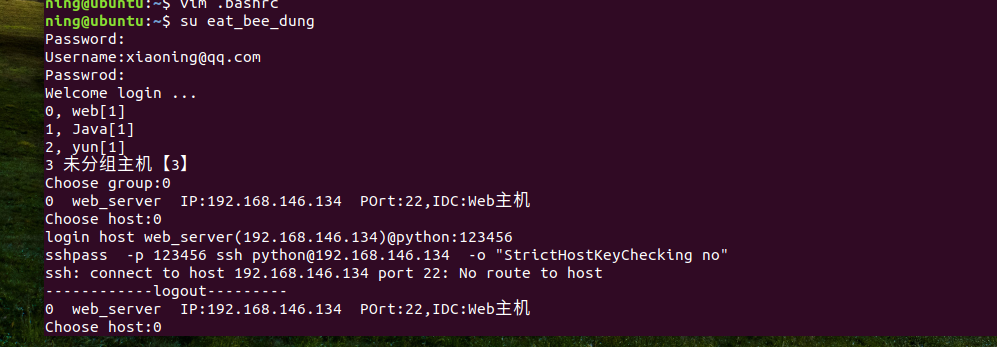
此时我的主机没有打开 不能登录 所以显示的是这个效果
现在我们的工作已经完成一半 那么我们下回分解