前言
作为曾经的Windows客户端程序员,对微软的技术实力还是相当佩服的。不过随着互联网的大发展,微软长期以来的封闭策略不受广大程序员的待见。看着Java、Python、PHP等语言在服务端受到热捧,Go, Elixer,Rust等后起之秀也广受关注,Node更时激发了各种奇怪设计的Javascript焕发出洪荒之力,大有一统前后端的气势。微软坐不住了,于是开源了.Net,经过近2年的努力开发,.Net Core 1.0 版本发布。让我们抛开偏见,试一下微软最大尺度的开源作品吧。
安装.NET Core
安装很简单,各个平台的下载地址可以在主页找到:https://www.microsoft.com/net/core 因为本人不想使用宇宙第一大IDE来安装.NET Core, 所有选择单独安装包,https://go.microsoft.com/fwlink/?LinkID=827524 下载,运行,一下搞定。打开命令行,输入dotnet, 结果如下:
Microsoft .NET Core Shared Framework Host

  Version  : 1.0.1
  Build    : cee57bf6c981237d80aa1631cfe83cb9ba329f12

Usage: dotnet [common-options] [[options] path-to-application]

Common Options:
  --help                           Display .NET Core Shared Framework Host help.

  --version                        Display .NET Core Shared Framework Host versi
on.

Options:
  --fx-version <version>           Version of the installed Shared Framework to use to run the application.
  --additionalprobingpath <path>   Path containing probing policy and assemblies to probe for.

Path to Application:
  The path to a .NET Core managed application, dll or exe file to execute.

If you are debugging the Shared Framework Host, set 'COREHOST_TRACE' to '1' in your environment.

To get started on developing applications for .NET Core, install .NET SDK from:
  http://go.microsoft.com/fwlink/?LinkID=798306&clcid=0x409
说明安装好了。
创建第一个程序
在命令行下,输入如下命令:
D:\devs\dot>mkdir core
D:\devs\dot>cd core
D:\devs\dot\core>mkdir start
D:\devs\dot\core>cd start
D:\devs\dot\core\start>dotnet new

Welcome to .NET Core!
---------------------
Learn more about .NET Core @ https://aka.ms/dotnet-docs. Use dotnet --help to se
e available commands or go to https://aka.ms/dotnet-cli-docs.
Telemetry
--------------
The .NET Core tools collect usage data in order to improve your experience. The
data is anonymous and does not include commandline arguments. The data is collec
ted by Microsoft and shared with the community.
You can opt out of telemetry by setting a DOTNET_CLI_TELEMETRY_OPTOUT environmen
t variable to 1 using your favorite shell.
You can read more about .NET Core tools telemetry @ https://aka.ms/dotnet-cli-te
lemetry.
Configuring...
-------------------
A command is running to initially populate your local package cache, to improve
restore speed and enable offline access. This command will take up to a minute t
o complete and will only happen once.
Decompressing 100% 2948 ms
Expanding 100% 17535 ms
Created new C# project in D:\devs\dot\core\start.
程序创建完毕。
运行程序
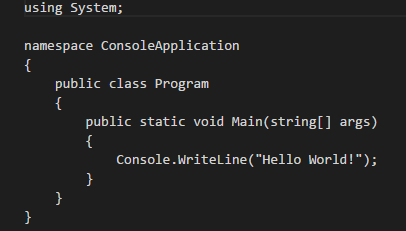
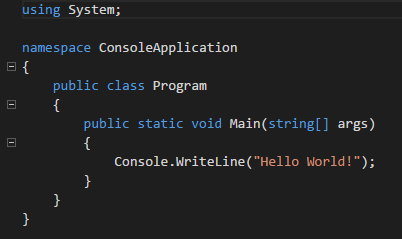
刚刚的dotnet new命令创建了两个文件:Program.cs和project.json。其中,Program.cs是C#程序文件,project.json是工程配置文件,和其他语言的配置文件类似,包含程序的版本和依赖信息。要编译程序,首先需要把这些依赖都给解决了,所以需要运行 dotnet restore 命令,下载相应的依赖。
D:\devs\dot\core\start>dotnet restore
log  : Restoring packages for D:\devs\dot\core\start\project.json...
log  : Writing lock file to disk. Path: D:\devs\dot\core\start\project.lock.json

log  : D:\devs\dot\core\start\project.json
log  : Restore completed in 2445ms.
然后使用命令 dotnet run 编译并运行
D:\devs\dot\core\start>dotnet run
Project start (.NETCoreApp,Version=v1.0) will be compiled because expected outputs are missing
Compiling start for .NETCoreApp,Version=v1.0

Compilation succeeded.
    0 Warning(s)
    0 Error(s)

Time elapsed 00:00:01.7660521


Hello World!
看到熟悉的Hello World! 说明运行成功。
调试程序
至此,高水平程序员已经可以开始用记事本开心的编写程序了。作为懒惰的程序员,当然无法忍受这样费力的方式啦。对Visual Studio Code做一番配置,使其作为一个C# 轻量IDE。
- 安装ms-vscode.csharp扩展以支持C#语法高亮


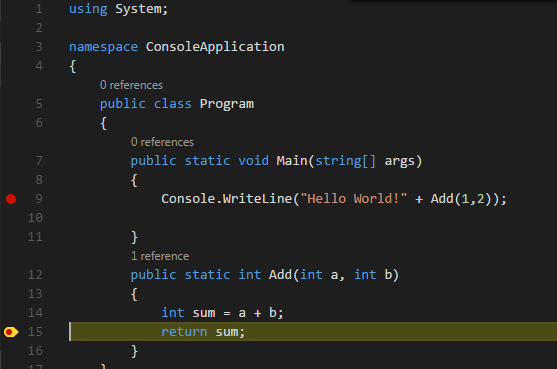
- 断点调试
按F5快捷键就可以启动调试了,第一次调试,会生成一个.vscode文件夹,在文件夹下面创建两个文件: tasks.json 和 launch.json,task.json里包含运行调试的各种命令,默认是一个build命令。这个命令在luanch.json里的preLaunchTask": "build"被调用。launch.json包含各个调试配置,默认生成三种启动调试的方式:
- .NET Core Launch (console)
- .NET Core Launch (web)
- .NET Core Attach
默认是console方式启动调试。正常情况,启动调试的配置文件会把program配置改成项目的目录,如果您的program还是"program": "${workspaceRoot}/bin/Debug/<target-framework>/<project-name.dll>",这样的形势,说明没有自动变换路径,手动改一下,改成 "program": "${workspaceRoot}/bin/Debug/netcoreapp1.0/start.dll",其中 start.dll是项目名,默认与文件夹同名。
如果在程序中加了断点,那么这个时候就能停下来。

编译输出
程序写好了,需要发布大到其他机器运行,.Net Core 有两种发布形式:
- Portable apps 这是默认的发布形式,运行命令dotnet puhlish, 会多出一个publish目录,里面没有exe,对,没有!这个程序的运行,需要借助于.net core runtime. 因此这种发布形式,要求目标机器需要有.net core的运行环境。 生成Portable apps很简单,运行命令 dotnet publish 就好了。为了验证程序是否能正常运行,把整个publish文件夹拷贝到别处,然后用命令行打开,进入publish目录,运行命令 dotnet start.dll
D:\publish>dotnet start.dll
Hello World!3
运行成功。如果要编一个release, 加上release选项:dotnet publish -c release
- Standalone apps 顾名思义,这种形式不需要.net core runtime, 会生成独立的exe文件。由于不是默认形式,所以要做一点小修改。打开project.json文件,注释掉"type": "platform",添加runtimes节点,如下所示:
{
  "version": "1.0.0-*",
  "buildOptions": {
    "debugType": "portable",
    "emitEntryPoint": true
  },
  "dependencies": {},
  "frameworks": {
    "netcoreapp1.0": {
      "dependencies": {
        "Microsoft.NETCore.App": {
          //"type": "platform",
          "version": "1.0.1"
        }
      },
      "imports": "dnxcore50"
    }
  },
  "runtimes": {
    "win10-x64": {},
    "osx.10.10-x64": {}
  }
}
运行命令
dotnet restore
dotnet build -r win10-x64
debug目录下会出现一个win10-x64文件夹,里面有久违的exe文件啦。