本文目录
一.ORM简介
二.全局配置
三.搞搞搞
一.ORM简介
.ORM是“对象-关系-映射”的简称
.MVC或者MTV框架中包括一个重要的部分,就是ORM,它实现了数据模型与数据库的解耦,即数据模型的设计不需要依赖于特定的数据库,通过简单的配置就可以,轻松更换数据库,这极大的减轻了开发人员的工作量,不需要面对因数据库变更而导致的无效劳动.
二.全局配置
.单表是相对简单的Django项目,我们再次进行对单表的增删改查操作,话不多说,项目开始。
1.setting.py 文件配置静态路径。
setting.py
STATIC_URL = '/static/'
STATICFILES_DIRS=[
    os.path.join(BASE_DIR,'static'),
]
2.同时禁用setting.py文件里面 一个Csrf中间件。
setting.py
MIDDLEWARE = [
    'django.middleware.security.SecurityMiddleware',
    'django.contrib.sessions.middleware.SessionMiddleware',
    'django.middleware.common.CommonMiddleware',
    # 'django.middleware.csrf.CsrfViewMiddleware',
    'django.contrib.auth.middleware.AuthenticationMiddleware',
    'django.contrib.messages.middleware.MessageMiddleware',
    'django.middleware.clickjacking.XFrameOptionsMiddleware',
]
3.我们在这里使用MySQL数据库,顺便先配置下。
setting.py
DATABASES = {
    # 'default': {
    #     'ENGINE': 'django.db.backends.sqlite3',
    #     'NAME': os.path.join(BASE_DIR, 'db.sqlite3'),
    # }
'default': {
        'ENGINE': 'django.db.backends.mysql',
        'NAME': 'db3', #数据库名称
        'HOST':'127.0.0.1', #地址,默认
        'PORT':3306,
        'USER':'root',
        'PASSWORD':'', #密码,我没设密码,用自己设置的密码
    }
}
4.在项目目录下找到__init__.py文件.(切记是在本项目的目录下)。这句话的作用是使用MySQL代替
sqlite3数据库。
__init__.py
import pymysql
pymysql.install_as_MySQLdb()
总结:到此我们的项目已经基本配置完成了,需要注意的就是__init__.py文件的配置位置。

一。接下来就是写项目了。项目的基本流程是。URL进去--视图函数(返回相对应的页面)--前端返回数据--视图函数处理数据--保存进数据库。

.1.既然是要操作表格,那就必须要有表格是不是,那我们就先弄出一个表格出来,怎么弄呢??
  别急,在弄出表格之前我们还有一步要走,生成app,这个可不是手机里的app哦。
 指令
python manage.py startapp app01

这时就生成一个app了。我们生成表格就是在app里面的models文件里面编写。
.2 编写models.py
models.py
from django.db import models

# Create your models here.


class Book(models.Model):
    nid=models.AutoField(primary_key=True)
    name=models.CharField(max_length=64)
    age=models.IntegerField()
    hobby=models.CharField(max_length=32)
    date=models.DateField()
    price=models.DecimalField(max_digits=8,decimal_places=2)
.3.进行数据迁移命令:
python manage.py makemigrations
python manage.py migrate
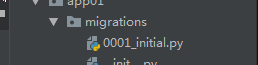
.4.可以看到在app01的migrations文件里多出0001_initial.py这个文件,这个就是迁移记录。
.5.我们这里用可视化工具来看,步骤如下。
。1.pychram右上角点击打开“Database”。

。2.点击加号选择MySQL。

。3.下载驱动,配置相关信息。

。4.配置完成后点击“Test Connection”连接。这个就可以直观的看到表格吗,如下图:

二.写代码了.
1>.配置urls.py
urlpatterns = [
    path('admin/', admin.site.urls),
    path('look_book/', views.look_book),  #查
    path('add_book/', views.add_book),   #增
    path('delete_book/', views.delete_book),  #删
    path('edit_book/', views.edit_book),   #改
    # path('index/', views.index),
]
2>.视图:
view.py
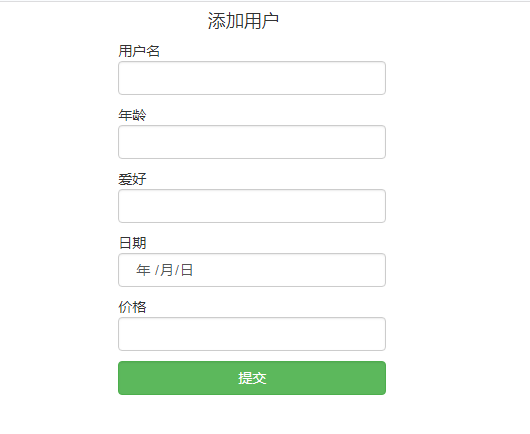
# 增加
def add_book(request):
    if request.method=='POST':
        nid=request.POST.get('nid')
        name=request.POST.get('name')
        age=request.POST.get('age')
        hobby=request.POST.get('hobby')
        date=request.POST.get('date')
        price=request.POST.get('price')

        Book.objects.create(nid=nid,name=name,age=age,hobby=hobby,date=date,price=price)
        return redirect('/look_book/')
    return render(request, 'add_book.html')
html
#增
<!DOCTYPE html>
<html lang="en">
<head>
    <meta charset="UTF-8">
    <link rel="stylesheet" href="/static/bootstrap-3.3.7-dist/css/bootstrap.css">
    <title>添加用户</title>
</head>
<body>
    <div class="row">
        <div class="col-md-3 col-md-offset-4">
        <h4 class="col-md-offset-4">添加用户</h4>
            <form action="" method="post">
                <p>用户名<input type="text" name="name" class="form-control"></p>
                <p>年龄<input type="text" name="age" class="form-control"></p>
                <p>爱好<input type="text" name="hobby" class="form-control"></p>
                <p>日期<input type="date" name="date" class="form-control"></p>
                <p>价格<input type="text" name="price" class="form-control"></p>
                <p><input type="submit" value="提交" class="form-control btn btn-success"></p>
            </form>
        </div>
    </div>
</body>
</html>
效果图:
#查
view.py
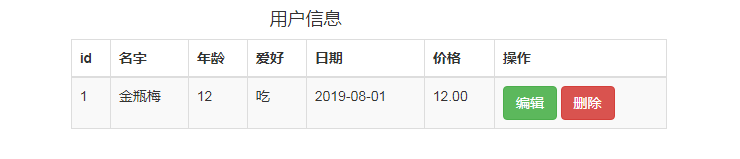
# 查看
def look_book(request):
    look_book=Book.objects.all()
    return render(request,'look_book.html',{'look_book':look_book})
html
#查
<!DOCTYPE html>
<html lang="en">
<head>
    <meta charset="UTF-8">
    <link rel="stylesheet" href="/static/bootstrap-3.3.7-dist/css/bootstrap.css">
    <title>添加用户</title>
</head>
<body>
   <div class="row">
        <div class="container">
           <div class="col-md-8 col-md-offset-2">
               <h4 class="col-md-offset-4">用户信息</h4>
               <table class="table table-striped table-hover table-bordered">
                   <thead>
                        <tr>
                            <th>id</th>
                            <th>名字</th>
                            <th>年龄</th>
                            <th>爱好</th>
                            <th>日期</th>
                            <th>价格</th>
                            <th>操作</th>
                        </tr>
                   </thead>
                   <tbody>
                        {% for book in look_book %}
                            <tr>
                                <td>{{ book.nid }}</td>
                                <td>{{ book.name }}</td>
                                <td>{{ book.age }}</td>
                                <td>{{ book.hobby }}</td>
                                <td>{{ book.date|date:"Y-m-d" }}</td>
                                <td>{{ book.price }}</td>
                                <td>
                                    <a href="/edit_book/?nid={{ book.nid }}" class="btn btn-success">编辑</a>
                                    <a href="/delete_book/?nid={{ book.nid }}" class="btn btn-danger">删除</a>
                                </td>
                            </tr>
                        {% endfor %}
                   </tbody>
               </table>
           </div>
        </div>
   </div>
</body>
</html>
效果图:
#改
view.py
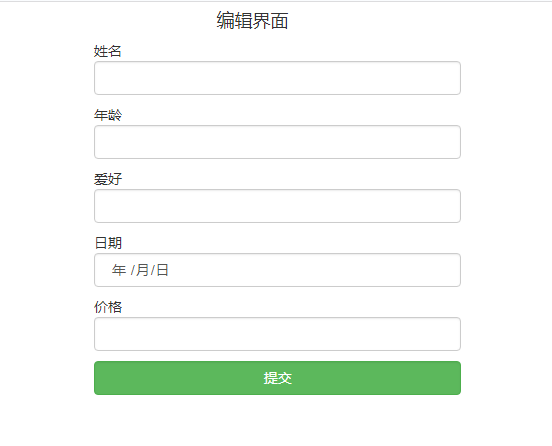
# 改

def edit_book(request):
    if request.method=='POST':
        nid=request.POST.get('nid')
        name=request.POST.get('name')
        age=request.POST.get('age')
        hobby=request.POST.get('hobby')
        date=request.POST.get('date')
        price=request.POST.get('price')
        Book.objects.filter(pk=nid).update(name=name,age=age,hobby=hobby,date=date,price=price)

        return redirect('/look_book/')

    nid=request.GET.get('nid')
    editbook=Book.objects.filter(nid=nid).first()
    return render(request,'edit_book.html',{'editbook':editbook})
html
#改
<!DOCTYPE html>
<html lang="en">
<head>
    <meta charset="UTF-8">
    <link rel="stylesheet" href="/static/bootstrap-3.3.7-dist/css/bootstrap.css">
    <title>编辑界面</title>
</head>
<body>
    <div class="row">
        <div class="col-md-4 col-md-offset-3">
            <h4 class="col-md-offset-4">编辑界面</h4>
            <form action="" method="post">
                <p> <input type="hidden" name="nid" value="{{ editbook.nid }}"></p>
                <p>姓名 <input type="text" name="name" value="{{ editbook.name }}" class="form-control"></p>
                <p>年龄 <input type="text" name="age" value="{{ editbook.age }}" class="form-control"></p>
                <p>爱好 <input type="text" name="hobby" value="{{ editbook.hobby }}" class="form-control"></p>
                <p>日期 <input type="date" name="date" value="{{ editbook.date }}" class="form-control"></p>
                <p>价格 <input type="text" name="price" value="{{ editbook.price }}" class="form-control"></p>
                <p><input type="submit" value="提交" class="form-control btn btn-success"></p>
            </form>
        </div>
    </div>
</body>
</html>
效果图:
#删
view.py
# 删
def delete_book(request):

    nid=request.GET.get('nid')
    Book.objects.filter(nid=nid).delete()
    return redirect('/look_book/')