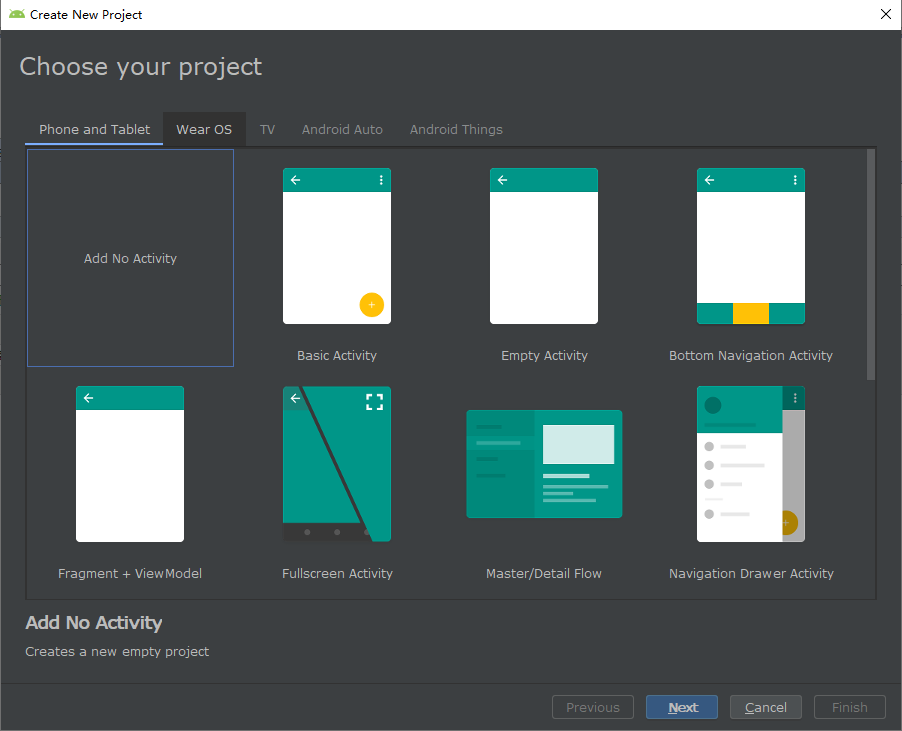
一、在创建项目时选择:Add No Activity。其他保持不变
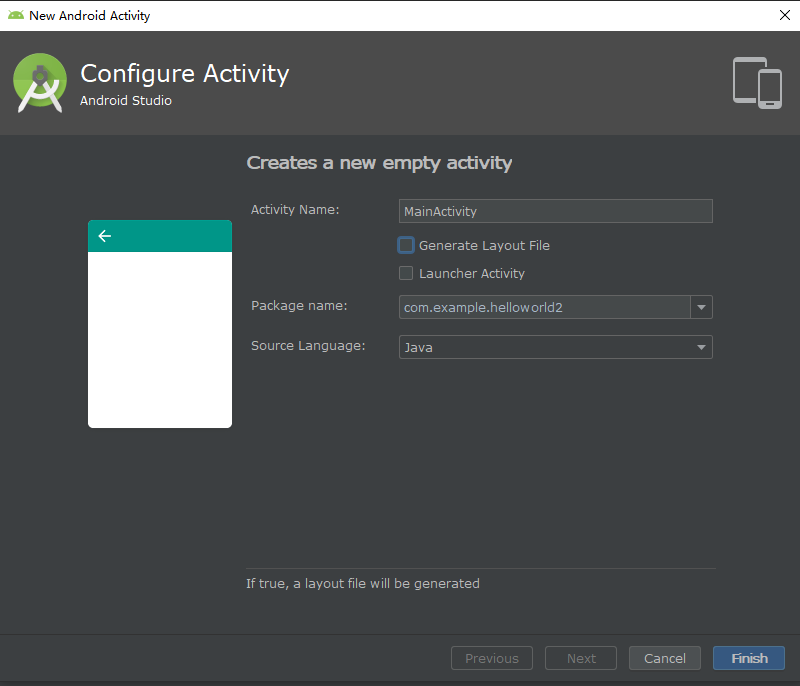
二、添加Empty Activity。注意取消自动创建Layout的选项,因为这里想要手动创建体验。
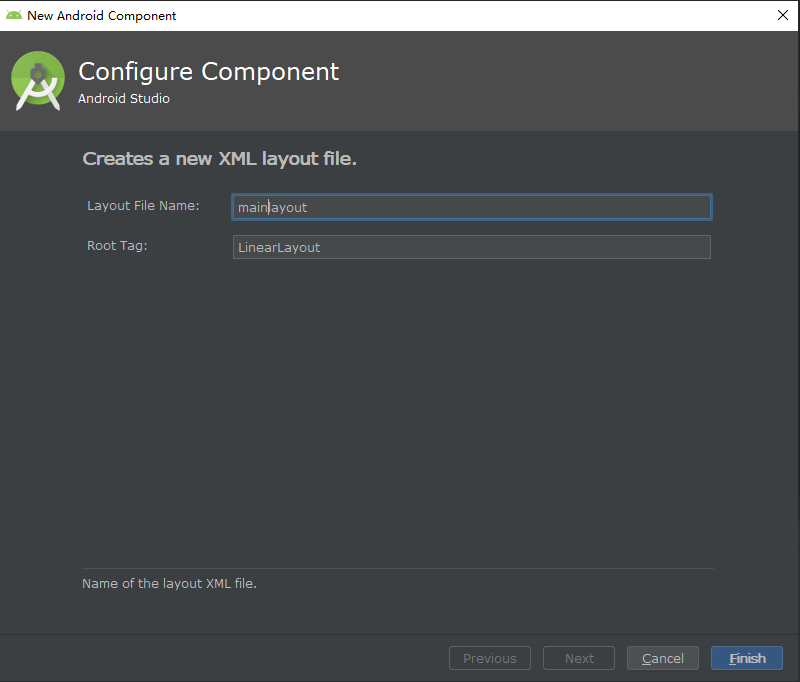
三、在res文件夹下添加layout文件夹
四、添加Layout文件。保持默认使用线性布局LinearLayout
五、在layout中添加TextView并设置显示文本为Hello World
<?xml version="1.0" encoding="utf-8"?>
<LinearLayout xmlns:android="http://schemas.android.com/apk/res/android"
    android:layout_width="match_parent"
    android:layout_height="match_parent">

    <TextView
        android:id="@+id/textView"
        android:layout_width="wrap_content"
        android:layout_height="wrap_content"
        android:layout_weight="1"
        android:text="Hello World!" />
</LinearLayout>
六、在AndroidManifest文件中注册MainActivity。其实创建Activity时,IDE已经自动注册了,这里只需要将MainActivity设置为主活动
<?xml version="1.0" encoding="utf-8"?>
<manifest xmlns:android="http://schemas.android.com/apk/res/android"
package="com.example.helloworld2">

<application
    android:allowBackup="true"
    android:icon="@mipmap/ic_launcher"
    android:label="@string/app_name"
    android:roundIcon="@mipmap/ic_launcher_round"
    android:supportsRtl="true"
    android:theme="@style/AppTheme">
    <activity android:name=".MainActivity">
        <intent-filter>
            <action android:name="android.intent.action.MAIN"/>
            <category android:name="android.intent.category.LAUNCHER"/>
        </intent-filter>
    </activity>
</application>

</manifest>
七、在MainActivity中设置Layout
package com.example.helloworld2;

import androidx.appcompat.app.AppCompatActivity;

import android.os.Bundle;

public class MainActivity extends AppCompatActivity {

    @Override
    protected void onCreate(Bundle savedInstanceState) {
        super.onCreate(savedInstanceState);
        setContentView(R.layout.mainlayout);
    }
}
八、运行。APP即可正常运行并看到Hello World