一,准备内容
IdentityServer4 是Asp.net core的一个中间件,用于添加符合OpenId Connect和OAuth2.0规范的终端到Asp.net Core应用。在这里简单介绍一下Openid和OAuth2.0。
OpenId:用户身份认证(Authentication )。当用户(End User)在微信、Google等OpenId提供者(OpenID Provider)平台注册账户时会产生一个身份标识,这个身份标识就是OpenId,当用户登录第三方应用(Relying Part)时如果Relying Part支持OpenId登录,会生成一个带有重定向地址的Url跳至OpenId Provider平台登录界面,用户登录成功后,根据重定向地址带着OpenId跳回Relying Part,标识着用户身份认证成功,该用户在OpenId Provider平台有注册。Relying Part根据OpenId自动注册账户,至此身份认证结束。有时Relying Part需要从Openid Provider那获取该用户的更多信息或资源,OpenId Provider需要对Relying Part的请求进行授权管理,这时就用要到OAuth2.0。
OAuth2.0:用户访问授权(Authorization)。OAuth2.0是一个JWT(Json Web Token ,Json格式Web令牌)解决方案。其最终目的是给用户一个包含加密令牌的JSON字符串,这个令牌内包含授权信息,决定了该用户可以访问那些资源。OAuth2.0协议规定了4种取得令牌的方式,可以参考这篇文章OAuth2.0的四种方式。
Openid Connect:实际上就是将Openid与OAuth2.0结合起来,解决身份认证和身份授权的问题。
二,创建Asp.net Core 项目
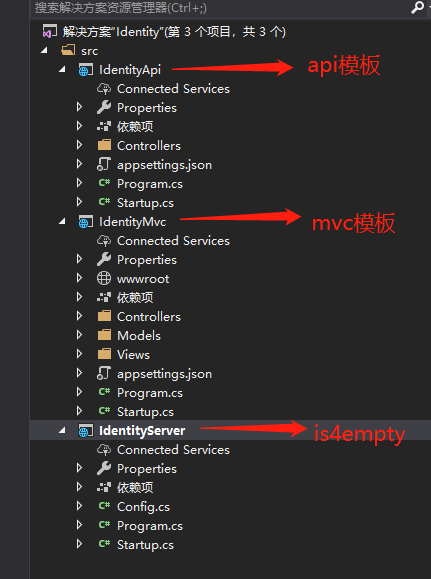
微软提供了一些针对IdentityServer4的项目模板,在命令行中输入” dotnet new -i IdentityServer4.Templates“即可安装,安装好后可以看到当前已安装的项目模板,其中有一个"is4empty",其实就是一个asp.net core 应用装了IdentityServer4包。在命令行中输入:dotnet new is4empty -n Projectname 就会根据这个模板生成一个新项目。下图是我的项目,一个api客户端、一个mvc客户端,一个identityserver4服务端
- 配置IdentityServer服务器,如果是用的is4empty模板创建的项目,已经有一些简单配置,可以慢慢去深化
  public void ConfigureServices(IServiceCollection services)
        {
            //添加IdentityServer
            var builder = services.AddIdentityServer()
                //身份信息授权资源
                .AddInMemoryIdentityResources(Config.GetIdentityResources())
                //API访问授权资源
                .AddInMemoryApiResources(Config.GetApis())
                //添加客户端
                .AddInMemoryClients(Config.GetClients());

            if (Environment.IsDevelopment())
            {
                builder.AddDeveloperSigningCredential();
            }
            else
            {
                throw new Exception("need to configure key material");
            }
        }

        public void Configure(IApplicationBuilder app)
        {
            if (Environment.IsDevelopment())
            {
                app.UseDeveloperExceptionPage();
            }
            //使用IdentityServer中间件
            app.UseIdentityServer();
        }
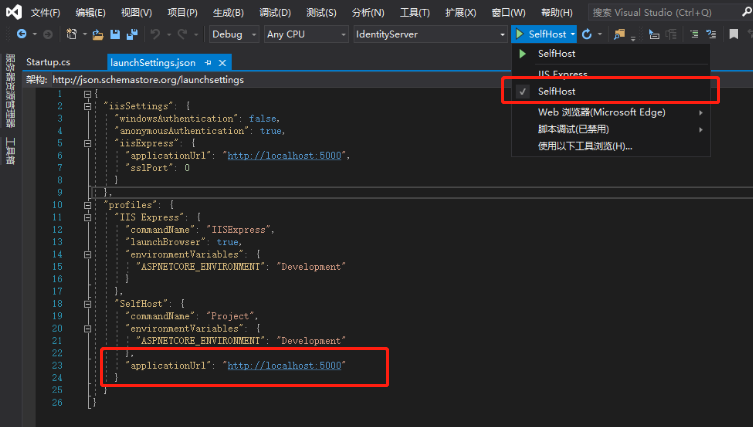
为了能更好的查看调试日志,使用Kestrel调试,可以在Properties/launchSettings.json中可以更改监听地址,默认为5000
启动项目后使用浏览器打开:http://localhost:5000/.well-known/openid-configuration。可以看到identityserver4的discover说明。
IdentityServer4服务端配置完后,接下来就是如何用IdentityServer4去守护接口安全。前边说过OAuth2.0有四种方式获取令牌,先尝试一下最为简单的客户端模式。
修改IdentityServer项目的Config类的GetClients方法,添加一个api资源(ApiResource)。每个被保护的API项目必需有对应一个ApiResource,一个ApiResource可以有被多个API标识,客户端请求令牌时根据ApiResource名称决定是否有权限访问这个API。
   public static IEnumerable<ApiResource> GetApis()
        {
            return new ApiResource[] {
                //secretapi:标识名称,Secret Api:显示名称,可以自定义
                new ApiResource("secretapi","Secret Api")
            };
        }
定义好ApiResouce后,再来添加一个客户端,使得这个客户端可以访问secretapi这个资源。修改Config类中的GetClients方法,添加一个用户。
public static IEnumerable<Client> GetClients()
        {
            return new Client[] {

                new Client()
                {
                    //客户端Id
                     ClientId="apiClientCd",
                     //客户端密码
                     ClientSecrets={new Secret("apiSecret".Sha256()) },
                     //客户端授权类型,ClientCredentials:客户端凭证方式
                     AllowedGrantTypes=GrantTypes.ClientCredentials,
                     //允许访问的资源
                     AllowedScopes={
                        "secretapi"
                    }
                }
            };
        }
Identity服务端的配置就完成了,再转到IdentityApi项目
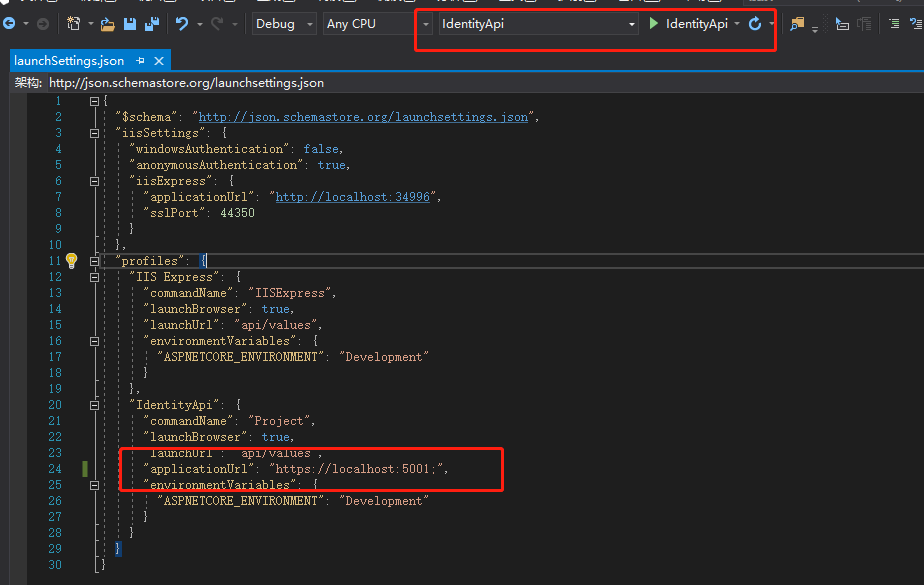
- 配置API项目监听端口和调试方式
- 配置Api项目认证
API-Startup.cs
public void ConfigureServices(IServiceCollection services)
        {
            services.AddMvc().SetCompatibilityVersion(CompatibilityVersion.Version_2_2);
            services.AddAuthentication("Bearer").AddJwtBearer(r => {
                //认证地址
                r.Authority = "http://localhost:5000";
                //权限标识
                r.Audience = "secretapi";
                //是否必需HTTPS
                r.RequireHttpsMetadata = false;
            });
        }

        // This method gets called by the runtime. Use this method to configure the HTTP request pipeline.
        public void Configure(IApplicationBuilder app, IHostingEnvironment env)
        {
            if (env.IsDevelopment())
            {
                app.UseDeveloperExceptionPage();
            }
            else
            {
                // The default HSTS value is 30 days. You may want to change this for production scenarios, see https://aka.ms/aspnetcore-hsts.
                app.UseHsts();
            }
            app.UseHttpsRedirection();
            //使用认证中间件
            app.UseAuthentication();
            app.UseMvcWithDefaultRoute();
        }
添加一个空的API控制器:IdentityController,添加一个Api:GetUserClaims
  [ApiController]
    public class IdentityController : ControllerBase
    {
        [HttpGet]
        [Route("api/identity")]
        [Microsoft.AspNetCore.Authorization.Authorize]
        public object GetUserClaims()
        {
            return User.Claims.Select(r => new { r.Type, r.Value });
        }
    }
这时GetUserClaims这个Api是访问不了的,用PostMan访问时返回401未认证状态

要能访问这个Api必需从IdentityServer服务端获取Token
- 从后台获取Token
在控制器 IdentityController里添加一个Api:getToken,需要从Nuget安装一个"IdentityModel" 包,IdentityModel封装了一系统Openid connect & OAuth2.0的访问方法。
        [HttpGet]
        [Route("api/getToken")]
        public async Task<object> GetCdTokenAsync(string type)
        {
            var client = new HttpClient();
            var disco = await client.GetDiscoveryDocumentAsync("http://localhost:5000");
            TokenResponse resp = null;
            switch (type)
            {
                case "cd":
                    resp = await client.RequestClientCredentialsTokenAsync(new ClientCredentialsTokenRequest
                    {
                        Address = disco.TokenEndpoint,
                        ClientId = "apiClientCd",
                        ClientSecret = "apiSecret",
                        Scope = "secretapi"
                    });
                    break;
            }
            return resp?.Json;
        }
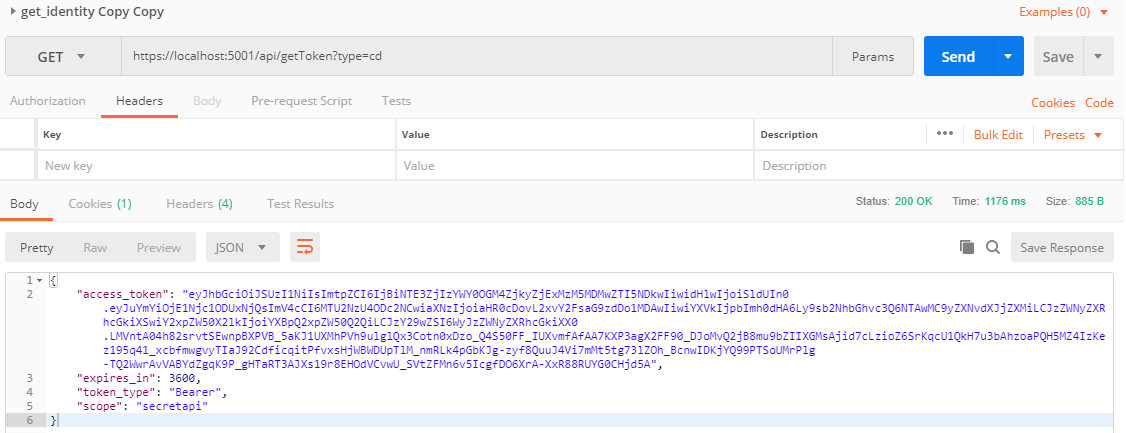
然后从postMan访问这个 https://localhost:5001/api/getToken?type=cd,可以看到已经返回Token
- 通过HTTP请求获取
IdentityModel只是封装了HTTP请求,当然也可以直接通过HTTP请求,直接打开http://localhost:5000/.well-known/openid-configuration,找到token_endpoint节点

使用PostMan对该节点发送如下Post请求,也能获取到Token

- 访问被保护的Api
由于使用的是Bearer认证机制,所以添加一个名为Authorization的Http请求头,请求头的内容是字符串“Bearer”+空格+获取到的Token:Bearer Token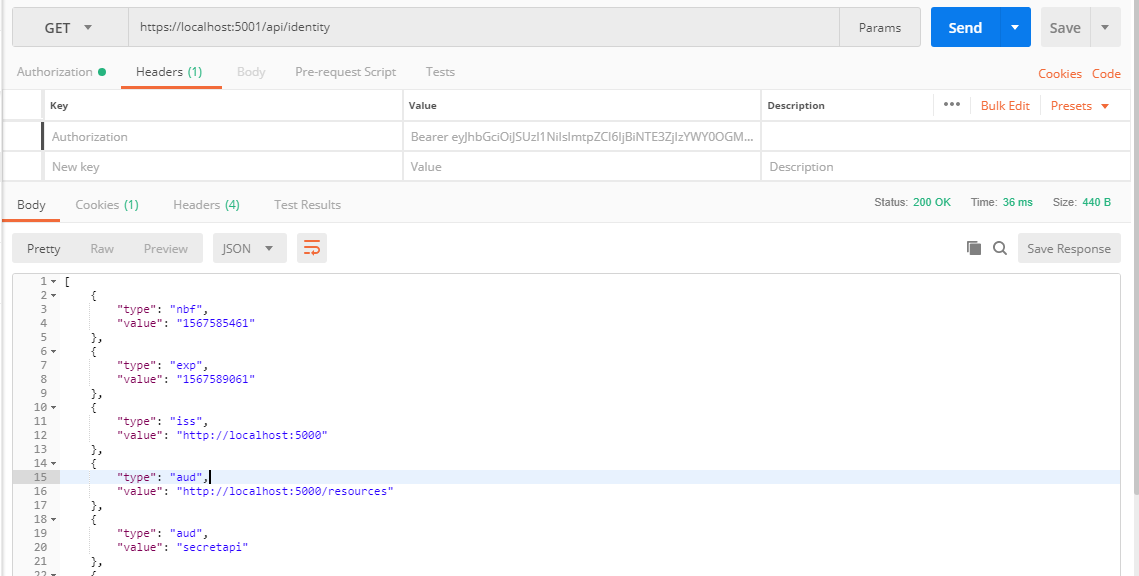
当然IdentityModel也封装了这样的请求,可以用如下的代码访问API,把getToken api改一下,加一个request参数,方便调试
 [HttpGet]
        [Route("api/getToken")]
        public async Task<object> GetCdTokenAsync(string type,bool? request)
        {
            var client = new HttpClient();
            var disco = await client.GetDiscoveryDocumentAsync("http://localhost:5000");
            TokenResponse resp = null;
            switch (type)
            {
                case "cd":
                    resp = await client.RequestClientCredentialsTokenAsync(new ClientCredentialsTokenRequest
                    {
                        Address = disco.TokenEndpoint,
                        ClientId = "apiClientCd",
                        ClientSecret = "apiSecret",
                        Scope = "secretapi"
                    });
                    break;
            }
            if (request??false&&null!=resp)
            {
                client.SetBearerToken(resp.AccessToken);
                var reslut =await client.GetStringAsync("https://localhost:5001/api/identity");
                JArray json = JArray.Parse(reslut);
                return json;
            }
            return resp?.Json;
        }
请求https://localhost:5001/api/getToken?type=cd&request=true 会先请求Token,再访问被守护的api
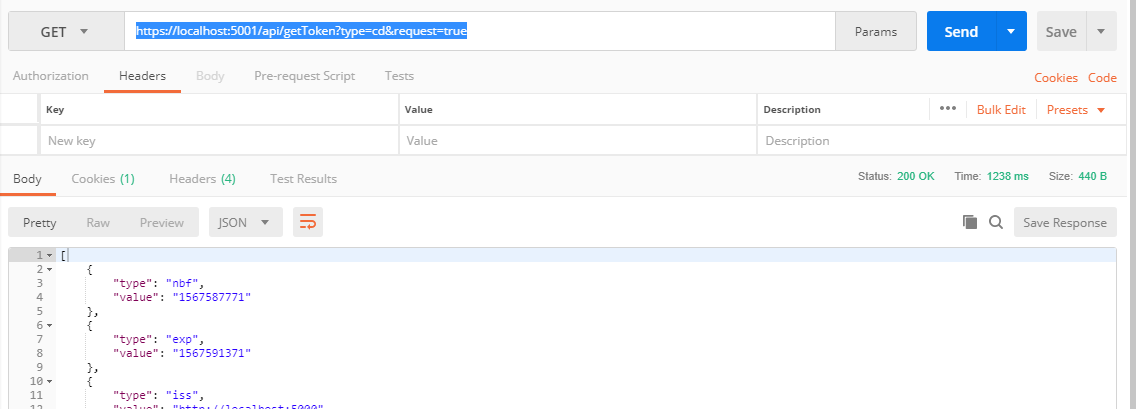
客户端模式只针对客户端授权,没有涉及到用户,如果被调用的Api需要知道一些用户的信息,或者权限管理是不能被满足的,下一节讲一讲IdentityServer4的密码模式访问被保护的API.