最近要使用python调用C++编译生成的DLL动态链接库,因此学习了一下ctypes库的基本使用。
ctypes是一个用于Python的外部函数库,它提供C兼容的数据类型,并允许在DLL或共享库中调用函数。
一、Python调用DLL里面的导出函数
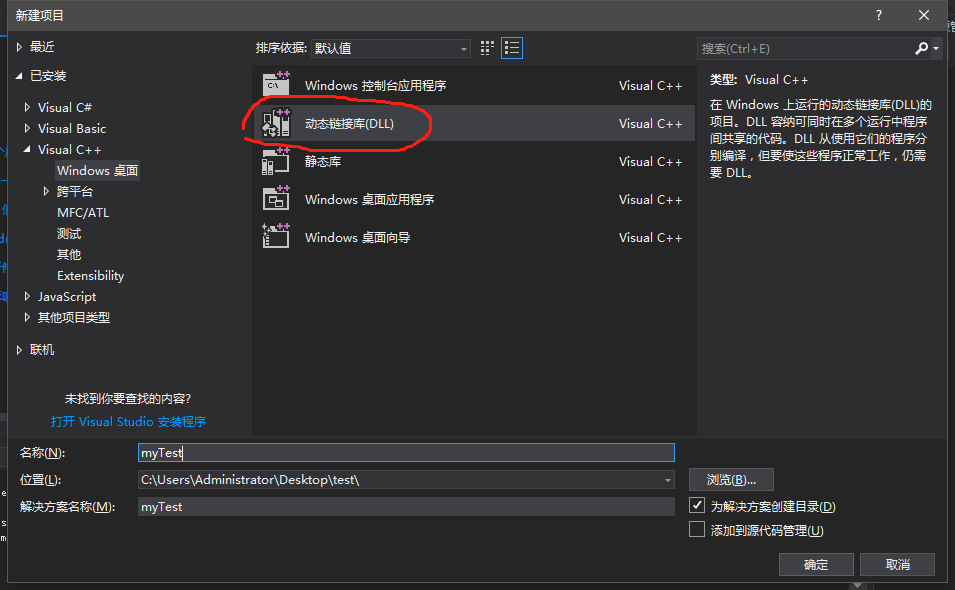
1.VS生成dll
1.1 新建动态链接库项目
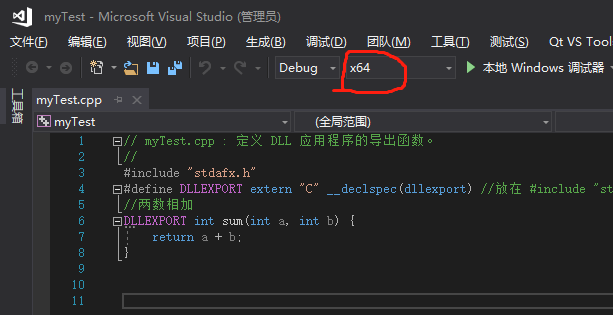
1.2 在myTest.cpp中输入以下内容:
// myTest.cpp : 定义 DLL 应用程序的导出函数。
//
#include "stdafx.h"
#define DLLEXPORT extern "C" __declspec(dllexport) //放在 #include "stdafx.h" 之后
//两数相加
DLLEXPORT int sum(int a, int b) {
    return a + b;
}
注意:导出函数前面要加 extern "C" __declspec(dllexport) ,这是因为ctypes只能调用C函数。如果不用extern "C",构建后的动态链接库没有这些函数的符号表。采用C++的工程,导出的接口需要extern "C",这样python中才能识别导出的函数。
1.3生成dll动态链接库
因为我的python3是64位的,所以VS生成的dll要选择64位的,如下所示:
点击标题栏的 生成 -> 生成解决方案

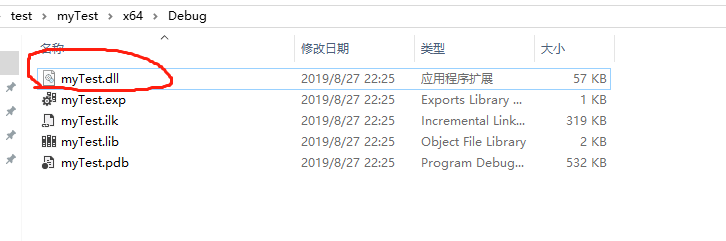
1.4 查看生成的dll动态链接库
2.Python导入dll动态链接库
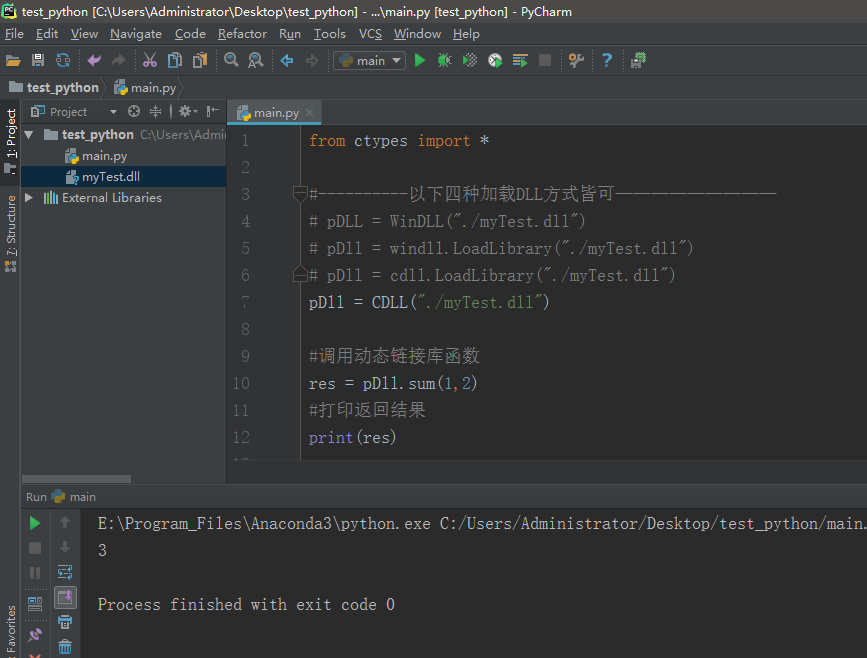
用python将动态链接库导入,然后调用动态链接库的函数。为此,新建main.py文件,输入如下内容:
from ctypes import *

#----------以下四种加载DLL方式皆可—————————
# pDLL = WinDLL("./myTest.dll")
# pDll = windll.LoadLibrary("./myTest.dll")
# pDll = cdll.LoadLibrary("./myTest.dll")
pDll = CDLL("./myTest.dll")

#调用动态链接库函数
res = pDll.sum(1,2)
#打印返回结果
print(res)
运行结果如下所示:
二、Python调用DLL里面的实例方法更新全局变量值
1.VS生成dll
1.1 添加 mainClass 类,内容如下:
mainClass.h:
#pragma once

extern int dta;
class mainClass
{
public:
    mainClass();
    ~mainClass();
    void produceData();
};
mainClass.cpp:
#include "stdafx.h"
#include "mainClass.h"

int dta = 0;

mainClass::mainClass()
{
}

mainClass::~mainClass()
{
}

void mainClass::produceData() {
    dta = 10;
}
1.2 更改 myTest.cpp 内容
myTest.cpp:
#include "stdafx.h"
#define DLLEXPORT extern "C" __declspec(dllexport) //放在 #include "stdafx.h" 之后
#include "mainClass.h"

//返回实例方法里面更新数据后的值
DLLEXPORT int getRandData() {
    mainClass dataClass = mainClass();
    dataClass.produceData();
    return dta;
}
1.3 生成64位dll
2.Python导入dll动态链接库
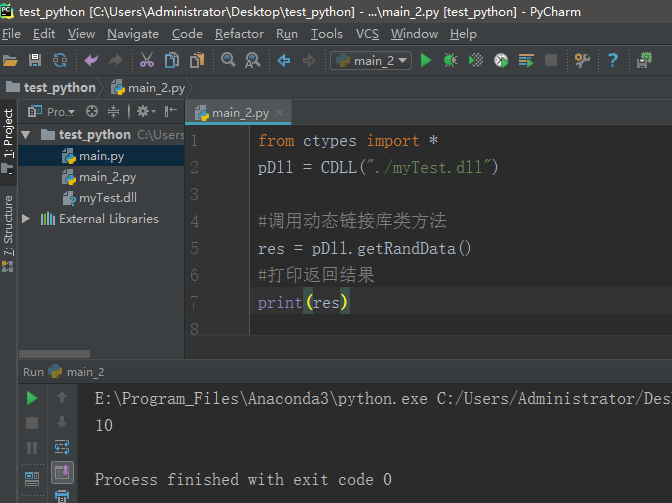
明显可以看出,在C++里设置的全局变量的值已经从0变为10了,说明python可以通过调用dll里面的实例方法来更新全局变量值