@Import 注解出自spring-context包中
package org.springframework.context.annotation;

import java.lang.annotation.Documented;
import java.lang.annotation.ElementType;
import java.lang.annotation.Retention;
import java.lang.annotation.RetentionPolicy;
import java.lang.annotation.Target;

@Target({ElementType.TYPE})
@Retention(RetentionPolicy.RUNTIME)
@Documented
public @interface Import {
    Class<?>[] value();
}
该注解主要是用作导入一个配置类(Configuration),正常我们创建一个配置文件,都是在 @SpringBootApplication 的可扫描范围内,然后业务在使用到这个配置的时候,直接 @Autowired 注入就可以正常使用。
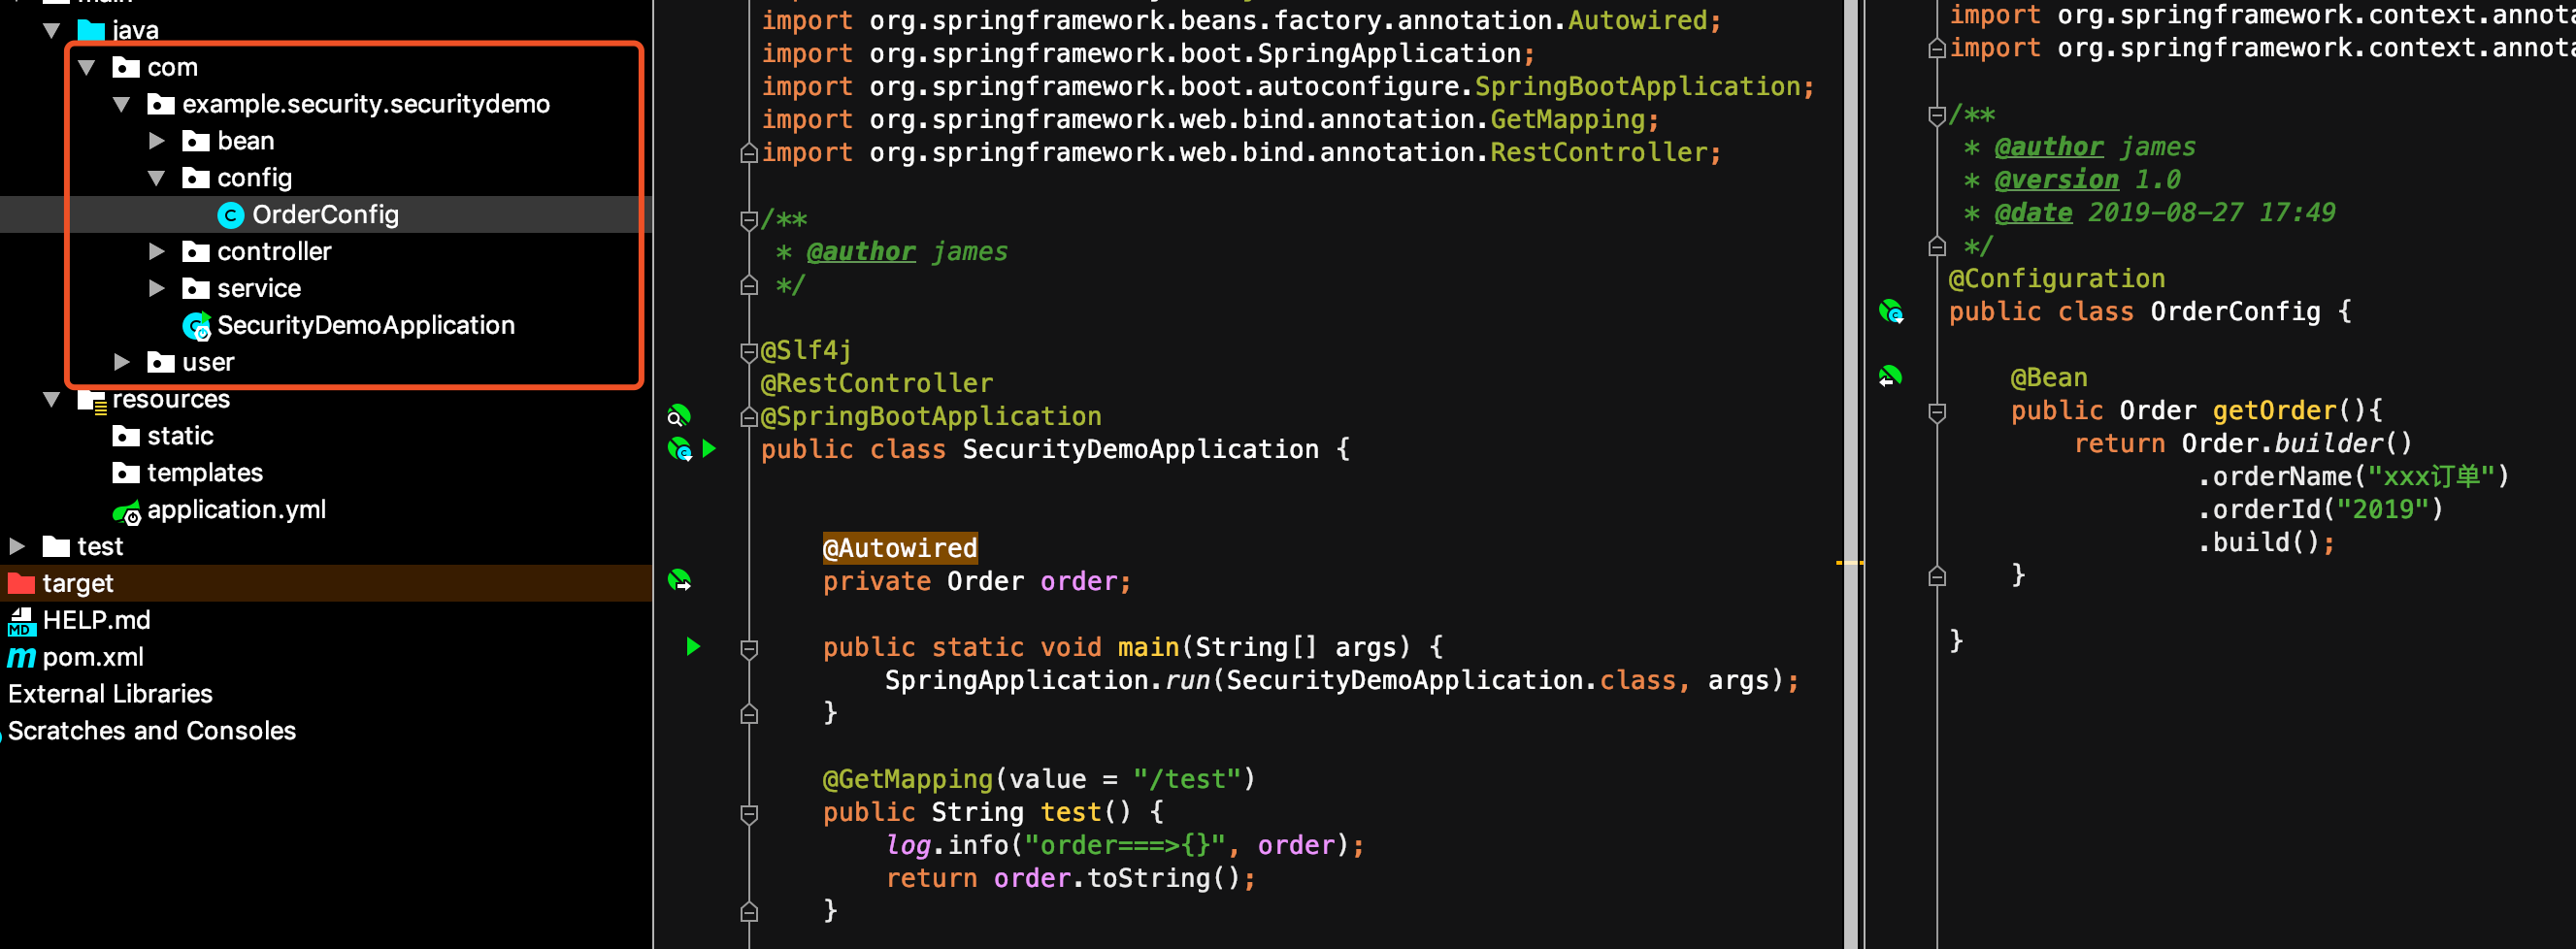
如上图所示,我们在使用order的时候直接注入是没有问题的,因为OrderConfig配置类,在启动主类的默认扫描范围内。
@SpringBootApplication 默认扫描范围是,扫描当前程序启动主类所在的包,及其当前包下的所有子包。如果需要扫描父类包中的配置,需要在启动类上使用 @ComponentScan("com.**") 注解来指明扫描的包路径。
如果配置类所在路径不在主类所在包,及其子包下,如下:
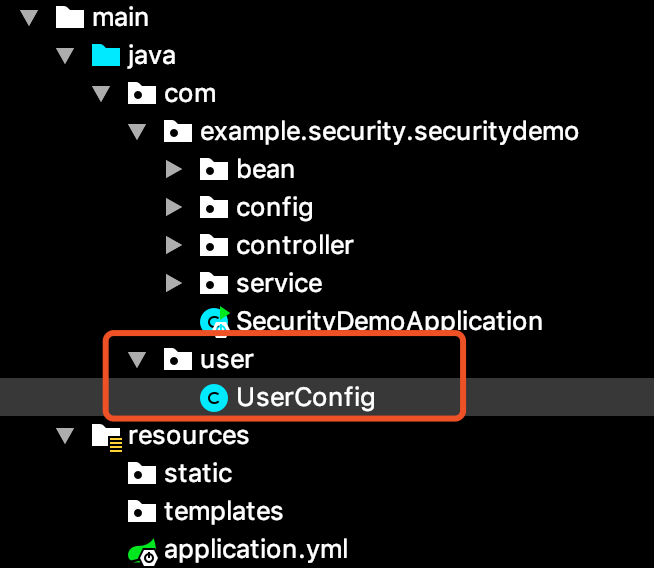
这种情况下,如果直接注入UserConfig的话,程序在启动的时候就会报错
Field user in com.example.security.securitydemo.SecurityDemoApplication required a bean of type 'com.example.security.securitydemo.bean.User' that could not be found.

The injection point has the following annotations:
    - @org.springframework.beans.factory.annotation.Autowired(required=true)
解决办法
- 在启动类上加 @ComponentScan("com.**") 注解,直接搞定
- 使用 @Import(UserConfig.class) 注解引入
方式一简单粗暴,直接解决问题,但是,这种解决方式,仅仅只适合你知道该类的包名,以com开头的,假如包名是org呢,就尴尬了,在此基础之上,就延伸出了 @Import。
@Import 就相当于原始spring xml中使用 <import/> 标签一样,二者没有差异。