什么是 tkinter 窗口
1.1 什么是 Tkinter
Python自带的可编辑的GUI界面,是一个图像窗口。
Tkinter是使用 python 进行窗口视窗设计的模块。简单的构造,多平台,多系统的兼容性, 能让它成为让你快速入门定制窗口文件的好助手。它在 python 窗口视窗模块中是一款简单型的。所以用来入门,熟悉窗口视窗的使用,非常有必要。
tkinter 的窗口部件
2.1 Label & Button 标签和按钮
窗口主体框架
每一个tkinter应用的主体框架都可以包含下面这部分,定义window窗口和window的一些属性,然后书写窗口内容,最后执行window.mainloop让窗口活起来。

- import tkinter as tk
- window = tk.Tk()
- window.title('my window')
- window.geometry('300x100')
- # 这里是窗口的内容
- window.mainloop()
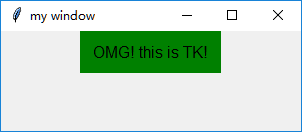
首先建立一个用来描述的标签tk.Label(注意对象的首字母一般是大写),示例代码如下所示:
- l = tk.Label(window,
- text='OMG! this is TK!', # 标签的文字
- bg='green', # 背景颜色
- font=('Arial', 12), # 字体和字体大小
- width=15, height=2) # 标签长宽
- l.pack() # 固定窗口位置
运行结果如图所示:
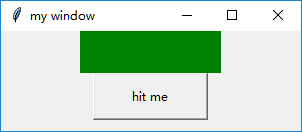
我们也可以通过变量的形式控制标签的显示,这时我们引入按钮 tk.Button 的概念,每点一次按钮,标签变化一次。 用以下内容替换上面的标签. 并把需要变化的文字存成变量 var:
- var = tk.StringVar() # 这时文字变量储存器
- l = tk.Label(window,
- textvariable=var, # 使用 textvariable 替换 text, 因为这个可以变化
- bg='green', font=('Arial', 12), width=15, height=2)
- l.pack()
接着做按钮tk.Button:
- b = tk.Button(window,
- text='hit me', # 显示在按钮上的文字
- width=15, height=2,
- command=hit_me) # 点击按钮式执行的命令
- b.pack() # 按钮位置
hit_me函数如下:
- on_hit = False # 默认初始状态为 Falsedef hit_me():
- global on_hit
- if on_hit == False: # 从 False 状态变成 True 状态
- on_hit = True
- var.set('you hit me') # 设置标签的文字为 'you hit me'
- else: # 从 True 状态变成 False 状态
- on_hit = False
- var.set('') # 设置文字为空
运行结果如下所示:
没有点击动作时:
点击第一次:

点击第二次:
完整代码:
- import tkinter as tk
- window=tk.Tk()
- window.title('my window')
- window.geometry('300x100')
- var=tk.StringVar()
- l=tk.Label(window,textvariable=var,bg='green',font=('Arial',12),width=15,
- height=2)
- l.pack()
- on_hit=False
- def hit_me():
- global on_hit
- if on_hit==False:
- on_hit=True
- var.set('you hit me')
- else:
- on_hit=False
- var.set('')
- b=tk.Button(window,text='hit me',width=15,
- height=2,command=hit_me)
- b.pack()
- window.mainloop()
2.2 Entry & Text 输入, 文本框
在定义了窗口的基础上,首先定义一个Entry,代码如下所示:
- e = tk.Entry(window,show=None)
- e.pack()
注意这里的show,可以自定义显示你想要在Entry中显示的字符,例如像输入密码时,可令show=‘*’
本节实现的例子功能为,如下所示的一个窗口,从上至下分别为定义的Entry、Button、Button和Text。两个Button分别命名为insert point和insert end,获取Entry中输入的内容并且分别在光标位置、末尾插入,内容显示在Text中。
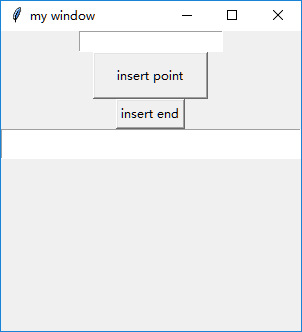
Button的定义如下所示:
- b1 = tk.Button(window,text='insert point',width=15,
- height=2,command=insert_point)
- b1.pack()
- b2 = tk.Button(window,text='insert end',
- command=insert_end)
函数的定义如下所示:
- def insert_point():
- var = e.get()
- t.insert('insert',var)
- def insert_end():
- var = e.get()
- t.insert('end',var)
完整代码如下:
- import tkinter as tk
- window = tk.Tk()
- window.title('my window')
- window.geometry('300x300')
- e = tk.Entry(window,show=None)
- e.pack()
- def insert_point():
- var = e.get()
- t.insert('insert',var)
- def insert_end():
- var = e.get()
- t.insert('end',var)
- b1 = tk.Button(window,text='insert point',width=15,
- height=2,command=insert_point)
- b1.pack()
- b2 = tk.Button(window,text='insert end',
- command=insert_end)
- b2.pack()
- t = tk.Text(window,height=2)
- t.pack()
- window.mainloop()
运行结果如下所示,首先在Entry中输入111111,点击按钮1,如下:

选择某一点作为插入位置,再在Entry中输入2,点击按钮1
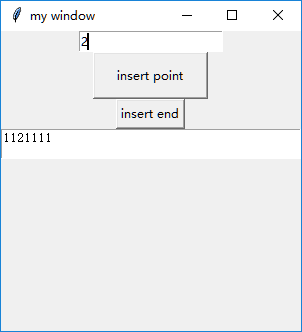
在Entry中输入3,点击按钮2

此外,insert还能实现具体位置的内容插入,例如将inser_end函数更改如下:
- def insert_end():
- var = e.get()
- t.insert(2.2,var)
则insert_end实现在Text的2行2列出插入内容,运行结果如下所示:

2.3 Listbox 列表部件
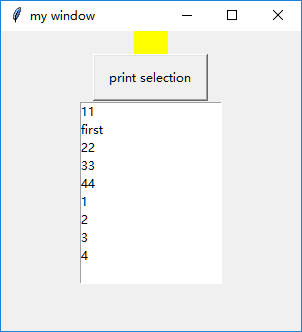
本节例子实现功能为:如下所示,从上到下分别为Label、Button和Listbox,Button实现将Listbox中当前光标选中的内容显示在Label中。
在定义好窗口的基础上首先定义Label,设置底色为黄色,并且要将文本内容定义为变量,代码如下:
- var1=tk.StringVar()
- l=tk.Label(window,bg='yellow',width=4,textvariable=var1)
- l.pack()
接着定义Button,命名为‘print selection’,并定义command的函数,如下所示:
- def print_selection():
- value=lb.get(lb.curselection())
- var1.set(value)
- b1 = tk.Button(window, text='print selection', width=15,
- height=2, command=print_selection)
- b1.pack()
最后定义Listbox,如下所示实现了Listbox中内容的设置、插入、删除等。
- var2=tk.StringVar()
- var2.set((11,22,33,44))
- lb=tk.Listbox(window,listvariable=var2)
- list_items=[1,2,3,4]for item in list_items:
- lb.insert('end',item)
- lb.insert(1,'first')
- lb.insert(2,'second')
- lb.delete(2)
- lb.pack()
完整代码如下所示:
- import tkinter as tk
- window = tk.Tk()
- window.title('my window')
- window.geometry('300x300')
- var1=tk.StringVar()
- l=tk.Label(window,bg='yellow',width=4,textvariable=var1)
- l.pack()
- def print_selection():
- value=lb.get(lb.curselection())
- var1.set(value)
- b1 = tk.Button(window, text='print selection', width=15,
- height=2, command=print_selection)
- b1.pack()
- var2=tk.StringVar()
- var2.set((11,22,33,44))
- lb=tk.Listbox(window,listvariable=var2)
- list_items=[1,2,3,4]for item in list_items:
- lb.insert('end',item)
- lb.insert(1,'first')
- lb.insert(2,'second')
- lb.delete(2)
- lb.pack()
- window.mainloop()
2.4 Radiobutton 选择按钮
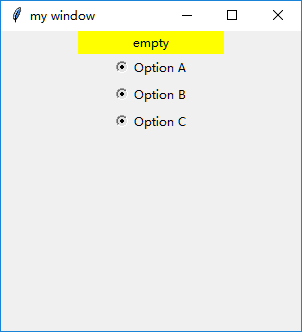
如图所示,Radiobutton即为上图中可选择的按钮,本节实现选中不同的Radiobutton时打印出相应的内容。
首先定义底色为黄色的Label,代码见完整代码。
接着要定义三个Radiobutton:
- r1=tk.Radiobutton(window,text='Option A',
- variable=var,value='A',
- command=print_selection)
- r1.pack()
Radiobutton放在window上,命名为‘Option A’,其中var=tk.StringVar(),接着令按钮的variable等于var,并且赋值为‘A’。
print_selection函数的定义如下:
- def print_selection():
- l.config(text='you have selected '+var.get())
config能对所有的参数进行更改,在函数定义中选择text属性进行更改。
完整代码如下:
- import tkinter as tk
- window = tk.Tk()
- window.title('my window')
- window.geometry('300x300')
- var=tk.StringVar()
- l=tk.Label(window,bg='yellow',width=20,text='empty')
- l.pack()
- def print_selection():
- l.config(text='you have selected '+var.get())
- r1=tk.Radiobutton(window,text='Option A',
- variable=var,value='A',
- command=print_selection)
- r1.pack()
- r2=tk.Radiobutton(window,text='Option B',
- variable=var,value='B',
- command=print_selection)
- r2.pack()
- r3=tk.Radiobutton(window,text='Option C',
- variable=var,value='C',
- command=print_selection)
- r3.pack()
- window.mainloop()
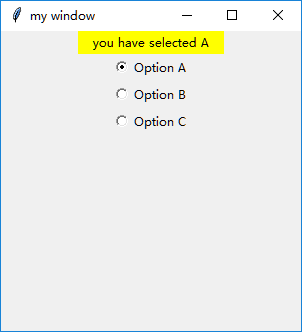
运行结果如下所示,当未选中时,Label内容显示为empty,当选中某一个Radiobutton时,则Label中显示相应的内容
2.5 Scale 尺度
可以被拉动的一个条,Scale返回的是一个数字。如下所示,当拉动时会在Label上显示具体的数字。

完整代码如下:
- import tkinter as tk
- window = tk.Tk()
- window.title('my window')
- window.geometry('300x300')
- l=tk.Label(window,bg='yellow',width=20,text='empty')
- l.pack()
- def print_selection(v):
- l.config(text='you have selected '+v)
- s=tk.Scale(window,label='try me',from_=5,to=11,orient=tk.HORIZONTAL,
- length=200,showvalue=0,tickinterval=3,resolution=0.01,command=print_selection)
- s.pack()
- window.mainloop()
定义Scale的属性时,名字为label,from to为取值范围,from_是为了区分python中的from,Scale还有横向和竖向属性,注意为tk.横向/竖向。length为显示的长度,不同于Label中的width,width的单位是字符,和length的单位是像素。showvalue即是否显示所选中的数字,取值为0时不显示,为1时显示。显示的标签单位长度为tickinterval,即显示出的数字的间隔,取值为3时,即显示5,8,11。resolution为要保留的小数个数。
在Scale中所定义的command功能是有默认传入值的,该传入值即为Scale标签当前标注的值。所以在定义print_selection函数时需要定义一个参数用于表示该传入值。
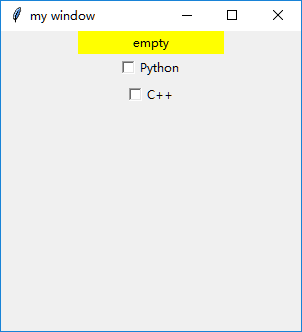
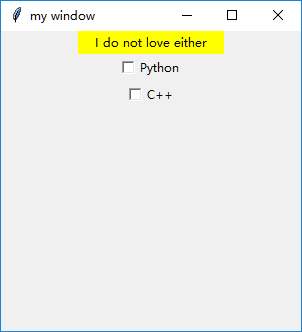
2.6 Checkbutton 勾选项
与Radiobutton类似,但是Radiobutton选中一个后其他默认为不选中,但是Checkbutton类似于多选,可以选中多个。
定义两个Checkbutton,如下所示:
- var1=tk.IntVar()
- var2=tk.IntVar()
- c1=tk.Checkbutton(window,text='Python',variable=var1,onvalue=1,offvalue=0,
- command=print_selection)
- c2=tk.Checkbutton(window,text='C++',variable=var2,onvalue=1,offvalue=0,
- command=print_selection)
- c1.pack()
- c2.pack()
首先定义两个变量var1和var2,为整型。
两个Checkbutton的variable分别等于var1和var,并且选中时value为1,即onvalue=1,未选中时offvalue=0.
command的print_selection定义如下,根据var1和var2的值来进行相应的操作。
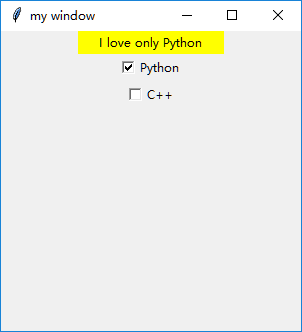
- def print_selection():
- if(var1.get()==1)&(var2.get()==0):
- l.config(text='I love only Python')
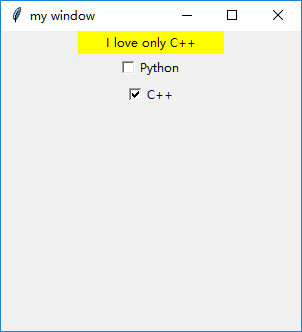
- elif(var1.get()==0)&(var2.get()==1):
- l.config(text='I love only C++')
- elif(var1.get()==0)&(var2.get()==0):
- l.config(text='I do not love either')
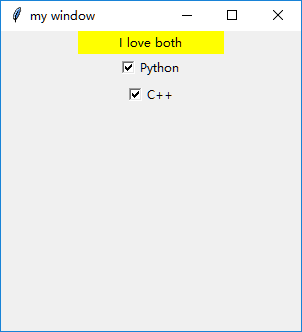
- else:
- l.config(text='I love both')
完整代码如下所示:
- import tkinter as tk
- window = tk.Tk()
- window.title('my window')
- window.geometry('300x300')
- l=tk.Label(window,bg='yellow',width=20,text='empty')
- l.pack()
- def print_selection():
- if(var1.get()==1)&(var2.get()==0):
- l.config(text='I love only Python')
- elif(var1.get()==0)&(var2.get()==1):
- l.config(text='I love only C++')
- elif(var1.get()==0)&(var2.get()==0):
- l.config(text='I do not love either')
- else:
- l.config(text='I love both')
- var1=tk.IntVar()
- var2=tk.IntVar()
- c1=tk.Checkbutton(window,text='Python',variable=var1,onvalue=1,offvalue=0,
- command=print_selection)
- c2=tk.Checkbutton(window,text='C++',variable=var2,onvalue=1,offvalue=0,
- command=print_selection)
- c1.pack()
- c2.pack()
- window.mainloop()
运行结果如下所示:
单独选中Python时:
单独选中C++时:
两个都选中:
两个都不选:
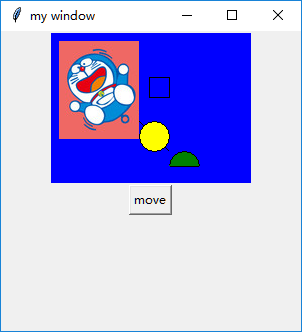
2.7 Canvas 画布
规定一片区域,可以放置图片、图形等等,并且可以把位置和形状进行改变。
- import tkinter as tk
- window = tk.Tk()
- window.title('my window')
- window.geometry('300x300')
- canvas=tk.Canvas(window,bg='blue',height=150,width=200)
- image_file=tk.PhotoImage(file='3.png')
- image=canvas.create_image(10,10,anchor='nw',image=image_file)
- x0,y0,x1,y1=90,90,120,120
- line=canvas.create_line(x0,y0,x1,y1)
- oval=canvas.create_oval(x0,y0,x1,y1,fill='yellow')
- arc=canvas.create_arc(x0+30,y0+30,x1+30,y1+30,start=0,extent=180,fill='green')
- rect=canvas.create_rectangle(100,30,100+20,30+20)
- canvas.pack()
- def moveit():
- canvas.move(rect,0,2)
- b=tk.Button(window,text='move',command=moveit).pack()
- window.mainloop()
首先定义一个Canvas。
放置一张图片,首先读取读片并存入到image_file中,接着Canvas通过create.image将图片放置到画布上。注意10,10为放置的坐标,anchor意为锚点,即锚定的位置,可选择的属性如下所示:

nw即为放置在左上角,图片最左上角的点放置的坐标应为所定义的10,10.
接着create.line从坐标为(90,90)到(120,120)绘制一条直线。
create.oval为绘制圆形,fill填充颜色。
create.arc为绘制扇形,start和extent表示该扇形从0°到180°。
create.rectangle为绘制一个正方形。
此外,定义了一个button,该按钮的作用是每点击一次,rect对象,即为所绘制的正方形下移两格,moveit函数中0表示x方向的位移为0,2为y方向上的位移变化尺度。结果如下所示。

单机move按钮,正方形的位置发生变化:
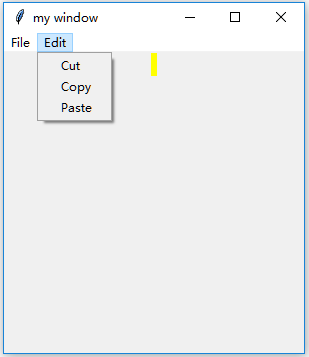
2.8 Menubar 菜单
菜单条,如下所示为本节将要完成的简单菜单条。

首先在窗口window上定义一个Menu
- menubar=tk.Menu(window)
接着在menubar上创建File选项,首先同样定义一个Menu,此时的Menu是放置在menubar上的,并通过add_cascade(cascade:级联)放置在menubar上
- filemenu=tk.Menu(menubar,tearoff=0)
- menubar.add_cascade(label='File',menu=filemenu)
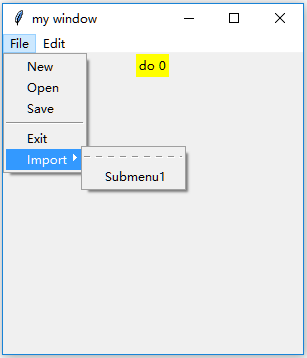
接着如上图所示,在File选项中,增加New、Open、Save,分隔线、以及Exit
- filemenu.add_command(label='New',command=do_job)
- filemenu.add_command(label='Open',command=do_job)
- filemenu.add_command(label='Save',command=do_job)
- filemenu.add_separator()
- filemenu.add_command(label='Exit',command=window.quit)
同理,增加Edit选项,代码详见完整代码
接着,我们来创建File中的Submenu,如下图所示
- submenu=tk.Menu(filemenu)
- filemenu.add_cascade(label='Import',menu=submenu,underline=0)
- submenu.add_command(label='Submenu1',command=do_job)
在代码中,do_job做了一个简单的显示功能,如下所示:
- counter=0def do_job():
- global counter
- l.config(text='do '+str(counter))
- counter+=1
完整代码:
- import tkinter as tk
- window = tk.Tk()
- window.title('my window')
- window.geometry('300x300')
- l=tk.Label(window,text='',bg='yellow')
- l.pack()
- counter=0def do_job():
- global counter
- l.config(text='do '+str(counter))
- counter+=1
- menubar=tk.Menu(window)
- filemenu=tk.Menu(menubar,tearoff=0)
- menubar.add_cascade(label='File',menu=filemenu)
- filemenu.add_command(label='New',command=do_job)
- filemenu.add_command(label='Open',command=do_job)
- filemenu.add_command(label='Save',command=do_job)
- filemenu.add_separator()
- filemenu.add_command(label='Exit',command=window.quit)
- editmenu=tk.Menu(menubar,tearoff=0)
- menubar.add_cascade(label='Edit',menu=editmenu)
- editmenu.add_command(label='Cut',command=do_job)
- editmenu.add_command(label='Copy',command=do_job)
- editmenu.add_command(label='Paste',command=do_job)
- submenu=tk.Menu(filemenu)
- filemenu.add_cascade(label='Import',menu=submenu,underline=0)
- submenu.add_command(label='Submenu1',command=do_job)
- window.config(menu=menubar)
- window.mainloop()
2.9 Frame 框架
底层框架,可以在上面放各种小部件

- import tkinter as tk
- window = tk.Tk()
- window.title('my window')
- window.geometry('300x300')
- tk.Label(window,text='on the window').pack()
- frm=tk.Frame(window)
- frm.pack()
- frm_l=tk.Frame(frm,)
- frm_r=tk.Frame(frm)
- frm_l.pack(side='left')
- frm_r.pack(side='right')
- tk.Label(frm_l,text='on the frm_l1').pack()
- tk.Label(frm_l,text='on the frm_l2').pack()
- tk.Label(frm_r,text='on the frm_r1').pack()
- window.mainloop()
首先定义一个主Frame,放在window上
接着定义了第二层的两个Frame,分别放在主Frame的左右侧
在左边的Frame上放置了两个标签,右边放了一个标签
2.10 messagebox 弹窗
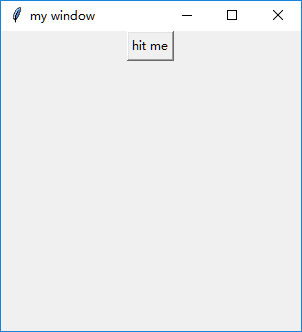
在window的基础上定义一个Button
- tk.Button(window, text='hit me', command=hit_me).pack()
如图所示:
接着定义一个弹窗,在运行时出现错误
AttributeError: module 'tkinter' has no attribute 'messagebox'
试着加入import则可运行成功
- from tkinter import messagebox
messagebox有多种功能,接下来将分别细述
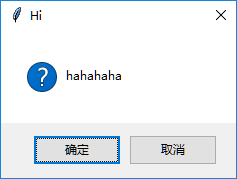
(1)showinfo
- tk.messagebox.showinfo(title='Hi', message='hahahaha')

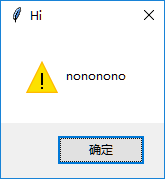
(2)showwarning
- tk.messagebox.showwarning(title='Hi', message='nononono')
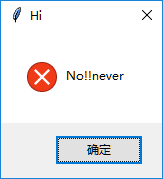
(3)showerror
- tk.messagebox.showerror(title='Hi', message='No!! never')
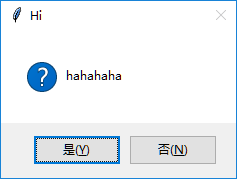
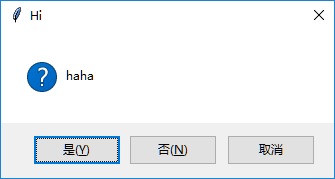
(4)askquestion返回是字符串,即返回的是‘yes’或者‘no’,可通过print打印出来以更好的理解
- print(tk.messagebox.askquestion(title='Hi', message='hahahaha')) # return 'yes' , 'no'

选择是打印出的值为‘yes’

根据return的值可进一步选择需要的操作
if return==‘yes’
(5)askyesno
返回的是True或者False
- print(tk.messagebox.askyesno(title='Hi', message='hahahaha')) # return True, False
同样可根据返回的值来进一步操作。
(6)asktrycancel
- print(tk.messagebox.asktrycancel(title='Hi', message='hahahaha')) # return True, False
但是不知道为什么运行时出现错误:AttributeError: module 'tkinter.messagebox' has no attribute 'asktrycancel'
(7)askokcancel
- print(tk.messagebox.askokcancel(title='Hi', message='hahahaha')) # return True, False
(8)askyesnocancel
- print(tk.messagebox.askyesnocancel(title="Hi", message="haha")) # return, True, False, None
完整代码:
- import tkinter as tk
- window = tk.Tk()
- window.title('my window')
- window.geometry('200x200')
- def hit_me():
- #tk.messagebox.showinfo(title='Hi', message='hahahaha')
- #tk.messagebox.showwarning(title='Hi', message='nononono')
- #tk.messagebox.showerror(title='Hi', message='No!! never')
- #print(tk.messagebox.askquestion(title='Hi', message='hahahaha')) # return 'yes' , 'no'
- #print(tk.messagebox.askyesno(title='Hi', message='hahahaha')) # return True, False
- #print(tk.messagebox.asktrycancel(title='Hi', message='hahahaha')) # return True, False
- #print(tk.messagebox.askokcancel(title='Hi', message='hahahaha')) # return True, False
- print(tk.messagebox.askyesnocancel(title="Hi", message="haha")) # return, True, False, None
- tk.Button(window, text='hit me', command=hit_me).pack()
- window.mainloop()
2.11 pack grid place 放置位置
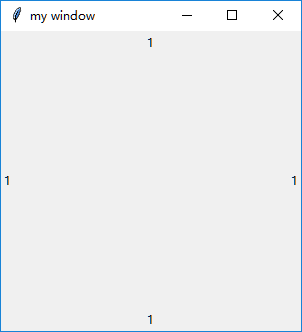
(1)pack
side属性来决定所放置的位置,共有top、bottom、left、right
- tk.Label(window,text='1').pack(side='top')
- tk.Label(window,text='1').pack(side='bottom')
- tk.Label(window,text='1').pack(side='left')t
- tk.Label(window,text='1').pack(side='right')
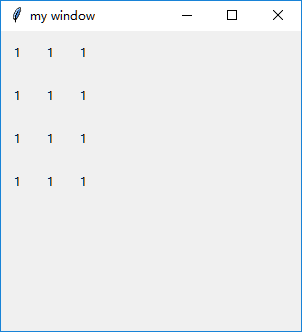
(2)grid
按照格点(方格的形式来放置)
- for i in range(4):
- for j in range(3):
- tk.Label(window,text=1).grid(row=i,column=j,padx=10,pady=10)
无padx和pady时:
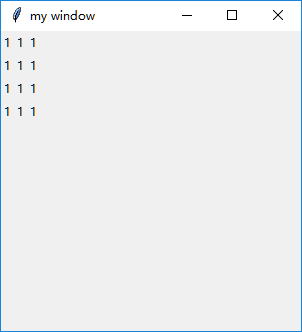
其中padx、pady用于填充显示,padx和pady用于设置框架的外部填充显示,ipadx和ipady用于设置框架的内部显示。
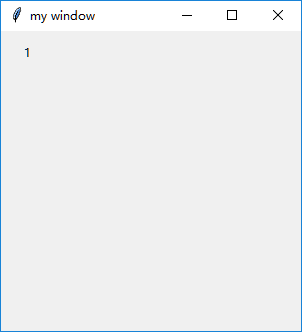
(3)place
能精确放置到某一坐标处
- tk.Label(window,text=1).place(x=20,y=10,anchor='nw')
登录窗口例子
3.1 例子1 登录窗口
综合前面所学习的内容,设计如下窗口
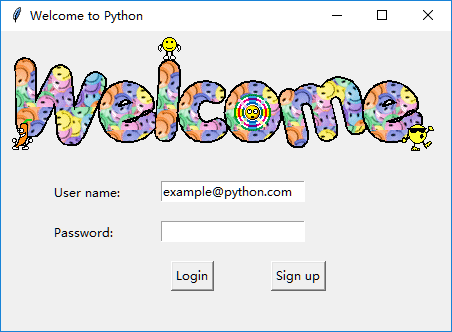
代码如下所示:
- import tkinter as tk
- window = tk.Tk()
- window.title('Welcome to Mofan Python')
- window.geometry('450x300')
- # welcome image
- canvas = tk.Canvas(window, height=200, width=500)
- image_file = tk.PhotoImage(file='welcome.gif')
- image = canvas.create_image(0,0, anchor='nw', image=image_file)
- canvas.pack(side='top')
- # user information
- tk.Label(window, text='User name: ').place(x=50, y= 150)
- tk.Label(window, text='Password: ').place(x=50, y= 190)
- var_usr_name = tk.StringVar()
- var_usr_name.set('[email protected]')
- entry_usr_name = tk.Entry(window, textvariable=var_usr_name)
- entry_usr_name.place(x=160, y=150)
- var_usr_pwd = tk.StringVar()
- entry_usr_pwd = tk.Entry(window, textvariable=var_usr_pwd, show='*')
- entry_usr_pwd.place(x=160, y=190)
- def usr_login():
- passdef usr_sign_up():
- pass
- # login and sign up button
- btn_login = tk.Button(window, text='Login', command=usr_login)
- btn_login.place(x=170, y=230)
- btn_sign_up = tk.Button(window, text='Sign up', command=usr_sign_up)
- btn_sign_up.place(x=270, y=230)
- window.mainloop()
3.2 例子1 登录窗口
本节添加了Login的功能,代码如下:
- def usr_login():
- usr_name = var_usr_name.get()
- usr_pwd = var_usr_pwd.get()
- try:
- with open('usrs_info.pickle', 'rb') as usr_file:
- usrs_info = pickle.load(usr_file)
- except FileNotFoundError:
- with open('usrs_info.pickle', 'wb') as usr_file:
- usrs_info = {'admin': 'admin'}
- pickle.dump(usrs_info, usr_file)
- if usr_name in usrs_info:
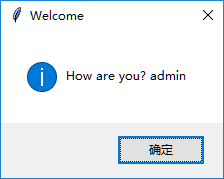
- if usr_pwd == usrs_info[usr_name]:
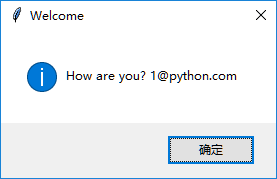
- tk.messagebox.showinfo(title='Welcome', message='How are you? ' + usr_name)
- else:
- tk.messagebox.showerror(message='Error, your password is wrong, try again.')
- else:
- is_sign_up = tk.messagebox.askyesno('Welcome',
- 'You have not sign up yet. Sign up today?')
- if is_sign_up:
- usr_sign_up()
首先以读二进制的方式打开并下载存储用户信息的文件,如果文件不存在,则建立该文件,并且加入了用户名为admin、密码为admin的用户。
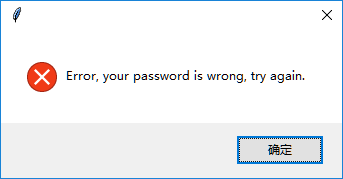
如果用户名在用户信息文件中存在,密码输入正确时,会弹出欢迎窗口,否则则显示密码错误。
如果用户不存在,则弹出窗口询问是否要进行注册,并通过返回的True或是False的值进行注册操作。
运行结果如下所示:
输入密码错误时:
正确输入密码时:
用户不存在时:

3.3 例子1 登录窗口
注册时将会弹出新窗口,如下所示:

首先定义一个新窗口
- window_sign_up=tk.Toplevel(window)
- window_sign_up.geometry('350x200')
- window_sign_up.title('Sign up window')
定义User name、Password和Confirm password,以及三个Entry和一个Button
- new_name = tk.StringVar()
- new_name.set('[email protected]')
- tk.Label(window_sign_up, text='User name: ').place(x=10, y= 10)
- entry_new_name = tk.Entry(window_sign_up, textvariable=new_name)
- entry_new_name.place(x=150, y=10)
- new_pwd = tk.StringVar()
- tk.Label(window_sign_up, text='Password: ').place(x=10, y=50)
- entry_usr_pwd = tk.Entry(window_sign_up, textvariable=new_pwd, show='*')
- entry_usr_pwd.place(x=150, y=50)
- new_pwd_confirm = tk.StringVar()
- tk.Label(window_sign_up, text='Confirm password: ').place(x=10, y= 90)
- entry_usr_pwd_confirm = tk.Entry(window_sign_up, textvariable=new_pwd_confirm, show='*')
- entry_usr_pwd_confirm.place(x=150, y=90)
- btn_confirm_sign_up = tk.Button(window_sign_up, text='Sign up', command=sign_to_Mofan_Python)
- btn_confirm_sign_up.place(x=150, y=130)
接着定义函数sign_to_Mofan_Python
- def sign_to_Mofan_Python():
- np = new_pwd.get()
- npf = new_pwd_confirm.get()
- nn = new_name.get()
- with open('usrs_info.pickle', 'rb') as usr_file:
- exist_usr_info = pickle.load(usr_file)
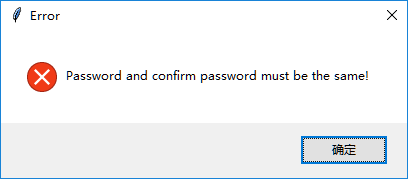
- if np != npf:
- tk.messagebox.showerror('Error', 'Password and confirm password must be the same!')
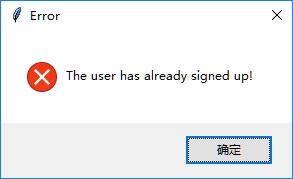
- elif nn in exist_usr_info:
- tk.messagebox.showerror('Error', 'The user has already signed up!')
- else:
- exist_usr_info[nn] = np
- with open('usrs_info.pickle', 'wb') as usr_file:
- pickle.dump(exist_usr_info, usr_file)
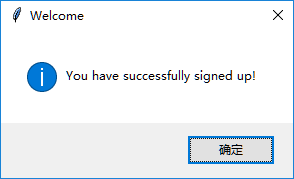
- tk.messagebox.showinfo('Welcome', 'You have successfully signed up!')
- window_sign_up.destroy()
打开读取文件usrs_info,首先判断密码是否相等,如果不相等,则弹出窗口提示密码输入不一致
如果用户名存在,则弹出窗口提示用户名已经注册
注册合格的话,则将信息存放,pickle里面存放的是一个字典,exist_usr_info[nn] = np该句即为username:password,通过dump将新的注册信息传入到用户信息文件中。并弹出窗口提示注册成功
最后通过destory关闭注册窗口
完整代码如下:
- def usr_sign_up():
- def sign_to_Mofan_Python():
- np = new_pwd.get()
- npf = new_pwd_confirm.get()
- nn = new_name.get()
- with open('usrs_info.pickle', 'rb') as usr_file:
- exist_usr_info = pickle.load(usr_file)
- if np != npf:
- tk.messagebox.showerror('Error', 'Password and confirm password must be the same!')
- elif nn in exist_usr_info:
- tk.messagebox.showerror('Error', 'The user has already signed up!')
- else:
- exist_usr_info[nn] = np
- with open('usrs_info.pickle', 'wb') as usr_file:
- pickle.dump(exist_usr_info, usr_file)
- tk.messagebox.showinfo('Welcome', 'You have successfully signed up!')
- window_sign_up.destroy()
- window_sign_up=tk.Toplevel(window)
- window_sign_up.geometry('350x200')
- window_sign_up.title('Sign up window')
- new_name = tk.StringVar()
- new_name.set('[email protected]')
- tk.Label(window_sign_up, text='User name: ').place(x=10, y=10)
- entry_new_name = tk.Entry(window_sign_up, textvariable=new_name)
- entry_new_name.place(x=150, y=10)
- new_pwd = tk.StringVar()
- tk.Label(window_sign_up, text='Password: ').place(x=10, y=50)
- entry_usr_pwd = tk.Entry(window_sign_up, textvariable=new_pwd, show='*')
- entry_usr_pwd.place(x=150, y=50)
- new_pwd_confirm = tk.StringVar()
- tk.Label(window_sign_up, text='Confirm password: ').place(x=10, y= 90)
- entry_usr_pwd_confirm = tk.Entry(window_sign_up, textvariable=new_pwd_confirm, show='*')
- entry_usr_pwd_confirm.place(x=150, y=90)
- btn_confirm_sign_up = tk.Button(window_sign_up, text='Sign up', command=sign_to_Mofan_Python)
- btn_confirm_sign_up.place(x=150, y=130)
运行结果如下所示:
当用户名已存在时:
当密码输入不一致时:
当注册成功时:
点击确定后注册窗口关闭
用注册的用户进行登录,弹出窗口: