交换机的Telnet远程登录设置
一、实验目标
掌握采用telnet方式配置交换机的方法
二、技术原理
1. 配置交换机的管理IP地址(计算机的IP地址与交换机管理IP地址在同一网段)
2. 为telnet用户配置用户名和登录口令
    Switch(config)#enble password  xxxx          //设置进入特权模式的密码
    Switch(config-line)#password xxxx               //设置console端口及telnet远程登录密码。
    Switch(config)#line console 0
    Switch(config-line)#password xxxx              //设置通过console端口连接设备的密码
    Switch(config-line)#login
    Switch(config)#line vty 0 4
    Switch(config-line)#password xxxx              //设置telnet远程登录密码
    Switch(config-line)#login
三、实验步骤
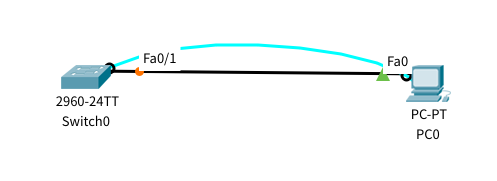
实验拓扑
实验步骤
配置交换机的管理IP地址
 Switch>enable
 Switch#configure terminal
 Switch(config)#interface vlan 1                 //默认情况下交换机所有端口都处于 vlan 1 当中
 Switch(config-if)#ip address 192.168.1.1 255.255.255.0      //配置交换机管理IP地址
 Switch(config-if)#no shutdown                 //开启Interface Vlan1
 Switch(config-if)#exit
设置进入特权模式的密码
Switch(config)#enable password 123456设置通过console端口连接设备的密码
 Switch(config)#line console 0
 Switch(config-line)#password asdf
 Switch(config-line)#login
 Switch(config-line)#exit
设置telnet远程登录密码
 Switch(config)#line vty 0 4
 Switch(config-line)#password abc123
 Switch(config-line)#login
 Switch(config-line)#end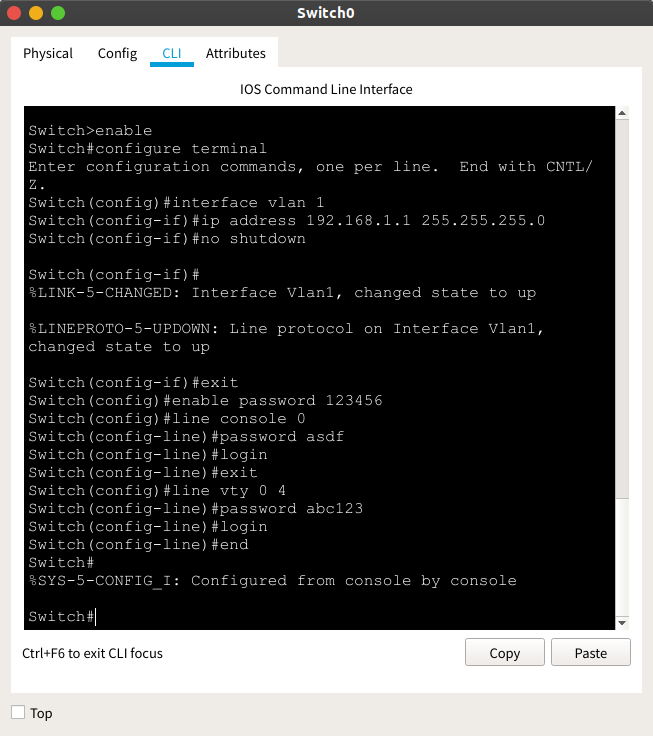
查看配置情况
Switch#show running-config
四、验证
验证通过console端口连接设备的密码
 Password:                                //这里输入asdf
 Switch>
验证进入特权模式的密码
 Switch>enable
 Password:                                //这里输入123456
 Switch#
验证telnet远程登录密码
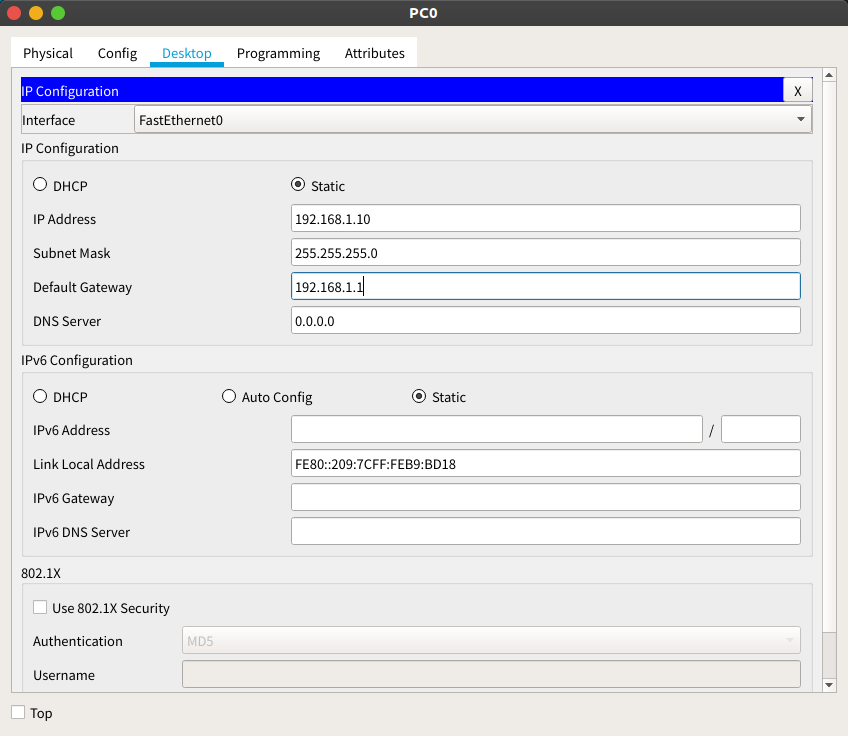
给PC机设置IP地址
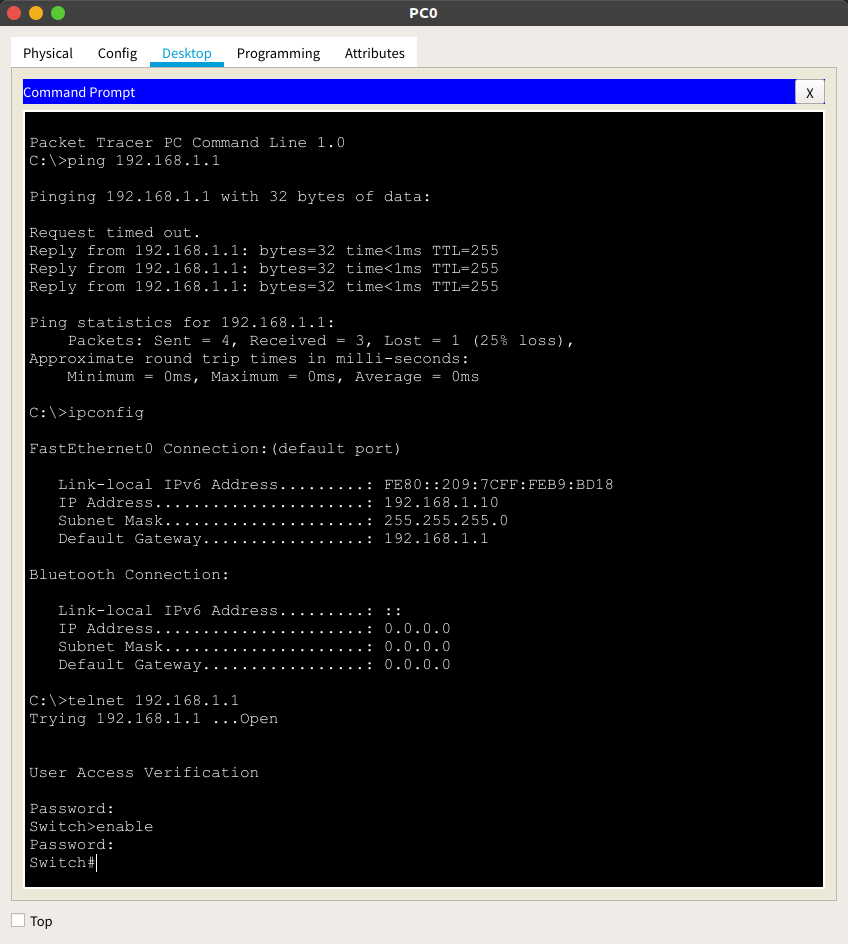
打开Command Prompt
 PC>ipconfig
 PC>ping 192.168.1.1
 PC>telnet 192.168.1.1