ElasticSearch基于Lucene的搜索服务器,支持分布式,提供REST接口,可用于云计算,可以实现实时搜索,开源免费。这时很官方的一句话,在使用之前,我们简单的介绍一下安装过程。在官网下载之后,直接解压出来,找到bin文件夹下,运行elasticsearch.bat,运行后的结果如下:
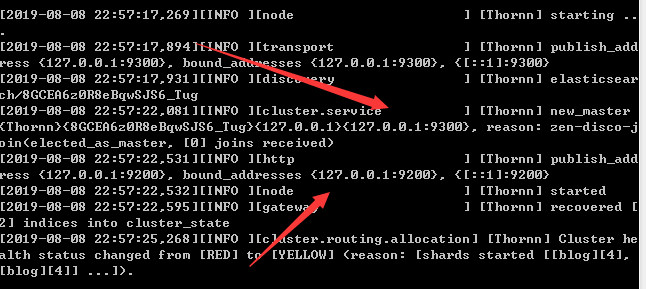
程序的连接端口是9300,服务器的管理端口是9200。运行之后看结果,则在浏览器上输入127.0.0.1:9200,显示如下:
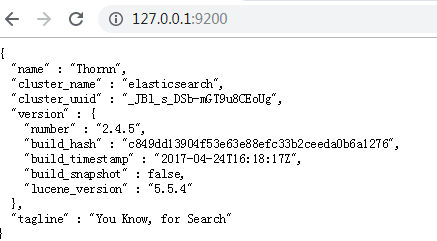
这样表示es已启动,为了更加直观,可以安装插件,即图形化管理工具:下载esHead插件,解压之后,放到 es的plugins文件夹下,文件名为head即可,后重启服务器,输入http://127.0.0.1:9200/_plugin/head,出现如下界面表示安装插件成功:

安装完成之后,下面简单介绍索引的创建和删除:
首先创建maven工程,引入相应的坐标:
<?xml version="1.0" encoding="UTF-8"?>

<project xmlns="http://maven.apache.org/POM/4.0.0" xmlns:xsi="http://www.w3.org/2001/XMLSchema-instance"
  xsi:schemaLocation="http://maven.apache.org/POM/4.0.0 http://maven.apache.org/xsd/maven-4.0.0.xsd">
  <modelVersion>4.0.0</modelVersion>

  <groupId>com.es.demo</groupId>
  <artifactId>elaticsearchdemo</artifactId>
  <version>1.0-SNAPSHOT</version>

  <name>elaticsearchdemo</name>
  <!-- FIXME change it to the project's website -->
  <url>http://www.example.com</url>

  <properties>
    <project.build.sourceEncoding>UTF-8</project.build.sourceEncoding>
    <maven.compiler.source>1.7</maven.compiler.source>
    <maven.compiler.target>1.7</maven.compiler.target>
  </properties>

  <dependencies>
    <!-- ElasticSearch core -->
    <dependency>
      <groupId>org.elasticsearch</groupId>
      <artifactId>elasticsearch</artifactId>
      <version>2.4.5</version>
    </dependency>
    <dependency>
      <groupId>junit</groupId>
      <artifactId>junit</artifactId>
      <version>4.12</version>
    </dependency>
    <dependency>
      <groupId>com.fasterxml.jackson.core</groupId>
      <artifactId>jackson-core</artifactId>
      <version>2.8.1</version>
    </dependency>
    <dependency>
      <groupId>com.fasterxml.jackson.core</groupId>
      <artifactId>jackson-databind</artifactId>
      <version>2.8.1</version>
    </dependency>
    <dependency>
      <groupId>com.fasterxml.jackson.core</groupId>
      <artifactId>jackson-annotations</artifactId>
      <version>2.8.1</version>
    </dependency>
  </dependencies>


  <build>
    <pluginManagement><!-- lock down plugins versions to avoid using Maven defaults (may be moved to parent pom) -->
      <plugins>
        <!-- clean lifecycle, see https://maven.apache.org/ref/current/maven-core/lifecycles.html#clean_Lifecycle -->
        <plugin>
          <artifactId>maven-clean-plugin</artifactId>
          <version>3.1.0</version>
        </plugin>
        <!-- default lifecycle, jar packaging: see https://maven.apache.org/ref/current/maven-core/default-bindings.html#Plugin_bindings_for_jar_packaging -->
        <plugin>
          <artifactId>maven-resources-plugin</artifactId>
          <version>3.0.2</version>
        </plugin>
        <plugin>
          <artifactId>maven-compiler-plugin</artifactId>
          <version>3.8.0</version>
        </plugin>
        <plugin>
          <artifactId>maven-surefire-plugin</artifactId>
          <version>2.22.1</version>
        </plugin>
        <plugin>
          <artifactId>maven-jar-plugin</artifactId>
          <version>3.0.2</version>
        </plugin>
        <plugin>
          <artifactId>maven-install-plugin</artifactId>
          <version>2.5.2</version>
        </plugin>
        <plugin>
          <artifactId>maven-deploy-plugin</artifactId>
          <version>2.8.2</version>
        </plugin>
        <!-- site lifecycle, see https://maven.apache.org/ref/current/maven-core/lifecycles.html#site_Lifecycle -->
        <plugin>
          <artifactId>maven-site-plugin</artifactId>
          <version>3.7.1</version>
        </plugin>
        <plugin>
          <artifactId>maven-project-info-reports-plugin</artifactId>
          <version>3.0.0</version>
        </plugin>
      </plugins>
    </pluginManagement>
  </build>
</project>
然后创建测试类,创建客户端对象,利用对象创建索引和删除索引,代码如下:

创建索引之后,可视化根据中出现:

表示索引成功,删除索引代码如上所示,同理。介绍完了索引的创建和删除,下面看看es的映射规则是怎么操作的: