4.6 日志配置
在settings/dev.py文件中追加如下配置:
# 日志配置
LOGGING = {
    'version': 1,
    'disable_existing_loggers': False,
    'formatters': {
        'verbose': {
            'format': '%(levelname)s %(asctime)s %(module)s %(lineno)d %(message)s'
        },
        'simple': {
            'format': '%(levelname)s %(module)s %(lineno)d %(message)s'
        },
    },
    'filters': {
        'require_debug_true': {
            '()': 'django.utils.log.RequireDebugTrue',
        },
    },
    'handlers': {
        'console': {
            'level': 'DEBUG',
            'filters': ['require_debug_true'],
            'class': 'logging.StreamHandler',
            'formatter': 'simple'
        },
        'file': {
            'level': 'INFO',
            'class': 'logging.handlers.RotatingFileHandler',
            # 日志位置,日志文件名,日志保存目录必须手动创建
            'filename': os.path.join(os.path.dirname(BASE_DIR), "logs/luffy.log"),
            # 日志文件的最大值,这里我们设置300M
            'maxBytes': 300 * 1024 * 1024,
            # 日志文件的数量,设置最大日志数量为10
            'backupCount': 10,
            # 日志格式:详细格式
            'formatter': 'verbose'
        },
    },
    # 日志对象
    'loggers': {
        'luffy': {
            'handlers': ['console', 'file'],
            'propagate': True, # 是否让日志信息继续冒泡给其他的日志处理系统
        },
    }
}
4.5 异常处理
新建utils/exceptions.py
from rest_framework.views import exception_handler

from django.db import DatabaseError
from rest_framework.response import Response
from rest_framework import status

import logging
logger = logging.getLogger('luffy')


def custom_exception_handler(exc, context):
    """
    自定义异常处理
    :param exc: 异常类
    :param context: 抛出异常的上下文
    :return: Response响应对象
    """
    # 调用drf框架原生的异常处理方法
    response = exception_handler(exc, context)

    if response is None:
        view = context['view']
        if isinstance(exc, DatabaseError):
            # 数据库异常
            logger.error('[%s] %s' % (view, exc))
            response = Response({'message': '服务器内部错误'}, status=status.HTTP_507_INSUFFICIENT_STORAGE)

    return response
settings/dev.py配置文件中添加
REST_FRAMEWORK = {
    # 异常处理
    'EXCEPTION_HANDLER': 'luffy.utils.exceptions.custom_exception_handler',
}
4.7 创建数据库
create database luffycity default charset=utf8;
为当前项目创建数据库用户[这个用户只能看到这个数据库]
create user luffy_user identified by 'luffy';
grant all privileges on luffycity.* to 'luffy_user'@'%';
flush privileges;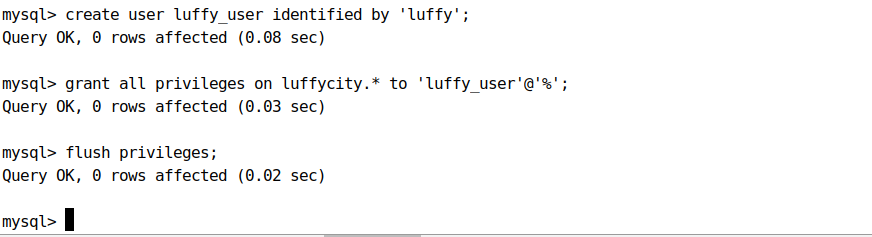
4.8 配置数据库连接
打开settings/dev.py文件,并配置
DATABASES = {
    "default": {
        "ENGINE": "django.db.backends.mysql",
        "HOST": "127.0.0.1",
        "PORT": 3306,
        "USER": "luffy_user",
        "PASSWORD": "luffy",
        "NAME": "luffycity",
    }
}
在项目主模块的 __init__.py中导入pymysql
import pymysql

pymysql.install_as_MySQLdb()
调整错误
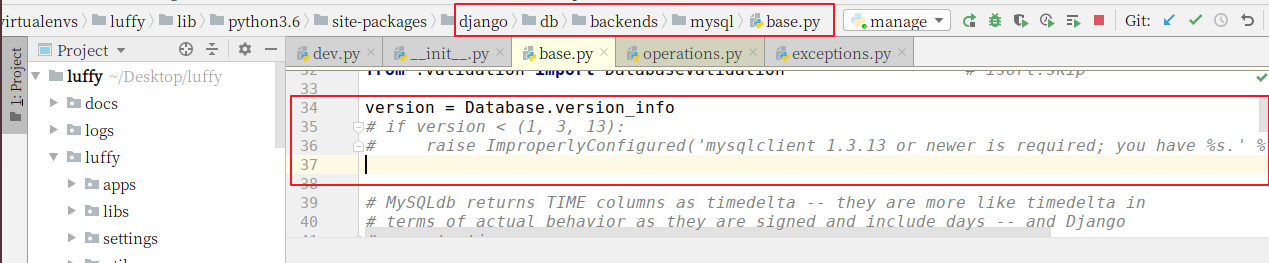
数据库版本检测导致的错误
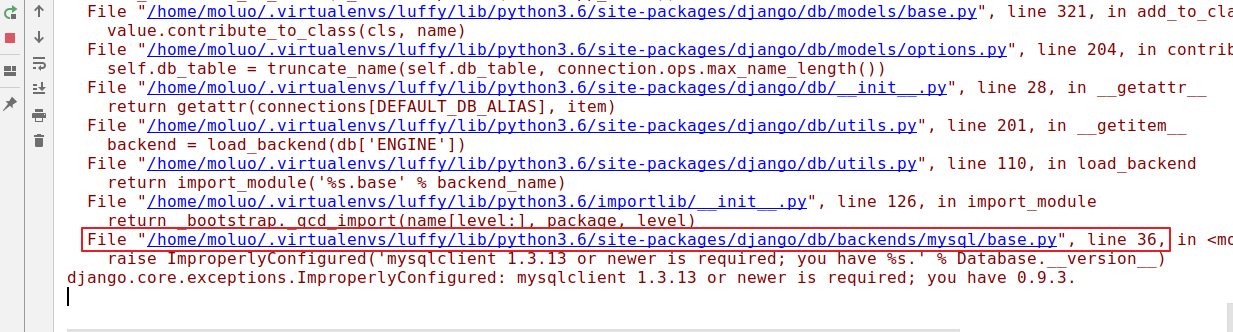
数据库的版本检测代码注释掉。、
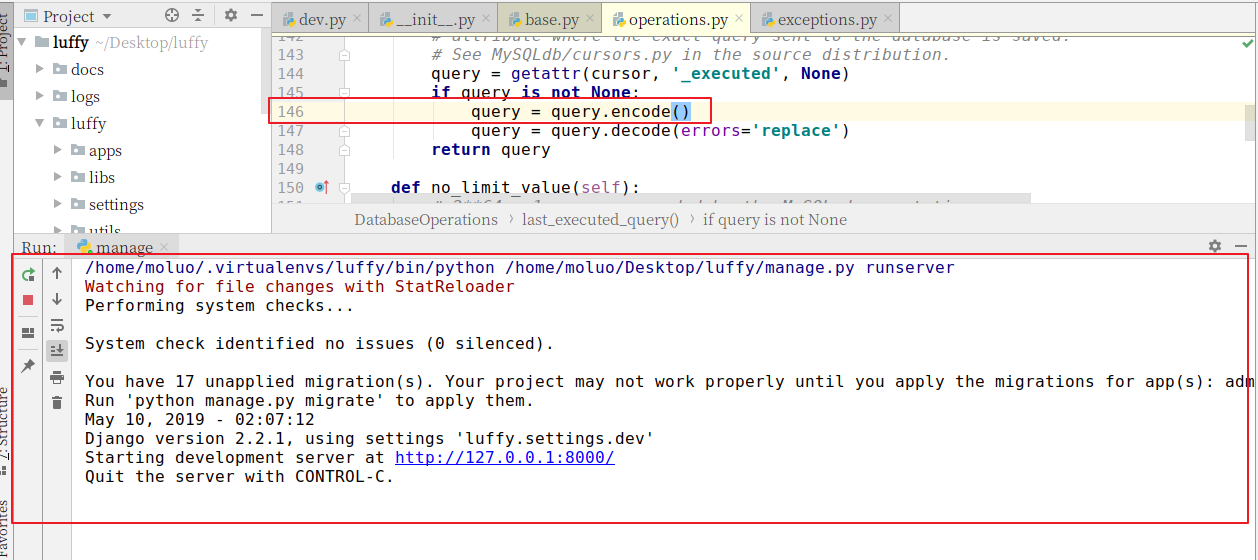
第二个错误也是因为数据库版本的默认编码导致,query返回的内容格式使用有误。
新增一行代码,把query查询结果转换格式为 bytes类型
5. 搭建前端项目
5.1 创建项目目录
cd 项目目录
vue init webpack lufei_pc
例如,我要把项目保存在~/Desktop桌面目录下,可以如下操作:
cd ~/Desktop
vue init webpack lufei_pc
根据需要在生成项目时,我们选择对应的选项, 效果:

根据上面的提示,我们已经把vue项目构建好了,运行测试服务器。

打开项目已经,在pycharm的终端下运行vue项目,查看效果。
npm run dev
接下来,我们根据终端上效果显示的对应地址来访问项目(如果有多个vue项目在运行,8080端口被占据了,服务器会自动改端口,所以根据自己实际在操作中看到的地址来访问。)
访问:http://localost:8080。效果:
我们也可以把我们的前端项目进行git源代码管理
5.2 初始化前端项目
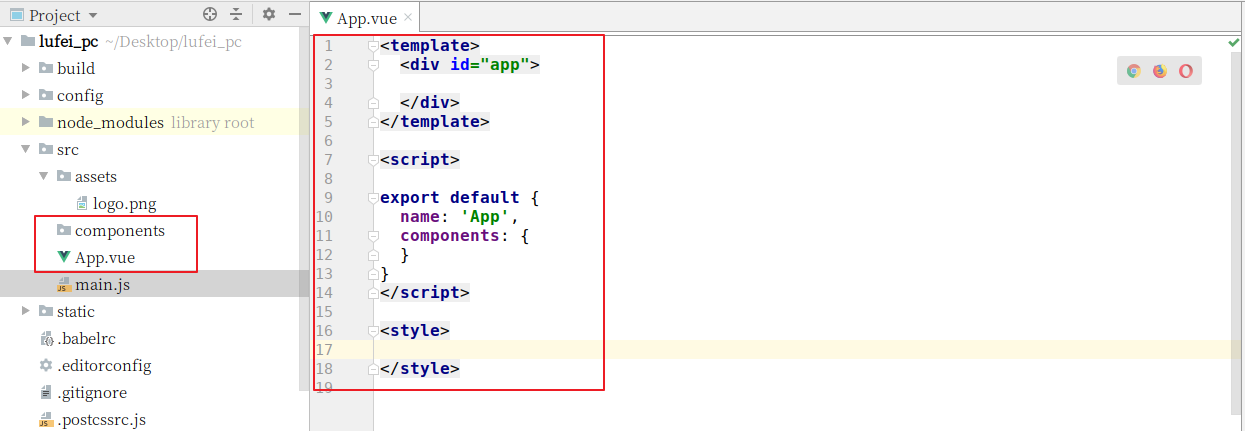
清除默认的HelloWorld组件和APP.vue中的默认样式
接下来,我们可以查看效果了,一张白纸~
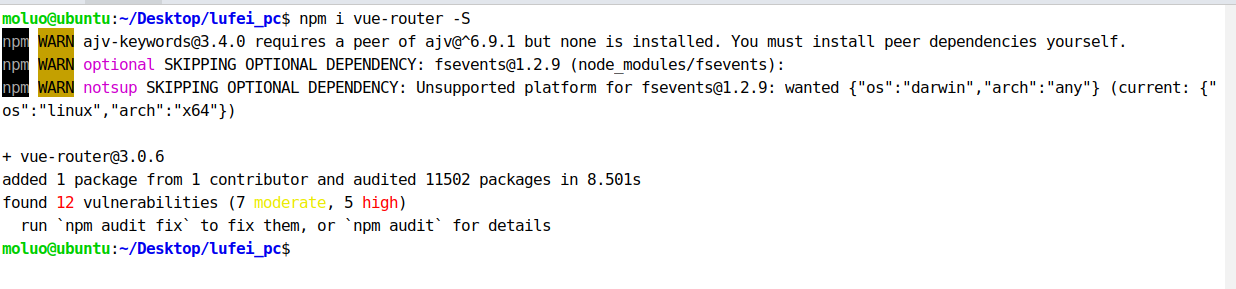
5.3 安装路由vue-router
5.3.1 下载路由组件
npm i vue-router -S
执行效果:
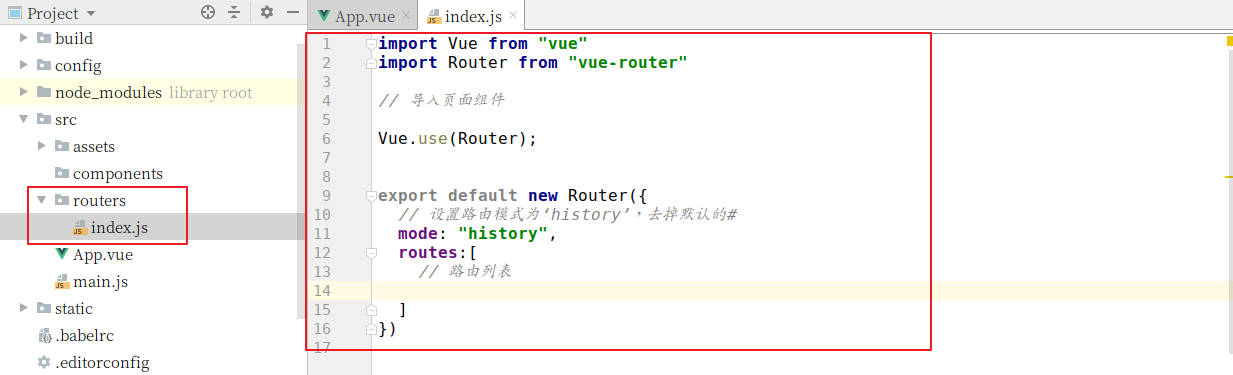
5.3.2 配置路由
5.3.2.1 初始化路由对象
在src目录下创建routers路由目录,在routers目录下创建index.js路由文件
index.js路由文件中,编写初始化路由对象的代码 .
import Vue from "vue"
import Router from "vue-router"

// 这里导入可以让让用户访问的组件

Vue.use(Router);

export default new Router({
  // 设置路由模式为‘history’,去掉默认的#
  mode: "history",
  routes:[
    // 路由列表

  ]
})
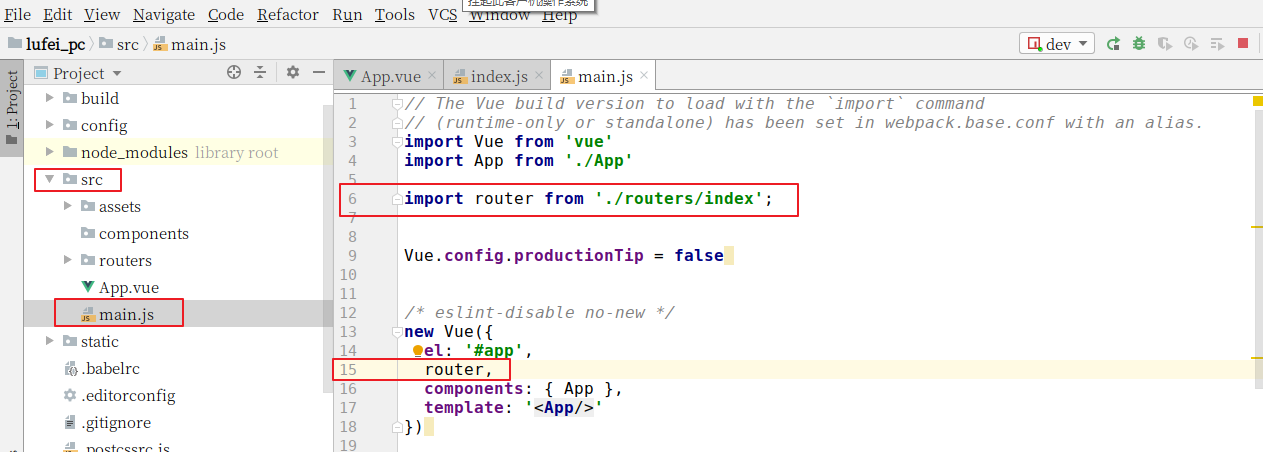
5.3.2.2 注册路由信息
打开main.js文件,把router对象注册到vue中.代码:
// The Vue build version to load with the `import` command
// (runtime-only or standalone) has been set in webpack.base.conf with an alias.
import Vue from 'vue'
import App from './App'
import router from './routers/index';

Vue.config.productionTip = false

/* eslint-disable no-new */
new Vue({
  el: '#app',
  router,
  components: { App },
  template: '<App/>'
});
5.3.2.3 在视图中显示路由对应的内容
在App.vue组件中,添加显示路由对应的内容。
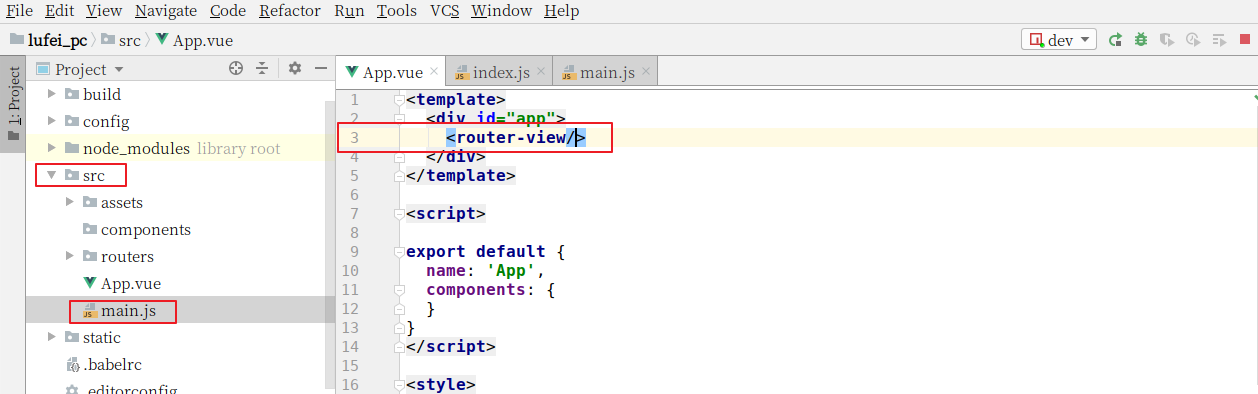
代码:
<template>
  <div id="app">
    <router-view/>
  </div>
</template>


<style>

</style>
5.3.2.4 创建并提供前端首页的组件
routers/index.js
// import Vue from "vue"
// import Router from "vue-router"
//
//
// // 这里导入可以让让用户访问的组件
import Home from "../components/Home"
// Vue.use(Router);
//
// export default new Router({
//   // 设置路由模式为‘history’,去掉默认的#
//   mode: "history",
//   routes:[
//     // 路由列表
     {
       name:"Home",
       path:"/",
       component:Home,
     },
      {
       name:"Home",
       path:"/home",
       component:Home,
     },
   ]
// })
创建Home组件
components/Home.vue
<template>
  <div id="home">
    前端首页
  </div>
</template>


<style scoped>

</style>

5.4 前端初始化全局变量和全局方法
在src目录下创建settings.js站点开发配置文件:
export default {
  Host:"http://127.0.0.1",
}
在main.js中引入
// // The Vue build version to load with the `import` command
// // (runtime-only or standalone) has been set in webpack.base.conf with an alias.
// import Vue from 'vue'
// import App from './App'
// import router from './routers/index';
import settings from "./settings"
// Vue.config.productionTip = false;
Vue.prototype.$settings = settings;
//
// /* eslint-disable no-new */
// new Vue({
//   el: '#app',
//   router,
//   components: { App },
//   template: '<App/>'
// });
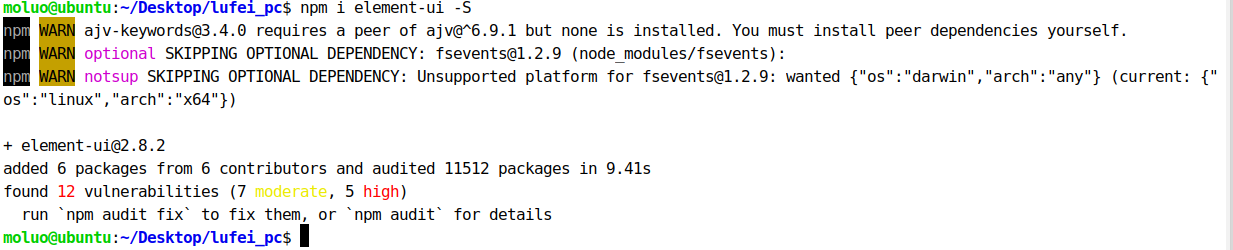
5.5 引入ElementUI
npm i element-ui -S
上面的命令等同于
npm install element-ui --save
执行命令效果:
5.5.1 配置ElementUI到项目中
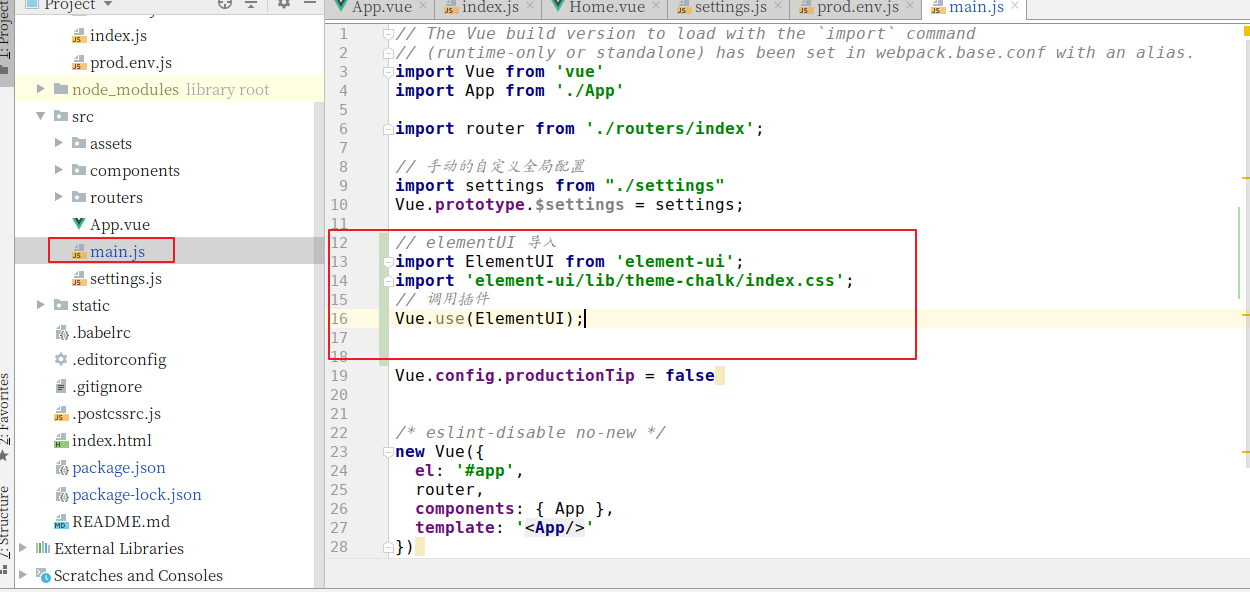
在main.js中导入ElementUI,并调用。
代码:
// The Vue build version to load with the `import` command
// (runtime-only or standalone) has been set in webpack.base.conf with an alias.
// import Vue from 'vue'
// import App from './App'
// import router from './routers/index';

// 开发配置文件
// import settings from "./settings"
// Vue.prototype.$settings = settings;

// elementUI 导入
import ElementUI from 'element-ui';
import 'element-ui/lib/theme-chalk/index.css';
// 调用插件
Vue.use(ElementUI);


// Vue.config.productionTip = false;

/* eslint-disable no-new */
// new Vue({
//   el: '#app',
//   router,
//   components: { App },
//   template: '<App/>'
// });
效果:
成功引入了ElementUI以后,接下来我们就可以开始进入前端页面开发,首先是首页。
接下来我们把之前完成的首页,直接拿过来使用[注意除了组件以外,还有静态文件也需要拿过来,包括App.vue里面的公共样式],并运行项目。
App.vue,全局css初始化代码
<style>
  body,h1,h2,h3,h4,h5,ul,p{
    padding: 0;
    margin:0;
    font-weight: normal;
  }
  body{
    margin-top: 80px;
  }
  a{
    text-decoration: none;
    color: #4a4a4a;
  }
  a:hover{
    color: #000;
  }

  ul{
    list-style: none;
  }

  img{
    width: 100%;
  }

  .header .el-menu li .el-submenu__title{
    height: 26px!important;
    line-height: 26px!important;
  }
  .el-menu--popup{
    min-width: 140px;
  }
  .el-checkbox__inner{
    width:16px;
    height: 16px;
    border: 1px solid #999;
  }
  .el-checkbox__inner:after{
    width: 6px;
    height: 8px;
  }
  .el-form-item__content{
    margin-left:0px!important;
    width: 120px;
  }
</style>
Home.vue中添加代码:
<template>
  <div id="home">
    <Header/>
    <Banner/>
    <Footer/>
  </div>
</template>


<style scoped>

</style>
components/common/Header.vue
<template>
<div class="header">
<el-container>
<el-header>
<el-row>
<el-col class="logo" :span="3">
<a href="/">
<img src="@/assets/head-logo.svg" alt="">
</a>
</el-col>
<el-col class="nav" :span="16">
<el-row>
<el-col :span="3"><router-link class="current" to="/course">免费课</router-link></el-col>
<el-col :span="3"><router-link to="/">轻课</router-link></el-col>
<el-col :span="3"><router-link to="/">学位课</router-link></el-col>
<el-col :span="3"><router-link to="/">题库</router-link></el-col>
<el-col :span="3"><router-link to="/">教育</router-link></el-col>
</el-row>
</el-col>
<el-col class="login-bar" :span="5">
<el-row v-if="token">
<el-col class="cart-ico" :span="9">
<router-link to="">
<b class="goods-number">0</b>
<img class="cart-icon" src="@/assets/cart.svg" alt="">
<span><router-link to="/cart">购物车</router-link></span>
</router-link>
</el-col>
<el-col class="study" :span="8" :offset="2"><router-link to="">学习中心</router-link></el-col>
<el-col class="member" :span="5">
<el-menu class="el-menu-demo" mode="horizontal">
<el-submenu index="2">
<template slot="title"><router-link to=""><img src="@/assets/[email protected]" alt=""></router-link></template>
<el-menu-item index="2-1">我的账户</el-menu-item>
<el-menu-item index="2-2">我的订单</el-menu-item>
<el-menu-item index="2-3">我的优惠卷</el-menu-item>
<el-menu-item index="2-3">退出登录</el-menu-item>
</el-submenu>
</el-menu>
</el-col>
</el-row>
<el-row v-else>
<el-col class="cart-ico" :span="9">
<router-link to="">
<img class="cart-icon" src="@/assets/cart.svg" alt="">
<span><router-link to="/cart">购物车</router-link></span>
</router-link>
</el-col>
<el-col :span="10" :offset="5">
<span class="register">
<router-link to="/login">登录</router-link>
|
<router-link to="/register">注册</router-link>
</span>
</el-col>
</el-row>
</el-col>
</el-row>
</el-header>
</el-container>
</div>
</template>
<style scoped>
.header{
top:0;
left:0;
right:0;
margin: auto;
background-color: #fff;
height: 80px;
z-index: 1000;
position: fixed;
box-shadow: 0 0.5px 0.5px 0 #c9c9c9;
}
.header .el-container{
width: 1200px;
margin: 0 auto;
}
.el-header{
height: 80px!important;
padding:0;
}
.logo{
}
.logo img{
padding-top: 22px;
}
.nav{
margin-top: 22px;
}
.nav .el-col a{
display: inline-block;
text-align: center;
padding-bottom: 16px;
padding-left: 5px;
padding-right: 5px;
position: relative;
font-size: 16px;
margin-left: 20px;
}
.nav .el-col .current{
color: #4a4a4a;
border-bottom: 4px solid #ffc210;
}
.login-bar{
margin-top: 22px;
}
.cart-ico{
position: relative;
border-radius: 17px;
}
.cart-ico:hover{
background: #f0f0f0;
}
.goods-number{
width: 16px;
height: 16px;
line-height: 17px;
font-size: 12px;
color: #fff;
text-align: center;
background: #fa6240;
border-radius: 50%;
transform: scale(.8);
position: absolute;
left: 16px;
top: -1px;
}
.cart-icon{
width: 15px;
height: auto;
margin-left: 6px;
}
.cart-ico span{
margin-left: 12px;
}
.member img{
width: 26px;
height: 26px;
border-radius: 50%;
display: inline-block;
}
.member img:hover{
border: 1px solid yellow;
}
</style>
components/common/Bannner.vue
<template>
  <div class="banner">
      <el-carousel trigger="click" height="473px">
        <el-carousel-item v-for="banner in banner_list">
          <a :href="banner.link"><img width="100%" :src="banner.img" alt=""></a>
        </el-carousel-item>
      </el-carousel>
  </div>
</template>


<style>
.el-carousel__arrow{
  width: 100px!important;
  height: 100px!important;
}
.el-icon-arrow-left{
  font-size: 35px;
  margin-left: 50px;
}
.el-carousel__arrow--left{
  left: -50px;
}
</style>
components/common/Footer.vue
<template>
  <div class="footer">
    <el-container>
      <el-row>
        <el-col :span="4"><router-link to="">关于我们</router-link></el-col>
        <el-col :span="4"><router-link to="">联系我们</router-link></el-col>
        <el-col :span="4"><router-link to="">商务合作</router-link></el-col>
        <el-col :span="4"><router-link to="">帮助中心</router-link></el-col>
        <el-col :span="4"><router-link to="">意见反馈</router-link></el-col>
        <el-col :span="4"><router-link to="">新手指南</router-link></el-col>
        <el-col :span="24"><p class="copyright">Copyright © luffycity.com版权所有 | 京ICP备17072161号-1</p></el-col>
      </el-row>
    </el-container>
  </div>
</template>


<style scoped>
.footer{
  width: 100%;
  height: 128px;
  background: #25292e;
}
.footer .el-container{
  width: 1200px;
  margin: auto;
}
.footer .el-row {
  align-items: center;
  padding: 0 200px;
  padding-bottom: 15px;
  width: 100%;
  margin-top: 38px;
}
.footer .el-row a{
  color: #fff;
  font-size: 14px;
}
.footer .el-row .copyright{
  text-align: center;
  color: #fff;
  font-size: 14px;
}
</style>
也可以把App.vue的style标签的css代码放到static外部目录下引用过来
main.js
import "../static/css/reset.css";
reset.css
body,h1,h2,h3,h4,h5,ul,p{
    padding: 0;
    margin:0;
    font-weight: normal;
  }
  body{
    margin-top: 80px;
  }
  a{
    text-decoration: none;
    color: #4a4a4a;
  }
  a:hover{
    color: #000;
  }

  ul{
    list-style: none;
  }

  img{
    width: 100%;
  }

  .header .el-menu li .el-submenu__title{
    height: 26px!important;
    line-height: 26px!important;
  }
  .el-menu--popup{
    min-width: 140px;
  }
  .el-checkbox__inner{
    width:16px;
    height: 16px;
    border: 1px solid #999;
  }
  .el-checkbox__inner:after{
    width: 6px;
    height: 8px;
  }
  .el-form-item__content{
    margin-left:0px!important;
    width: 120px;
  }
6. 跨域CORS
我们现在为前端和后端分别设置两个不同的域名:
| 位置 | 域名 |
|---|---|
| 前端 | www.luffycity.cn |
| 后端 | api.luffycity.cn |
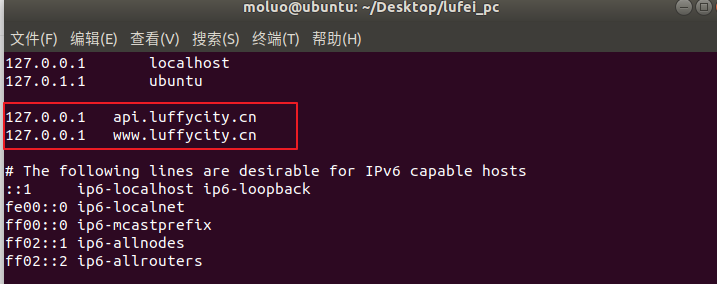
编辑/etc/hosts文件,可以设置本地域名
sudo vim /etc/hosts
在文件中增加两条信息
127.0.0.1   localhost
127.0.0.1   api.luffycity.cn
127.0.0.1   www.luffycity.cn
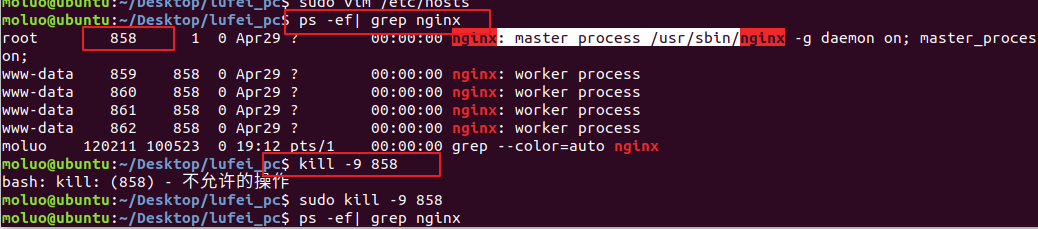
通过浏览器访问前端vue项目,会出现nginx的欢迎页面,主要因为我们当前项目已经有一个nginx监听了80端口,所以访问www.luffycity.cn网址时,会自动被转发到127.0.0.1本机,因为没有网址默认端口是80端口,所以被nginx进行处理了当前请求,因此我们暂时先把nginx关闭先。
# 查找nginx的进程
ps -ef|grep nginx
# 关闭进程
sudo kill -9 nginx进程号
关闭了nginx以后,访问www.luffy.cirty.cn网址,效果:
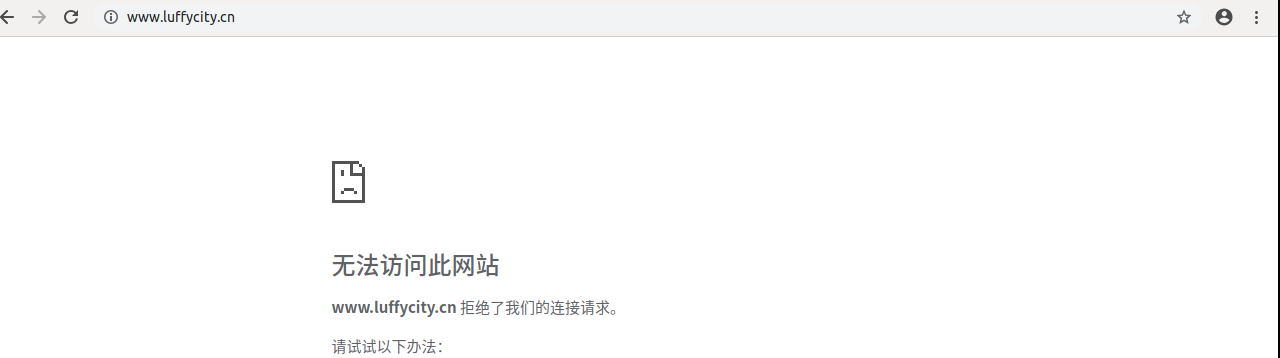
上面并不是错误,而是没人监听了这个地址和端口了,解决方法:
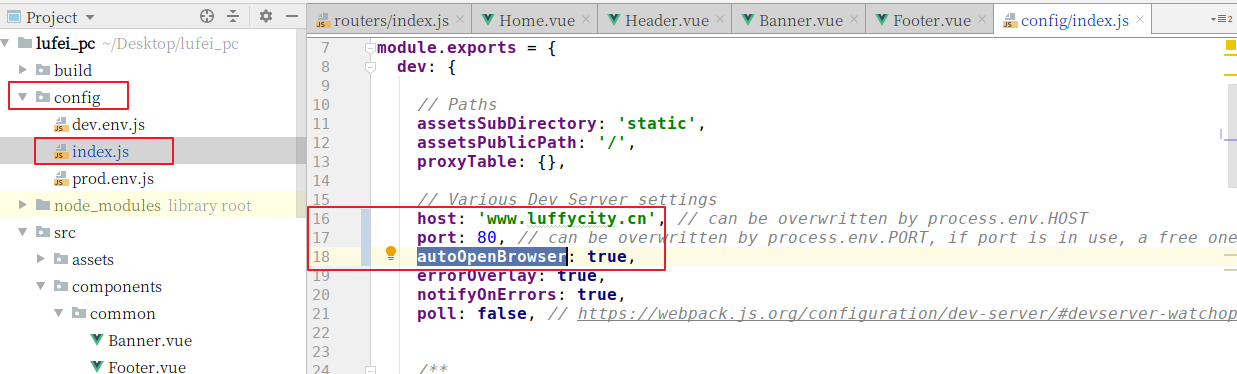
暂停运行前端项目,并修改配置文件config/index.js
    host: 'www.luffycity.cn', // can be overwritten by process.env.HOST
    port: 8080, // can be overwritten by process.env.PORT, if port is in use, a free one will be determined
    autoOpenBrowser: true,
保存修改信息,并重启项目
通过浏览器访问drf项目,会出现以下错误信息
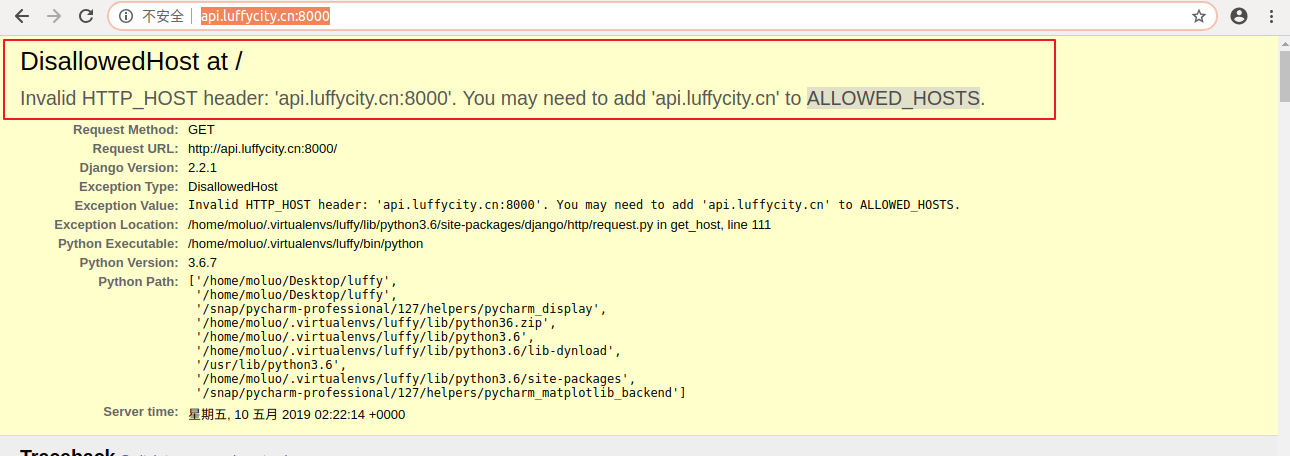
可以通过settings/dev.py的ALLOWED_HOSTS,设置允许访问
# 设置哪些客户端可以通过地址访问到后端
ALLOWED_HOSTS = [
    'api.luffycity.cn',
]

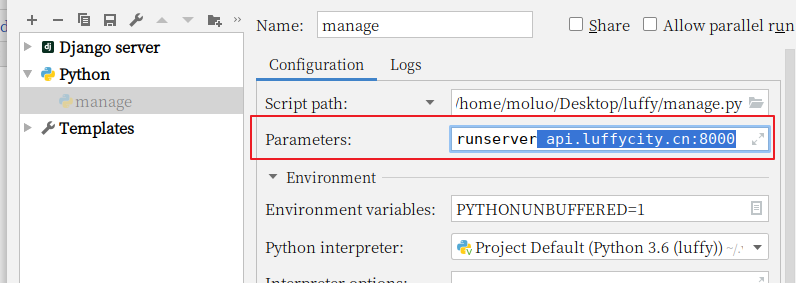
让用户访问的时候,使用api.luffycity.cn:8000
1. 修改pycharm的manage.py的配置参数
现在,前端与后端分处不同的域名,我们需要为后端添加跨域访问的支持
否则前端无法使用axios无法请求后端提供的api数据,我们使用CORS来解决后端对跨域访问的支持。
使用django-cors-headers扩展
在 Response(headers={"Access-Control-Allow-Origin":'客户端地址/*'})
文档:https://github.com/ottoyiu/django-cors-headers/
安装
pip install django-cors-headers
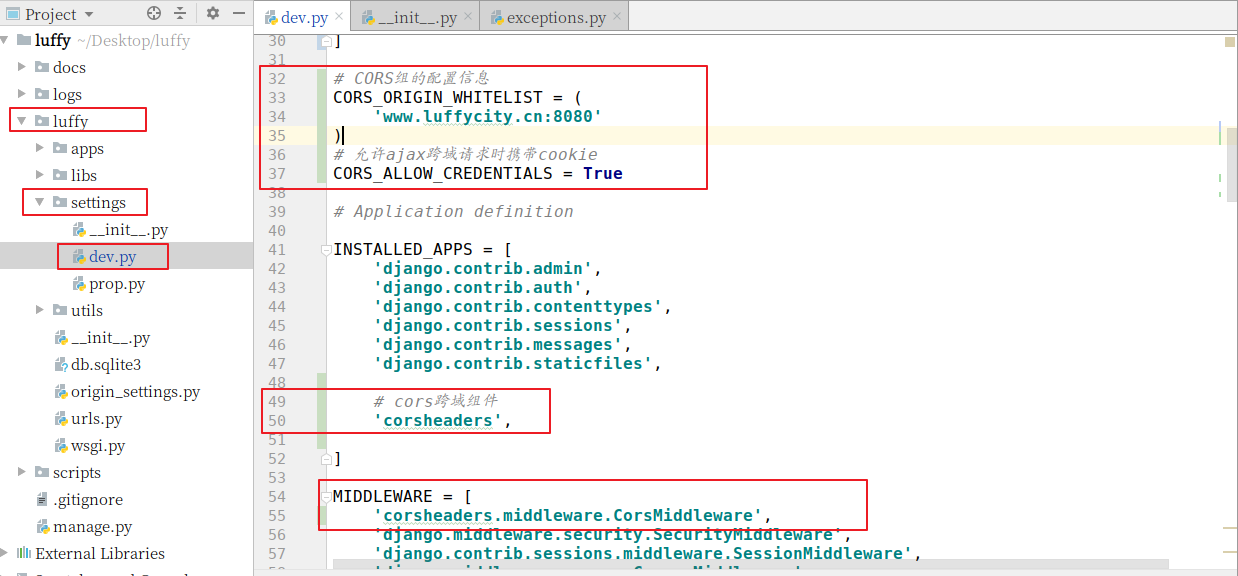
添加应用
INSTALLED_APPS = (
    ...
    'corsheaders',
    ...
)
中间层设置【必须写在第一个位置】
MIDDLEWARE = [
    'corsheaders.middleware.CorsMiddleware',
    ...
]
添加白名单
# CORS组的配置信息
CORS_ORIGIN_WHITELIST = (
    'www.luffycity.cn:8080'
)
CORS_ALLOW_CREDENTIALS = True  # 允许ajax跨域请求时携带cookie
完成了上面的步骤,我们就可以通过后端提供数据给前端使用ajax访问了。
前端使用 axios就可以访问到后端提供给的数据接口,但是如果要附带cookie信息,前端还要设置一下。
前端引入axios插件并配置允许axios发送cookie信息[axios本身也不允许ajax发送cookie到后端]
npm i axios -S
在main.js中引用 axios插件
import axios from 'axios'; // 从node_modules目录中导入包
// 允许ajax发送请求时附带cookie
axios.defaults.withCredentials = true;

Vue.prototype.$axios = axios; // 把对象挂载vue中