- MongoDB官网下载链接:https://www.mongodb.com/download-center/community
- MongoDB官网安装教程:https://docs.mongodb.com/manual/tutorial/install-mongodb-on-windows/
- MongoDB 3.6.11版本,官网下载:
绿色版(.zip):https://fastdl.mongodb.org/win32/mongodb-win32-x86_64-2008plus-ssl-3.6.11.zip
安装版(.msi):https://fastdl.mongodb.org/win32/mongodb-win32-x86_64-2008plus-ssl-3.6.11-signed.msi
个人偏好“绿色版”安装,其移植性、各系统识别性强,“一个zip装天下” ^_^。Windows、Linux、Mac系统均识别.zip文件。可在磁盘路径变化后,只需修改系统环境变量path路径,即可恢复正常使用。适用于对系统环境熟悉的人员。
注意:在 MongoDB 2.2 版本后已经不再支持 Windows XP 系统。最新版本也已经没有了 32 位系统的安装文件。
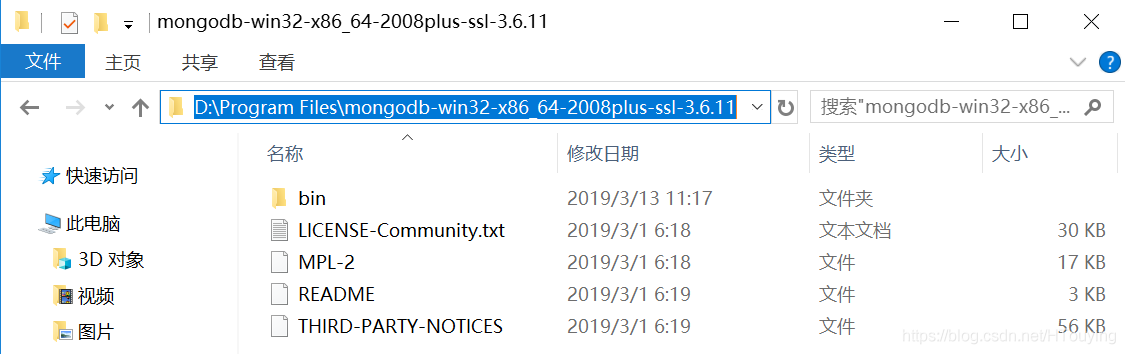
1. 自定义安装(解压)到:
D:\Program Files\mongodb-win32-x86_64-2008plus-ssl-3.6.11
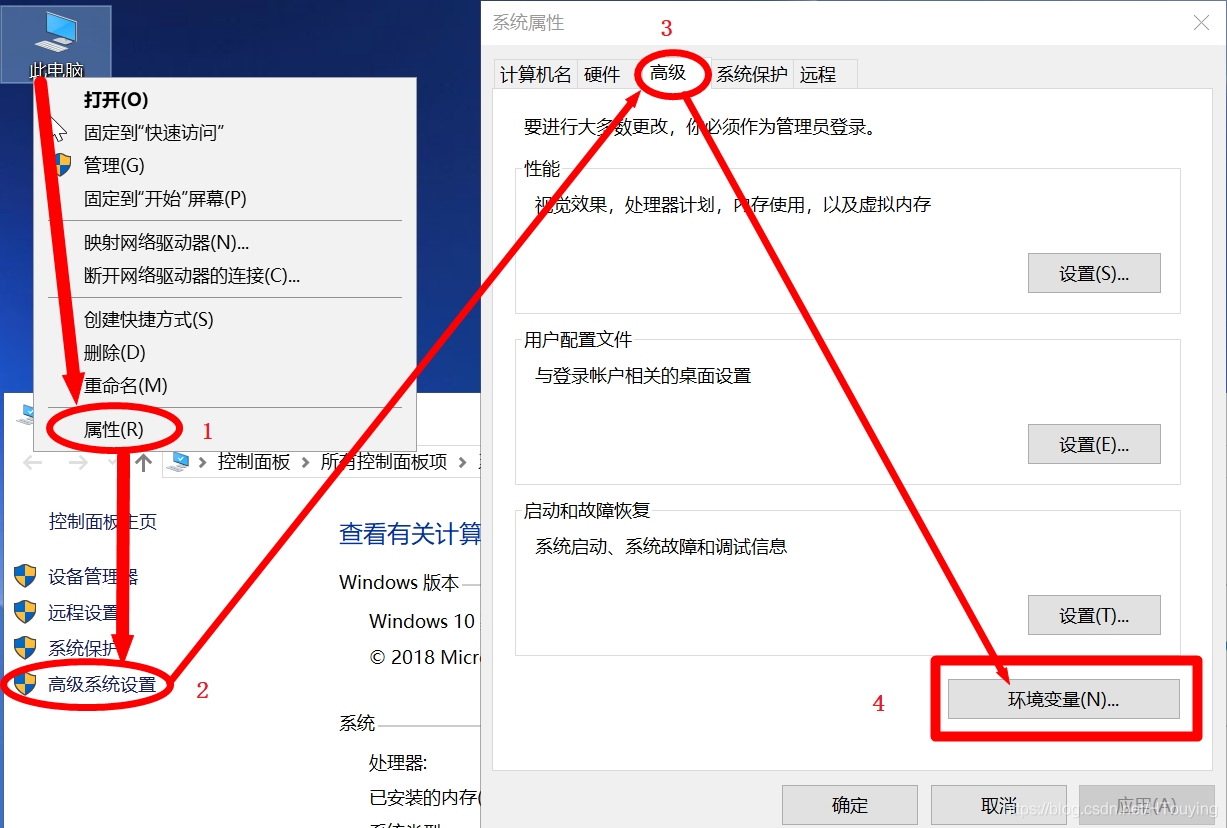
2. 配置系统环境变量path:

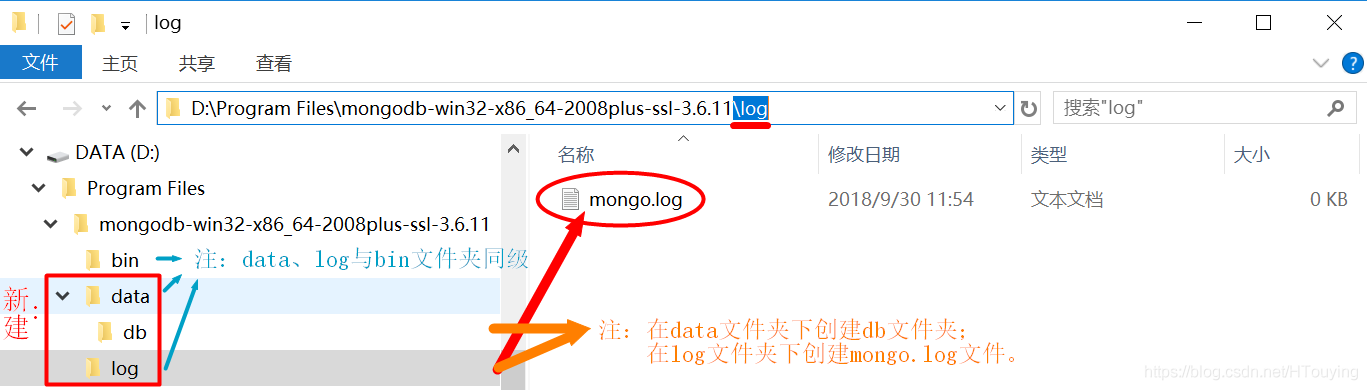
3. 在安装路径下创建文件夹和文件:
- "/data" 和 "/log" 两个文件夹("/data"文件夹下,用于存放数据库源数据;"/log"文件夹下,用于存放logger日志);
- 在data文件夹下创建"/db"空文件夹;
- 在log文件夹下创建"mongo.log"空文件。
注:其实data和log两个文件夹,在何处创建都无所谓,依个人习惯。关键在于下一步骤,"mongo.config"配置内容中,"dbpath"和"logpath"所指向的路径。
为将重要文件与非重要文件分离,以便数据移植,故data文件夹与log文件夹分开创建。
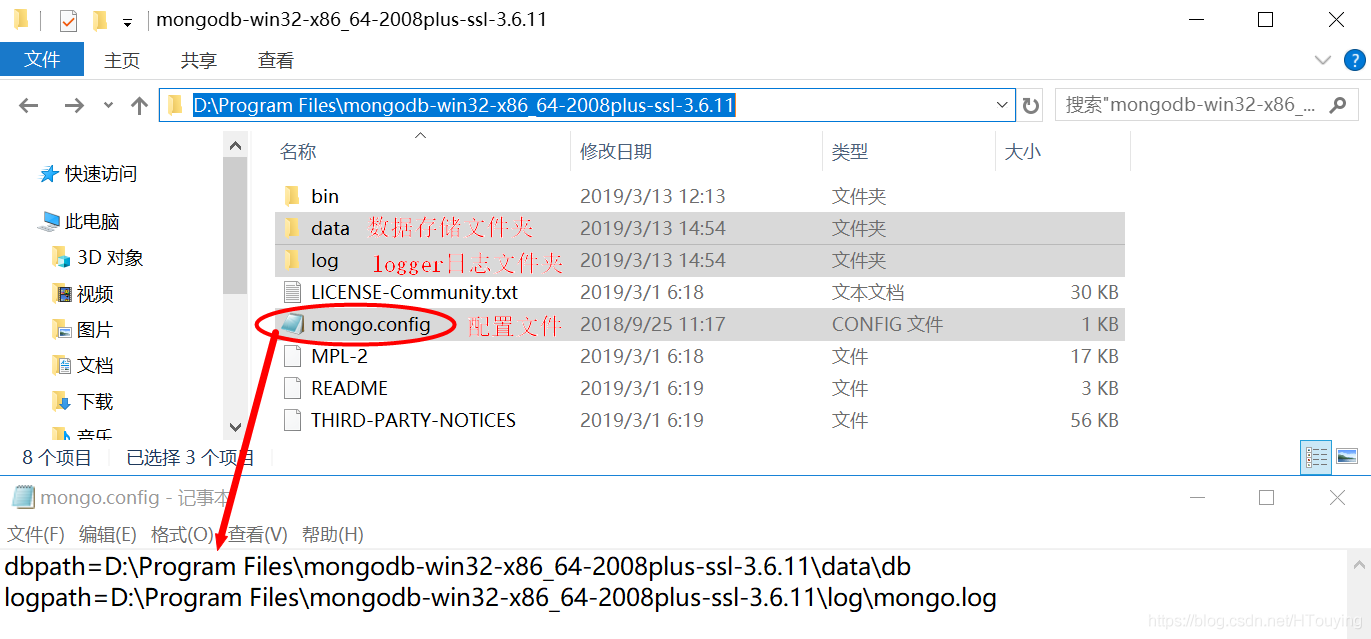
4. 在安装路径下创建配置文件“mongo.config”,并写入以下内容:
-
#数据库文件的存放位置
-
dbpath=D:\Program Files\mongodb-win32-x86_64-
2008plus-ssl-
3.6.
11\data\db
-
-
#日志文件存放的路径
-
logpath=D:\Program Files\mongodb-win32-x86_64-
2008plus-ssl-
3.6.
11\
log\mongo.log
5. 以“超级管理员身份”运行"cmd",创建MongoDB管理服务,输入以下命令:
mongod --config "D:\Program Files\mongodb-win32-x86_64-2008plus-ssl-3.6.11\mongo.config" --install --serviceName "MongoDB"

启动MongoDB服务命令(同样要使用“超级管理员身份运行”):
net start MongoDB关闭MongoDB服务命令:
net stop MongoDB
6. 启动服务完成后,win + R直接运行"cmd",输入"mongo"即可运行。
显示信息如下:
C:\Users\PC>mongo
MongoDB shell version v3.6.11
connecting to: mongodb://127.0.0.1:27017
MongoDB server version: 3.6.11
Server has startup warnings:
2019-03-13T15:36:39.950+0800 I CONTROL [initandlisten]
2019-03-13T15:36:39.950+0800 I CONTROL [initandlisten] ** WARNING: Access control is not enabled for the database.
2019-03-13T15:36:39.950+0800 I CONTROL [initandlisten] ** Read and write access to data and configuration is unrestricted.
2019-03-13T15:36:39.950+0800 I CONTROL [initandlisten]
2019-03-13T15:36:39.950+0800 I CONTROL [initandlisten] ** WARNING: This server is bound to localhost.
2019-03-13T15:36:39.950+0800 I CONTROL [initandlisten] ** Remote systems will be unable to connect to this server.
2019-03-13T15:36:39.950+0800 I CONTROL [initandlisten] ** Start the server with --bind_ip <address> to specify which IP
2019-03-13T15:36:39.950+0800 I CONTROL [initandlisten] ** addresses it should serve responses from, or with --bind_ip_all to
2019-03-13T15:36:39.950+0800 I CONTROL [initandlisten] ** bind to all interfaces. If this behavior is desired, start the
2019-03-13T15:36:39.950+0800 I CONTROL [initandlisten] ** server with --bind_ip 127.0.0.1 to disable this warning.
2019-03-13T15:36:39.950+0800 I CONTROL [initandlisten]
>
-
# 端口号,默认27017
-
#port=27017
-
-
# 数据库文件位置
-
dbpath=/data/db
-
-
#日志文件位置
-
logpath=/log/mongo.log
-
-
# 是否追加方式写入日志,默认True
-
logappend=
true
-
-
# 设置绑定ip
-
bind_ip =
127.0
.0
.1
-
# 设置端口
-
port =
27017
-
-
# 是否以守护进程方式运行,默认false
-
fork =
true
-
-
#这个选项可以过滤掉一些无用的日志信息,若需要调试使用请设置为false
-
quiet=
false
-
-
# 启用日志文件,默认启用
-
journal=
true
-
-
# 启用定期记录CPU利用率和 I/O 等待,默认false
-
#cpu = true
-
-
# 是否以安全认证方式运行,默认是不认证的非安全方式
-
#noauth = true
-
#auth = true
-
-
# 详细记录输出,默认false
-
#verbose = true
-
-
#用于开发驱动程序时验证客户端请求
-
#objcheck = true
-
-
# # 启用数据库配额管理,默认false
-
#quota = true
-
-
# 设置oplog日志记录等级,默认0
-
# 0=off (default)
-
# 1=W
-
# 2=R
-
# 3=both
-
# 7=W+some reads
-
#oplog = 0
-
-
# 是否打开动态调试项,默认false
-
#nocursors = true
-
-
# 忽略查询提示,默认false
-
#nohints = true
-
-
# 禁用http界面,默认为localhost:28017
-
#nohttpinterface = true
-
-
# 关闭服务器端脚本,这将极大的限制功能,默认false
-
#noscripting = true
-
-
# 关闭扫描表,任何查询将会是扫描失败
-
#notablescan = true
-
-
# 关闭数据文件预分配
-
#noprealloc = true
-
-
# 为新数据库指定.ns文件的大小,单位:MB
-
# nssize = <size>
-
-
# 用于Mongo监控服务器的Accout token。
-
#mms-token = <token>
-
-
# Mongo监控服务器的服务器名称。
-
#mms-name = <server-name>
-
-
# Mongo监控服务器的Ping间隔时间,即心跳
-
#mms-interval = <seconds>
-
-
# Replication Options
-
-
# 设置主从复制参数
-
#slave = true # 设置从节点
-
#source = master.example.com # 指定从节点的主节点
-
# Slave only: 指定要复制的单个数据库
-
#only = master.example.com
-
# or
-
#master = true # 设置主节点
-
#source = slave.example.com
-
-
# 设置副本集的名字,所有的实例指定相同的名字属于一个副本集
-
replSet = name
-
-
#pairwith = <server:port>
-
-
# 仲裁服务器地址
-
#arbiter = <server:port>
-
-
# 默认为false,用于从实例设置。是否自动重新同步
-
#autoresync = true
-
-
# 指定的复制操作日志(OPLOG)的最大大小
-
#oplogSize = <MB>
-
-
# 限制复制操作的内存使用
-
#opIdMem = <bytes>
-
-
# 设置ssl认证
-
# Enable SSL on normal ports
-
#sslOnNormalPorts = true
-
-
# SSL Key file and password
-
#sslPEMKeyFile = /etc/ssl/mongodb.pem
-
#sslPEMKeyPassword = pass
-
-
# path to a key file storing authentication info for connections
-
# between replica set members
-
#指定存储身份验证信息的密钥文件的路径
-
#keyFile=/path/to/keyfile
MongoDB集群基本配置:
-
# 集群配置文件
-
dbpath=/
var/lib/mongodb
-
logpath=/
var/log/mongodb/mongodb.log
-
pidfilepath=/
var/log/mongodb/master.pid
-
directoryperdb=
true
-
logappend=
true
-
replSet=name
-
bind_ip=
127.0
.0
.1
-
port=
27017
-
fork=
true
-
noprealloc=
true
原文地址:https://blog.csdn.net/HTouying/article/details/88428452