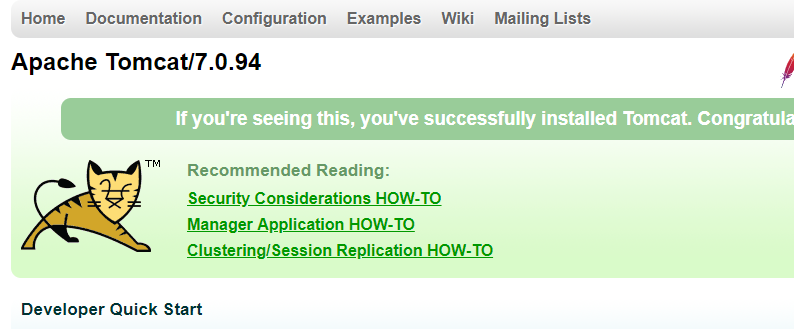
昨天新装了一个虚拟机,装了tomcat,jdk,准备随便扔一个应用上去跑着玩玩的,然后就发现被坑了。。。
1、tomcat启动正常不报错,但是主机就是无法访问,于是就用了
wget\curl在虚拟机中尝试,结果能通,怀疑防火墙于是
- 临时关闭防火墙
systemctl stop firewalld - 永久防火墙开机自关闭
systemctl disable firewalld - 临时打开防火墙
systemctl start firewalld - 防火墙开机启动
systemctl enable firewalld - 查看防火墙状态
systemctl status firewalld
关了之后,宿主就能访问到了,但是应用访问不了
https://blog.csdn.net/sudazf/article/details/50551822

2、来继续第二个坑
当时这个应用没注意看是在git里面找到的一个应用用来学习的,没仔细去看,直接在idea中打了一个包,但是尴尬的东东来了,
这个应用是基于springboot的,如果直接想用tomcat部署war包,打包的方式就需要改,需要改代码、pom;可以参考下面的方式
这里有个点,就是我们的springboot里面是集成了tomcat启动所有的jar(不需要单独的tomcat容器也能启动),所以参考下面的文档就能实现
https://blog.csdn.net/yalishadaa/article/details/70037846
把spring-boot项目按照平常的web项目一样发布到tomcat容器下
一、修改打包形式
在pom.xml里设置
<packaging>war</packaging>
二、移除嵌入式tomcat插件
在pom.xml里找到
spring-boot-starter-web依赖节点,在其中添加如下代码,<dependency> <groupId>org.springframework.boot</groupId> <artifactId>spring-boot-starter-web</artifactId> <!-- 移除嵌入式tomcat插件 --> <exclusions> <exclusion> <groupId>org.springframework.boot</groupId> <artifactId>spring-boot-starter-tomcat</artifactId> </exclusion> </exclusions> </dependency>
三、添加servlet-api的依赖
下面两种方式都可以,任选其一
<dependency> <groupId>javax.servlet</groupId> <artifactId>javax.servlet-api</artifactId> <version>3.1.0</version> <scope>provided</scope> </dependency><dependency> <groupId>org.apache.tomcat</groupId> <artifactId>tomcat-servlet-api</artifactId> <version>8.0.36</version> <scope>provided</scope> </dependency>
四、修改启动类,并重写初始化方法
我们平常用main方法启动的方式,都有一个App的启动类,代码如下:
-
@SpringBootApplication
public class Application {
    public static void main(String[] args) {
        SpringApplication.run(Application.class, args);
    }
}
我们需要类似于web.xml的配置方式来启动spring上下文了,在Application类的同级添加一个SpringBootStartApplication类,其代码如下:
/**
 * 修改启动类,继承 SpringBootServletInitializer 并重写 configure 方法
 */
public class SpringBootStartApplication extends SpringBootServletInitializer {

    @Override
    protected SpringApplicationBuilder configure(SpringApplicationBuilder builder) {
        // 注意这里要指向原先用main方法执行的Application启动类
        return builder.sources(Application.class);
    }
}
在项目根目录下(即包含pom.xml的目录),在命令行里输入:
mvn clean package即可, 等待打包完成,出现[INFO] BUILD SUCCESS即为打包成功。
然后把target目录下的war包放到tomcat的webapps目录下,启动tomcat,即可自动解压部署。
最后在浏览器中输入
http://localhost:[端口号]/[打包项目名]/发布成功
3、接着启动然后又来问题,本地跑跟虚拟机跑还是有差异的哈,数据库是配在本地的,然后虚拟机访问就会出现问题,尴尬。。。。
解决方案:
如果你想连接你的mysql的时候发生这个错误:
ERROR 1130: Host '192.168.1.3' is not allowed to connect to this MySQL server
1。 改表法。可能是你的帐号不允许从远程登陆,只能在localhost。这个时候只要在localhost的那台电脑,登入mysql后,更改 "mysql" 数据库里的 "user" 表里的 "host" 项,从"localhost"改称"%"
mysql -u root -pvmwaremysql>use mysql;
mysql>update user set host = '%' where user = 'root';
mysql>select host, user from user;
2. 授权法。例如,你想myuser使用mypassword从任何主机连接到mysql服务器的话。
GRANT ALL PRIVILEGES ON *.* TO 'myuser'@'%' IDENTIFIED BY 'mypassword' WITH GRANT OPTION;
如果你想允许用户myuser从ip为192.168.1.3的主机连接到mysql服务器,并使用mypassword作为密码
GRANT ALL PRIVILEGES ON *.* TO 'root'@'192.168.1.3' IDENTIFIED BY 'mypassword' WITH GRANT OPTION;
GRANT ALL PRIVILEGES ON *.* TO 'root'@'192.168.1.3' IDENTIFIED BY '1235' WITH GRANT OPTION;
mysql>flush privileges; 这句一定要加上!!!
- 临时关闭防火墙
systemctl stop firewalld - 永久防火墙开机自关闭
systemctl disable firewalld - 临时打开防火墙
systemctl start firewalld - 防火墙开机启动
systemctl enable firewalld - 查看防火墙状态
systemctl status firewalld
关了之后,宿主就能访问到了,但是应用访问不了
https://blog.csdn.net/sudazf/article/details/50551822

2、来继续第二个坑
当时这个应用没注意看是在git里面找到的一个应用用来学习的,没仔细去看,直接在idea中打了一个包,但是尴尬的东东来了,
这个应用是基于springboot的,如果直接想用tomcat部署war包,打包的方式就需要改,需要改代码、pom;可以参考下面的方式
这里有个点,就是我们的springboot里面是集成了tomcat启动所有的jar(不需要单独的tomcat容器也能启动),所以参考下面的文档就能实现
https://blog.csdn.net/yalishadaa/article/details/70037846
把spring-boot项目按照平常的web项目一样发布到tomcat容器下
一、修改打包形式
在pom.xml里设置
<packaging>war</packaging>
二、移除嵌入式tomcat插件
在pom.xml里找到
spring-boot-starter-web依赖节点,在其中添加如下代码,<dependency> <groupId>org.springframework.boot</groupId> <artifactId>spring-boot-starter-web</artifactId> <!-- 移除嵌入式tomcat插件 --> <exclusions> <exclusion> <groupId>org.springframework.boot</groupId> <artifactId>spring-boot-starter-tomcat</artifactId> </exclusion> </exclusions> </dependency>
三、添加servlet-api的依赖
下面两种方式都可以,任选其一
<dependency> <groupId>javax.servlet</groupId> <artifactId>javax.servlet-api</artifactId> <version>3.1.0</version> <scope>provided</scope> </dependency><dependency> <groupId>org.apache.tomcat</groupId> <artifactId>tomcat-servlet-api</artifactId> <version>8.0.36</version> <scope>provided</scope> </dependency>
四、修改启动类,并重写初始化方法
我们平常用main方法启动的方式,都有一个App的启动类,代码如下:
-
@SpringBootApplication
public class Application {
    public static void main(String[] args) {
        SpringApplication.run(Application.class, args);
    }
}
我们需要类似于web.xml的配置方式来启动spring上下文了,在Application类的同级添加一个SpringBootStartApplication类,其代码如下:
/**
 * 修改启动类,继承 SpringBootServletInitializer 并重写 configure 方法
 */
public class SpringBootStartApplication extends SpringBootServletInitializer {

    @Override
    protected SpringApplicationBuilder configure(SpringApplicationBuilder builder) {
        // 注意这里要指向原先用main方法执行的Application启动类
        return builder.sources(Application.class);
    }
}
在项目根目录下(即包含pom.xml的目录),在命令行里输入:
mvn clean package即可, 等待打包完成,出现[INFO] BUILD SUCCESS即为打包成功。
然后把target目录下的war包放到tomcat的webapps目录下,启动tomcat,即可自动解压部署。
最后在浏览器中输入
http://localhost:[端口号]/[打包项目名]/发布成功
3、接着启动然后又来问题,本地跑跟虚拟机跑还是有差异的哈,数据库是配在本地的,然后虚拟机访问就会出现问题,尴尬。。。。
解决方案:
如果你想连接你的mysql的时候发生这个错误:
ERROR 1130: Host '192.168.1.3' is not allowed to connect to this MySQL server
1。 改表法。可能是你的帐号不允许从远程登陆,只能在localhost。这个时候只要在localhost的那台电脑,登入mysql后,更改 "mysql" 数据库里的 "user" 表里的 "host" 项,从"localhost"改称"%"
mysql -u root -pvmwaremysql>use mysql;
mysql>update user set host = '%' where user = 'root';
mysql>select host, user from user;
2. 授权法。例如,你想myuser使用mypassword从任何主机连接到mysql服务器的话。
GRANT ALL PRIVILEGES ON *.* TO 'myuser'@'%' IDENTIFIED BY 'mypassword' WITH GRANT OPTION;
如果你想允许用户myuser从ip为192.168.1.3的主机连接到mysql服务器,并使用mypassword作为密码
GRANT ALL PRIVILEGES ON *.* TO 'root'@'192.168.1.3' IDENTIFIED BY 'mypassword' WITH GRANT OPTION;
GRANT ALL PRIVILEGES ON *.* TO 'root'@'192.168.1.3' IDENTIFIED BY '1235' WITH GRANT OPTION;
mysql>flush privileges; 这句一定要加上!!!