在开始搭建之前先来一张图,说明一下现在需要搭建的Hystrix,需要创建三个项目,一个是Hystrix Dashboard,用于收集每一个节点的监控数据;一个是但节点的Hystrix Client用于展示客户端上报到Hystrix Dashboard的过程;一个是服务调用的时候,服务端和客户端都将数据上报到Hystrix DashBoard,该项目在后续引入Feign的时候再进行集成。

一、hystrix-client项目
1、在start.spring.io中添加Web、Actuator、Hystrix
2、在启动类中添加@EnableCircuitBreaker注解
激活Hystrix服务可以使用@EnableCircuitBreaker注解,也可以使用@EnableHystrix注解。@EnableCircuitBreaker相当于@EnableHystrix + Spring Cloud 功能(如 /hystrix.stream 端点)
import org.springframework.boot.SpringApplication;
import org.springframework.boot.autoconfigure.SpringBootApplication;
import org.springframework.cloud.client.circuitbreaker.EnableCircuitBreaker;

@EnableCircuitBreaker
@SpringBootApplication
public class HystrixClientApplication {
	public static void main(String[] args) {

		SpringApplication.run(HystrixClientApplication.class, args);
	}
}3、添加一个ServletRegistrationBean配置文件
添加一个ServletRegistrationBean<HystrixMetricsStreamServlet>类型的Spring Bean,只要能保证@ComponentScan能扫描到就可以了,为了方便我直接放到与启动类同级的根目录下:
import com.netflix.hystrix.contrib.metrics.eventstream.HystrixMetricsStreamServlet;
import org.springframework.boot.web.servlet.ServletRegistrationBean;
import org.springframework.context.annotation.Bean;
import org.springframework.context.annotation.Configuration;

@Configuration
public class ConfigBean {

    /**
     *  配置
     * @return 配置信息
     */
    @Bean
    public ServletRegistrationBean<HystrixMetricsStreamServlet> getServlet() {
        HystrixMetricsStreamServlet servlet = new HystrixMetricsStreamServlet();
        ServletRegistrationBean<HystrixMetricsStreamServlet> bean = new ServletRegistrationBean<>(servlet);
        bean.addUrlMappings("/hystrix.stream");
        bean.setName("HystrixMetricsStreamServlet");
        return bean;
    }
}
4、添加Controller
使用Hystrix注解的方式,在Controller中利用Random模拟调用方法的执行所消耗的时间,如果超时调用异常方法的逻辑,进行返回,下面分别是注解式和编程式的Controller。
import com.netflix.hystrix.contrib.javanica.annotation.HystrixCommand;
import com.netflix.hystrix.contrib.javanica.annotation.HystrixProperty;
import org.springframework.web.bind.annotation.GetMapping;
import org.springframework.web.bind.annotation.RestController;

import java.util.Random;

@RestController
public class HystrixAnnotationDemoController {

    /**
     *  启动一个随机数
     */
    private static Random random = new Random();

    @HystrixCommand(
            fallbackMethod = "errorFunction",
            commandProperties = {
                    @HystrixProperty(name = "execution.isolation.thread.timeoutInMilliseconds",
 value = "100")
            }
    )
    @GetMapping("/hello")
    public String getHelloWorld() throws InterruptedException {
        int value = random.nextInt(200);
        System.out.println("get hello value = " + value);
        Thread.sleep(value);
        return "hello world!";
    }

    public String errorFunction() {
        return "get timeout!";
    }
}
import com.netflix.hystrix.HystrixCommand;
import com.netflix.hystrix.HystrixCommandGroupKey;
import org.springframework.web.bind.annotation.GetMapping;
import org.springframework.web.bind.annotation.RestController;
import java.util.Random;
@RestController
public class HystrixCodeDemoController {
private static Random random = new Random();
@GetMapping("hello2")
public String getHello2() {
return new HelloCommand().execute();
}
private class HelloCommand extends HystrixCommand<String> {
protected HelloCommand() {
super(HystrixCommandGroupKey.Factory.asKey("helloWorld!"), 100);
}
@Override
protected String run() throws Exception {
int value = random.nextInt(200);
System.out.println("get hello 2 value = " + value);
Thread.sleep(value);
return "hello world-2!";
}
@Override
protected String getFallback() {
return "error --- 2";
}
}
}在浏览器端分别调用服务: http://localhost:8769/hello http://localhost:8769/hello2 多调用几次就可以看见熔断后的返回结果
二、hystrix-dashboard 项目
1、在start.spring.io中添加Web、Actuator、Hystrix 、Hystrix Dashboard
2、在启动类中添加@EnableHystrixDashboard注解,并且启动项目即可
import org.springframework.boot.SpringApplication;
import org.springframework.boot.autoconfigure.SpringBootApplication;
import org.springframework.cloud.netflix.hystrix.dashboard.EnableHystrixDashboard;
import java.util.HashMap;
/**
* 熔断器的Web控制面板, 访问路径: http://ip:port/hystrix/
*
* 在进入监控页面后访问设置需要监控的服务器地址: 如:http://localhost:8768/hystrix.stream
* 设置delay值
* 点击监控即可!
*/
@SpringBootApplication
@EnableHystrixDashboard
public class HystrixDashboardApplication {
public static void main(String[] args) {
SpringApplication.run(HystrixDashboardApplication.class, args);
}
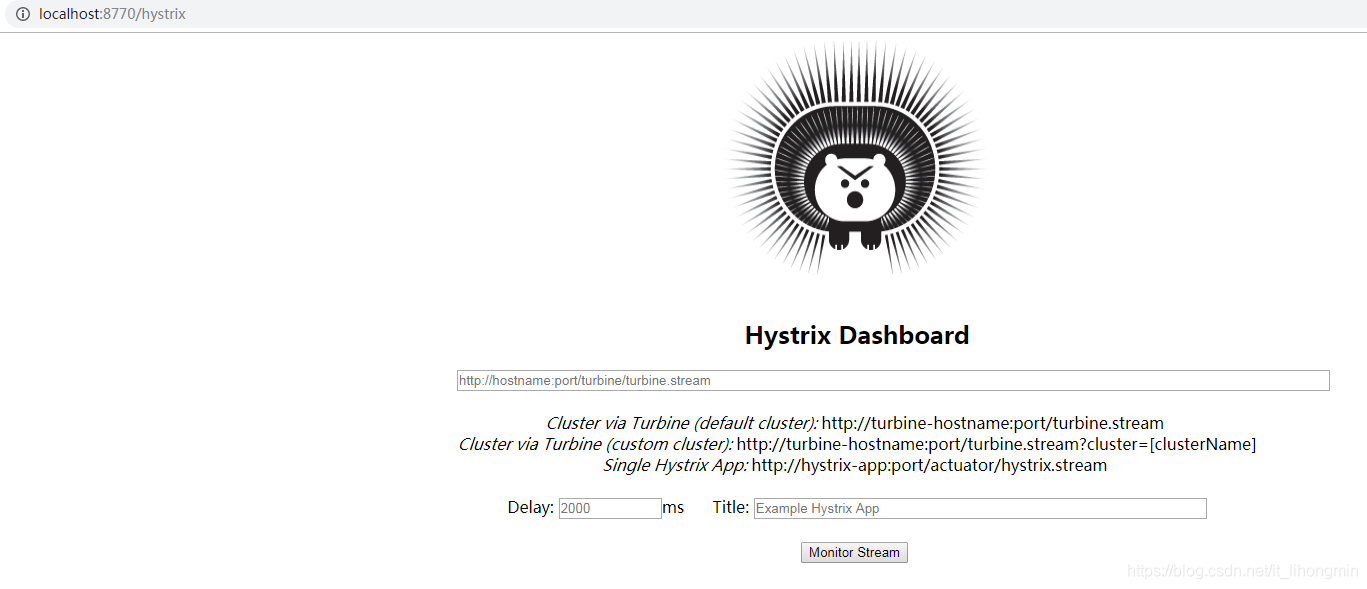
}比如启动端口为: 8770,访问地址为: http://localhost:8770/hystrix.stream,界面如下:
3、监控Hystrix节点
控制面板中,根据单节点还是集群方式,添加监控的url, 比如当前为单节点地址为: http://localhost:8769/hystrix.stream
填写延迟时间和标题,点击监控按钮。再调用几次监控的服务,即可看见下面的界面。
