学习《学成在线》的时候需要fastdfs,啥也不说了,都是泪,安了两天才搞定,在这里借鉴了两篇大神的著作,最后会附上,开始吧
安装前准备
(1)环境CentOS7,先下载所需要的全部工具
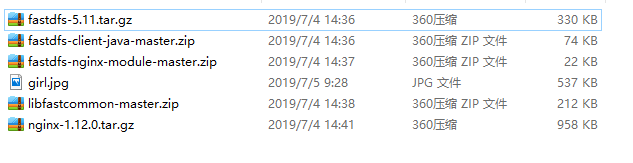
yum -y install zlib zlib-devel pcre pcre-devel gcc gcc-c++ openssl openssl-devel libevent libevent-devel perl unzip net-tools wget(2)搭建的所有工具截图
链接:https://pan.baidu.com/s/1t-ZwmqtanT4Q4LHrQaQzhA 提取码:o7xv
(3)创建好tracker和storage文件夹
mkdir -p /home/mm/fastdfs/tracker
mkdir -p /home/mm/fastdfs/storage
开始安装
我是把所有的文件都上传到/usr/local里了,大家随意
(1)安装libfastcommon
unzip libfastcommon-master.zip
cd libfastcommon-master
执行编译 make.sh
执行安装make.sh install
执行软链接
ln -s /usr/lib64/libfastcommon.so /usr/local/lib/libfastcommon.so
ln -s /usr/lib64/libfastcommon.so /usr/lib/libfastcommon.so
ln -s /usr/lib64/libfdfsclient.so /usr/local/lib/libfdfsclient.so
ln -s /usr/lib64/libfdfsclient.so /usr/lib/libfdfsclient.so
(2)安装FastDFS
回到/usr/local
执行 tar -zxvf fastdfs-5.11.tar.gz
cd fastdfs-5.11
./make.sh
./make.sh install
查看可执行命令
ls -la /usr/bin/fdfs*

接下来,继续
[root@localhost sbin]# cd /etc/fdfs/
[root@localhost fdfs]# ll
-rw-r--r--. 1 root root 1461 6月 24 13:19 client.conf.sample
-rw-r--r--. 1 root root 7927 6月 24 13:19 storage.conf.sample
-rw-r--r--. 1 root root 7389 6月 24 13:19 tracker.conf.sample
我们需要把这三个实例文件复制一份,去掉sample
cp client.conf.sample client.conf
cp storage.conf.sample storage.conf
cp tracker.conf.sample tracker.conf
到此~FastDFS安装结束。
(3)配置Tracker服务
编辑tracker.conf:vi tracker.conf,修改相关参数
base_path=/home/mm/fastdfs/tracker  #tracker存储data和log的跟路径,必须提前创建好
http.server_port=80 #http端口,需要和nginx相同
启动 tracker 命令如下。
service fdfs_trackerd start如果不能成功启动,可以通systemctl命令
systemctl start fdfs_trackerd成功之后可以看见
[root@localhost fdfs]# service fdfs_trackerd start
Starting fdfs_trackerd (via systemctl):                    [  OK  ]
然后 我们不能每次都这么启动tracker,我们需要给tracker加入开机启动
首先需要给执行权限,
chmod +x /etc/rc.d/rc.local
然后开始修改rc.local
vi /etc/rc.d/rc.local
在配置文件最后加下最后一句话即可
#!/bin/bash
# THIS FILE IS ADDED FOR COMPATIBILITY PURPOSES
#
# It is highly advisable to create own systemd services or udev rules
# to run scripts during boot instead of using this file.
#
# In contrast to previous versions due to parallel execution during boot
# this script will NOT be run after all other services.
#
# Please note that you must run 'chmod +x /etc/rc.d/rc.local' to ensure
# that this script will be executed during boot.

touch /var/lock/subsys/local
service fdfs_trackerd start
保存,然后 查看tracker端口监听情况
[root@localhost fastdfs_tracker]# netstat -unltp|grep fdfs
tcp 0 0 0.0.0.0:22122 0.0.0.0:* LISTEN 7850/fdfs_trackerd
到此22122端口监听成功。
(4)配置Storage服务
vi /etc/fdfs/storage.conf,修改相关参数:
base_path=/home/mm/fastdfs/storage   #storage存储data和log的跟路径,必须提前创建好
store_path0=/home/mm/fastdfs/storage  #如果为空,则使用base_path
tracker_server=192.168.1.134:22122 #配置该storage监听的tracker的ip和port
保存之后 创建软引用
ln -s /usr/bin/fdfs_storaged /usr/local/bin启动storage
service fdfs_storaged start
同理 如果不能启动可以用下述命令
systemctl start fdfs_storaged
成功应该是如下
[root@localhost fdfs]# service fdfs_stroaged start
Starting fdfs_storaged (via systemctl):                    [  OK  ]
同样设置开机启动
修改rc.local
vim /etc/rc.d/rc.local
#!/bin/bash
# THIS FILE IS ADDED FOR COMPATIBILITY PURPOSES
#
# It is highly advisable to create own systemd services or udev rules
# to run scripts during boot instead of using this file.
#
# In contrast to previous versions due to parallel execution during boot
# this script will NOT be run after all other services.
#
# Please note that you must run 'chmod +x /etc/rc.d/rc.local' to ensure
# that this script will be executed during boot.

touch /var/lock/subsys/local
service fdfs_trackerd start
service fdfs_storaged start
同样查看服务是否启动
[root@localhost 00]# netstat -unltp | grep fdfs
tcp        0      0 0.0.0.0:22122           0.0.0.0:*               LISTEN      7850/fdfs_trackerd
tcp        0      0 0.0.0.0:23000           0.0.0.0:*               LISTEN      8077/fdfs_storaged
服务启动,到此fastdfs已经配置完成了。最后我们再确认一下,storage是否注册到了tracker中去。
/usr/bin/fdfs_monitor /etc/fdfs/storage.conf
成功后可以看到:
ip_addr = 192.168.150.132 (localhost.localdomain) ACTIVE 的字样