我没有去下载 Percona-XtraDB-Cluster ,而是通过更新yum源的方式:
rpm -Uvh https://www.percona.com/redir/downloads/percona-release/redhat/0.1-6/percona-release-0.1-6.noarch.rpm一 准备工作
1. 准备三台机器:
192.168.158.144
192.168.158.145
192.168.158.146
2. 关闭三台机器上的selinux校验
setenforce 0
3. 在三台机器上分别更新percona-release的yum源:
rpm -Uvh https://www.percona.com/redir/downloads/percona-release/redhat/0.1-6/percona-release-0.1-6.noarch.rpm
更新过yum源后,会在 /etc/yum.repos.d/ 下生成 percona-release.repo,如图:

此时,

二 在3台机器上安装 Percona-XtraDB-Cluster
1 先查看有哪些可用Percona-XtraDB-Cluster包,
yum list | grep percona
percona 安装包依赖关系:
Percona-XtraDB-Cluster-57-5.7.23-31.31.1.el7.x86_64.rpm 依赖于:
Percona-XtraDB-Cluster-server-57 = 5.7.23-31.31.1.el7
Percona-XtraDB-Cluster-client-57 = 5.7.23-31.31.1.el7Percona-XtraDB-Cluster-client-57-5.7.23-31.31.1.el7.x86_64.rpm 依赖于:
perl-DBIPercona-XtraDB-Cluster-server-57-5.7.23-31.31.1.el7.x86_64.rpm 依赖于:
Percona-XtraDB-Cluster-client-57 = 5.7.23-31.31.1.el7
Percona-XtraDB-Cluster-shared-57 = 5.7.23-31.31.1.el7
percona-xtrabackup-24 >= 2.4.12
perl(Data::Dumper)
perl-DBD-MySQL
perl-DBI
qpress
socatpercona-xtrabackup-80-8.0.6-1.el7.x86_64.rpm 依赖于:
libev.so.4()(64bit)
perl(DBD::mysql)
perl(Digest::MD5)Percona-XtraDB-Cluster-shared-57-5.7.23-31.31.1.el7.x86_64.rpm 有一个冲突:
error: Failed dependencies:
mariadb-libs >= 5.5.37 is obsoleted by Percona-XtraDB-Cluster-shared-57-5.7.23-31.31.1.el7.x86_64
因此,安装顺序:
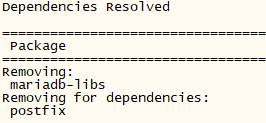
移除的依赖:
[root@sjk2 ~]# rpm -qa|grep mariadb
mariadb-libs-5.5.56-2.el7.x86_64
yum -y remove mariadb-libs
移除依赖 mariadb-libs 后,
![]()
同时,/etc/ 下也不再有 ![]()
安装依赖1:
yum -y install socat安装依赖2:
yum -y install libev安装依赖3:
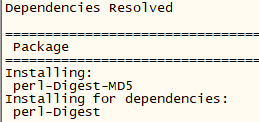
yum -y install perl-Digest-MD5或者你多安几个也无所谓:
yum -y install perl-Digest-MD5 perl-Digest-SHA perl-Digest-SHA1


安装依赖4:
[root@sjk1 ~]# yum -y install qpress
qpress 来自于 percona-release-x86_64 这个yum 库
有可能出现问题:
The GPG keys listed for the "Percona-Release YUM repository - x86_64" repository are already installed but they are not correct for this package.
Check that the correct key URLs are configured for this repository.
Failing package is: Percona-Server-shared-56-5.6.44-rel86.0.el7.x86_64
GPG Keys are configured as: file:///etc/pki/rpm-gpg/RPM-GPG-KEY-Percona
解决方案:
yum -y install qpress --nogpgcheck遇到这种问题,解决方案同此,加 --nogpgcheck 。下同。
这个问题往往源于用户仓库中的rpm包有时候是用户自己制作的,或者从第三方获取,这个时候问题就会出现。从字面上理解,是“为“***”源码仓库出示的GPG密钥已经安装,但不正确”。
首先,GPG密钥存在的目的是处于安全和规范考虑,RedHat在发布软件包的时候会根据软件包生成对应密钥,当用户安装软件包的时候会根据密钥校验软件包。
若是用yum安装,当/etc/yum.conf文件有如下配置项目时。
gpgcheck=1
yum安装的时候就会校验软件包是否是官方发布的。当然可以给yum添加--nogpgcheck来强制安装。
sudo yum install *** --nogpgcheck
安装 percona 组件:
安装percona组件1 Percona-XtraDB-Cluster-shared-57
yum -y install Percona-XtraDB-Cluster-shared-57 --nogpgcheck安装percona组2 Percona-XtraDB-Cluster-shared-compat-57
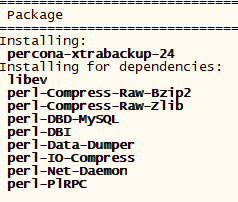
yum -y install Percona-XtraDB-Cluster-shared-compat-57 --nogpgcheck安装percona组件3 percona-xtrabackup-24
yum -y install percona-xtrabackup-24 --nogpgcheck
安装percona组件4 Percona-XtraDB-Cluster-client-57
yum -y install Percona-XtraDB-Cluster-client-57 --nogpgcheck安装percona组件5 Percona-XtraDB-Cluster-server-57
yum -y install Percona-XtraDB-Cluster-server-57 --nogpgcheckyum 安装时会提示UDFs功能,根据需要可以在mysql启动后执行以下语句:
Percona XtraDB Cluster is distributed with several useful UDFs from Percona Toolkit.
Run the following commands to create these functions:
mysql -e "CREATE FUNCTION fnv1a_64 RETURNS INTEGER SONAME 'libfnv1a_udf.so'"
mysql -e "CREATE FUNCTION fnv_64 RETURNS INTEGER SONAME 'libfnv_udf.so'"
mysql -e "CREATE FUNCTION murmur_hash RETURNS INTEGER SONAME 'libmurmur_udf.so'"

安装 Percona-XtraDB-Cluster-server-57 后,会删除旧的 /etc/my.cnf(如果有的话),并生成新的
![]() 和
和 ![]()
新的 my.cnf 内容如下:

安装percona组件6 Percona-XtraDB-Cluster-57
yum -y install Percona-XtraDB-Cluster-57 --nogpgcheckyum 安装 Percona组件 顺序汇总:

三 配置mysql及集群配置文件
默认主配置文件 /etc/my.cnf 文件内容如下:
[root@sjk1 ~]# more /etc/my.cnf
#
# The Percona XtraDB Cluster 5.7 configuration file.
#
#
# * IMPORTANT: Additional settings that can override those from this file!
#   The files must end with '.cnf', otherwise they'll be ignored.
#   Please make any edits and changes to the appropriate sectional files
#   included below.
#
!includedir /etc/my.cnf.d/
!includedir /etc/percona-xtradb-cluster.conf.d/
而 /etc/my.cnf.d/ 下为空的,/etc/percona-xtradb-cluster.conf.d/下有3个配置文件:
[root@sjk1 ~]# ls /etc/my.cnf.d
[root@sjk1 ~]# ls /etc/percona-xtradb-cluster.conf.d/
mysqld.cnf  mysqld_safe.cnf  wsrep.cnf
所以,mysql及集群的配置文件修改,主要包括3个配置文件内容的修改:mysqld.cnf、mysqld_safe.cnf、wsrep.cnf
下面我将采用直接改动主配置文件my.cnf,而不去改动mysqld.cnf、mysqld_safe.cnf、wsrep.cnf
其中 mysqld_safe.cnf的默认内容如下:
[root@sjk1 percona-xtradb-cluster.conf.d]# more mysqld_safe.cnf
#
# The Percona Server 5.7 configuration file.
#
# One can use all long options that the program supports.
# Run program with --help to get a list of available options and with
# --print-defaults to see which it would actually understand and use.
#
# For explanations see
# http://dev.mysql.com/doc/mysql/en/server-system-variables.html

[mysqld_safe]
pid-file = /var/run/mysqld/mysqld.pid
socket   = /var/lib/mysql/mysql.sock
nice     = 0
以第一个节点的 my.cnf 举例。内容更改如下:
[root@sjk1 etc]# cat my.cnf
[mysqld]

#cluster parameters
#wsrep lib
wsrep_provider=/usr/lib64/libgalera_smm.so
#cluster address,first time using blank,then fill with the real node ips
wsrep_cluster_address=gcomm://192.168.158.144,192.168.158.145,192.168.158.146
#wsrep_cluster_address=gcomm://
#must be row
binlog_format=ROW
#only support innodb
default_storage_engine=InnoDB
#must to 2
innodb_autoinc_lock_mode=2
#this node ip address
wsrep_node_address=192.168.158.144
#our cluster name,must be unique in the whole cluster
wsrep_cluster_name=honor-production
wsrep_node_name=honor_node1
#sst syc method
wsrep_sst_method=xtrabackup-v2
#sst user and password
wsrep_sst_auth="sstuser:s3cret"
#transaction cache for Galera replication,larger size,bigger chance to use ist
wsrep_provider_options="gcache.size=300M;gcache.page_size=300M"
#replication transactions threads for client
wsrep_slave_threads=6
#change it to RSU,when big change like alter table ,change column name, add index happened, otherwise it will infute the whole cluster,
wsrep_OSU_method=TOI

#db parameters
log-slave-updates = 1
server-id=144
log-bin=bin-log
expire_logs_days = 7
skip-name-resolve
skip-host-cache
character-set-server=utf8
#the data files go to
datadir=/mysql
#men cache,up tp 60% of whole physical memory,change it when deploy to production env
innodb_buffer_pool_size=200M
#each log file
innodb_log_file_size=256M
#each table in a seprate storage file
innodb_file_per_table=1
#log buffer
innodb_flush_log_at_trx_commit=2
#too small will cause commit error
max_allowed_packet=20M
#it will first read cache,then go to open table
table_open_cache=1024
#increase sort by
sort_buffer_size=4M
join_buffer_size=8M
#increase table sequence scan
read_buffer_size=10M
#1g->8
thread_cache_size=320
tmp_table_size=512M
wait_timeout=108000
max_connections = 5000
query_cache_type=1
query_cache_limit=2M
query_cache_size=512M
slow_query_log=ON
general_log=ON
long_query_time=2
四 启动PXC集群
1 启动第一个节点
[root@sjk1 ~]# systemctl start [email protected]
启动后查看mysql进程如下:

从进程信息,可知
错误日志文件是 sjk1.err
定位错误日志文件位置:
![]()