1.要搭建一个ssh,咱第一步首先要知道ssh是什么。ssh是spring、struts、hibernate的集成。
2.搭建一个简单的ssh,最简单上手的是用一个maven项目,因为maven项目只需要引入关键的jar,其所依赖的jar maven会帮你自动引入。
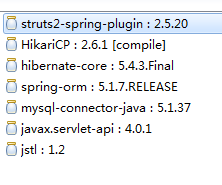
3.导包。①struts2-spring ②HikariCp(数据源所需要jar,使用其他数据源可导入相对应的jar)
③mysql ④spring-orm ⑤hibernate-core
注意:引包注意版本一致。
4.在web.xml里面配置环境
扫描二维码关注公众号,回复:
6728607 查看本文章

<!-- struts -->
    <filter>
        <filter-name>struts2</filter-name>
        <filter-class>org.apache.struts2.dispatcher.filter.StrutsPrepareAndExecuteFilter</filter-class>
    </filter>
    <filter-mapping>
        <filter-name>struts2</filter-name>
        <url-pattern>/*</url-pattern>
    </filter-mapping>
<!-- spring -->
    <context-param>
        <param-name>contextConfigLocation</param-name>
        <param-value>classpath:spring.xml</param-value>
    </context-param>
    <listener>
        <listener-class>org.springframework.web.context.ContextLoaderListener</listener-class>
    </listener>
这边我的spring的核心配置文件的名字是spring.xml。所以在web.xml里classpath:后面写的是核心配置文件的名字
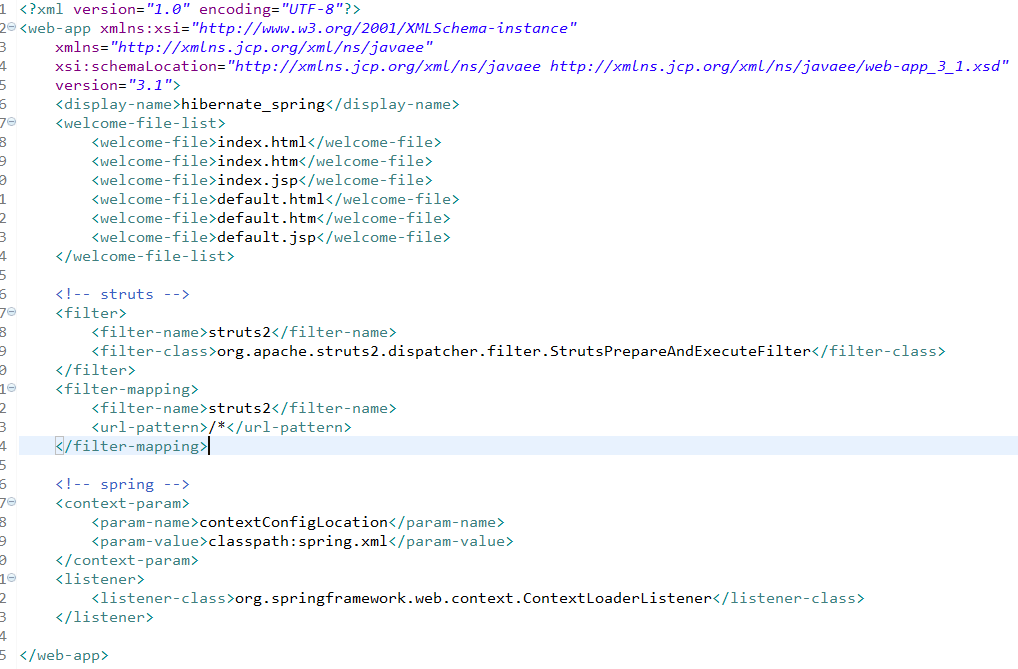
这是配置好的web.xml。
5.导入相应的核心配置文件
1.spring.xml
<?xml version="1.0" encoding="UTF-8"?> <beans xmlns="http://www.springframework.org/schema/beans" xmlns:xsi="http://www.w3.org/2001/XMLSchema-instance" xmlns:context="http://www.springframework.org/schema/context" xmlns:tx="http://www.springframework.org/schema/tx" xsi:schemaLocation="http://www.springframework.org/schema/beans https://www.springframework.org/schema/beans/spring-beans.xsd http://www.springframework.org/schema/context https://www.springframework.org/schema/context/spring-context.xsd http://www.springframework.org/schema/tx http://www.springframework.org/schema/tx/spring-tx-2.0.xsd "> <context:component-scan base-package="com.blb" /> <!-- Hikari Datasource --> <bean id="dataSource" class="com.zaxxer.hikari.HikariDataSource" destroy-method="shutdown"> <property name="jdbcUrl" value="jdbc:mysql://localhost:3306/hibernate?useUnicode=true&characterEncoding=UTF-8" /> <property name="username" value="root" /> <property name="password" value="root" /> <property name="readOnly" value="false" /> <property name="connectionTimeout" value="30000" /> <property name="idleTimeout" value="600000" /> <property name="maxLifetime" value="1800000" /> <property name="maximumPoolSize" value="15" /> </bean> <bean id="mySessionFactory" class="org.springframework.orm.hibernate5.LocalSessionFactoryBean"> <property name="dataSource" ref="dataSource" /> <property name="configLocations" value="classpath:hibernate.cfg.xml" /> </bean> <bean id="action" class="com.blb.web.Action" /> </beans>
2.strust.xml
<?xml version="1.0" encoding="UTF-8"?>
<!DOCTYPE struts PUBLIC
    "-//Apache Software Foundation//DTD Struts Configuration 2.5//EN"
    "http://struts.apache.org/dtds/struts-2.5.dtd">

<struts>

    <!-- 开发模式 -->
    <constant name="struts.devMode" value="true" />
    <constant name="struts.enable.DynamicMethodInvocation" value="true" />


    <package name="basicstruts2" extends="struts-default" strict-method-invocation="false" >

        <action name="*test" class="action" method="{1}">
            <result name="success">/index.jsp</result>
        </action>

    </package>

</struts>
3.hibernate.xml
<?xml version="1.0" encoding="UTF-8"?>
<!DOCTYPE hibernate-configuration PUBLIC
        "-//Hibernate/Hibernate Configuration DTD 3.0//EN"
        "http://www.hibernate.org/dtd/hibernate-configuration-3.0.dtd">
<hibernate-configuration>

    <session-factory>

        <property name="dialect">org.hibernate.dialect.MySQLDialect</property>


        <property name="show_sql">true</property>

        <mapping class="com.blb.entity.User" />
    </session-factory>

</hibernate-configuration>
注意:我这里已经把要测试的环境都配好了,如果要自己测试需要更改一下路径地址和测试的方法名。
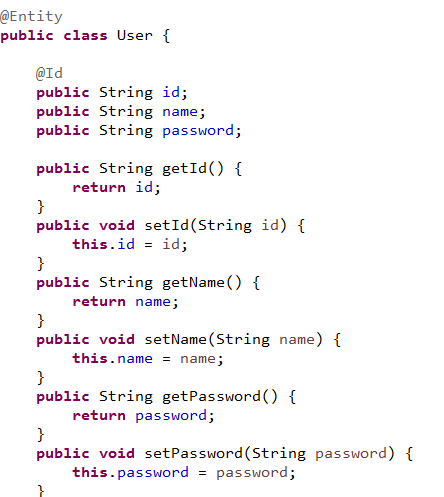
创建一个实体类,和一个测试类。
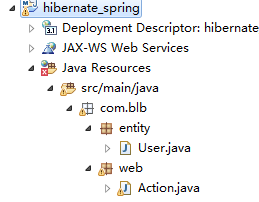
实体类里面就写一点简单的内容就OK了,然后hibernate框架,我这边直接是用的注解的方式
接下来就是测试类的代码了
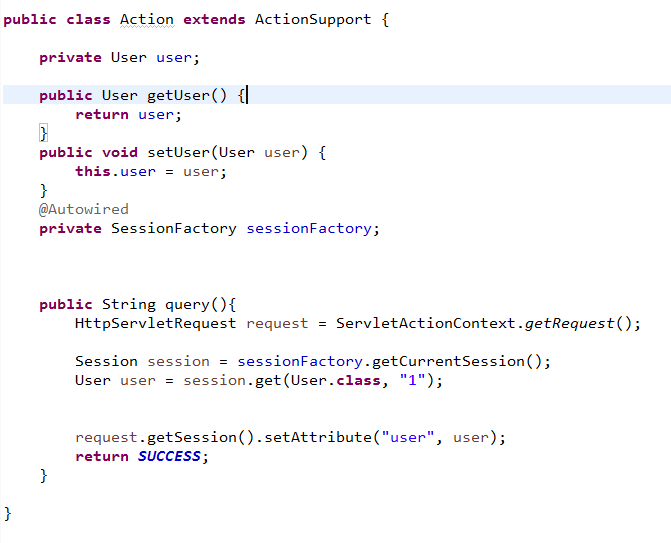
我这边在spring里开始了扫描,spring中集成了hibernate,所以只需要在sessionFactory上加上自动注入的注解,接下来的就可以交个spring了。
重点的重点来了,因为集成配置用再用tomcat启动的话会出错,在pom.xml文件中插入jetty启动。
<plugins>
            <plugin>
                <groupId>org.eclipse.jetty</groupId>
                <artifactId>jetty-maven-plugin</artifactId>
                <version>9.4.7.v20170914</version>
                <configuration>
                    <webApp>
                        <contextPath>/${build.finalName}</contextPath>
                    </webApp>
                    <stopKey>CTRL+C</stopKey>
                    <stopPort>8999</stopPort>
                    <scanIntervalSeconds>10</scanIntervalSeconds>
                    <scanTargets>
                        <scanTarget>src/main/webapp/WEB-INF/web.xml</scanTarget>
                    </scanTargets>
                </configuration>
            </plugin>
    </plugins>
接下来就可以启动项目了。....