学习 java 第一天:从零开始搭建项目,写第一个接口(IDEA)
前言
虽然我是一枚妥妥的前端无疑了,但是前端和后端的关系是密不可分的,数据对接是每个前后端的家常便饭,我相信学习一门后端语言会有助于前后端的沟通。我相信好的程序员是不分前后端的。只是侧重点不同而已。所以决定从今天开始,拓展一下语言的宽度,来学一下 Java,在此记录一下学习成果。本文适合 Java 菜鸟看,如果你是一枚老司机,欢迎多多指点。
一、从零开始搭建项目
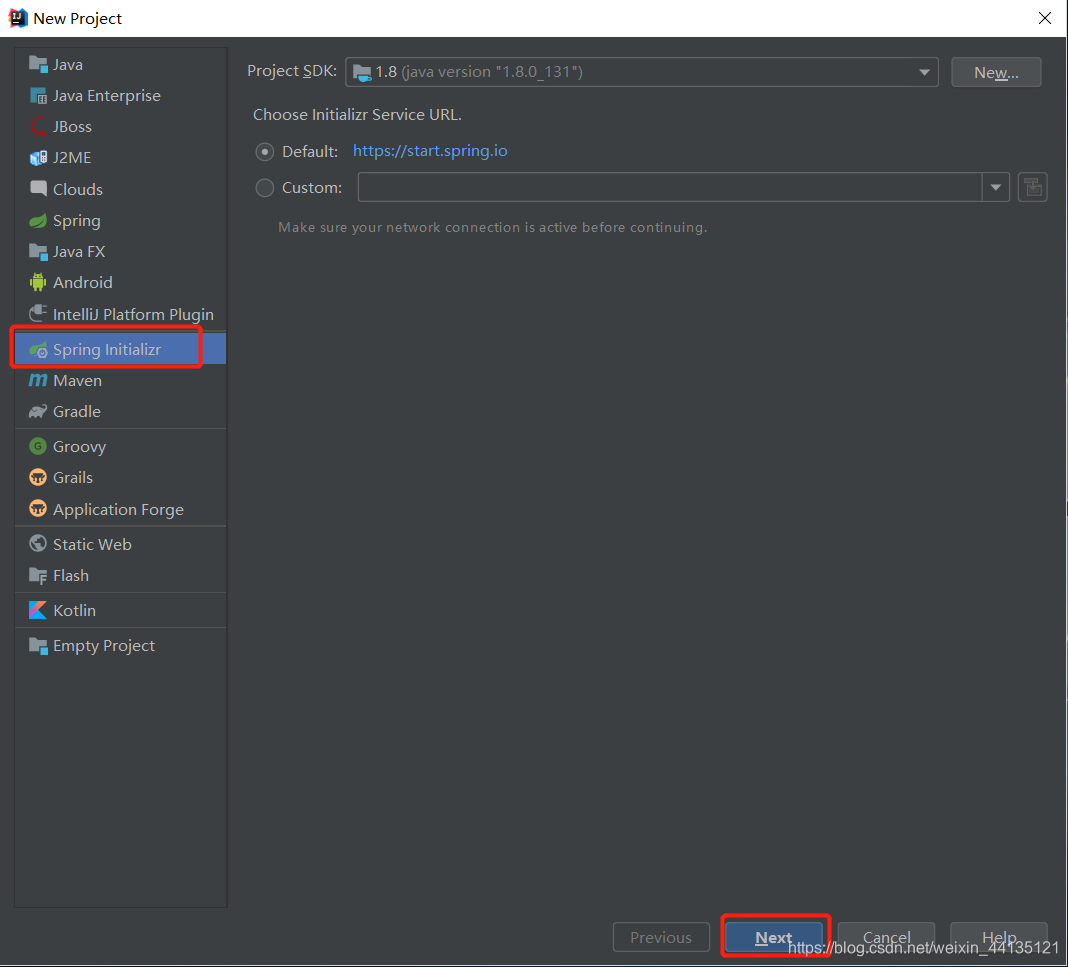
- 打开 IDEA 编辑器,选择 File -> New -> Project;

- 选择 Spring Initializr ,点击 Next;
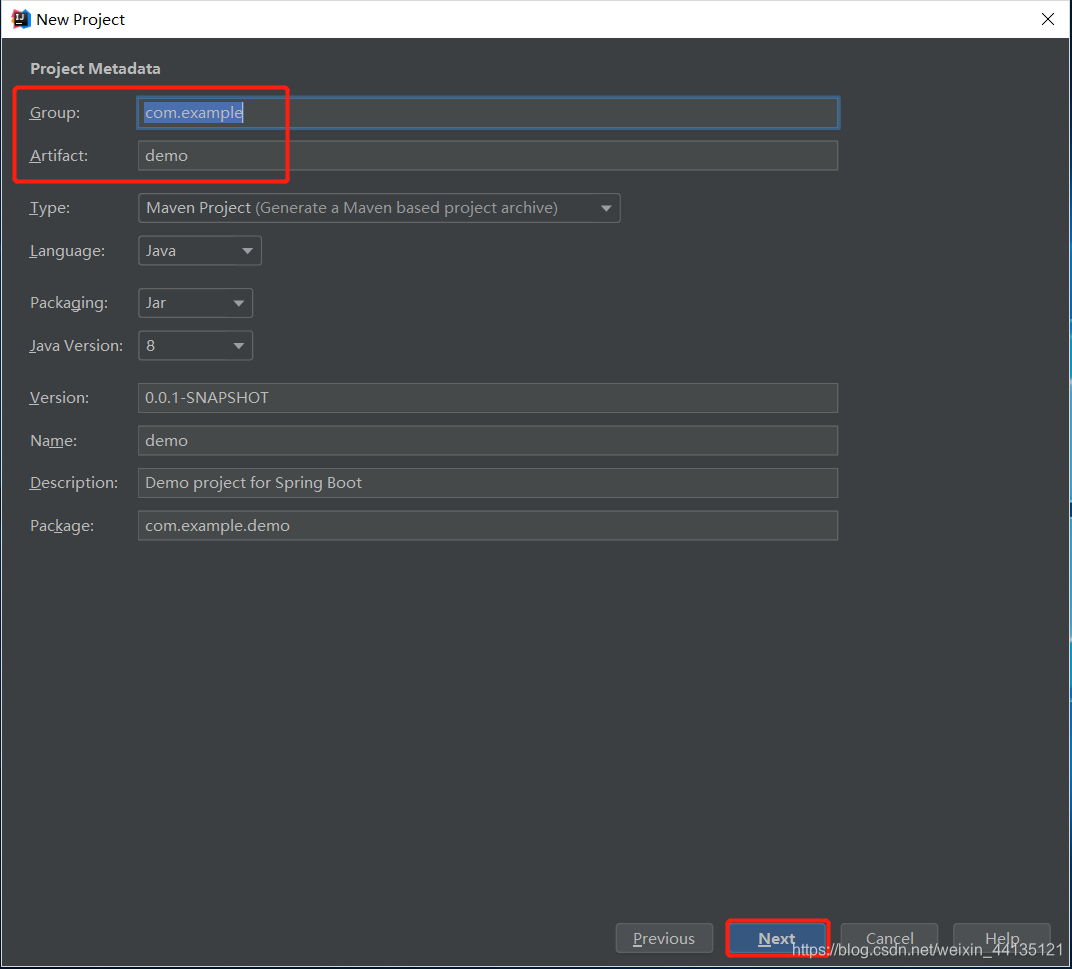
- 填写 Group( maven项目中的唯一坐标,可以由组织,比如 com ,和公司名称组成 )及 Artifact(项目名称),点击 Next;
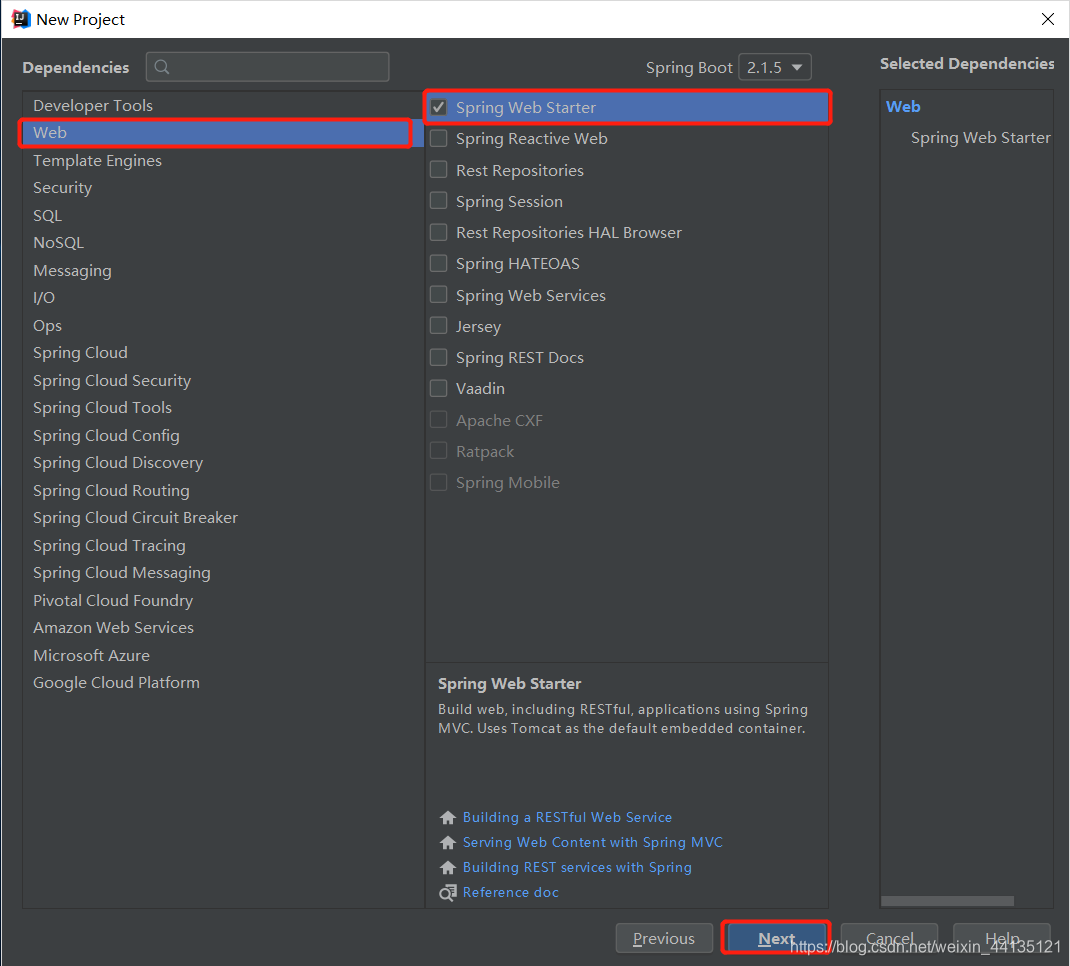
- 选择 Web,选择 Spring Web Starter,点击 Next;
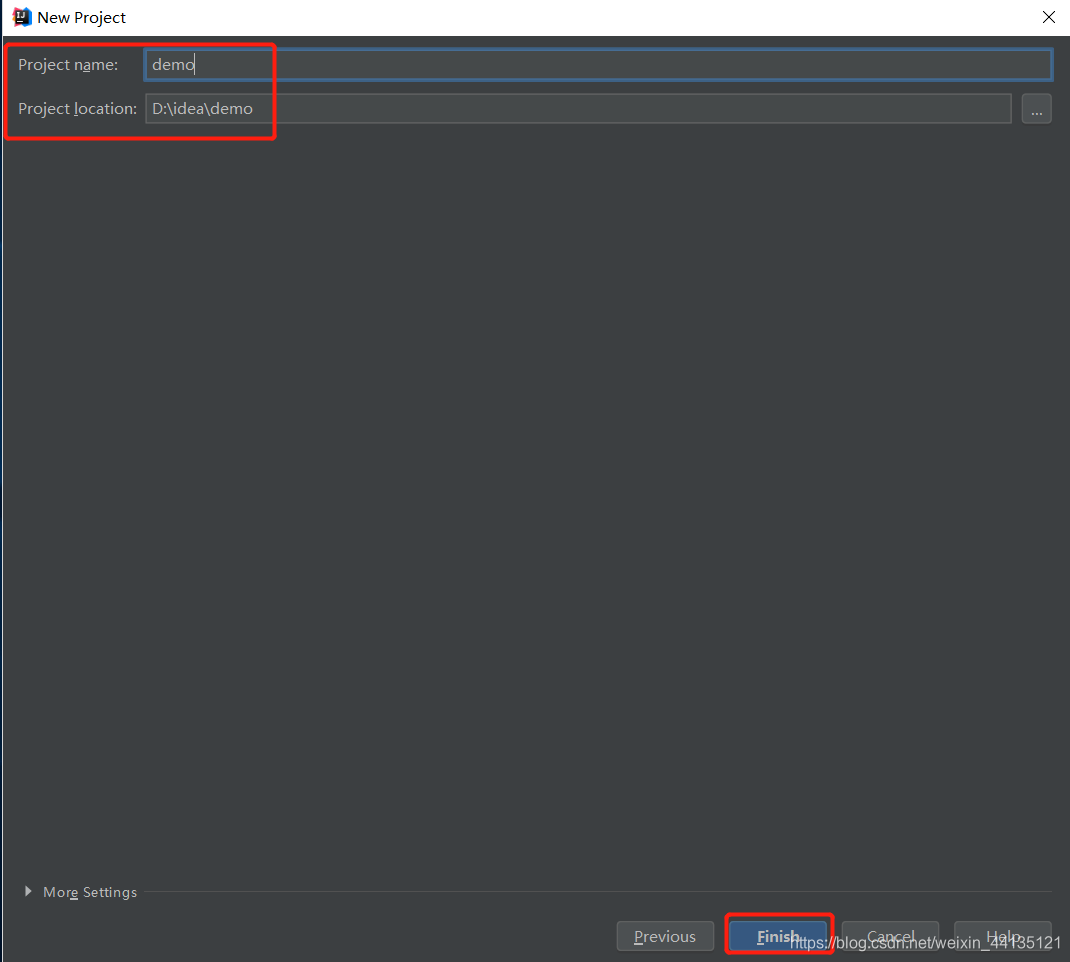
- 选择项目名称和项目存放路径,点击 Finish 完成;
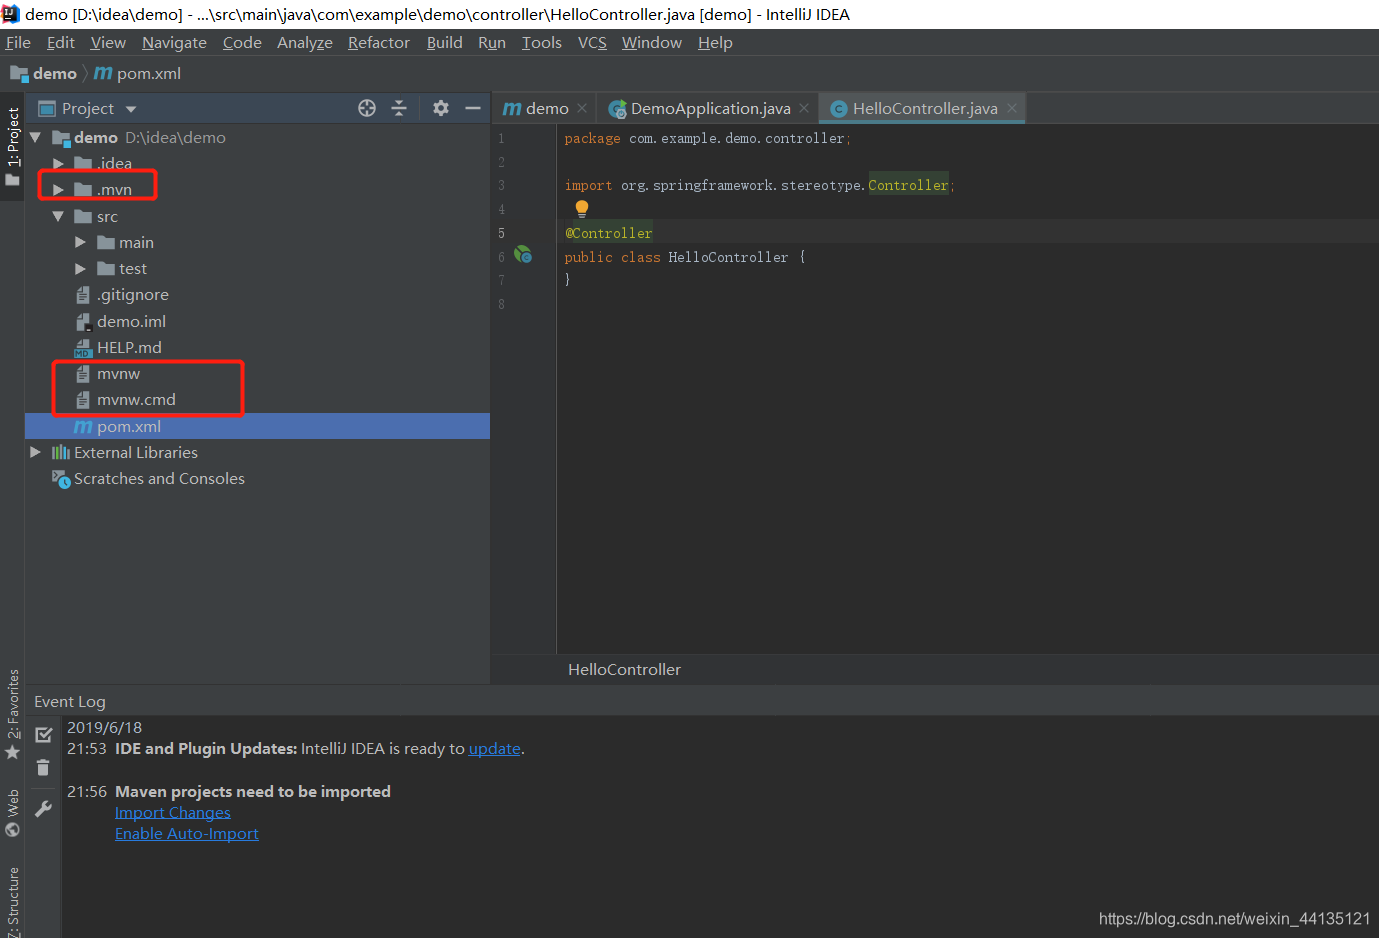
- 以上步骤操作完之后,项目搭建就完成了,有时候 IDEA 会根据 pom.xml 中的配置下载依赖,如果没有自动下载,可手动下载,如下图所示;

- 下载完成之后,可将 .mvn 文件,mvnw 文件,mvnw.cmd 文件删除。
二、写第一个接口
写一个获取用户列表信息的接口
- 在 com.example.demo 文件包下新建 entity 文件包;在此文件包下新建 User 类,在 User 类中分别定义 name 和 password 属性,内容如下;
package com.example.demo.entity;
public class User {
    String name;
    int password;
    public String getName(){
        return  name;
    }
    public void setName(String name){
        this.name = name;
    }
    public int getPassword(){
        return  password;
    }
    public void setPassword(String password){
        this.password = password;
    }
    public String toString(){
        return "user{name='"+name+"\',"+"password="+password+"}";
    }
}
- 在 com.example.demo 文件包下新建 service 文件包;在此文件包下新建 UserService 接口,在 UserService 接口中调用 getUserInfo 方法,内容如下:
package com.example.demo.service;
import com.example.demo.entity.User;
public interface UserService {
    public User getUserInfo();
}
随后在 service 文件包中新建 impl 文件包,在 impl 文件包中新建 UserServiceImpl 来实现 UserService 接口,内容如下:
package com.example.demo.service.impl;
import com.example.demo.entity.User;
import com.example.demo.service.UserService;
import org.springframework.stereotype.Service;

@Service
public class UserServiceImpl implements UserService {
    public User getUserInfo(){
        User user = new User();
        user.setName("jack");
        user.setPassword(12341234);
        return user;
    }
}
.idea
- 在 com.example.demo 文件包下新建 controller 文件包;在此文件包下新建 UserController 类,定义接口路径,返回接口数据,内容如下:
package com.example.demo.controller;

import com.example.demo.entity.User;
import com.example.demo.service.UserService;
import org.springframework.beans.factory.annotation.Autowired;
import org.springframework.web.bind.annotation.RequestMapping;
import org.springframework.web.bind.annotation.RequestMethod;
import org.springframework.web.bind.annotation.RestController;

@RestController
public class UserController {
    @Autowired
    UserService service;
    @RequestMapping(value = "/getUserList",method = RequestMethod.GET)
    public String getUserList(){
        User user = service.getUserInfo();
        return user.toString();
    }
}
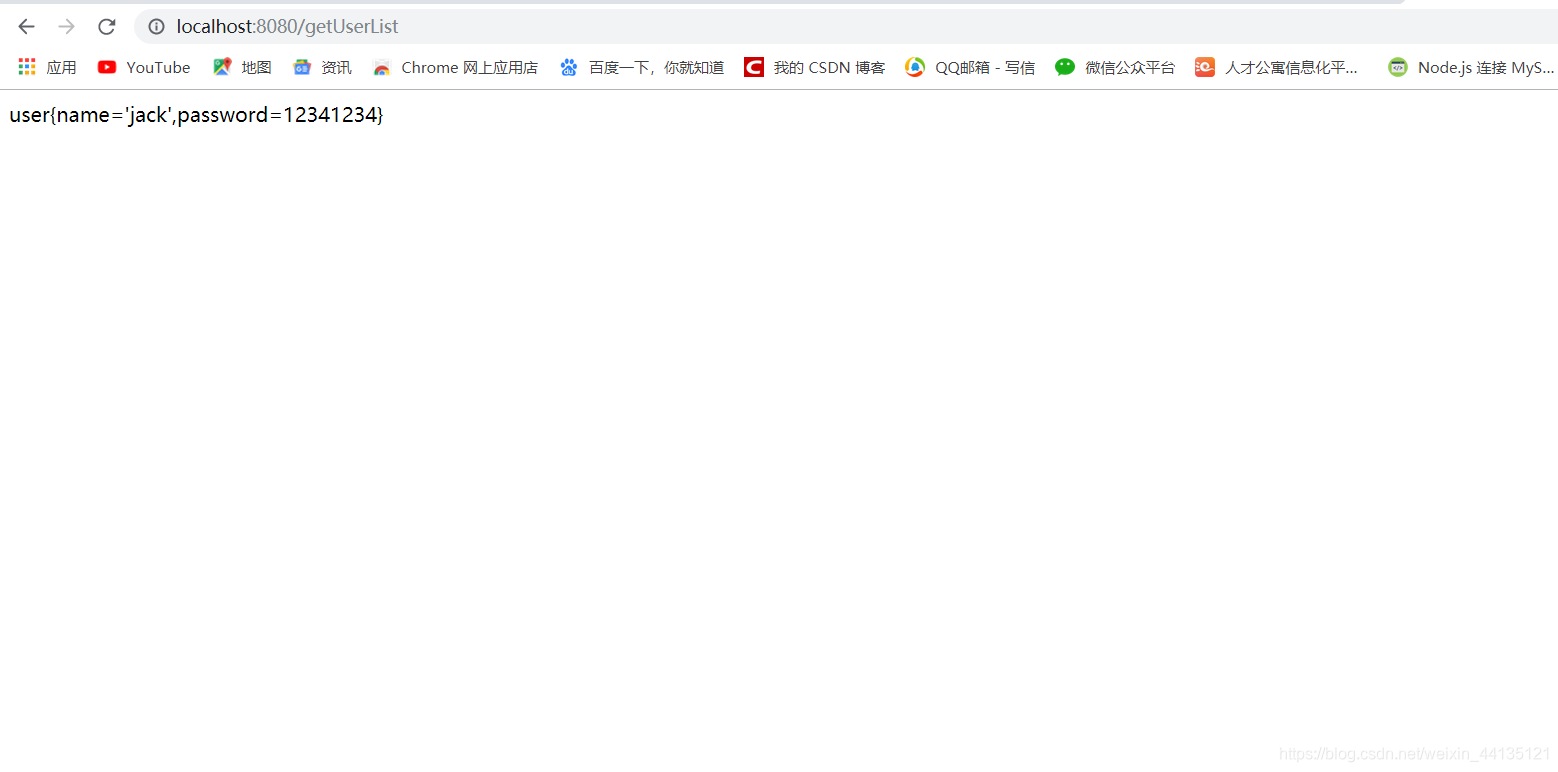
三、验证接口
- 执行主函数
- 在地址栏输入 http://localhost:8080/getUserList 进行验证,结果正确。