一:AOP基于AspectJ的注解开发
1,简单的实例:
1)引入相应的jar包

![]()
2)在配置文件里引入相关约束
<beans xmlns="http://www.springframework.org/schema/beans"
	xmlns:xsi="http://www.w3.org/2001/XMLSchema-instance" xmlns:context="http://www.springframework.org/schema/context" xmlns:aop="http://www.springframework.org/schema/aop" xmlns:tx="http://www.springframework.org/schema/tx" xsi:schemaLocation="http://www.springframework.org/schema/beans http://www.springframework.org/schema/beans/spring-beans.xsd http://www.springframework.org/schema/context http://www.springframework.org/schema/context/spring-context.xsd http://www.springframework.org/schema/aop http://www.springframework.org/schema/aop/spring-aop.xsd http://www.springframework.org/schema/tx http://www.springframework.org/schema/tx/spring-tx.xsd"> </beans>
3)编写目标类和切面类并配置到IoC容器中,在配置文件中开启注解的AOP开发
<!-- 开启注解的AOP开发 -->
<aop:aspectj-autoproxy/>
<!-- 引入目标类 -->
<bean id="userDao" class="com.test.spring.demo1.UserDao"></bean> <!-- 引入切面类 --> <bean id="myAspectAnno" class="com.test.spring.demo1.MyAspectAnno"></bean>
4)在编写切面类时即可加入相关的注解
@Aspect//表明该类为切面类
public class MyAspectAnno { //前置通知 @Before(value="execution(* com.test.spring.demo1.UserDao.delete(..))") public void before(){ System.out.println("前置通知代码========"); } }
2,注解通知的分类
- @Before(前置通知)
- @AfterReturning(后置通知)
- @Around(环绕通知)
- @AfterThrowing(异常通知)
- @After(最终通知)
@Aspect//表明该类为切面类
public class MyAspectAnno { //前置通知 @Before("execution(* com.test.spring.demo1.UserDao.save(..))") public void before(){ System.out.println("前置通知代码========"); } //后置通知 @AfterReturning(value="execution(* com.test.spring.demo1.UserDao.delete(..))",returning="result") public void afterReturning(Object result){ System.out.println("后置通知代码"+result); } //环绕通知 @Around(value="execution(* com.test.spring.demo1.UserDao.update(..))") public Object around(ProceedingJoinPoint joinPoint) throws Throwable{ System.out.println("环绕前代码===="); Object obj = joinPoint.proceed(); System.out.println("环绕后代码==="); return obj; } //异常通知 @AfterThrowing(value="execution(* com.test.spring.demo1.UserDao.find(..))",throwing="ex") public void afterThrowing(Throwable ex){ System.out.println("异常通知代码===="+ex.getMessage()); } //最终通知 @After(value="execution(* com.test.spring.demo1.UserDao.find(..))") public void after(){ System.out.println("最终通知代码======="); } }- @Pointcut (注解切入点)
//异常通知
	@AfterThrowing(value="MyAspectAnno.pointcut1()",throwing="ex")
	public void afterThrowing(Throwable ex){ System.out.println("异常通知代码===="+ex.getMessage()); } //最终通知 @After(value="MyAspectAnno.pointcut1()") public void after(){ System.out.println("最终通知代码======="); } //切入点的注解 @Pointcut(value="execution(* com.test.spring.demo1.UserDao.find(..))") private void pointcut1(){}; @Pointcut(value="execution(* com.test.spring.demo1.UserDao.update(..))") private void pointcut2(){};
二:Spring JDBC模板使用
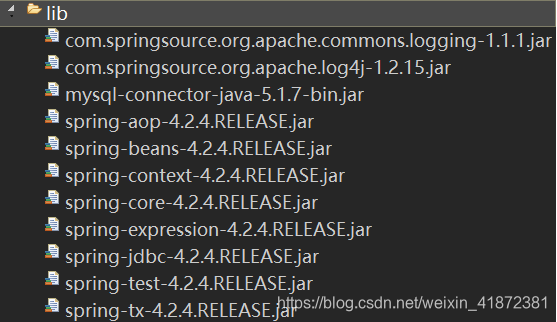
1,简单实例
1)引入相关jar包
![]()
2)将Spring内置连接池和JDBC模板配置到配置文件中
<!-- 配置内置连接池 -->
	<bean id="dataSource" class="org.springframework.jdbc.datasource.DriverManagerDataSource"> <!-- 注入属性 --> <property name="driverClassName" value="com.mysql.jdbc.Driver" /> <property name="url" value="jdbc:mysql:///Spring_day003_jdbc" /> <property name="password" value="123456" /> <property name="username" value="root" /> </bean> <!-- 配置JDBC模板 --> <bean id="jdbcTemplate" class=" org.springframework.jdbc.core.JdbcTemplate"> <!-- 注入连接池 --> <property name="dataSource" ref="dataSource" /> </bean> </beans>
3)编写测试类
@RunWith(SpringJUnit4ClassRunner.class)
@ContextConfiguration("classpath:applicationContext.xml")
public class JdbcDemo2 { @Resource(name="jdbcTemplate") private JdbcTemplate JdbcTemplate; @Test public void demo01(){ JdbcTemplate.update("insert into account values(null,?,?)","零",1000d); } }
2,配置第三方连接池
1)配置dbcp连接池
首先引入dbcp的相干jar包
![]()
![]()
在配置文件中配置dbcp连接池
        <!--配置dbcp连接池 -->
	<bean id="dataSource" class=" org.apache.commons.dbcp.BasicDataSource"> <!-- 注入属性 --> <property name="driverClassName" value="com.mysql.jdbc.Driver" /> <property name="url" value="jdbc:mysql:///Spring_day003_jdbc" /> <property name="password" value="123456" /> <property name="username" value="root" /> </bean> <!-- 配置JDBC模板 --> <bean id="jdbcTemplate" class=" org.springframework.jdbc.core.JdbcTemplate"> <!-- 注入连接池 --> <property name="dataSource" ref="dataSource" /> </bean>
2)配置c3p0连接池(常用)
引入相关jar包
![]()
![]()
在配置文件中配置c3p0连接池
        <!-- 配置c3p0连接池 -->
	<bean id="dataSource" class="com.mchange.v2.c3p0.ComboPooledDataSource"> <!-- 属性注入 --> <property name="driverClass" value="com.mysql.jdbc.Driver" /> <property name="jdbcUrl" value="jdbc:mysql:///Spring_day003_jdbc" /> <property name="user" value="root" /> <property name="password" value="root"></property> </bean> <!-- 配置JDBC模板 --> <bean id="jdbcTemplate" class=" org.springframework.jdbc.core.JdbcTemplate"> <!-- 注入连接池 --> <property name="dataSource" ref="dataSource" /> </bean>
3)将连接池配置信息放入外部文件中,并引入到配置文件中
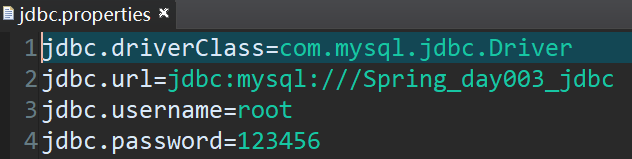
![]()
<!-- 引入外部属性文件 -->
		<!-- 1,通过配置bean标签,较少使用 -->
	<!-- <bean class=" org.springframework.beans.factory.config.PropertyPlaceholderConfigurer">
	<property name="location" value="classpath:jdbc.properties"/>
	</bean> -->
		<!-- 2,通过配置context标签,常用 -->
	<context:property-placeholder location="classpath:jdbc.properties"/> <!-- 配置c3p0连接池 --> <bean id="dataSource" class="com.mchange.v2.c3p0.ComboPooledDataSource"> <!-- 属性注入 --> <property name="driverClass" value="${jdbc.driverClass}" /> <property name="jdbcUrl" value="${jdbc.url}" /> <property name="user" value="${jdbc.username}" /> <property name="password" value="${jdbc.password}"></property> </bean> <!-- 配置JDBC模板 --> <bean id="jdbcTemplate" class=" org.springframework.jdbc.core.JdbcTemplate"> <!-- 注入连接池 --> <property name="dataSource" ref="dataSource" /> </bean>
3,使用JDBC模板进行简单CRUD操作
@RunWith(SpringJUnit4ClassRunner.class)
@ContextConfiguration("classpath:applicationContext.xml")
public class JdbcDemo2 { @Resource(name="jdbcTemplate") private JdbcTemplate JdbcTemplate; @Test public void demo01(){ JdbcTemplate.update("insert into account values(null,?,?)","44",1000d); } @Test //删除 public void delete(){ JdbcTemplate.update("delete from account where id=?",1); } @Test //更改 public void update(){ JdbcTemplate.update("update account set name=? where id=?","23333",2); } @Test //查询单个字段值 public void query01(){ String obj = JdbcTemplate.queryForObject("select name from account where id=?", String.class,3); System.out.println(obj); } @Test //查询并封装到一个对象中 public void query02(){ Account account = JdbcTemplate.queryForObject("select * from account where id=?", new myRowMapper(),2); System.out.println(account); } @Test //查询并封装到list集合里 public void query03(){ List<Account> accountList = JdbcTemplate.query("select * from account",new myRowMapper()); for (Account account : accountList) { System.out.println(account); } } } //将查询到的数据封装到实体对象中 class myRowMapper implements RowMapper<Account>{ @Override public Account mapRow(ResultSet resultSet, int rowNum) throws SQLException { Account account =new Account(); account.setId(resultSet.getInt("id")); account.setName(resultSet.getString("name")); account.setMoney(resultSet.getDouble("money")); return account; } }
三:Spring的事务管理
1,事务简介
事务:逻辑上的一组操作,组成这组操作的各个单元,要么全部成功,要么全部失败
事务的特性:
- 原子性(事务不可分割)
- 一致性(事务前后数据保持一致)
- 隔离性(各个事务之间不受干扰)
- 持久性(事务过后,数据应持久保留在数据库中)
事务失去隔离性后引发的问题:
- 脏读:一个事务读取到其他事务未提交的数据
- 不可重复度:一个事务读取到其他事务已提交的update数据
- 幻读:一个事务读取到其他事务已提交的insert数据
- 会引起写入操作的丢失
事务的隔离级别(isolate):
- read uncommitted(未提交读,什么都不能解决)
- read committed(提交读,只解决脏读,oracle默认)
- repeatable read(重复读,只能解决脏读和不可重复读,幻读可能发生,mysql默认)
- serializable(串行化,不允许事务的并行,什么都可以解决,但效率低)
2,Spring事务管理的API
1)PlatformTransactionManager(平台事务管理)
这是一个接口,其中有两个实现类:
- DataSourceTransactionManger:底层通过JDBC管理事务
- HibernateTransactionManger:底层通过Hibernate来管理事务
2)TransactionDefinition(事务定义)
定义事务的隔离级别,超时信息,传播行为,是否只读
3)TransactionStatus(事务状态)
事务是否提交等状态信息
4)事务API之间的联系:
事务管理平台通过事务定义的信息来管理,过程中事务的状态存在TransactionStatus中
3,Spring事务的传播行为(解决Service层方法互相调用的问题,例A方法被B方法调用,但A方法中可能存在事务)
1)保证多个操作在同一个事务中
PROPAGATION REQUIRED(默认) ,如果A中有事务,使用A中的事务,如果A中没有事务,创建一个新的事务将操作包含进来
2)保证多个操作不在同一个事务中
PROPAGATION REQUIRES NEW ,如果A中有事务,则将A事务挂起(暂停),创建一个新事务,只包含自身操作,如果A中没有事务,则创建一个新事务,包含自身操作
3) 嵌套式事务
PROPAGATION NESTED 如果A中有事务,按照A的事务执行,执行完后,设置一个保存点后,执行B的操作,如果没有异常,执行通过,如果有异常,可以回滚到执行A操作前,也可以回滚到执行A操作后(保存点)
4,第一类:编程式事务管理
	<!-- 配置事务管理器 -->
<bean id="transactionManager" class="org.springframework.jdbc.datasource.DataSourceTransactionManager"> <property name="dataSource" ref="dataSource" /> </bean> <!-- 配置事务管理模板,能够简化事务管理 --> <bean id="transactionTemplate" class="org.springframework.transaction.support.TransactionTemplate"> <property name="transactionManager" ref="transactionManager" /> </bean> <bean id="accountService" class="com.test.spring.tx.AccountServiceImp"> <property name="accountDao" ref="accountDao" /> <!-- 在业务层注入事务模板 --> <property name="transactionTemplate" ref="transactionTemplate" /> </bean>
public class AccountServiceImp implements AccountService { private AccountDao accountDao; private TransactionTemplate transactionTemplate; public void setTransactionTemplate(TransactionTemplate transactionTemplate) { this.transactionTemplate = transactionTemplate; } public void setAccountDao(AccountDao accountDao) { this.accountDao = accountDao; } @Override public void transfor(final String from,final String to,final Double money) { transactionTemplate.execute(new TransactionCallbackWithoutResult() { @Override protected void doInTransactionWithoutResult(TransactionStatus arg0) { accountDao.from(from, money); //int i=1/0; accountDao.to(to, money); } }); } } 5,声明式事务管理(底层采用AOP)
注意:引入相关的AOP开发的jar包
1)xml方式(在配置文件中配置)
<!-- 配置事务管理器 -->
	<bean id="transactionManager" class="org.springframework.jdbc.datasource.DataSourceTransactionManager"> <property name="dataSource" ref="dataSource"/> </bean> <!-- 配置事务的增强 --> <tx:advice id="txAdvice" transaction-manager="transactionManager"> <tx:attributes> <!-- 事务的管理规则 --> <tx:method name="update*"/> <tx:method name="save*"/> <tx:method name="delete*"/> <tx:method name="find*" read-only="true"/> <tx:method name="transfor"/> </tx:attributes> </tx:advice> <!-- AOP的配置 --> <aop:config> <!-- 配置切入点 --> <aop:pointcut expression="execution(* com.test.spring.tx2.AccountServiceImp.*(..))" id="pointcut1"/> <!-- 配置切面 --> <aop:advisor advice-ref="txAdvice" pointcut-ref="pointcut1"/> </aop:config>
2)注解方式
<!-- 配置事务管理器 -->
	<bean id="transactionManager" class="org.springframework.jdbc.datasource.DataSourceTransactionManager"> <property name="dataSource" ref="dataSource"/> </bean> <!-- 开启事务注解 --> <tx:annotation-driven transaction-manager="transactionManager"/>
配置好后在业务层应用注解:
@Transactional(isolation=Isolation.DEFAULT,propagation=Propagation.REQUIRED)
public class AccountServiceImp implements AccountService { private AccountDao accountDao; public void setAccountDao(AccountDao accountDao) { this.accountDao = accountDao; } @Override public void transfor(String from,String to,Double money) { accountDao.from(from, money); int i=1/0; accountDao.to(to, money); } }