一、本特效主要用到的前端知识点
CSS中绝对定位(absolute)
CSS实现垂直居中
jQuery中简单的淡入淡出动画效果(fadeIn,fadeOut)
定时器(setInterval,clearInterval)
jQuery中增删类(addClass,removeClass)
二、特效分析
网页开始加载的时候,图片开始做轮播,效果为淡入淡出。当轮播到最后一个图片,从第一个图片开始重新做轮播。
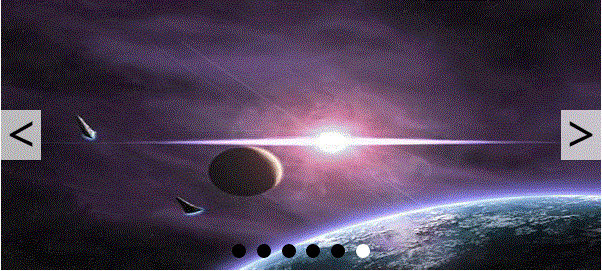
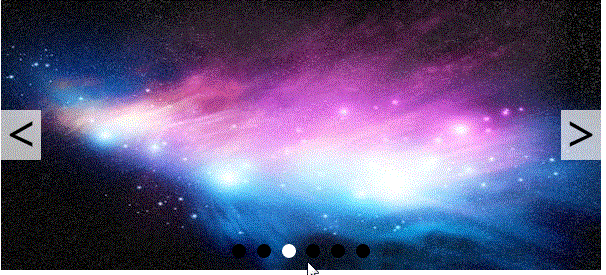
图片与下面的圆点相对应,鼠标移入该圆点时,对应图片淡入,圆点增加当前样式。
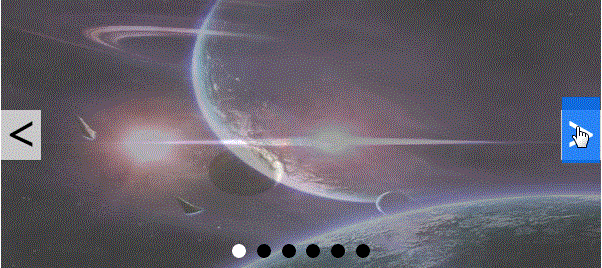
左右两边附有左右按钮,点击左按钮,当前图片的左边图片淡入,当左边图片至第一个时,从最后一个图片依次向左重新淡入;点击右按钮,当前图片的右边图片淡入,当右边图片至最后一个时,从第一个图片依次向右重新淡入。

(一)HTML
<div class="container">
<div class="box">
<img src="https://img-blog.csdn.net/20170908172159479">
<img src="https://img-blog.csdn.net/20170908172353986">
<img src="https://img-blog.csdn.net/20170908172424315">
<img src="https://img-blog.csdn.net/20170908172444061">
<img src="https://img-blog.csdn.net/20170908172525692">
<img src="https://img-blog.csdn.net/20170908172549035">
</div>
<div class="circle">
<b class="current"></b>
<b></b>
<b></b>
<b></b>
<b></b>
<b></b>
</div>
<div class="btn left"> < </div>
<div class="btn right"> > </div>
</div>
html样式没有什么难点,都是最基本的样式。
(二)CSS样式
.container {
    position: absolute;
    top: 100px;
    left: 100px;
    width: 600px;
    height: 270px;
}
/*使用绝对定位,使全部图片叠加到一块*/
.box, .box img {
    position: absolute;
    top: 0;
    left: 0;
}
/*下面小圆点,使用绝对定位,位于图片的正下方*/
.circle {
    width: 200px;
    height: 14px;
    position: absolute;
    bottom: 15px;
    left: 50%;
    margin-left: -100px;
    text-align: center;
    cursor: pointer;
}
/*每个小圆点的样式*/
.circle b {
    display: inline-block;
    width: 14px;
    height: 14px;
    background-color: #000;
    border-radius: 50%;
    margin: 3px;
}
/*小圆点的当前样式,也是鼠标移上去的样式*/
.circle .current {
    background-color: #fff;
}
/*左右两侧的按钮,采用绝对定位*/
.btn {
    position: absolute;
    top: 50%;
    width: 40px;
    height: 50px;
    margin-top: -25px;
    background-color: rgba(255, 255, 255, .7);
    text-align: center;
    line-height: 50px;
    font-size: 50px;
    cursor: pointer;
}
.left {
    left: 0;
}
.right {
    right: 0;
}
CSS样式里面需要的注意的是垂直居中的两种方法:
a、使用绝对定位
top: 50%;然后再设置margin-top的值为要居中元素的高的-(1/2),也就是再向上移动该元素的高的1/2距离;这个方法对于水平居中也是有效的,left: 50%;然后再设置margin-left的值为要居中元素的宽的-(1/2);
top: 50%;然后再设置margin-top的值为要居中元素的高的-(1/2),也就是再向上移动该元素的高的1/2距离;这个方法对于水平居中也是有效的,left: 50%;然后再设置margin-left的值为要居中元素的宽的-(1/2);
b、使用line-height属性,使line-height属性值和该元素的height属性值相同。
(三) jQuery动态效果
(三) jQuery动态效果
<script type="text/javascript" src="http://apps.bdimg.com/libs/jquery/1.6.4/jquery.js"></script>
<script type="text/javascript">
    /*i表示当前图片的下标和当前圆点的下标(图片和圆点是对应关系)*/
    var i = 0;
    var timer;
    $(function(){
        /*Step 1: 设置页面刚加载出来显示的是第一张图片*/
        $("img").eq(0).show().siblings().hide();
        /*开始做图片轮播,使用定时器*/
        start();
        /*Step 2: 鼠标移入小圆点的时候,首先清除定时器,找到当前圆点的索引,改变当前显示的图片,使其变换成圆点对应的图片,当前圆点变换样式*/
        $("b").hover(function(){
            clearInterval(timer);
            i = $(this).index();
            change();
        }, function(){
            /*鼠标移出的时候,重新启动定时器*/
            start();
        });
        /*Step 3: 点击左边按钮时候,显示当前图片的左边的第一个图片,再点击,依次向左,图片变换,圆点样式变换。当停止点击按钮时,图片依旧一定时间内显示下一个图片(右边的第一个)*/
        $(".left").click(function(){
            i--;
            /*当图片已经是第一个,再点击的时候,显示最后一张图片*/
            if(i == -1){
                i = 5;
            }
            change();
        });
        /*Step 4: 点击右边按钮时候,显示当前图片的右边的第一个图片,原理同左边图片效果*/
        $(".right").click(function(){
            i++;
            /*当图片已经是最后一个,再点击的时候,显示第一张图片*/
            if(i == 6){
                i = 0;
            }
            change();
        });
    });
    /*开始轮播函数*/
    function start(){
        /*定时器,每个图片在页面上停留的时间是3s*/
        timer = setInterval(function(){
            i++;
            if(i == 6){
                i = 0;
            }
            change();
        }, 3000);
    }
    /*当前图片及对应圆点变换函数*/
    function change(){
        /*当前图片淡入,其他图片淡出*/
        $("img").eq(i).fadeIn(300).siblings().stop(true, true).fadeOut(300);
        /*当前圆点添加类current,其他圆点删除其类current*/
        $("b").eq(i).addClass("current").siblings().removeClass("current");
    }
</script>
这个方法做轮播对我来说是比较简单的,思维逻辑清晰,代码也简单。
<!doctype html> <html> <head> <meta charset="UTF-8"> <title>轮播图制作</title> <style> .container { position: absolute; top: 100px; left: 100px; width: 600px; height: 270px; } .box, .box img { position: absolute; top: 0; left: 0; } .circle { width: 200px; height: 14px; position: absolute; bottom: 15px; left: 50%; margin-left: -100px; text-align: center; cursor: pointer; } .circle b { display: inline-block; width: 14px; height: 14px; background-color: #000; border-radius: 50%; margin: 3px; } .circle .current { background-color: #fff; } .btn { position: absolute; top: 50%; width: 40px; height: 50px; margin-top: -25px; background-color: rgba(255, 255, 255, .7); text-align: center; line-height: 40px; font-size: 50px; cursor: pointer; } .left { left: 0; } .right { right: 0; } </style> </head> <body> <div class="container"> <div class="box"> <img src="https://img-blog.csdn.net/20170908172159479"> <img src="https://img-blog.csdn.net/20170908172353986"> <img src="https://img-blog.csdn.net/20170908172424315"> <img src="https://img-blog.csdn.net/20170908172444061"> <img src="https://img-blog.csdn.net/20170908172525692"> <img src="https://img-blog.csdn.net/20170908172549035"> </div> <div class="circle"> <b class="current"></b> <b></b> <b></b> <b></b> <b></b> <b></b> </div> <div class="btn left"> < </div> <div class="btn right"> > </div> </div> <script type="text/javascript" src="http://apps.bdimg.com/libs/jquery/1.6.4/jquery.js"></script> <script type="text/javascript"> var i = 0; var timer; $(function(){ $("img").eq(0).show().siblings().hide(); start(); $("b").hover(function(){ clearInterval(timer); i = $(this).index(); change(); }, function(){ start(); }); $(".left").click(function(){ i--; if(i == -1){ i = 5; } change(); }); $(".right").click(function(){ i++; if(i == 6){ i = 0; } change(); }); }); function start(){ timer = setInterval(function(){ i++; if(i == 6){ i = 0; } change(); }, 3000); } function change(){ $("img").eq(i).fadeIn(300).siblings().stop(true, true).fadeOut(300); $("b").eq(i).addClass("current").siblings().removeClass("current"); } </script> </body> </html>