这一篇我们讲解disconf在项目中的基本使用:
在项目中使用disconf来管理配置文件,需要下面的一些步骤:
- 在把配置信息存放在disconf服务器上
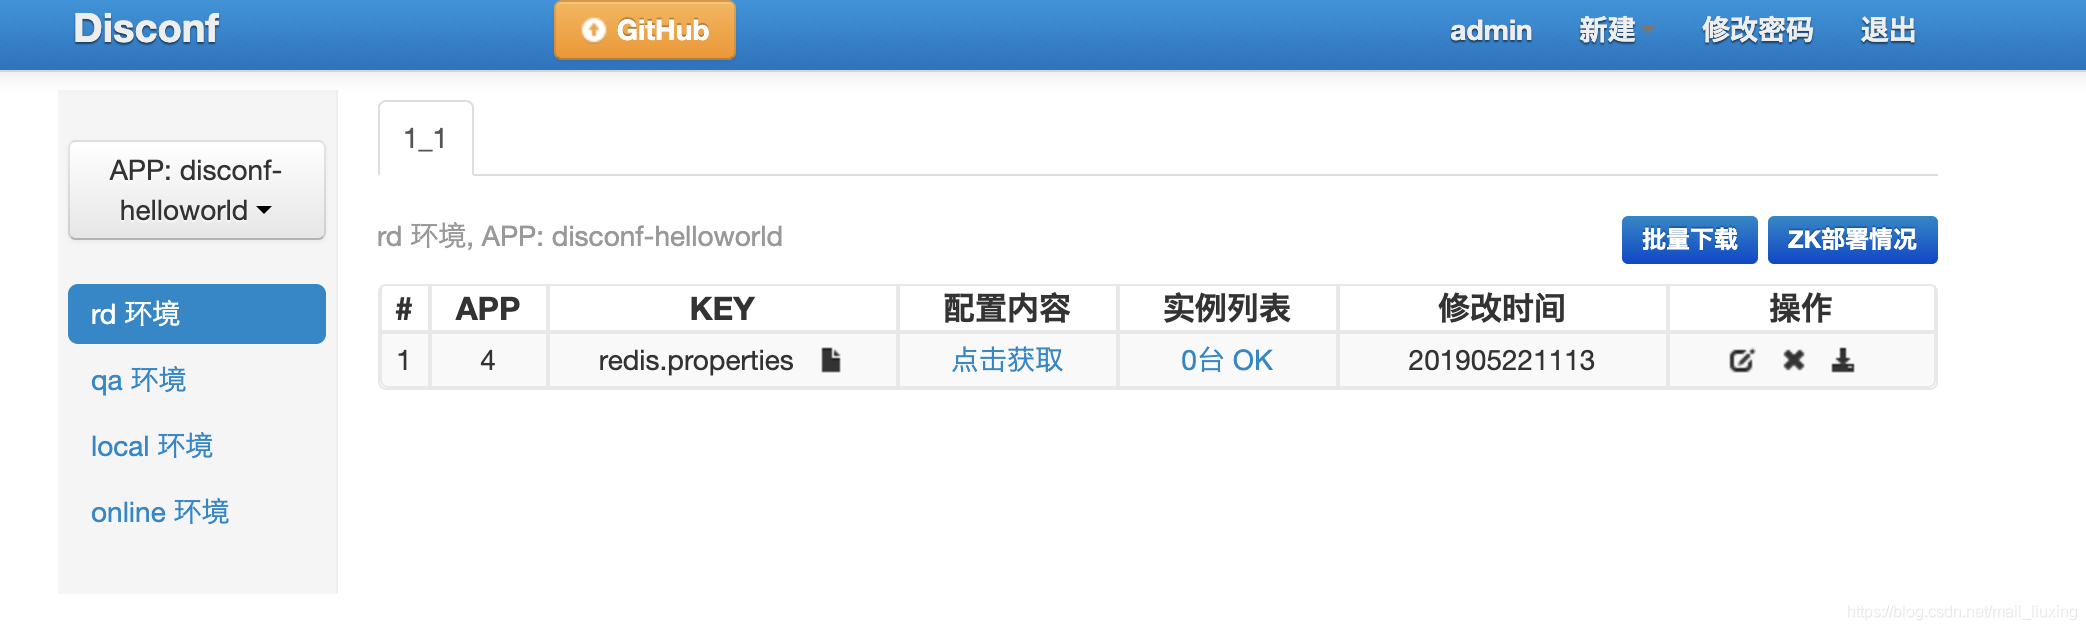
这一步我们可以在上一片安装的disconf管理界面进行操作,通过“新建”按钮创建自己的app,然后新建配置文件输入配置文本(也可以上传配置文件),我这里创建了一个disconf-helloworld应用,然后在rd环境下面创建了一个redis.properties文件,版本为1_1(自己随便定义),内容如下:
redis.host=10.211.55.6
redis.port=6379
效果如下:
2. 创建自己的项目,我这里使用的是springboot,引入disconf相关的依赖:
    <dependency>
      <groupId>com.baidu.disconf</groupId>
      <artifactId>disconf-client</artifactId>
      <version>2.6.36</version>
    </dependency>
- 在resources下面添加spring-disconf.xml,引入disconf配置
 <!-- 使用disconf必须添加以下配置 -->
  <bean id="disconfMgrBean" class="com.baidu.disconf.client.DisconfMgrBean"
    destroy-method="destroy">
    <!--    写自己需要被disconf扫描的包-->
    <property name="scanPackage" value="com.firewolf.disconf.conf"/>
  </bean>
  <bean id="disconfMgrBean2" class="com.baidu.disconf.client.DisconfMgrBeanSecond"
    init-method="init" destroy-method="destroy">
  </bean>
  <!--  扫描需要通过disconf配置包-->
  <context:component-scan base-package="com.firewolf.disconf.conf"/>
  <!--  支持cglib的aop-->
  <aop:aspectj-autoproxy proxy-target-class="true"/>
- 创建配置类,引用disconf上面的配置文件
package com.firewolf.disconf.conf;

import com.baidu.disconf.client.common.annotations.DisconfFile;
import com.baidu.disconf.client.common.annotations.DisconfFileItem;
import org.springframework.context.annotation.Scope;
import org.springframework.stereotype.Component;

/**
 * 作者:刘兴 时间:2019-05-22
 **/
@Component
@Scope("singleton")
@DisconfFile(filename = "redis.properties")
public class RedisConfig {

  // 代表连接地址
  private String host;

  // 代表连接port
  private int port;

  /**
   * 地址, 分布式文件配置
   */
  @DisconfFileItem(name = "redis.host", associateField = "host")
  public String getHost() {
    return host;
  }

  public void setHost(String host) {
    this.host = host;
  }

  /**
   * 端口, 分布式文件配置
   */
  @DisconfFileItem(name = "redis.port", associateField = "port")
  public int getPort() {
    return port;
  }

  public void setPort(int port) {
    this.port = port;
  }
}
这个配置类加载了redis.properties里面的两个key.
相关注解:
- @DisconfFile:指定要加载的配置文件名
- @DisconfFileItem:指定要加载的配置项,name是属性文件中的key,associateField是对象中字段的名字,可选,没有指定的话,会自动分析
- 在resources里面添加disconf主配置文件disconf.properties:
# 是否使用远程配置文件
# true(默认)会从远程获取配置 false则直接获取本地配置
enable.remote.conf=true

#
# 配置服务器的 HOST,用逗号分隔  127.0.0.1:8000,127.0.0.1:8000
#
conf_server_host=10.211.55.6:8081

# 版本, 请采用 X_X_X_X 格式
version=1_1

# APP 请采用 产品线_服务名 格式
app=disconf-helloworld

# 环境
env=rd

# debug
debug=true

# 忽略哪些分布式配置,用逗号分隔
ignore=

# 获取远程配置 重试次数,默认是3次
conf_server_url_retry_times=1
# 获取远程配置 重试时休眠时间,默认是5秒
conf_server_url_retry_sleep_seconds=1
- 启动类加载spring-disconf.xml
@SpringBootApplication
@ImportResource(value = {"classpath:spring-disconf.xml"})
public class App
{
    public static void main( String[] args )
    {
        SpringApplication.run(App.class,args);
    }
}
- 测试
这里我写了一个控制器用来显示RedisConfig内容:
package com.firewolf.disconf.controller;

import com.firewolf.disconf.conf.RedisConfig;
import org.springframework.beans.factory.annotation.Autowired;
import org.springframework.web.bind.annotation.GetMapping;
import org.springframework.web.bind.annotation.RestController;

/**
 * 作者:刘兴 时间:2019-05-22
 **/
@RestController
public class DisconfController {


  @Autowired
  private RedisConfig redisConfig;


  @GetMapping("/test")
  public String showRedisConf() {
    return redisConfig.getHost() + "," + redisConfig.getPort();
  }
}
启动后访问效果如下:
