版权声明:@抛物线 https://blog.csdn.net/qq_28513801/article/details/90696863
一:SSH配置文件相关参数详细说明
1)SSH客户端配置文件
[root@controller ~]# vi /etc/ssh/sshd_config
#       $OpenBSD: sshd_config,v 1.93 2014/01/10 05:59:19 djm Exp $

# This is the sshd server system-wide configuration file.  See
# sshd_config(5) for more information.

# This sshd was compiled with PATH=/usr/local/bin:/usr/bin

# The strategy used for options in the default sshd_config shipped with
# OpenSSH is to specify options with their default value where
# possible, but leave them commented.  Uncommented options override the
# default value.

# If you want to change the port on a SELinux system, you have to tell
# SELinux about this change.
# semanage port -a -t ssh_port_t -p tcp #PORTNUMBER
#
#Port 22
#AddressFamily any
#ListenAddress 0.0.0.0
#ListenAddress ::

# The default requires explicit activation of protocol 1
#Protocol 2

# HostKey for protocol version 1
#HostKey /etc/ssh/ssh_host_key
# HostKeys for protocol version 2
HostKey /etc/ssh/ssh_host_rsa_key
#HostKey /etc/ssh/ssh_host_dsa_key
HostKey /etc/ssh/ssh_host_ecdsa_key
HostKey /etc/ssh/ssh_host_ed25519_key

# Lifetime and size of ephemeral version 1 server key
#KeyRegenerationInterval 1h
#ServerKeyBits 1024

# Ciphers and keying
#RekeyLimit default none
#ServerKeyBits 1024

# Ciphers and keying
#RekeyLimit default none

# Logging
# obsoletes QuietMode and FascistLogging
#SyslogFacility AUTH
SyslogFacility AUTHPRIV
#LogLevel INFO

# Authentication:

#LoginGraceTime 2m
#PermitRootLogin yes
#StrictModes yes
#MaxAuthTries 6
#MaxSessions 10

#RSAAuthentication yes
#PubkeyAuthentication yes

# The default is to check both .ssh/authorized_keys and .ssh/authorized_keys2
# but this is overridden so installations will only check .ssh/authorized_keys
AuthorizedKeysFile      .ssh/authorized_keys

#AuthorizedPrincipalsFile none

#AuthorizedKeysCommand none
#AuthorizedKeysCommandUser nobody

# For this to work you will also need host keys in /etc/ssh/ssh_known_hosts
#RhostsRSAAuthentication no
# similar for protocol version 2
#HostbasedAuthentication no
# Change to yes if you don't trust ~/.ssh/known_hosts for
# RhostsRSAAuthentication and HostbasedAuthentication
#IgnoreUserKnownHosts no
# Don't read the user's ~/.rhosts and ~/.shosts files
#IgnoreRhosts yes

# To disable tunneled clear text passwords, change to no here!
#PasswordAuthentication yes
#PermitEmptyPasswords no
PasswordAuthentication yes

# Change to no to disable s/key passwords
#ChallengeResponseAuthentication yes
ChallengeResponseAuthentication no

# Kerberos options
#KerberosAuthentication no
#KerberosOrLocalPasswd yes
#KerberosTicketCleanup yes
#KerberosGetAFSToken no
#KerberosUseKuserok yes

# GSSAPI options
GSSAPIAuthentication no
GSSAPICleanupCredentials no
#GSSAPIStrictAcceptorCheck yes
#GSSAPIKeyExchange no
#GSSAPIEnablek5users no

# Set this to 'yes' to enable PAM authentication, account processing,
# and session processing. If this is enabled, PAM authentication will
# be allowed through the ChallengeResponseAuthentication and
# PasswordAuthentication.  Depending on your PAM configuration,
# PAM authentication via ChallengeResponseAuthentication may bypass
# the setting of "PermitRootLogin without-password".
# If you just want the PAM account and session checks to run without
# PAM authentication, then enable this but set PasswordAuthentication
# and ChallengeResponseAuthentication to 'no'.
# WARNING: 'UsePAM no' is not supported in Red Hat Enterprise Linux and may cause several
# problems.
UsePAM yes

#AllowAgentForwarding yes
#AllowTcpForwarding yes
#GatewayPorts no
X11Forwarding yes
#X11DisplayOffset 10
#X11UseLocalhost yes
#PermitTTY yes
#PrintMotd yes
#PrintLastLog yes
#TCPKeepAlive yes
#UseLogin no
UsePrivilegeSeparation sandbox          # Default for new installations.
#PermitUserEnvironment no
#Compression delayed
#ClientAliveInterval 0
#ClientAliveCountMax 3
#ShowPatchLevel no
UseDNS no
#PidFile /var/run/sshd.pid
#MaxStartups 10:30:100
#PermitTunnel no
#ChrootDirectory none
#VersionAddendum none

# no default banner path
#Banner none

# Accept locale-related environment variables
AcceptEnv LANG LC_CTYPE LC_NUMERIC LC_TIME LC_COLLATE LC_MONETARY LC_MESSAGES
AcceptEnv LC_PAPER LC_NAME LC_ADDRESS LC_TELEPHONE LC_MEASUREMENT
AcceptEnv LC_IDENTIFICATION LC_ALL LANGUAGE
AcceptEnv XMODIFIERS

# override default of no subsystems
Subsystem       sftp    /usr/libexec/openssh/sftp-server

# Example of overriding settings on a per-user basis
#Match User anoncvs
#       X11Forwarding no
#       AllowTcpForwarding no
#       PermitTTY no
#       ForceCommand cvs server
"/etc/ssh/sshd_config" 153L, 4358C
/etc/ssh/ssh——config


#配置文件概要


Host *                                         #选项“Host”只对能够匹配后面字串的计算机有效。“*”表示所有的计算机。

ForwardAgent no                      #设置连接是否经过验证代理(如果存在)转发给远程计算机。

ForwardX11 no                          #设置X11连接是否被自动重定向到安全的通道和显示集(DISPLAY set)

RhostsAuthentication n            #设置是否使用基于rhosts的安全验证。

RhostsRSAAuthentication no   #设置是否使用用RSA算法的基于rhosts的安全验证。

RSAAuthentication yes             #设置是否使用RSA算法进行安全验证。

PasswordAuthentication yes    #设置是否使用口令验证。

FallBackToRsh no                     #设置如果用ssh连接出现错误是否自动使用rsh。

UseRsh no                               #设置是否在这台计算机上使用“rlogin/rsh”。

BatchMode no                        #如果设为“yes”,passphrase/password(交互式输入口令)的提示将被禁止。当不能交互式输入口令的时候,这个选项对脚本文件和批处理任务十分有用。

CheckHostIP yes                      #设置ssh是否查看连接到服务器的主机的IP地址以防止DNS欺骗。建议设置为“yes”。

StrictHostKeyChecking no      #如果设置成“yes”,ssh就不会自动把计算机的密匙加入“$HOME/.ssh/known_hosts”文件,并且一旦计算机的密匙发生了变化,就拒绝连接。

IdentityFile ~/.ssh/identity     #设置从哪个文件读取用户的RSA安全验证标识。

Port 22                                    #设置连接到远程主机的端口。

Cipher blowfish                      #设置加密用的密码。

EscapeChar ~                         #设置escape字符。
2)SSH服务端配置文件详解
/etc/ssh/sshd_config

#配置文件概要


Port 22          # SSH 预设使用 22 这个 port,最好是用别的 port !

Protocol 2,1  # 选择的 SSH 协议版本,可以是 1 也可以是 2 ,如果要同时支持两者,就必须要使用 2,1 这个分隔了!
ListenAddress 0.0.0.0


#监听的主机适配卡!举个例子来说,如果您有两个 IP,分别是 192.168.0.100 及 192.168.2.20 ,那么只想要开放 192.168.0.100 时,

#就可以写如同下面的样式:ListenAddress 192.168.0.100 只监听来自 192.168.0.100 这个 IP 的SSH联机。

如果不使用设定的话,则预设所有接口均接受 SSH
PidFile /var/run/sshd.pid  # 可以放置 SSHD 这个 PID 的档案!左列为默认值


LoginGraceTime 600           # 当使用者连上 SSH server 之后,会出现输入密码的画面,在该画面中,在多久时间内没有成功连上

SSH server ,就断线!时间为秒!
Compression yes              # 是否可以使用压缩指令?


HostKey /etc/ssh/ssh_host_key          # SSH version 1 使用的私钥


HostKey /etc/ssh/ssh_host_rsa_key   # SSH version 2 使用的 RSA 私钥


HostKey /etc/ssh/ssh_host_dsa_key  # SSH version 2 使用的 DSA 私钥


KeyRegenerationInterval 3600       # 由前面联机的说明可以知道, version 1 会使用 server 的 Public Key ,每隔一段时间来重新建立一次!时间为秒!
ServerKeyBits 768                         # Server key 的长度!


SyslogFacility AUTH                        # 当有人使用 SSH 登入系统的时候,SSH会记录信息


LogLevel INFO                            # 登录记录的等级---》全部

PermitRootLogin no                     # 是否允许 root 登入!预设是允许的,但是建议设定成 no!

UserLogin no                         # 在 SSH 底下本来就不接受 login 这个程序的登入!

StrictModes yes                   # 当使用者的 host key 改变之后,Server 就不接受联机

RSAAuthentication yes                 # 是否使用纯的 RSA 认证!?仅针对 version 1 !

PubkeyAuthentication yes              # 是否允许 Public Key ?只有 version 2

AuthorizedKeysFile .ssh/authorized_keys         #设定若要使用不需要密码登入的账号时,那么那个账号的存放档案所在档名!

RhostsAuthentication no          # 本机系统不使用 .rhosts , .rhosts 不安全!

IgnoreRhosts yes              # 是否取消使用 ~/.ssh/.rhosts 来做为认证!

RhostsRSAAuthentication no         # 针对 version 1 ,使用 rhosts 档案在/etc/hosts.equiv配合 RSA 演算方式来进行认证!

HostbasedAuthentication no         # 这个项目与上面的项目类似,不过是给 version 2 使用的!

IgnoreUserKnownHosts no      # 是否忽略家目录内的 ~/.ssh/known_hosts 这个档案所记录的主机内容

PasswordAuthentication yes         # 密码验证当然是需要的!

PermitEmptyPasswords no      # 上面那一项如果设定为 yes 的话,这一项就最好设定为 no ,这个项目在是否允许以空的密码登入!

ChallengeResponseAuthentication yes         # 挑战任何的密码认证!所以,任何 login.conf规定的认证方式,均可适用!

PAMAuthenticationViaKbdInt yes         # 是否启用其它的 PAM 模块!启用这个模块将会导致 PasswordAuthentication 设定失效!
#与Kerberos 有关的参数设定!底下不用设定
  KerberosAuthentication no

  KerberosOrLocalPasswd yes

  KerberosTicketCleanup yes

  KerberosTgtPassing no
#有关在 X-Window 底下使用的相关设定
    X11Forwarding yes

  X11DisplayOffset 10

  X11UseLocalhost yes
PrintMotd no                        # 登入后是否显示出一些信息呢?例如上次登入的时间、地点等,预设是 yes ,但是,如果为了安全,可以考虑改为 no !

PrintLastLog yes       # 显示上次登入的信息!可以啊!预设也是 yes !

KeepAlive yes         # 一般而言,如果设定这项目的话,那么 SSH Server 会传送KeepAlive 的讯息给 Client 端,
以确保两者的联机正常!在这个情况下,任何一端死掉后
,
SSH 可以立刻知道!而不会有僵尸程序的发生!

UsePrivilegeSeparation yes        # 使用者的权限设定项目!

MaxStartups 10            # 同时允许几个尚未登入的联机画面?

DenyUsers *               # 设定受抵挡的使用者名称
二:常用的SSH服务端远程登录配置与实践
配置文件 /ect/ssh/sshd_config
 #常用参数:
    Port                                  # 可修改ssh访问端口,默认为22。默认在本机的所有网络接口上监听。端口范围:0~65535,不能与已有的服务器端口冲突

    PermitEmptyPasswords   #是否允许密码为空的用户远程登录。默认为"no"

    PermitRootLogin             #是否允许ssh远程登录root帐号,建议为no

    ClientAliveInterval 0        #客户端连接数做限制,根据需求设置

    UseDNS                          #指定sshd是否应该对远程主机名进行方向解析,以检查此主机名是否与其IP地址真实对应。默认值为"yes"。个人建议改成no,否则可能会导致ssh连接很慢

    GSSAPIAuthentication no             #解决Linux之间使用SSH远程连接慢的问题


    #限制可登录用户的办法如下:


    AllowUsers user1 user2 user3        #允许ssh登录用户

    DenyUsers             #禁止ssh登陆用户

    AllowGroups         #允许ssh登录用户组

    DenyGroups         #禁止ssh登陆用户组
#温馨提示:这里用虚拟机做测试,以免参数设置有误,连接不上。可以上真实虚拟机修改
[root@localhost ssh]# cp sshd_config sshd_config$(date +%F)
[root@localhost ssh]# cat sshd_config
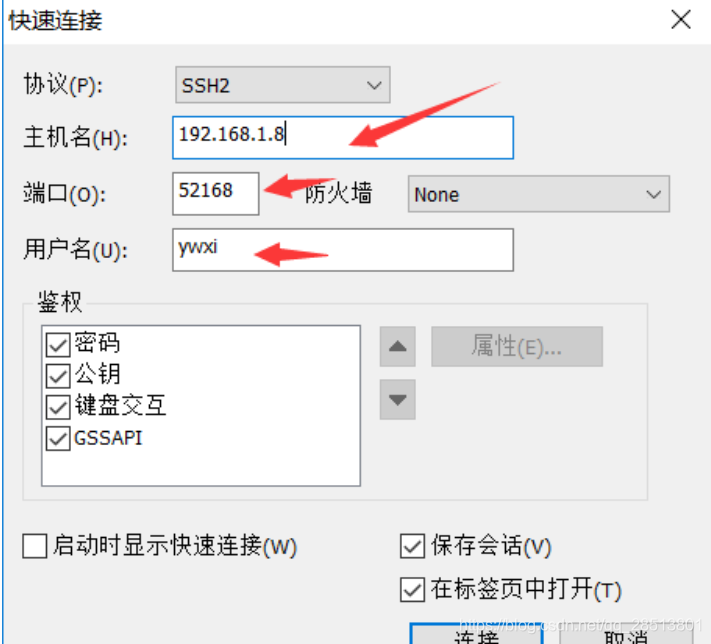
Port 52168 #连接端口改为52168
PermitRootLogin no #不允许ssh远程登录root帐号
PermitEmptyPasswords no #不允许密码为空的用户远程登录
UseDNS no #不进行解析
GSSAPIAuthentication no #解决Linux之间使用SSH远程连接慢的问题
allowusers ywxi@192.168.1.11 #允许ywxi用户使用本机内网地址链接
denyusers ywxitest@192.168.1.11 #禁止ywxitest用户使用本机内网地址连接
[root@localhost ssh]# useradd ywxi #创建用户,用来测试
[root@localhost ssh]# useradd ywxitest
[root@localhost ssh]# passwd ywxi #给ywxi用户设置密码,暂时不给ywxitest用户设置
[root@localhost ssh]# ifconfig |grep 'inet addr' #虚拟机IP地址
inet addr:192.168.1.8 Bcast:192.168.1.255 Mask:255.255.255.0
inet addr:127.0.0.1 Mask:255.0.0.0
[root@localhost ssh]# /etc/init.d/sshd restart #重启服务,使SSH服务端配置生效
Stopping sshd: [ OK ]
Starting sshd: [ OK ]
[root@localhost ssh]# grep 52168 /etc/sysconfig/iptables
-A INPUT -m state --state NEW -m tcp -p tcp --dport 52168 -j ACCEPT #添加防火墙规则允许52168端口开放
[root@localhost ssh]# /etc/init.d/iptables restart
iptables: Setting chains to policy ACCEPT: filter [ OK ]
iptables: Flushing firewall rules: [ OK ]
iptables: Unloading modules: [ OK ]
iptables: Applying firewall rules: [ OK ]
以下是客户端用CRT工具通过sshd服务远程连接虚拟主机过程:
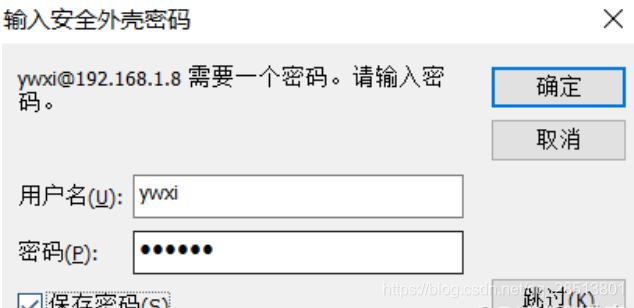

用root用户连接,一直会提示密码验证失败
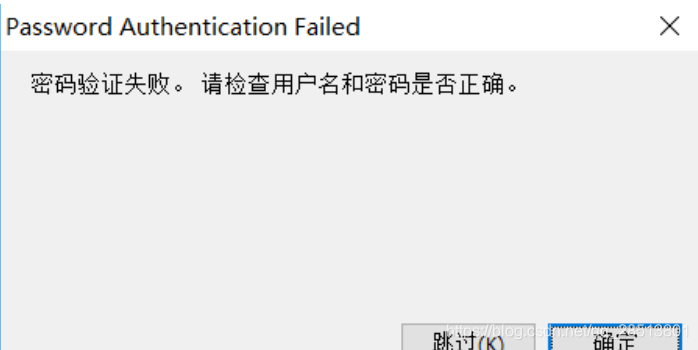
修改配置PermitRootLogin yes 改为yes,注意有allowusers限制用户时需要把root用户也允许
修改后,重启sshd服务设置好端口后,root用户即可连接

扫描二维码关注公众号,回复:
6420802 查看本文章

三:更高级的SSH安全策略
限制用户登录IP的方法有两种;
1)修改/etc/hosts.allow和/etc/hosts.deny 这两个文件,把需要通过的IP写在/etc/hosts.allow 文件里


[root@localhost ~]# cat /etc/hosts.allow
sshd:192.168.1.11:allow
[root@localhost ~]# cat /etc/hosts.deny
sshd:ALL
[root@localhost ~]# /etc/init.d/sshd restart     #重启服务使配置生效


2)修改/etc/ssh/sshd_config文件

[root@localhost ~]# cat /etc/ssh/sshd_config
allowusers ywxi@192.168.1.11
allowusers root@192.168.1.11
denyusers  ywxitest@192.168.1.11
[root@localhost ~]# /etc/init.d/sshd restart     #重启服务使配置生效
更改SSH监听的IP,使其监听内网IP段或指定ip;
1)更改SSH监听的IP,使其监听内网IP段

[root@localhost ssh]# cat sshd_config|grep Listen
ListenAddress 192.168.1.8:52168


2)通过防火墙限制仅能使用内网IP连接此服务器。限制命令如下
iptables -I INPUT -p -tcp --dport 52168 -s 192.168.1.0/24 -j ACCEPT


3)通过拨号到×××服务器,然后从局域网访问这些服务器,提升安全性。
四:ssh服务安全加强的建议(仅供参考,工作中根据需求来就好行)
   1、不要使用默认端口

     2、禁止使用protocol version 1

     3、限制可登录用户

     4、设定空闲会话超时时长

     5、利用防火墙设置ssh访问策略

     6、仅监听特定的IP地址

     7、基于口令认证时,使用强密码策略

            tr -dc A-Za-z0-9_ < /dev/urandom | head -c 30 | xargs


     8、使用基于密钥的认证

     9、禁止使用空密码

     10、禁止root用户直接登录

     11、限制ssh的访问频度和并发在线数

     12、做好日志,经常分析


     13、锁死sshd服务的配置文件,防止篡改,修改锁文件命令