1、安装版本与环境
elasticsearch版本: C-6.5.4
elasticsearch目录: /opt/elasticsearch/
centos7服务器,内存要求至少8G.
2、三台服务集群
172.17.115.124 master
172.17.115.125 master data
172.17.115.126 master data
3、创建elasticsearch启动账号
useradd newUser
passwd newUser
4、创建数据与日志目录
mkdir -p /opt/elasticsearch/data/data/
mkdir -p /opt/elasticsearch/data/logs/
授权
chown -R newUser:newUser /opt
5、修改elasticsearch配置信息
1)172.17.115.124 配置信息:
cluster.name: my-application
node.name: node-172-17-115-124
path.data: /opt/elasticsearch/data/data
path.logs: /opt/elasticsearch/data/logs
bootstrap.memory_lock: false
bootstrap.system_call_filter: false
network.host: 172.17.115.124
http.port: 9200
discovery.zen.ping.unicast.hosts: ["172.17.115.125:9300","172.17.115.124:9300","172.17.115.126:9300"]
discovery.zen.minimum_master_nodes: 2
gateway.recover_after_nodes: 3
node.master: true
node.data: false
node.ingest: false
search.remote.connect: false
http.cors.enabled: true
http.cors.allow-origin: "*"
2)172.17.115.125 配置信息:
cluster.name: my-application
node.name: node-172-17-115-125
path.data: /opt/elasticsearch/data/data
path.logs: /opt/elasticsearch/data//logs
bootstrap.memory_lock: false
bootstrap.system_call_filter: false
network.host: 172.17.115.125
http.port: 9200
discovery.zen.ping.unicast.hosts: ["172.17.115.125:9300","172.17.115.124:9300","172.17.115.126:9300"]
discovery.zen.minimum_master_nodes: 2
gateway.recover_after_nodes: 3
node.master: true
node.data: false
node.ingest: false
search.remote.connect: false
http.cors.enabled: true
http.cors.allow-origin: "*"
3)172.17.115.126 配置信息:
cluster.name: my-application
node.name: node-172-17-115-126
path.data: /opt/elasticsearch/data/data
path.logs: /opt/elasticsearch/data/logs
bootstrap.memory_lock: false
bootstrap.system_call_filter: false
network.host: 172.17.115.126
http.port: 9200
discovery.zen.ping.unicast.hosts: ["172.17.115.125:9300","172.17.115.124:9300","172.17.115.126:9300"]
discovery.zen.minimum_master_nodes: 2
gateway.recover_after_nodes: 3
node.master: true
node.data: false
node.ingest: false
search.remote.connect: false
http.cors.enabled: true
http.cors.allow-origin: "*"
6、启动elasticsearch
./bin/elasticsearch
或者后台启动
./bin/elasticsearch -d
启动成功之后,用CURL 请求测试集群是否搭建成功。
curl http://172.17.115.124:9200/_cat/nodes?v
如下图,172.17.115.126为主节点

说明:
3台机器的cluster.name值必须一样,node.name值必须不一样。
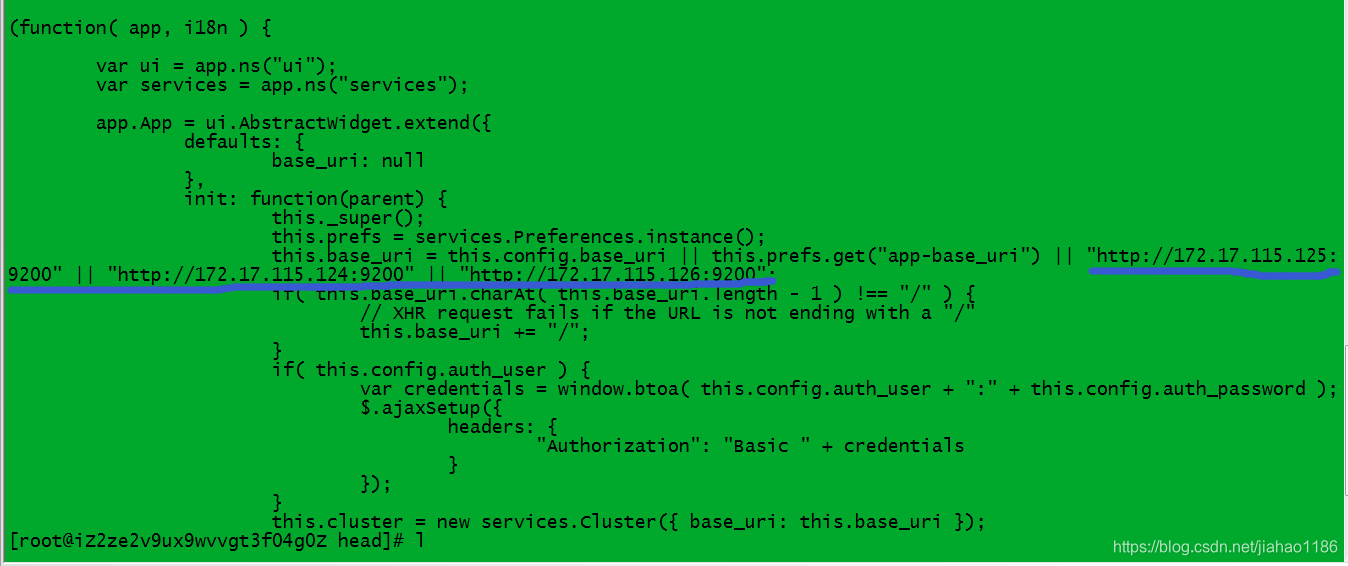
7、head配置
vi _site/app.js
8、head启动
# node_modules/grunt/bin/grunt server &
后台启动
# nohup node_modules/grunt/bin/grunt server &
看到下图,即大工高成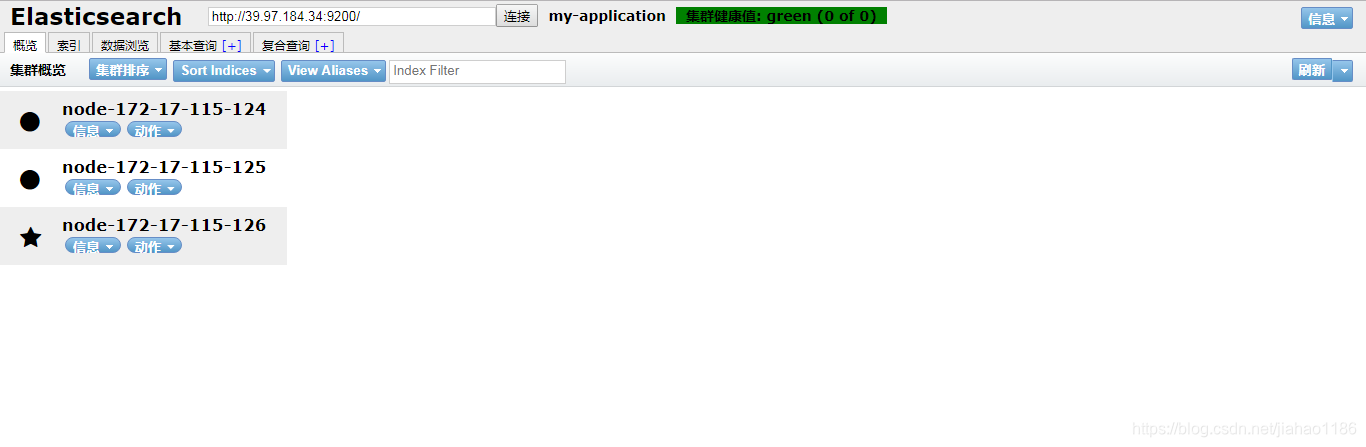
此文是在以下两篇问文章基础之上给出的安装说明,如有问题请先阅读下两篇文章,或留言讨论