1 导入逆向工程到eclipse中

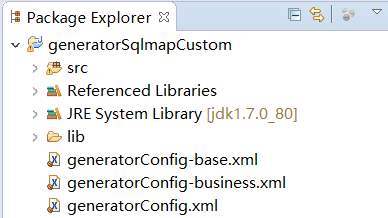
2 修改配置文件
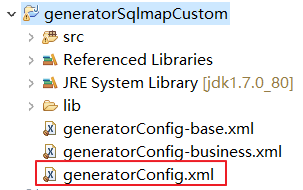
注意修改以下几点:
- 修改要生成的数据库表
- pojo文件所在包路径
- Mapper所在的包路径
配置文件如下:
<?xml version="1.0" encoding="UTF-8"?>
<!DOCTYPE generatorConfiguration
  PUBLIC "-//mybatis.org//DTD MyBatis Generator Configuration 1.0//EN"
  "http://mybatis.org/dtd/mybatis-generator-config_1_0.dtd">

<generatorConfiguration>
    <context id="testTables" targetRuntime="MyBatis3">
        <commentGenerator>
            <!-- 是否去除自动生成的注释[英文] true:是 : false:否 -->
            <property name="suppressAllComments" value="true" />
        </commentGenerator>
        <!--数据库连接的信息:驱动类、连接地址、用户名、密码 -->
        <jdbcConnection driverClass="com.mysql.jdbc.Driver"
            connectionURL="jdbc:mysql://39.105.94.154:3306/mybatis"
            userId="tom"
            password="tom,">
        </jdbcConnection>
        <!--
        <jdbcConnection driverClass="oracle.jdbc.OracleDriver"
            connectionURL="jdbc:oracle:thin:@127.0.0.1:1521:yycg"
            userId="yycg"
            password="yycg">
        </jdbcConnection>
        -->

        <!-- 默认false,把JDBC DECIMAL 和 NUMERIC 类型解析为 Integer,为 true时把JDBC DECIMAL 和
            NUMERIC 类型解析为java.math.BigDecimal -->
        <javaTypeResolver>
            <property name="forceBigDecimals" value="false" />
        </javaTypeResolver>

        <!-- targetProject:生成PO类的位置 -->
        <javaModelGenerator targetPackage="com.mybatis.spring.pojo"
            targetProject=".\src">
            <!-- enableSubPackages:是否让schema作为包的后缀 -->
            <property name="enableSubPackages" value="false" />
            <!-- 从数据库返回的值被清理前后的空格 -->
            <property name="trimStrings" value="true" />
        </javaModelGenerator>
        <!-- targetProject:mapper映射文件生成的位置 -->
        <sqlMapGenerator targetPackage="com.mybatis.spring.mapper"
            targetProject=".\src">
            <!-- enableSubPackages:是否让schema作为包的后缀 -->
            <property name="enableSubPackages" value="false" />
        </sqlMapGenerator>
        <!-- targetPackage:mapper接口生成的位置 -->
        <javaClientGenerator type="XMLMAPPER"
            targetPackage="com.mybatis.spring.mapper"
            targetProject=".\src">
            <!-- enableSubPackages:是否让schema作为包的后缀 -->
            <property name="enableSubPackages" value="false" />
        </javaClientGenerator>
        <!-- 指定数据库表 -->
        <table schema="" tableName="user"></table>
        <table schema="" tableName="orders"></table>

        <!-- 有些表的字段需要指定java类型
             比如我们表里面有一个字段是tinyint类型,范围-128~127.
             你会发现它自己生成的时候会生成一个Boolean类型。
             他认为之后装0,和 1.
             如果说你想装0,1,2,3,4,5,6多个值,这时候boolean就不行了。
             这时候你就需要指定一下tinyint类型的字段转换后的类型为int。
         <table schema="" tableName="">
            <columnOverride column="id" javaType="int" />
        </table> -->
    </context>
</generatorConfiguration>
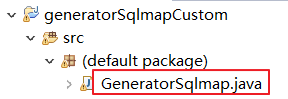
3 生成逆向工程代码
找到下图所示的java文件,执行工程main主函数,

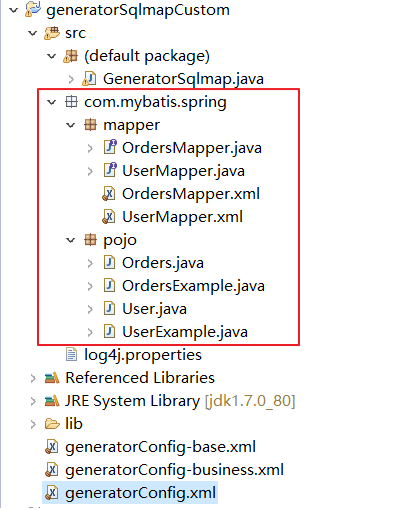
刷新工程,发现代码生成,如下图:
4 测试逆向工程代码
1 新建一个java工程名为mybatis-spring-second
2.复制刚刚生成的逆向工程代码到项目中,效果如下

修改spring配置文件
在applicationContext.xml修改.注意使用扫描的方式配置代理
<?xml version="1.0" encoding="UTF-8"?>
<beans xmlns:xsi="http://www.w3.org/2001/XMLSchema-instance"
       xmlns="http://www.springframework.org/schema/beans"
       xmlns:context="http://www.springframework.org/schema/context"
       xmlns:aop="http://www.springframework.org/schema/aop"
       xmlns:tx="http://www.springframework.org/schema/tx"
       xmlns:p="http://www.springframework.org/schema/p"
       xsi:schemaLocation="http://www.springframework.org/schema/beans
                           http://www.springframework.org/schema/beans/spring-beans-4.0.xsd
                        http://www.springframework.org/schema/context
                        http://www.springframework.org/schema/context/spring-context-4.0.xsd
                        http://www.springframework.org/schema/aop
                        http://www.springframework.org/schema/aop/spring-aop-4.0.xsd
                        http://www.springframework.org/schema/tx
                        http://www.springframework.org/schema/tx/spring-tx-4.0.xsd
                           http://www.springframework.org/schema/util
                           http://www.springframework.org/schema/util/spring-util-4.0.xsd">

    <!-- 1加载配置文件 -->
    <context:property-placeholder location="classpath:db.properties" />

    <!-- 2配置连接池 -->
    <bean name="dataSource" class="org.apache.commons.dbcp.BasicDataSource">
        <property name="driverClassName" value="${jdbc.driver}" />
        <property name="url" value="${jdbc.url}" />
        <property name="username" value="${jdbc.username}" />
        <property name="password" value="${jdbc.password}" />
        <property name="maxActive" value="10" />
        <property name="maxIdle" value="5" />
    </bean>

    <!--3 配置SqlSessionFactory  -->
    <bean id="sqlSessionFactory" class="org.mybatis.spring.SqlSessionFactoryBean">
        <!-- 配置mybatis核心配置文件 -->
        <property name="configLocation" value="classpath:SqlMapConfig.xml" />
        <!-- 配置数据源 -->
        <property name="dataSource" ref="dataSource" />
    </bean>

    <!-- Mapper代理的方式开发,扫描包方式配置代理 -->
    <bean class="org.mybatis.spring.mapper.MapperScannerConfigurer">
        <!-- 配置Mapper接口,如果需要加载多个包,直接写进来,中间用,分隔 -->
        <property name="basePackage" value="com.mybatis.spring.mapper"></property>
    </bean>

</beans>
修改SqlMapConfig.xml文件
<?xml version="1.0" encoding="UTF-8"?>
<!DOCTYPE configuration
PUBLIC "-//mybatis.org//DTD Config 3.0//EN"
"http://mybatis.org/dtd/mybatis-3-config.dtd">
<configuration>
    <!-- 设置别名 -->
    <typeAliases>
        <!-- 2. 指定扫描包,会把包内所有的类都设置别名,别名的名称就是类名,大小写不敏感 -->
        <package name="com.mybatis.spring.pojo" />
    </typeAliases>

    <mappers>
        <package name="com.mybatis.spring.mapper"/>
    </mappers>
</configuration>
注意事项
注意:
- 逆向工程生成的代码只能做单表查询
- 不能在生成的代码上进行扩展,因为如果数据库变更,需要重新使用逆向工程生成代码,原来编写的代码就被覆盖了。
- 一张表会生成4个文件
测试程序
package com.mybatis.spring.junit;

import java.util.Date;
import java.util.List;

import org.junit.Before;
import org.junit.Test;
import org.springframework.context.ApplicationContext;
import org.springframework.context.support.ClassPathXmlApplicationContext;

import com.mybatis.spring.mapper.UserMapper;
import com.mybatis.spring.pojo.User;
import com.mybatis.spring.pojo.UserExample;

public class UserMapperTest {

    private ApplicationContext ac;

    @Before
    public void setUp() throws Exception {
        this.ac = new ClassPathXmlApplicationContext("classpath:applicationContext.xml");
    }

    @Test
    //测试插入,插入全部字段
    public void testInsert() {
        // 获取Mapper
        UserMapper userMapper = ac.getBean(UserMapper.class);

        User user = new User();
        user.setUsername("曹操");
        user.setSex("1");
        user.setBirthday(new Date());
        user.setAddress("三国");

        userMapper.insert(user);
    }

    @Test
    //测试插入,插入部分字段全部字段
    public void testInsertSelective() {
        // 获取Mapper
        UserMapper userMapper = ac.getBean(UserMapper.class);

        User user = new User();
        user.setUsername("卢小西");

        user.setBirthday(new Date());

        userMapper.insertSelective(user);
    }

    @Test
    //测试根据条件删除
    public void testDeleteByExample(){
        // 获取Mapper
        UserMapper userMapper = ac.getBean(UserMapper.class);

        // 创建User对象扩展类,用户设置查询条件
        UserExample example = new UserExample();
        example.createCriteria().andUsernameLike("%西%");

        //删除数据
        int deleteCount = userMapper.deleteByExample(example);

        System.out.println("删除了:"+deleteCount+"条数据");

    }

    @Test
    //测试根据id删除
    public void testDeleteByPrimaryKey(){
        // 获取Mapper
        UserMapper userMapper = ac.getBean(UserMapper.class);


        //删除数据
        int deleteCount = userMapper.deleteByPrimaryKey(38);

        System.out.println("删除了:"+deleteCount+"条数据");

    }

    @Test
    //查询名字里面含有张的用户
    public void testSelectByExample1() {
        // 获取Mapper
        UserMapper userMapper = ac.getBean(UserMapper.class);

        // 创建User对象扩展类,用户设置查询条件
        UserExample example = new UserExample();
        example.createCriteria().andUsernameLike("%张%");

        // 查询数据
        List<User> list = userMapper.selectByExample(example);

        System.out.println(list.size());
    }

    @Test
    //查询性别为1,并且名字里面含有“明”字的,并且降序排序
    public void testSelectByExample2() {
        // 获取Mapper
        UserMapper userMapper = ac.getBean(UserMapper.class);

        // 创建User对象扩展类,用户设置查询条件
        UserExample example = new UserExample();
        String username = "明";
        example.createCriteria().andSexEqualTo("1").andUsernameLike("%" + username + "%");
        example.setOrderByClause("id desc");

        List<User> list = userMapper.selectByExample(example);
        for (User u : list) {
            System.out.println(u.getId() + "\t" + u.getUsername());
        }
    }

    @Test
    //查询性别为1,并且名字里面含有“明”字的用户数量
    public void testSelectByExample3() {
        // 获取Mapper
        UserMapper userMapper = ac.getBean(UserMapper.class);

        // 创建User对象扩展类,用户设置查询条件
        UserExample example = new UserExample();
        String username = "明";
        example.createCriteria().andSexEqualTo("1").andUsernameLike("%" + username + "%");


        int count = userMapper.countByExample(example);
        System.out.println(count);
    }

    @Test
    public void testSelectByPrimaryKey() {
        // 获取Mapper
        UserMapper userMapper = ac.getBean(UserMapper.class);

        User user = userMapper.selectByPrimaryKey(31);
        System.out.println(user.getId()+"\t"+user.getUsername()+"\t"+
        user.getAddress()+"\t"+user.getSex()+"\t"+user.getBirthday());
    }

    @Test
    //测试用户修改,根据id,修改全部字段
    public void testUpdateByPrimaryKey(){
        // 获取Mapper
        UserMapper userMapper = ac.getBean(UserMapper.class);

        User user = new User();
        user.setId(1);
        user.setUsername("曹操");
        user.setSex("1");
        user.setBirthday(new Date());
        user.setAddress("三国");

        userMapper.updateByPrimaryKey(user);
        System.out.println(user);
    }

    @Test
    //测试用户修改,根据id,但是只修改其中的某个字段,或者某几个字段,非全部字段
    public void testUpdateByPrimaryKeySelective(){
        // 获取Mapper
        UserMapper userMapper = ac.getBean(UserMapper.class);

        User user = new User();
        user.setId(1);
        user.setUsername("诸葛亮");

        userMapper.updateByPrimaryKeySelective(user);
        System.out.println(user.getId()+"\t"+user.getUsername());
    }

    @Test
    //测试用户修改,根据example,修改全部字段
    public void testUpdateByExample(){
        // 获取Mapper
        UserMapper userMapper = ac.getBean(UserMapper.class);

        //创建需要修改的用户对象
        User user = new User();
        user.setId(1);
        user.setUsername("习大大");
        user.setSex("1");
        user.setBirthday(new Date());
        user.setAddress("china");

        // 创建User对象扩展类,用户设置查询条件
        UserExample example = new UserExample();
        example.createCriteria().andIdEqualTo(1);

        userMapper.updateByExample(user, example);

        System.out.println(user.getId()+"\t"+user.getUsername());
    }

    @Test
    //测试用户修改,根据id,但是只修改其中的某个字段,或者某几个字段,非全部字段
    public void testUpdateByExampleSelective(){
        // 获取Mapper
        UserMapper userMapper = ac.getBean(UserMapper.class);

        //创建需要修改的用户对象
        User user = new User();
        user.setId(1);
        user.setUsername("小强");
        user.setSex("2");

        // 创建User对象扩展类,用户设置查询条件
        UserExample example = new UserExample();
        example.createCriteria().andIdEqualTo(1);

        userMapper.updateByExampleSelective(user, example);

        System.out.println(user.getId()+"\t"+user.getUsername());
    }
}