使用Docker进行Selenium Grid分布式测试
本文主要介绍如何使用Docker进行Selenium Grid分布式测试,附上简单例子以及遇到的一些问题,准备环境如下:
- CentOS 7.0
- Docker 1.18
- selenium/hub 镜像
- selenium/node-chrome 镜像
- eclipse Oxygen.3 Release
- JDK 1.8.0 以上
- 宿主主机IP 10.10.12.223
获取镜像
本文所使用的selenium镜像均为latest,如需指定版本则前往hub中查看版本号再进行获取
# 获取hub镜像
docker pull selenium/hub

# 获取chrome节点镜像
docker pull selenium/node-chrome
启动容器
- 启动hub
# 启动hub,映射端口(依据Dockerfile EXPOSE)
docker run -d -p 4444:4444 --name selenium-hub selenium/hub:latest
注:也可以使用-P进行高阶端口的映射,根据需求而定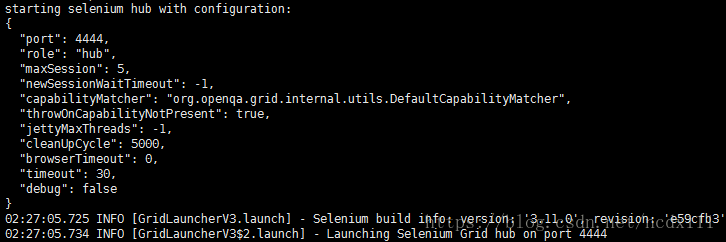
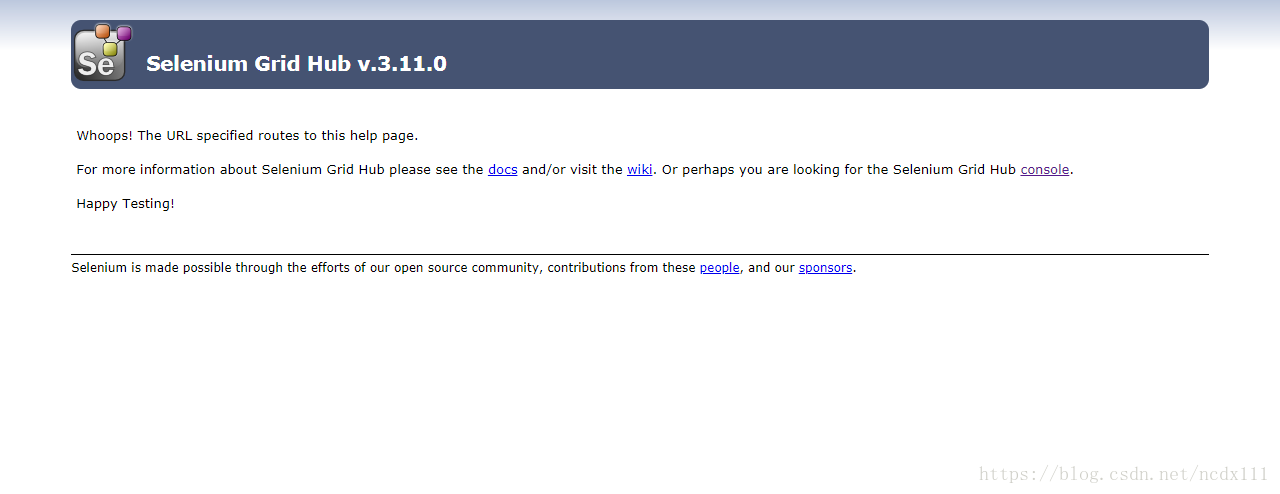
从图中可以查看到端口为4444,版本为3.11.0,浏览器访问http://10.10.12.223:4444/,看到下图表示selenium服务正常连接
- 启动chrome节点
# 启动node,无需映射端口,需要连接(link)hub
docker run -d --link selenium-hub:hub --name selenium-chrome selenium/node-chrome:latest
从图中可以查看出正确连接到了hub,节点内部端口为5555,且成功将node注册到hub中。访问http://10.10.12.223:4444/grid/console可以看到node状态

执行Demo测试
本文使用Java编写的Demo
- 创建简单的Maven项目,并添加如下依赖
<dependency>
    <groupId>junit</groupId>
    <artifactId>junit</artifactId>
    <version>4.11</version>
    <scope>test</scope>
</dependency>
<dependency>
    <groupId>org.seleniumhq.selenium</groupId>
    <artifactId>selenium-server</artifactId>
    <version>3.0.1</version>
</dependency>- 创建selenium Demo
public class DockerSeleniumDemoTest {

    WebDriver driver;
    String remoteAddress = "http://10.10.12.223:4444/wd/hub";
    Map<String, String> chromeMap = new HashMap<String, String>();
    WebDriverWait wait;
    Actions action;
    DesiredCapabilities dc;
    String chrome = this.getClass().getClassLoader().getResource("chromedriver.exe").getPath();
    String folderName = "img-node1";

    @Before
    public void setUp() throws Exception {
        System.setProperty("webdriver.chrome.driver", chrome);
        driver = new RemoteWebDriver(new URL(remoteAddress), DesiredCapabilities.chrome());
        wait = new WebDriverWait(driver, 10);
        action = new Actions(driver);
    }

    @After
    public void tearDown() throws Exception {
        driver.close();
    }

    @Test
    public void test() throws Exception {
        driver.get("https://www.csdn.net/");
        Thread.sleep(2000);
        ScreenShotUtil.screenShoter(driver, folderName + "\\01 shouye.png");
        Thread.sleep(1000);
    }

}其中ScreenShotUtil工具类如下
public class ScreenShotUtil {

    public static void screenShoter(WebDriver driver,String filePathName) {
        File screenShotFile = ((TakesScreenshot)driver).getScreenshotAs(OutputType.FILE);
        try {
            FileUtils.copyFile(screenShotFile, new File(filePathName));
        } catch (IOException e) {
            e.printStackTrace();
        }
    }
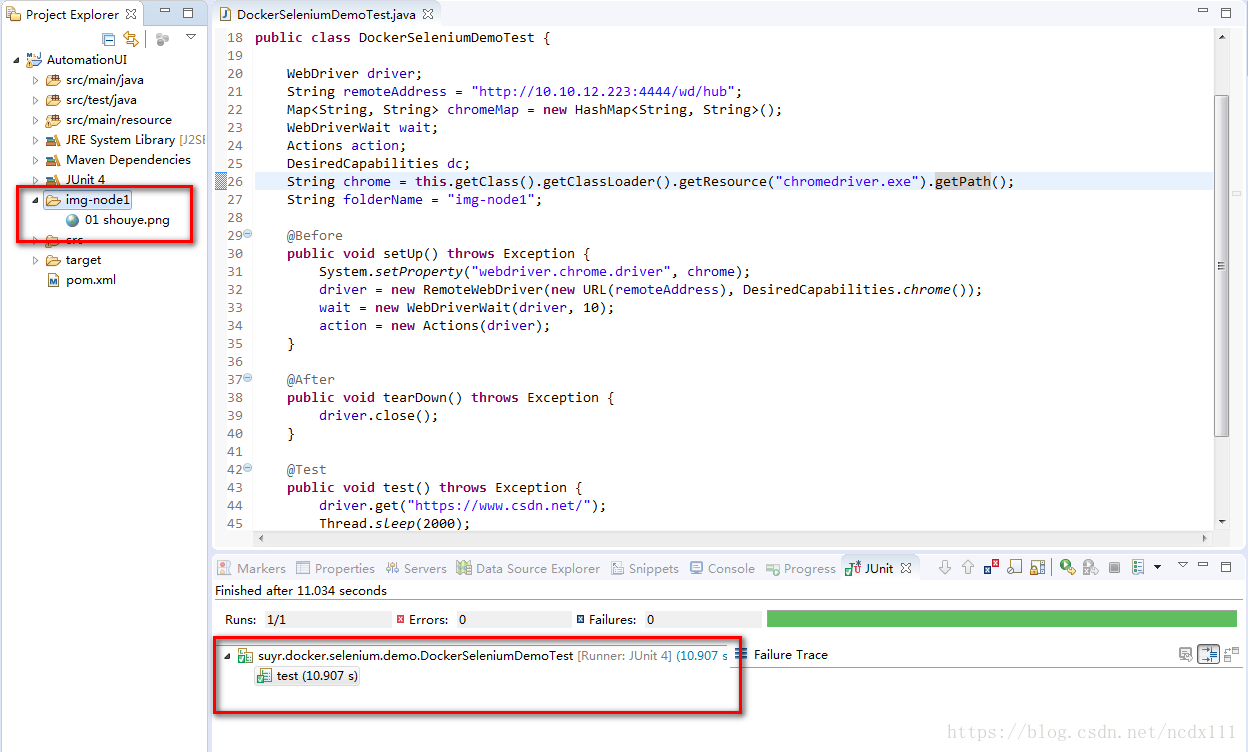
}- 执行测试,使用junit运行器运行测试类
selenium Hub日志如下
selenium chrome节点日志如下
- 查看运行截图,分辨较小,出现了滚动条


注意事项
- 脚本只能运行一次,再次运行时会出现阻塞现象
原因:查看chrome节点配置文件/opt/bin/generate_config中涉及的环境变量NODE_MAX_INSTANCES,默认值为1,说明单个node只能运行一个测试用例。
解决办法:运行完成一个用例后,重启节点。回到selenium自动测试的过程中看,不难理解这种做法。打个比方,node相当于浏览器进程,在运行TestCaseA测试时,会打开浏览器然后运行指定操作,结束后关闭浏览器(进程随之关闭)。再次运行TestCaseA时,会重新打开浏览器(相当于新进程),与前一次毫无关系。只是在docker中,node是一个容器,不会自动关闭,所以要想释放掉当前实例,需要重启node即可。当然还有一种方法,在启动node时加上-e NODE_MAX_INSTANCES=2 -e NODE_MAX_SESSION=2就刻意运行两次脚本了,但是达到所设数值上限后还是得重启。
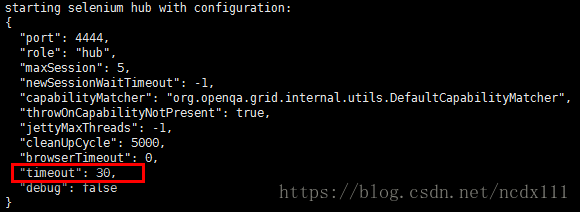
思考:个人认为,用Grid进行自动化测试的应该是较大的系统,相当于跑个一天甚至两天才能出一次测试结果的,所以依据docker最佳实践来说,每次跑节点只需要新建,跑完后销毁或停止节点即可。 - 关于Hub中timeout参数的解释
timeout代表会话超时,假设当前仅运行一个测试用例,若用例在30s无操作,那么hub自动断开session连接。打个比方,我们都知道selenium在做自动化测试时,需要设置sleep时间,以保证页面加载完成同时可以正确找到所需的元素,但是如果中间存在一个步骤需要停留超过30s,那么此时hub断开会话连接,用例剩下的步骤均不会再执行。
建议:建议修改此配置,将timeout的值设置大一点

结束语
本文介绍的demo较为简单,后期若是进行最佳实践再进行分享