Lnamp的架构
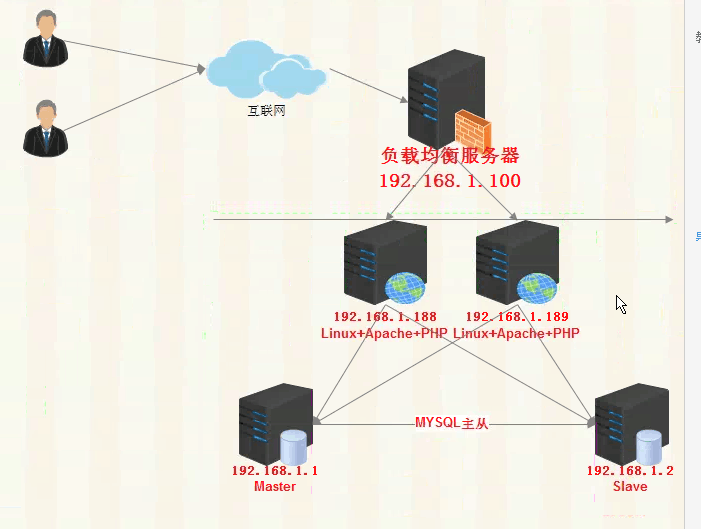
环境:
图上面是5台服务器
192.168.1.116 是nginx负载均衡+动静分离
192.168.1.117:linux+apache+php
192.168.1.118:linux+apache+php
192.168.1.18:mysql主
192.168.1.19:msql从
!# 忽略安装http php mysql服务,可以源码安装 也可以yum安装,安装方法可以看其他笔记。
nginx安装:
接下来我们就应该做nginx负载均衡+动静分离+反向代理的配置
什么是动静分离:动态和静态请求分开不能理解成只是单纯的把动态页面和静态页面物理分离可以理解成使用Nginx处理静态页面,Tomcat、Resin出来动态页面。动态走后端 静态走nginx本地发布目录解析
在1.116安装nginx
接下来正式安装Nginx,首先需要安装pcre库。
#安装pcre支持rewrite库,也可以安装源码,注*安装源码时,指定pcre路径为解压
源码的路径,而不是编译后的路径,否则会报错
(make[1]: *** [/usr/local/pcre/Makefile] Error 127 错误)
yum install pcre-devel pcre -y
#下载Nginx源码包
cd /usr/src
wget -c http://nginx.org/download/nginx-1.6.2.tar.gz
#解压Nginx源码包
tar -xzf nginx-1.6.2.tar.gz
#预编译Nginx
useradd www ;./configure --user=www --group=www --prefix=/usr/local/nginx --with-
http_stub_status_module --with-http_ssl_module
#.configure预编译成功后,执行make命令进行编译
make
#make执行成功后,执行make install 正式安装
make install
#自此Nginx安装完毕
/usr/local/nginx/sbin/nginx -t 检查nginx配置文件是否正确,返回OK即正确。
[root@localhost ~]# /usr/local/nginx/sbin/nginx -t
nginx: the configuration file /usr/local/nginx/conf/nginx.conf syntax is ok
nginx: configuration file /usr/local/nginx/conf/nginx.conf test is successful
[root@localhost ~]#
然后启动nginx,/usr/local/nginx/sbin/nginx 回车即可。查看进程是否已启动:
[root@localhost ~]# ps -ef |grep nginx
然后配置nginx的配置文件

打开配置文件nginx.conf 配置方向代理+优化等如下:
Nginx配置文件:如下(都是优化参数)
user www www;
worker_processes 8;
worker_cpu_affinity 00000001 00000010 00000100 00001000 00010000
00100000 01000000 10000000;
error_log  /usr/local/nginx/logs/error.log  crit;
pid /usr/local/nginx/nginx.pid;
worker_rlimit_nofile 102400;
events {
    use epoll;
    worker_connections  102400;
    multi_accept on;
}

http {
include       mime.types;
log_format  main  '$remote_addr - $remote_user [$time_local] "$request" '
                      '$status $body_bytes_sent "$http_referer" '
                      '"$http_user_agent" "$request_time"';
default_type  application/octet-stream;
    access_log    logs/access.log  main ;
    sendfile        on;
    tcp_nopush on;
    tcp_nodelay   on;
    keepalive_timeout  60;
   gzip on;
   gzip_min_length 1k;
   gzip_buffers   4 16k;
   gzip_http_version 1.1;
   gzip_comp_level 4;
   gzip_types       text/plain application/x-javascript text/css application/xml;
   gzip_vary on;
   client_max_body_size 10m;
client_body_buffer_size 128k;
    proxy_connect_timeout  90;
    proxy_send_timeout 90;
    proxy_read_timeout 90;
     proxy_buffer_size 4k;
proxy_buffers 4 32k;
proxy_busy_buffers_size 64k;
 large_client_header_buffers  4 4k;
client_header_buffer_size 4k;
open_file_cache max=102400 inactive=20s;
open_file_cache_valid 30s;
open_file_cache_min_uses 1;
 include vhosts.conf;
# include vhosts/*;
}
然后我们在当前目录下建立一个vhosts.conf文件 配置如下
Vhosts.conf配置文件如下:动静分离的配置文件 静态文件走nginx 必须要拷贝到nginx服务器:(拷贝整个网站到发布目录www1和www2)
 upstream tdt_wugk {
                server   192.168.1.117:80 weight=1 max_fails=2 fail_timeout=30s;
                server   192.168.1.119:80 weight=1 max_fails=2 fail_timeout=30s;
        }
 server {
        listen       80;
        server_name  www.jf.com jf.com;
######规则访问所有的域名都会调到www.jf.com###############
         if ($host != 'www.jf.com' ) {
rewrite ^/(.*)$  http://www.jf.com/$1  permanent;
      }
#######拒绝wget下载##########################
      if ($http_user_agent ~* "wget")
        {
             return 404;
              }
        root   /data/webapps/www/www1;
        index index.php index.html index.htm;
        location /{
            root     /data/webapps/www/www1;
           index index.php index.html;
           expires 3d;
       }
#########反向代理配置 负载网站 动态走后端########################
          location ~ .*\.(php|jsp|cgi)?$ {
          proxy_next_upstream http_502 http_404 http_504 error timeout invalid_header;
          proxy_redirect off;
          proxy_set_header Host $host;
          proxy_set_header X-Real-IP $remote_addr;
          proxy_set_header X-Forwarded-For $proxy_add_x_forwarded_for;
          proxy_pass http://tdt_wugk;

     }
############静态文件走nginx的发布目录   浏览器缓存图片3天###############
          location ~ .*\.(html|htm|gif|jpg|jpeg|bmp|png|ico|txt|js|css)$
          {

           root         /data/webapps/www/www1;
 expires      3d;
          }
#############防盗链配置###################

         location ~* \.(gif|jpg|png|swf|flv)$ {
                valid_referers none blocked  *.jf.com;
                root    /data/webapps/www/www1;
        if ($invalid_referer) {
                return 403;
}
}
}
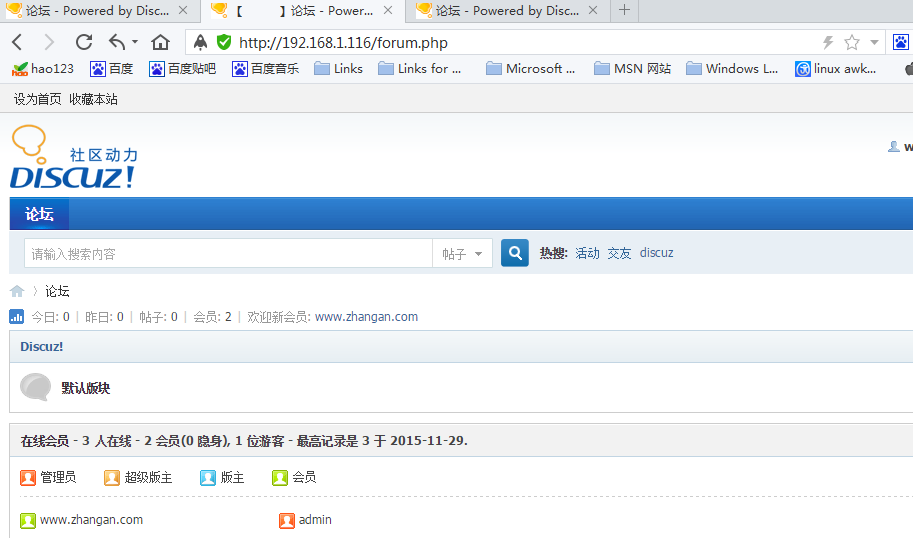
下面就是动静分离 静态走的是nginx 动态走的是后端

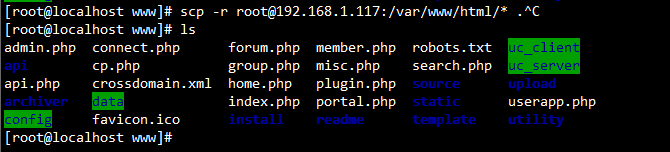
但是上面访问的有文字没有界面是吧 这说明了没有静态文件 那么这是我们就应该把1.117上的网站配置的所有文件拷贝到nginx网站目录,我能不能只拷贝静态文件 我们应该把所有的网站文件都拷贝就ok了。
在企业我们也是这么干的 这么干就相当于网站动静分离
下面就是一个动静分离的网站 静态文件走的是nginx 动态文件走的是后端
#vhosts配置文件解析 反向代理配置解析
这里为后端服务器wugk应用集群配置,根据后端实际情况修改即可,tdt_wugk为负载均衡名称,可以任意指定
下面的所有配置是个负载均衡单没有配置动静分离 动静分离就是上面我配置vhosts.conf的文件 自己去理解
weight配置权重,在fail_timeout内检查max_fails次数,失败则剔除均衡。
upstream tdt_wugk {
server 192.168.1.117:80 weight=1 max_fails=2 fail_timeout=30s;
server 192.168.1.119:80 weight=1 max_fails=2 fail_timeout=30s;
}
#虚拟主机配置
server {
#侦听80端口
listen 80;
#定义使用www.wuguangke.cn访问
server_name www.wuguangke.cn;
#设定本虚拟主机的访问日志
access_log logs/access.log main;
root /data/webapps/wugk; #定义服务器的默认网站根目录位置
index index.php index.html index.htm; #定义首页索引文件的名称
#默认请求
location ~ /{
root /data/www/wugk; #定义服务器的默认网站根目录位置
index index.php index.html index.htm; #定义首页索引文件的名称
#以下是一些反向代理的配置.
proxy_next_upstream http_502 http_404 http_504 error timeout invalid_header;
#如果后端的服务器返回502、504、执行超时等错误,自动将请求转发到upstream负载均衡池中的另一台服务器,实现故障转移。
proxy_redirect off;
#后端的Web服务器可以通过X-Forwarded-For获取用户真实IP
proxy_set_header Host $host;
proxy_set_header X-Real-IP $remote_addr;
proxy_set_header X-Forwarded-For $proxy_add_x_forwarded_for;
proxy_pass http://tdt_wugk; #请求转向后端定义的均衡模块
}