1、Spring框架
- Spring是分层的JavaSE/EE full-stack(一站式) 轻量级开源框架
- 分层:SUN提供的EE的三层结构:控制层、业务层、数据访问层(持久层)
- struts:web层
- Hibernate:数据访问层
- Mybatis:数据访问层
常用框架: SSM:spring、springMVC、mybatis
SSH:spring、struts、hibernate
SSI:spring、struts、ibatis
-
本次介绍SSM框架
2、搭建SSM框架-拷贝jar包
- Spring+SpringMVC的包:

- AOP开发框架:Aspect

- Spring依赖的jar包:

- 连接mysql数据

- 连接池jar:
![]()
![]()
- Springmvc的文件上传依赖Apache的fileupload组件:

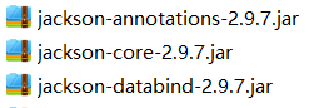
- Json数据:
- jstl标准标签库:
![]()
-
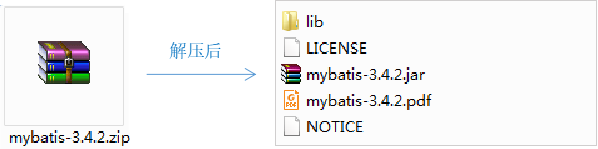
Mybatis框架相关的jar包

- Mybatis下载地址:https://github.com/mybatis/mybatis-3/releases
3、搭建SSM框架-配置文件
配置文件 Spring的配置文件src下面创建:applicationContext.xml
扫描二维码关注公众号,回复:
6173969 查看本文章

完整的约束
<beans xmlns="http://www.springframework.org/schema/beans"
xmlns:xsi="http://www.w3.org/2001/XMLSchema-instance"
xmlns:mvc="http://www.springframework.org/schema/mvc"
xmlns:context="http://www.springframework.org/schema/context"
xmlns:aop="http://www.springframework.org/schema/aop"
xmlns:tx="http://www.springframework.org/schema/tx"
xsi:schemaLocation="http://www.springframework.org/schema/beans
    http://www.springframework.org/schema/beans/spring-beans-4.3.xsd
    http://www.springframework.org/schema/mvc
    http://www.springframework.org/schema/mvc/spring-mvc-4.3.xsd
    http://www.springframework.org/schema/context
    http://www.springframework.org/schema/context/spring-context-4.3.xsd
    http://www.springframework.org/schema/aop
    http://www.springframework.org/schema/aop/spring-aop-4.3.xsd
    http://www.springframework.org/schema/tx
    http://www.springframework.org/schema/tx/spring-tx-4.3.xsd">

<!-- 配置扫描@Service @@Repository注解 -->
<context:component-scan base-package=“com.zq.service" />

<!--读取jdbc.properties -->
<context:property-placeholder location="classpath:jdbc.properties" />

<!-- 打开aspectj的注解开发方式 -->
<aop:aspectj-autoproxy />

<!-- 配置数据库连接 -->
<bean id="dataSource" class="com.mchange.v2.c3p0.ComboPooledDataSource">
	<property name="driverClass" value="${driverClass}"></property>
	<property name="jdbcUrl" value="${jdbcUrl}"></property>
	<property name="user" value="${user}"></property>
	<property name="password" value="${password}"></property>
</bean>

<!-- 配置事务管理器 -->
<bean id="transactionManager"
	class="org.springframework.jdbc.datasource.DataSourceTransactionManager">
	<property name="dataSource" ref="dataSource"></property>
</bean>

<!-- 注册一下事务管理器的驱动 -->
<tx:annotation-driven transaction-manager="transactionManager" />
数据库连接信息src下面创建:jdbc.properties
driverClass=com.mysql.jdbc.Driver
jdbcUrl=jdbc:mysql://localhost:3306/shop
user=root
password=root
springMVC配置文件src下面创建:springmvc-config.xml(约束同spring配置文件的约束)
<!-- 配置扫描器 -->
<context:component-scan base-package="com.zq.controller" />
<!-- 注解驱动 -->
<mvc:annotation-driven />
<!--配置静态资源的访问映射,此配置中的文件,将不被前端控制器拦截 -->
<mvc:resources location="/js/" mapping="/js/**" />
<mvc:resources location="/css/" mapping="/css/**" />
<mvc:resources location="/images/" mapping="/images/**" />

<!-- 配置视图解释器ViewResolver -->
<bean id="jspViewResolver“ class="org.springframework.web.servlet.view.InternalResourceViewResolver">
	<property name="prefix" value="/WEB-INF/jsp/" />
	<property name="suffix" value=".jsp" />
</bean>

<!-- 配置拦截器,先不加 -->
<!-- <mvc:interceptors>
	<mvc:interceptor>
		<mvc:mapping path="/**" />
		<bean class="com.zq.interceptor.LoginInterceptor" />
	</mvc:interceptor>
</mvc:interceptors> -->
配置文件---web.xml
<!-- 配置加载Spring文件的监听器-->
<context-param>
	<param-name>contextConfigLocation</param-name>
	<param-value>classpath:applicationContext.xml</param-value>
</context-param>
<listener>
	<listener-class>
		org.springframework.web.context.ContextLoaderListener
	</listener-class>
</listener>

<!-- 防止中文乱码,过滤器 -->
<filter>
	<filter-name>encodingFilter</filter-name>
  	<filter-class>org.springframework.web.filter.CharacterEncodingFilter</filter-class>
  	<init-param>
  		<param-name>encoding</param-name>
  		<param-value>UTF-8</param-value>
  	</init-param>
</filter>
<filter-mapping>
  	<filter-name>encodingFilter</filter-name>
  	<url-pattern>/*</url-pattern>
</filter-mapping>
<servlet>
	<!-- 前端控制器 -->
  	<servlet-name>springmvc</servlet-name>
  	<servlet-class>org.springframework.web.servlet.DispatcherServlet</servlet-class>

  	<!-- 初始化加载配置文件 可以不配,不配时,默认加载的springmvc的配置文件,去WEB-INF下面找:servlet的名称-servlet.xml-->
  	<init-param>
  		<param-name>contextConfigLocation</param-name>
  		<param-value>classpath:springmvc-config.xml</param-value>
  	</init-param>

  	<!-- 表示容器一启动就加载servlet -->
  	<load-on-startup>1</load-on-startup>
</servlet>
<servlet-mapping>
	<servlet-name>springmvc</servlet-name>
  	<url-pattern>*.do</url-pattern>
	<!-- /拦截所有的请求,*.do拦截访问请求地址后缀是.do的 -->
</servlet-mapping>
测试下

mybatis

在applicationContext.xml中添加mybatis配置
<!-- 配置 MyBatis的工厂 -->
<bean class="org.mybatis.spring.SqlSessionFactoryBean">
	<!-- 数据源 -->
	<property name="dataSource" ref="dataSource" />
	<!-- 配置MyBatis的核心配置文件所在位置 -->
	<property name="configLocation" value="classpath:mybatis-config.xml" />
</bean>
<!-- 接口开发,扫描 com.zq.dao包 ,写在此包下的接口即可被扫描到 -->
<bean class="org.mybatis.spring.mapper.MapperScannerConfigurer">
	<property name="basePackage" value="com.zq.dao" />
</bean>
4、mybatis-mybatis-config.xml(mybatis.pdf  P3、P14)
<?xml version="1.0" encoding="UTF-8" ?>
<!DOCTYPE configuration PUBLIC "-//mybatis.org//DTD Config 3.0//EN"
"http://mybatis.org/dtd/mybatis-3-config.dtd">
<configuration>
	<!-- 别名定义,自动将报下面的类命名别名,首字母小写 -->
	<typeAliases>
		<package name="com.zq.model" />
	</typeAliases>
</configuration>
测试下
4、搭建SSM框架-UserDao.xml
1、Xml头部约束(mybatis.pdf P4)
<?xml version="1.0" encoding="UTF-8" ?>
<!DOCTYPE mapper PUBLIC "-//mybatis.org//DTD Mapper 3.0//EN" "http://mybatis.org/dtd/mybatis-3-mapper.dtd">
2、命名空间<mapper namespace=“com.zq.dao.UserDao”>要与接口一一对应
3、sql语句-查询

