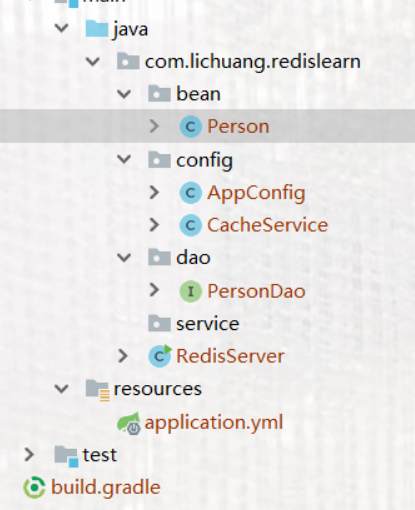
该项目需要的类目录
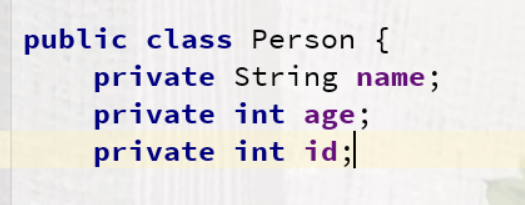
1.首先我们需要创建我们的实体类
2.放置我们的dao层,在里面写入方法

3.配置类Appconfig需要加入我们的JdbcTemplate方法,因为我们用的是spring,所以需要手动添加@Bean
package com.lichuang.redislearn.config;

import org.springframework.cache.CacheManager;
import org.springframework.cache.annotation.EnableCaching;
import org.springframework.context.annotation.Bean;
import org.springframework.context.annotation.ComponentScan;
import org.springframework.context.annotation.Configuration;
import org.springframework.data.redis.cache.RedisCacheConfiguration;
import org.springframework.data.redis.cache.RedisCacheManager;
import org.springframework.data.redis.cache.RedisCacheWriter;
import org.springframework.data.redis.connection.RedisConnectionFactory;
import org.springframework.data.redis.connection.RedisStandaloneConfiguration;
import org.springframework.data.redis.connection.lettuce.LettuceConnectionFactory;
import org.springframework.data.redis.core.StringRedisTemplate;
import org.springframework.data.redis.serializer.GenericJackson2JsonRedisSerializer;
import org.springframework.data.redis.serializer.RedisSerializationContext;
import org.springframework.jdbc.core.JdbcTemplate;
import org.springframework.jdbc.datasource.DataSourceTransactionManager;
import org.springframework.jdbc.datasource.DriverManagerDataSource;

@Configuration
@ComponentScan
@EnableCaching
public class AppConfig {

    @Bean
    public RedisStandaloneConfiguration redisStandaloneConfiguration(){
        RedisStandaloneConfiguration standaloneConfiguration = new RedisStandaloneConfiguration("101.132.107.145",6379);
        return  standaloneConfiguration;
    }
    @Bean
    public RedisConnectionFactory redisConnectionFactory(){
        LettuceConnectionFactory lettuceConnectionFactory= new LettuceConnectionFactory(redisStandaloneConfiguration());
        return  lettuceConnectionFactory;
    }
    @Bean
    public StringRedisTemplate stringRedisTemplate(){
        StringRedisTemplate stringRedisTemplate = new StringRedisTemplate(redisConnectionFactory());
        return  stringRedisTemplate;
    }

    @Bean
    public CacheManager cacheManager(){
        RedisCacheConfiguration redisCacheConfiguration=
        RedisCacheConfiguration.defaultCacheConfig().serializeValuesWith(RedisSerializationContext.SerializationPair.fromSerializer(new GenericJackson2JsonRedisSerializer()));
        RedisCacheWriter redisCacheWriter=RedisCacheWriter.nonLockingRedisCacheWriter(redisConnectionFactory());
        RedisCacheManager redisCacheManager=new RedisCacheManager(redisCacheWriter,redisCacheConfiguration);
        return redisCacheManager;
    }

    @Bean
    public JdbcTemplate jdbcTemplate(){
        DriverManagerDataSource dataSource=new DriverManagerDataSource();
        dataSource.setDriverClassName("com.mysql.cj.jdbc.Driver");
        dataSource.setUsername("root");
        dataSource.setPassword("123");
        dataSource.setUrl("jdbc:mysql://localhost:3306/docker-test?serverTimezone=UTC");
        return new JdbcTemplate(dataSource);
    }
}
4.CacheService里面注入JdbcTemplate,写查询方法
@Service
public class CacheService {
    @Autowired
    private JdbcTemplate jdbcTemplate;

    @Cacheable(cacheNames = "person")
    public Person selectById(int id){
        System.out.println("缓存中如果没有,则执行此方法添加缓存");
        return jdbcTemplate.queryForObject("select * from person where id=?", new Object[]{id}, new RowMapper<Person>() {
            @Override
            public Person mapRow(ResultSet rs, int rowNum) throws SQLException {
                Person person=new Person();
                person.setName(rs.getString("name"));
                person.setAge(rs.getInt("age"));
                person.setId(rs.getInt("id"));
               return person;
            }
        });
    }
5.操作main方法
public class RedisServer {
    public static void main(String[] args) {
        AnnotationConfigApplicationContext applicationContext=new AnnotationConfigApplicationContext(AppConfig.class);
        StringRedisTemplate redisTemplate=applicationContext.getBean(StringRedisTemplate.class);
//        redisTemplate.opsForValue().set("name","test");

        CacheService cacheService=applicationContext.getBean(CacheService.class);
        for (int i=1;i<3;i++){
            System.out.println(cacheService.selectById(i).getName());
        }
    }
}
6.application.yml里面需要加入我们连接数据库的属性
spring:
  application:
    name: redis-server
  datasource:
    driver-class-name: com.mysql.cj.jdbc.Driver
    username: root
    password: 123
    url: jdbc:mysql://localhost:3306/docker-test?serverTimezone=UTC
  redis:
    host: 101.132.107.145
    port: 6379
7.所需的依赖
dependencies {
    implementation 'org.springframework.boot:spring-boot-starter-actuator'
    implementation 'org.springframework.boot:spring-boot-starter-web'
    implementation 'org.springframework.cloud:spring-cloud-starter'
    // implementation 'org.springframework.cloud:spring-cloud-starter-config'
    testImplementation 'org.springframework.boot:spring-boot-starter-test'
    implementation 'org.springframework.boot:spring-boot-starter-data-redis'
    compileOnly group: 'org.projectlombok', name: 'lombok'
    compile group: 'com.alibaba', name: 'fastjson', version: '1.2.58'
    implementation 'org.springframework.boot:spring-boot-starter-jdbc'
    runtimeOnly 'mysql:mysql-connector-java'
    compile group: 'org.mybatis.spring.boot', name: 'mybatis-spring-boot-starter', version: '2.0.1'

}
连接服务器进行操作redis
首先需要打开我们的redis容器客户端
docker exec -it 738d6038d618 redis-cli
进入redis内部进行操作数据库

完成!