版权声明:本文为博主原创文章,未经博主允许不得转载。 https://blog.csdn.net/RedKeyer/article/details/89512962
ListView既可以纵向也可以横向,是Flutter中非常重要的控件。以下只是进行了简单用法的演示,因为目前我的水平也仅是熟练使用。真的等到,可以分析源码的水平时,在进入深入补充。
一图顶千言,下图为后面代码运行效果。
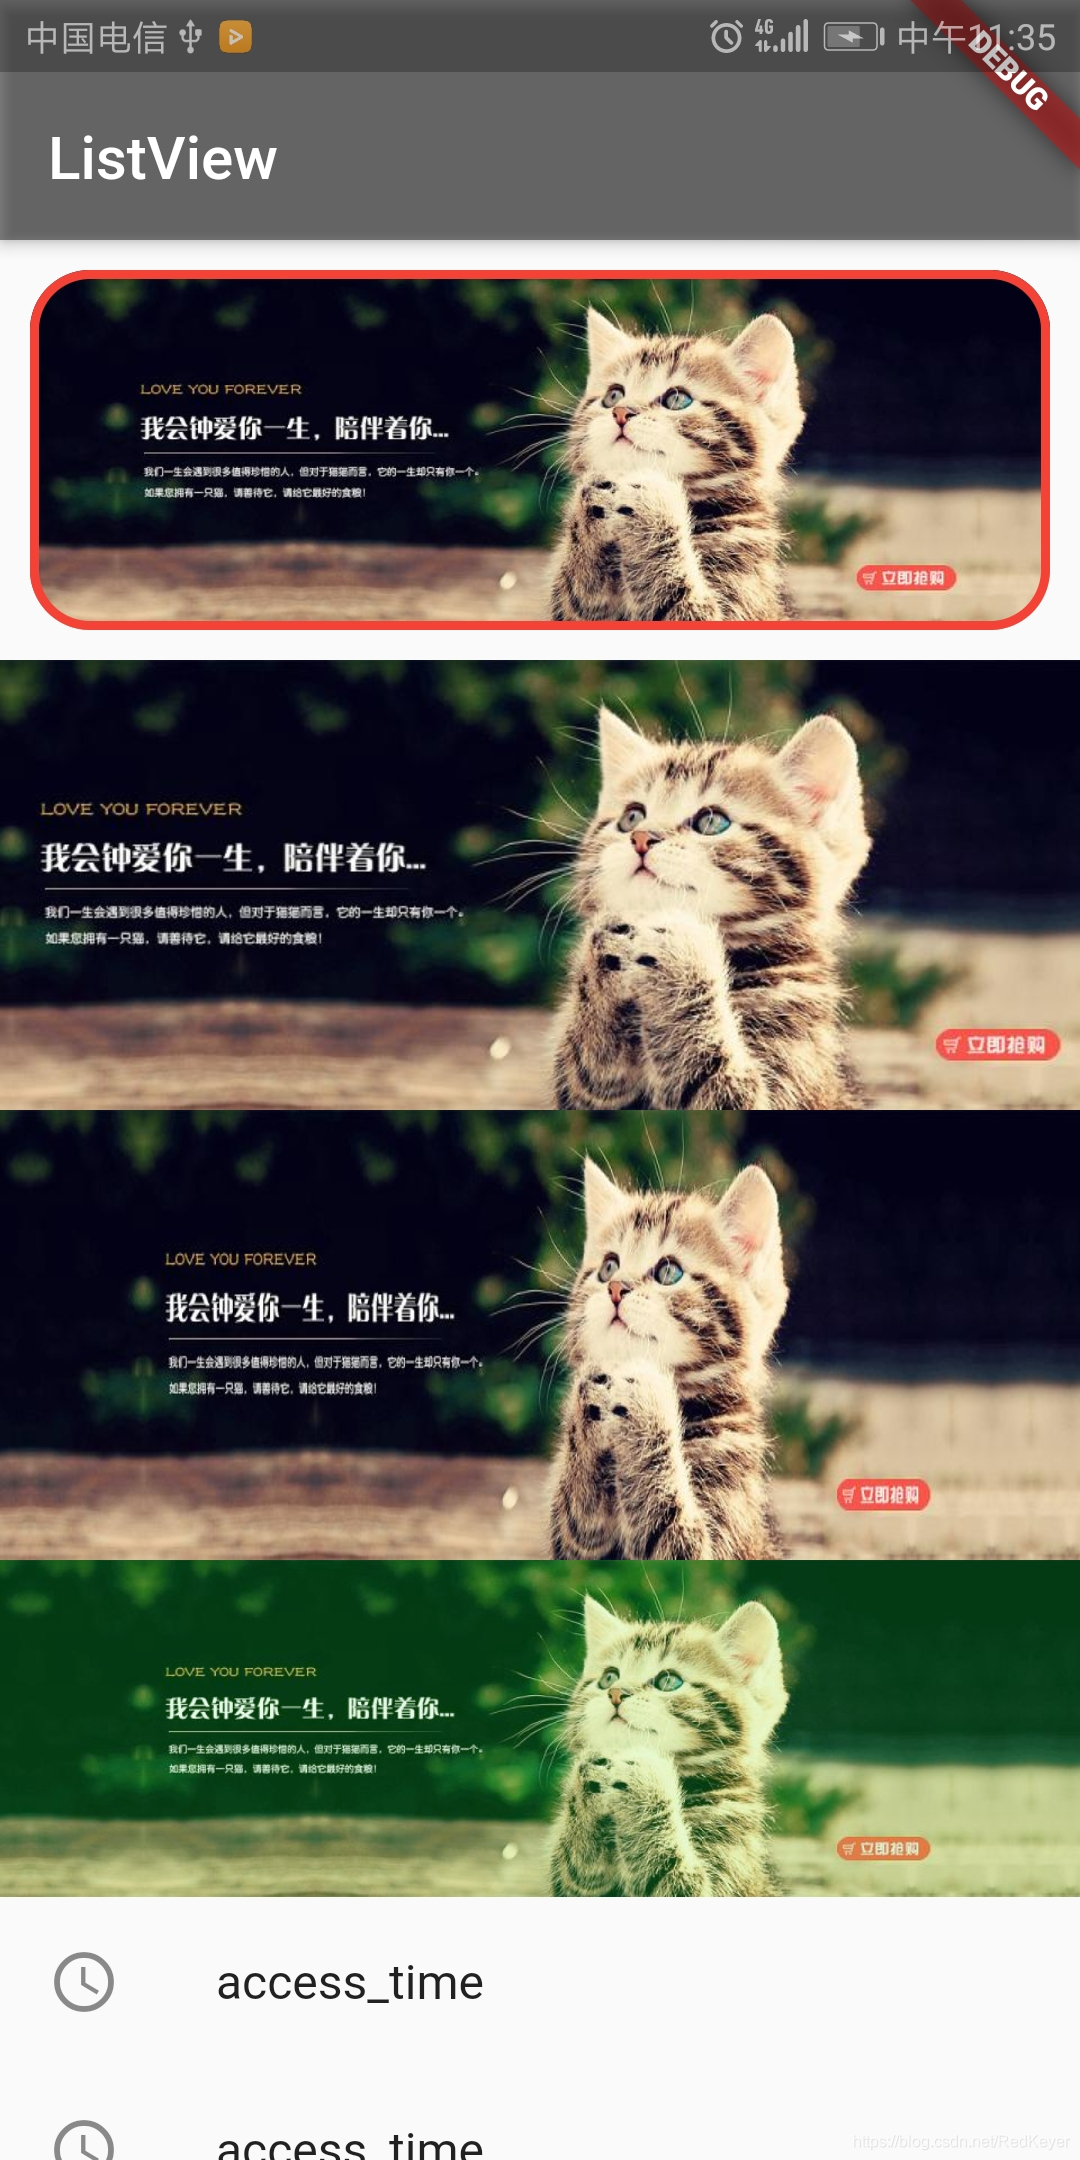
代码中ListView包含的条目有Container、Image、ListTile等,仅是为了基本用法,代码都是写死的。其中 Container 与 Image进行了组合运用。
import 'package:flutter/material.dart';

void main() => runApp(MyApp());

class MyApp extends StatelessWidget {
  @override
  Widget build(BuildContext context) {
    // TODO: implement build
    return MaterialApp(
      title: "ListViewShow",
      home: Scaffold(
        appBar: new AppBar(
            title: new Text("ListView"),
            backgroundColor: Colors.black45), // Bar 背景设置为灰色
        body: new ListView(
          //创建 ListView控件
          children: <Widget>[
            new Container(
              child: Container(
                height: 120, //Container高度
                // width: 200,  //ListView 为纵向的,所以这里的width 不生效,默认是屏幕宽度
                margin: EdgeInsets.all(10), //margin 与Android原生作用相同
                decoration: new BoxDecoration(
                  border:
                      Border.all(color: Colors.red, width: 3.0), //Container 外边框
                  borderRadius: new BorderRadius.all(
                      new Radius.circular(20.0)), //Container 倒角
                  image: new DecorationImage(
                      //有点类似与Container背景图片
                      image: new NetworkImage(
                          'https://ss0.bdstatic.com/70cFuHSh_Q1YnxGkpoWK1HF6hhy/it/u=1124031774,2733632602&fm=26&gp=0.jpg'),
                      fit: BoxFit.cover //指定图片填充方式
                      ),
                ),
              ),
            ),
            new Image.network(
                "https://ss0.bdstatic.com/70cFuHSh_Q1YnxGkpoWK1HF6hhy/it/u=1124031774,2733632602&fm=26&gp=0.jpg",
                height: 150,
                fit: BoxFit.cover //图片被裁剪
                ),
            new Image.network(
              "https://ss0.bdstatic.com/70cFuHSh_Q1YnxGkpoWK1HF6hhy/it/u=1124031774,2733632602&fm=26&gp=0.jpg",
              height: 150,
              fit: BoxFit.fill, //图片拉伸了
            ),
            new Image.network(
                "https://ss0.bdstatic.com/70cFuHSh_Q1YnxGkpoWK1HF6hhy/it/u=1124031774,2733632602&fm=26&gp=0.jpg",
                // 图片混合模式 color 和 colorBlendMode 一起使用,可以使图片偏向某种颜色或效果
                color: Color.fromARGB(100, 100, 200, 100),
                colorBlendMode: BlendMode.hardLight),

            //ListTile 简单条目
            new ListTile(
              leading: new Icon(Icons.access_time),
              title: new Text("access_time"),
            ),
            new ListTile(
              leading: new Icon(Icons.access_time),
              title: new Text("access_time"),
            ),
            new ListTile(
              leading: new Icon(Icons.access_time),
              title: new Text("access_time"),
            ),
          ],
        ),
      ),
    );
  }
}
ListView简单的动态赋值
以下演示ListTile,对其进行动态赋值。
import 'package:flutter/material.dart';

void main() => runApp(MyApp(
  items: new List<String>.generate(100, (i)=>"Item $i")  //new  List<String> 命名为items, 并且赋值 "Item $i"
));

class MyApp extends StatelessWidget {
  final List<String> items;
  MyApp({Key key,@required this.items}):super(key:key);

  @override
  Widget build(BuildContext context) {
    // TODO: implement build
    return MaterialApp(
      title:"List",
      home: Scaffold(
        appBar: new AppBar(title: new Text("List data"),),
        body: new ListView.builder(
          itemCount: items.length,  //item 的数量
          itemBuilder: (context,index){
            return new ListTile(
              leading: new Icon(Icons.access_time), //随意放了一张图片
              title: new Text("${items[index]}"));  // 展示List对应index的内容
          },
        ),
      ),
    );
  }
}
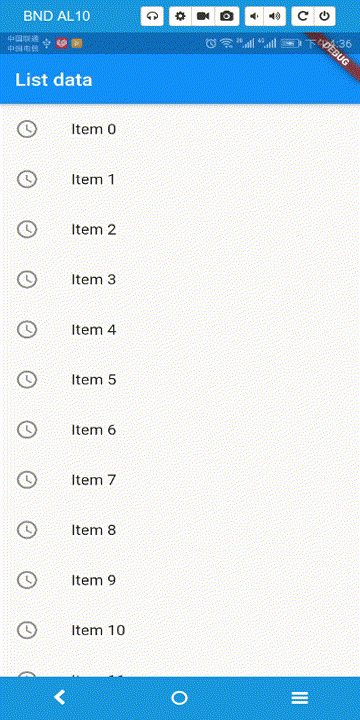
展示效果图: