前言:
在实际的生产环境当中,每分每秒都会有客户在访问我们的nginx服务器。这样,我们就不能直接reload重新加载配置,否则会影响客户的访问,甚至导致Nginx服务器崩溃,影响用户体验!这就需要发送信号来平滑升级。
一、Nginx的平滑升级及回退
当前服务器中正在运行Nginx服务,现想将当前运行的Nginx服务的版本经行升级,(从1.15.8升级到1.6.0,版本的跨度不要太大,容易造成服务的崩溃),且在服务不停止的前提下经行升级。
基本思想:
- 1、 在不停掉老进程的情况下,启动新进程。
- 2、 老进程负责处理仍然没有处理完的请求,但不再接受处理请求。
- 3、 新进程接受新请求。
- 4、 老进程处理完所有请求,关闭所有连接后,停止
1、首先需要两个不同版本的Nginx安装包
[root@server1 ~]# ls
nginx-1.15.8.tar.gz nginx-1.16.0.tar.gz
2、先安装nginx-1.15.8
1、解压缩安装包
[root@server1 ~]# tar zxf nginx-1.15.8.tar.gz
[root@server1 ~]# ls
nginx-1.15.8.tar.gz nginx-1.16.0.tar.gz
2、关闭debug日志
[root@server1 ~]# cd nginx-1.15.8
[root@server1 nginx-1.15.8]# vim auto/cc/gcc
171 # debug
172 #CFLAGS="$CFLAGS -g"

3、下载编译nginx时需要的依赖包
[root@server1 nginx-1.15.8]# yum install pcre-devel zlib-devel gcc -y
4、测试存在特性
[root@server1 nginx-1.15.8]# ./configure --prefix=/usr/local/nginx --with-file-aio

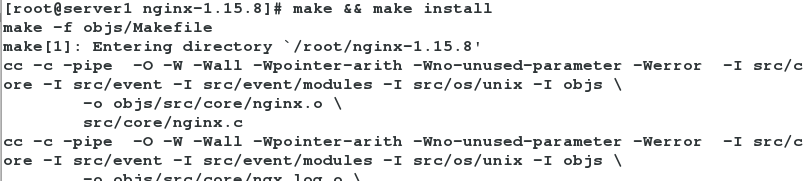
5、编译安装
[root@server1 nginx-1.15.8]# make && make install
6、给配置文件添加高亮(不是必须要做,可以方便我们书写配置文件)
[root@server1 ~]# mkdir .vim
[root@server1 ~]# cp -r nginx-1.15.8/contrib/vim/* .vim/
此时再打开配置文件,就会高亮显示。
[root@server1 ~]# vim /usr/local/nginx/conf/nginx.conf

3、修改配置文件、启动nginx-1.15.8
[root@server1 sbin]# pwd
/usr/local/nginx/sbin
[root@server1 sbin]# ./nginx -t			#查看nginx配置文件是否正确
nginx: the configuration file /usr/local/nginx/conf/nginx.conf syntax is ok
nginx: configuration file /usr/local/nginx/conf/nginx.conf test is successful
[root@server1 sbin]# ./nginx -V			#查看nginx的版本及测试特性时所加的参数
nginx version: nginx/1.15.8
built by gcc 4.8.5 20150623 (Red Hat 4.8.5-11) (GCC)
configure arguments: --prefix=/usr/local/nginx --with-file-aio
[root@server1 sbin]# useradd nginx

[root@server1 sbin]# vim ../conf/nginx.conf
  1
  2 user  nginx nginx;
  3 worker_processes  2;				#设置产生两个worker进程来处理客户请求
  4
  5 #error_log  logs/error.log;
  6 #error_log  logs/error.log  notice;
  7 #error_log  logs/error.log  info;
  8
  9 #pid        logs/nginx.pid;
 10
 11
 12 events {
 13     worker_connections  65535;		#更改最大连接数
 14 }
修改linux资源限制配置文件:
[root@server1 sbin]# vim /etc/security/limits.conf
 61 # End of file
 62 nginx   -       nofile  65535

启动nginx:
[root@server1 sbin]# ./nginx
4、将nginx-1.15.8平滑升级为nginx-1.16.0

1、解压缩
[root@server1 ~]# tar zxf nginx-1.16.0.tar.gz
[root@server1 ~]# ls
nginx-1.15.8  nginx-1.15.8.tar.gz  nginx-1.16.0  nginx-1.16.0.tar.gz
2、测试存在特性、编译
[root@server1 nginx-1.16.0]# pwd
/root/nginx-1.16.0
[root@server1 nginx-1.16.0]# /usr/local/nginx/sbin/nginx -V
nginx version: nginx/1.15.8
built by gcc 4.8.5 20150623 (Red Hat 4.8.5-11) (GCC)
configure arguments: --prefix=/usr/local/nginx --with-file-aio
[root@server1 nginx-1.16.0]# ./configure --prefix=/usr/local/nginx --with-file-aio
[root@server1 nginx-1.16.0]# make				##切忌不能make install负责会覆盖老版本的所有相关文件
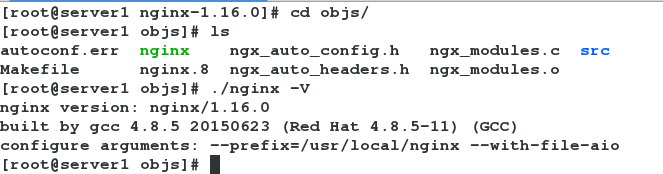
3、查看新版本的二进制执行文件版本
[root@server1 nginx-1.16.0]# cd objs/
[root@server1 objs]# ls
autoconf.err  nginx    ngx_auto_config.h   ngx_modules.c  src
Makefile      nginx.8  ngx_auto_headers.h  ngx_modules.o
[root@server1 objs]# ./nginx -V
nginx version: nginx/1.16.0
built by gcc 4.8.5 20150623 (Red Hat 4.8.5-11) (GCC)
configure arguments: --prefix=/usr/local/nginx --with-file-aio
4、备份老版本的二进制可执行文件,可以防止升级失败无法版本回退。
[root@server1 objs]# pwd
/root/nginx-1.16.0/objs
[root@server1 objs]# cd /usr/local/nginx/sbin/
[root@server1 sbin]# ./nginx -V
nginx version: nginx/1.15.8
built by gcc 4.8.5 20150623 (Red Hat 4.8.5-11) (GCC)
configure arguments: --prefix=/usr/local/nginx --with-file-aio
[root@server1 sbin]# cp nginx nginx.old
[root@server1 sbin]# ls
nginx  nginx.old

5、将新版本的脚本复制到旧版本的脚本目录下
[root@server1 sbin]# cd -
/root/nginx-1.16.0/objs
[root@server1 objs]# cp -f nginx /usr/local/nginx/sbin/
cp: overwrite ‘/usr/local/nginx/sbin/nginx’? y

此时/usr/local/nginx/sbin/目录下的nginx为新版本的执行文件,nginx.old为旧版本的二进制执行文件
6、平滑升级
查看到此时nginx的master线程和两个worker进程:
[root@server1 objs]# ps -ef | grep nginx
root      5115     1  0 19:19 ?        00:00:00 nginx: master process ./nginx
nginx     5116  5115  0 19:19 ?        00:00:00 nginx: worker process
nginx     5117  5115  0 19:19 ?        00:00:00 nginx: worker process
root      7680  2119  0 19:53 pts/0    00:00:00 grep --color=auto nginx
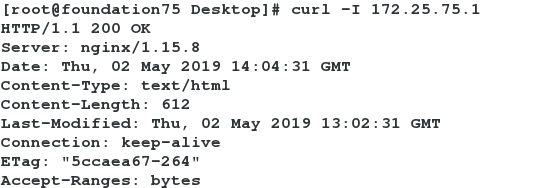
客户端查看此时生效的nginx服务器:
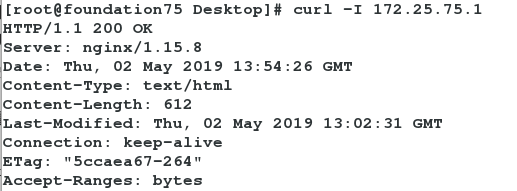
此时为nginx-1.15.8生效!!!
Nginx信号简介
主进程支持的信号
TERM, INT: 立刻退出
QUIT: 等待工作进程结束后再退出
KILL: 强制终止进程
HUP: 重新加载配置文件,使用新的配置启动工作进程,并逐步关闭旧进程。
USR1: 重新打开日志文件
USR2: 启动新的主进程,实现热升级
WINCH: 逐步关闭工作进程
工作进程支持的信号
TERM, INT: 立刻退出
QUIT: 等待请求处理结束后再退出
USR1: 重新打开日志文件
1、 在不停掉老进程的情况下,启动新进程。

注意:此时5115为旧版本的master进程,5116,5117为旧版本接收用户请求的worker进程!!!
[root@server1 objs]# ps -ef | grep nginx
root      5115     1  0 19:19 ?        00:00:00 nginx: master process ./nginx
nginx     5116  5115  0 19:19 ?        00:00:00 nginx: worker process
nginx     5117  5115  0 19:19 ?        00:00:00 nginx: worker process
root      7680  2119  0 19:53 pts/0    00:00:00 grep --color=auto nginx
[root@server1 objs]# kill -USR2 5115		#5115master进程的两个工作进程不再接收新的请求,只处理当前的请求。同时打开新版本的nginx的master进程,和它的两个工作进程,处理新的用户请求
[root@server1 objs]# ps -ef | grep nginx
root      5115     1  0 19:19 ?        00:00:00 nginx: master process ./nginx
nginx     5116  5115  0 19:19 ?        00:00:00 nginx: worker process
nginx     5117  5115  0 19:19 ?        00:00:00 nginx: worker process
root      7681  5115  0 19:59 ?        00:00:00 nginx: master process ./nginx
nginx     7682  7681  0 19:59 ?        00:00:00 nginx: worker process
nginx     7683  7681  0 19:59 ?        00:00:00 nginx: worker process
root      7685  2119  0 19:59 pts/0    00:00:00 grep --color=auto nginx
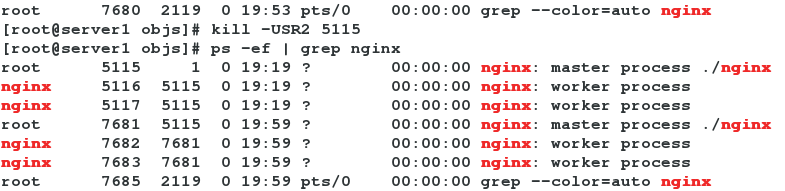
注意:此时的7681为新版本的master进程,7682,7683为新版本的两个worker进程,用于处理新的用户请求。而5116,5117为旧版本的两个worker进程处理当前正在处理的用户请求,不再接收新的用户请求
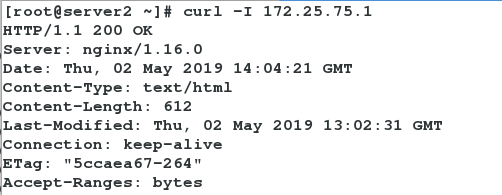
我们新的虚拟机访问,正在处理的新版本的nginx服务器,之前访问过的主机访问仍是旧版本的nginx服务器,这样不会影响用户体验!
2、 老进程处理完所有请求,关闭所有连接后,停止
[root@server1 objs]# ps -ef | grep nginx
root      5115     1  0 19:19 ?        00:00:00 nginx: master process ./nginx
nginx     5116  5115  0 19:19 ?        00:00:00 nginx: worker process
nginx     5117  5115  0 19:19 ?        00:00:00 nginx: worker process
root      7681  5115  0 19:59 ?        00:00:00 nginx: master process ./nginx
nginx     7682  7681  0 19:59 ?        00:00:00 nginx: worker process
nginx     7683  7681  0 19:59 ?        00:00:00 nginx: worker process
root      7700  2119  0 20:09 pts/0    00:00:00 grep --color=auto nginx
[root@server1 objs]# kill -WINCH 5115		#关闭旧版本master进程的两个worker进程
[root@server1 objs]# ps -ef | grep nginx
root      5115     1  0 19:19 ?        00:00:00 nginx: master process ./nginx
root      7681  5115  0 19:59 ?        00:00:00 nginx: master process ./nginx
nginx     7682  7681  0 19:59 ?        00:00:00 nginx: worker process
nginx     7683  7681  0 19:59 ?        00:00:00 nginx: worker process
root      7702  2119  0 20:09 pts/0    00:00:00 grep --color=auto nginx


kill -WINCH 只会杀掉旧版本master进程的两个worker进程,不会杀掉master进程。等更新完毕后,可以杀死旧版本的master进程,则平滑升级完毕!!!
5、版本回退
我们再实际生产环境当中,如果升级失败,则需要再第一时间,版本回退!!!
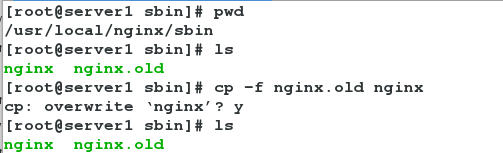
1、将备份好的旧版本的脚本还原
[root@server1 sbin]# pwd
/usr/local/nginx/sbin
[root@server1 sbin]# ls
nginx  nginx.old
[root@server1 sbin]# cp -f nginx.old nginx
cp: overwrite ‘nginx’? y
[root@server1 sbin]# ls
nginx  nginx.old
2、唤醒旧版本的master进程,使之产生新的worker进程
[root@server1 sbin]# ps -ef | grep nginx
root      5115     1  0 19:19 ?        00:00:00 nginx: master process ./nginx
root      7681  5115  0 19:59 ?        00:00:00 nginx: master process ./nginx
nginx     7682  7681  0 19:59 ?        00:00:00 nginx: worker process
nginx     7683  7681  0 19:59 ?        00:00:00 nginx: worker process
root      7711  2119  0 20:21 pts/0    00:00:00 grep --color=auto nginx
[root@server1 sbin]# kill -HUP 5115		#唤醒旧版本的master进程,使之产生新的worker进程
[root@server1 sbin]# ps -ef | grep nginx
root      5115     1  0 19:19 ?        00:00:00 nginx: master process ./nginx
root      7681  5115  0 19:59 ?        00:00:00 nginx: master process ./nginx
nginx     7682  7681  0 19:59 ?        00:00:00 nginx: worker process
nginx     7683  7681  0 19:59 ?        00:00:00 nginx: worker process
nginx     7712  5115  0 20:21 ?        00:00:00 nginx: worker process
nginx     7713  5115  0 20:21 ?        00:00:00 nginx: worker process
root      7715  2119  0 20:21 pts/0    00:00:00 grep --color=auto nginx

3、使回退版本的worker进程接收新的用户请求。同时新版本的master进程的worker进程不再接收新的用户请求,只处理当前的用户请求
[root@server1 sbin]# ps -ef | grep nginx
root      5115     1  0 19:19 ?        00:00:00 nginx: master process ./nginx
root      7681  5115  0 19:59 ?        00:00:00 nginx: master process ./nginx
nginx     7682  7681  0 19:59 ?        00:00:00 nginx: worker process
nginx     7683  7681  0 19:59 ?        00:00:00 nginx: worker process
nginx     7712  5115  0 20:21 ?        00:00:00 nginx: worker process
nginx     7713  5115  0 20:21 ?        00:00:00 nginx: worker process
root      7717  2119  0 20:24 pts/0    00:00:00 grep --color=auto nginx
[root@server1 sbin]# kill -USR2 7681
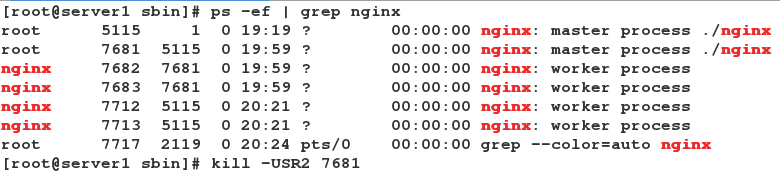
4、关闭新版本master进程的两个worker进程
[root@server1 sbin]# ps -ef | grep nginx
root      5115     1  0 19:19 ?        00:00:00 nginx: master process ./nginx
root      7681  5115  0 19:59 ?        00:00:00 nginx: master process ./nginx
nginx     7682  7681  0 19:59 ?        00:00:00 nginx: worker process
nginx     7683  7681  0 19:59 ?        00:00:00 nginx: worker process
nginx     7712  5115  0 20:21 ?        00:00:00 nginx: worker process
nginx     7713  5115  0 20:21 ?        00:00:00 nginx: worker process
root      7719  2119  0 20:26 pts/0    00:00:00 grep --color=auto nginx
[root@server1 sbin]# kill -WINCH 7681
[root@server1 sbin]# ps -ef | grep nginx
root      5115     1  0 19:19 ?        00:00:00 nginx: master process ./nginx
root      7681  5115  0 19:59 ?        00:00:00 nginx: master process ./nginx
nginx     7712  5115  0 20:21 ?        00:00:00 nginx: worker process
nginx     7713  5115  0 20:21 ?        00:00:00 nginx: worker process
root      7721  2119  0 20:26 pts/0    00:00:00 grep --color=auto nginx


现在正在工作的为旧版本的nginx服务!!!杀掉新版本的master进程后,则版本回退完毕!!!
二、nginx日志切割
我们再日常的生产环境当中,日志文件的大小可能高达几个G,这对我们的管理造成很大的不变。我们需要日志切割将每天的日志定期备份,并且新的日志产生再新的日志文件,方便日志的管理。
这就是日志切割!!!
1、创建每天日志切割后存放目录
[root@server1 logs]# pwd
/usr/local/nginx/logs
[root@server1 logs]# mkdir oldlogs
[root@server1 logs]# ls
access.log  error.log  nginx.pid  nginx.pid.oldbin  oldlogs
2、编写日志切割脚本
[root@server1 logs]# vim /usr/local/nginx/logs/backup.sh
#!/bin/bash

LOG_PATH=/usr/local/nginx/logs/oldlogs		##定义切割日志后存放的路径变量
CUR_LOG_PATH=/usr/local/nginx/logs			##定义nginx日志存放的路径变量
YESTERDAY=$(date +%F -d -1day)				##定义昨天的日期变量

mv $CUR_LOG_PATH/access.log $LOG_PATH/${YESTERDAY}_access.log	##将昨天的access日志文件移动到切割目录,并且重命名
mv $CUR_LOG_PATH/error.log $LOG_PATH/${YESTERDAY}_error.log   	##将昨天的error日志文件移动到切割目录,并且重命名

kill -USR1 $(cat /usr/local/nginx/logs/nginx.pid)			##告诉nginx产生新的日志文件,用来存放日志

3、制作定时任务,定时nginx日志切割
[root@server1 logs]# crontab -e
no crontab for root - using an empty one
crontab: installing new crontab
[root@server1 logs]# crontab -l
0 0 * * * /bin/bash /usr/local/nginx/logs/backup.sh		#每天的00:00进行日志切割

这样我们日志切割的定时任务就部署好啦!!!