● 问题
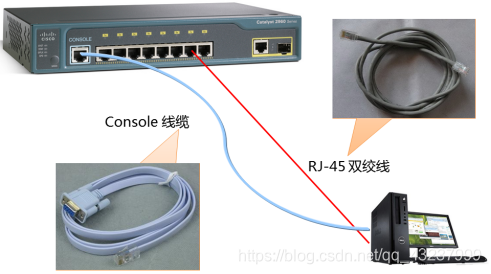
对于思科交换机来说,主要有2种配置途径:其一,使用交换机自带的Console线缆连接到计算机的COM口,然后利用计算机的超级终端软件直接配置,首次配置通常使用这种方式;其二,通过telnet方式远程访问、配置交换机,这种方式要求此交换机已配置有IP地址且已接入计算机网络,后续课程会学习此访问方式。
● 通过超级终端访问交换机
● 交换机工作模式的进入与退出
● 修改交换机主机名
● 查看交换机配置信息
● 交换机密码配置
● 方案
真实设备环境
本例中的配置练习可采用思科模拟器 —— Cisco Packet Tracer 6.0来实现。
1)安装Packet Tracer 6.2
双击安装包执行默认安装,然后将中文语言文件Chinese.ptl解压到安装目录下的多语言文件夹,比如C:\Program Files (x86)\Cisco Packet Tracer 6.0\languages。
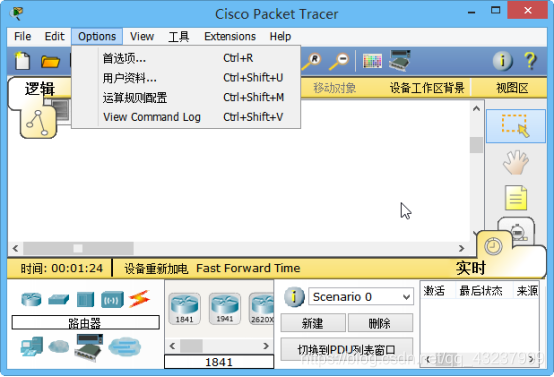
双击桌面的Cisco Packet Tracer快捷方式以启动程序,打开菜单“Options”–>“Preferences”–>切换到“Interface”选项卡–>选择下方的Chinese.ptl–>单击右下角“Change Language”按钮,弹出提示时单击“OK”。

关闭当前Packet Tracer程序,然后再重新启动此程序,可发现已经变成中文语言界面了(当前汉化的还不完整)。
2)建立实验网络拓扑
在Packet Tracer程序主窗口中,添加一台Cisco 2960交换机、一台普通PC机,并添加Console连接、直通网线连接,确认完毕后将当前拓扑结构保存为c2960-pc.pkt文件。

其中,连接细节如下:
交换机的Console口 <–> PC机的RS 232串口。
交换机的FastEthernet0/24接口 <–> PC机的FastEthernet0网卡。
● 步骤
实现此案例需要按照如下步骤进行。
步骤一:通过超级终端访问交换机
1)配置并打开超级终端
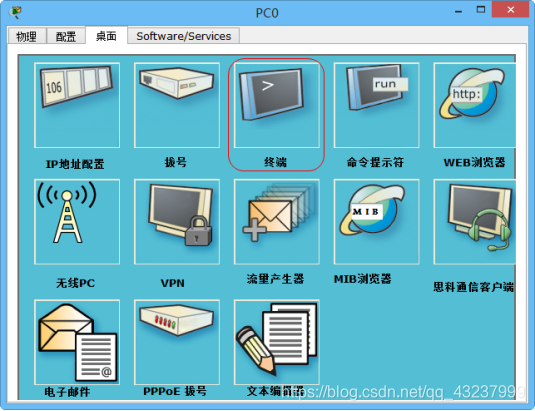
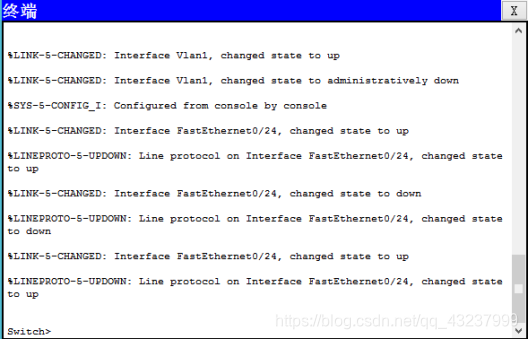
在此前建立的Packet Tracer实验拓扑环境中,单击PC机以打开此设备,确认电源已启动(机箱示意图上的指示灯为黄绿色),切换到“桌面选项卡”,找到其中的“终端”并单击打开。
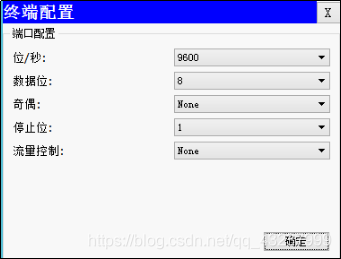
在弹出的终端配置窗口中,单击“确定”以接受默认值。
接下来就可以看到“终端”窗口了,其中显示了通过Console线连接的交换机初始化信息,回车后可进入交换机的“Switch>”配置系统。
提示:在Packet Tracer环境中,可直接单击交换机图标,然后切换到“命令行”选项卡,也可以进入IOS配置环境。
步骤二:交换机工作模式的进入与退出
1)交换机工作模式的进入如下:
Switch>enable   //切换为特权模式
Switch# configure terminal  	//进入全局配置模式
Enter configuration commands, one per line.  End with CNTL/Z.
Switch(config)#interface fastEthernet 0/1      //进入接口模式
Switch(config-if)#
2)交换机工作模式的退出下:
Switch(config-if)#exit                           //接口模式退到全局配置模式
Switch(config)#exit                              //全局配置模式退到特权模式
Switch#exit                                       //特权模式退到用户模式
Switch>
步骤三:修改交换机主机名
进入全局配置模式后,使用hostname指令可以为交换机设置主机名。例如,以下操作可以将主机名设置为sw1:
Switch(config)# hostname sw1 					//配置主机名
sw1(config)#
步骤四:查看交换机配置信息
查看交换机当前的运行配置:
查看交换机当前的运行配置(或write terminal):
sw1# show running-config  				//查看当前的运行配置
Building configuration...

Current configuration : 1052 bytes
!
version 12.2
no service timestamps log datetime msec
no service timestamps debug datetime msec
no service password-encryption
!
hostname sw1  						//已配置主机名
!
!
!
!
spanning-tree mode pvst
!
interface FastEthernet0/1
!
interface FastEthernet0/2
!
interface FastEthernet0/3
!
interface FastEthernet0/4
!
interface FastEthernet0/5
!
interface FastEthernet0/6
!
interface FastEthernet0/7
!
interface FastEthernet0/8
!
interface FastEthernet0/9
!
interface FastEthernet0/10
!
interface FastEthernet0/11
!
interface FastEthernet0/12
!
interface FastEthernet0/13
!
interface FastEthernet0/14
!
interface FastEthernet0/15
!
interface FastEthernet0/16
!
interface FastEthernet0/17
!
interface FastEthernet0/18
!
interface FastEthernet0/19
!
interface FastEthernet0/20
!
interface FastEthernet0/21
!
interface FastEthernet0/22
!
interface FastEthernet0/23
!
interface FastEthernet0/24
!
interface GigabitEthernet1/1
!
interface GigabitEthernet1/2
!
interface Vlan1
 no ip address
 shutdown
!
!
line con 0
!
line vty 0 4
 login
line vty 5 15
 login
!
!
end
sw1#
步骤五:交换机密码配置
1)设置特权模式口令
包括两种典型的方法(任选其一):
方法1(明文):enable password 密码字串
方法2(加密):enable secret 密码字串
比如,以下操作将明文口令设为cisco、加密口令设置为cisco2960:
sw2960(config)# enable password cisco
sw2960(config)# enable secret cisco2960
返回全局配置模式,查看运行配置可观察两种口令设置的差异:
sw2960(config)# end  	//返回特权模式
sw2960#
%SYS-5-CONFIG_I: Configured from console by console

sw2960# show running-config 	//查看当前的运行配置
.. ..
!
hostname sw2960
!
enable secret 5 $1$mERr$pUBB1obEqpmMUtC1rBieD1 		//加密口令设置
enable password cisco 	//非加密的口令设置
!
!
.. ..
执行disable切换到用户模式,再执行enable切换到特权模式,此时会要求输入正确的口令才允许进入(如果明文/密文口令都设置了,则密文口令起作用):
sw2960> enable
Password: 	//尝试明文口令cisco无效
Password:    //输入密文口令cisco2960验证成功
sw2960#
2)设置console口令
以下操作配置交换机console口令
Sw2960(config)#line console 0
Sw2960(config-line)#password 123     //设置consol口令
Sw2960(config-line)#login
切换到用户模式,提示输入conslole口令才能再次进入到用户模式:
Sw2960(config-line)#end
Sw2960#
%SYS-5-CONFIG_I: Configured from console by console
Sw2960#exit
Sw2960 con0 is now available
Press RETURN to get started.
User Access Verification
Password: