一、SpringCloud OAuth2认证服务搭建
二、SpringCloud OAuth2资源服务搭建
三、SpringCloud OAuth2模拟第三方服务
文章目录
一. 创建MAVEN项目完成认证服务配置
1.pom中依赖如下:
<?xml version="1.0" encoding="UTF-8"?>
<project xmlns="http://maven.apache.org/POM/4.0.0"
         xmlns:xsi="http://www.w3.org/2001/XMLSchema-instance"
         xsi:schemaLocation="http://maven.apache.org/POM/4.0.0 http://maven.apache.org/xsd/maven-4.0.0.xsd">
    <parent>
        <groupId>org.springframework.boot</groupId>
        <artifactId>spring-boot-starter-parent</artifactId>
        <version>2.1.4.RELEASE</version>
        <relativePath/> <!-- lookup parent from repository -->
    </parent>

    <modelVersion>4.0.0</modelVersion>

    <artifactId>springcloud-auth-server</artifactId>

    <dependencies>
        <dependency>
            <groupId>org.springframework.boot</groupId>
            <artifactId>spring-boot-starter-web</artifactId>
            <exclusions>
                <!--排除tomcat依赖-->
                <exclusion>
                    <artifactId>spring-boot-starter-tomcat</artifactId>
                    <groupId>org.springframework.boot</groupId>
                </exclusion>
            </exclusions>
        </dependency>
        <!--undertow容器-->
        <dependency>
            <groupId>org.springframework.boot</groupId>
            <artifactId>spring-boot-starter-undertow</artifactId>
        </dependency>
        <!--spring security 、oauth、jwt依赖-->
        <dependency>
            <groupId>org.springframework.cloud</groupId>
            <artifactId>spring-cloud-starter-oauth2</artifactId>
            <version>2.1.2.RELEASE</version>
        </dependency>
    </dependencies>

</project>
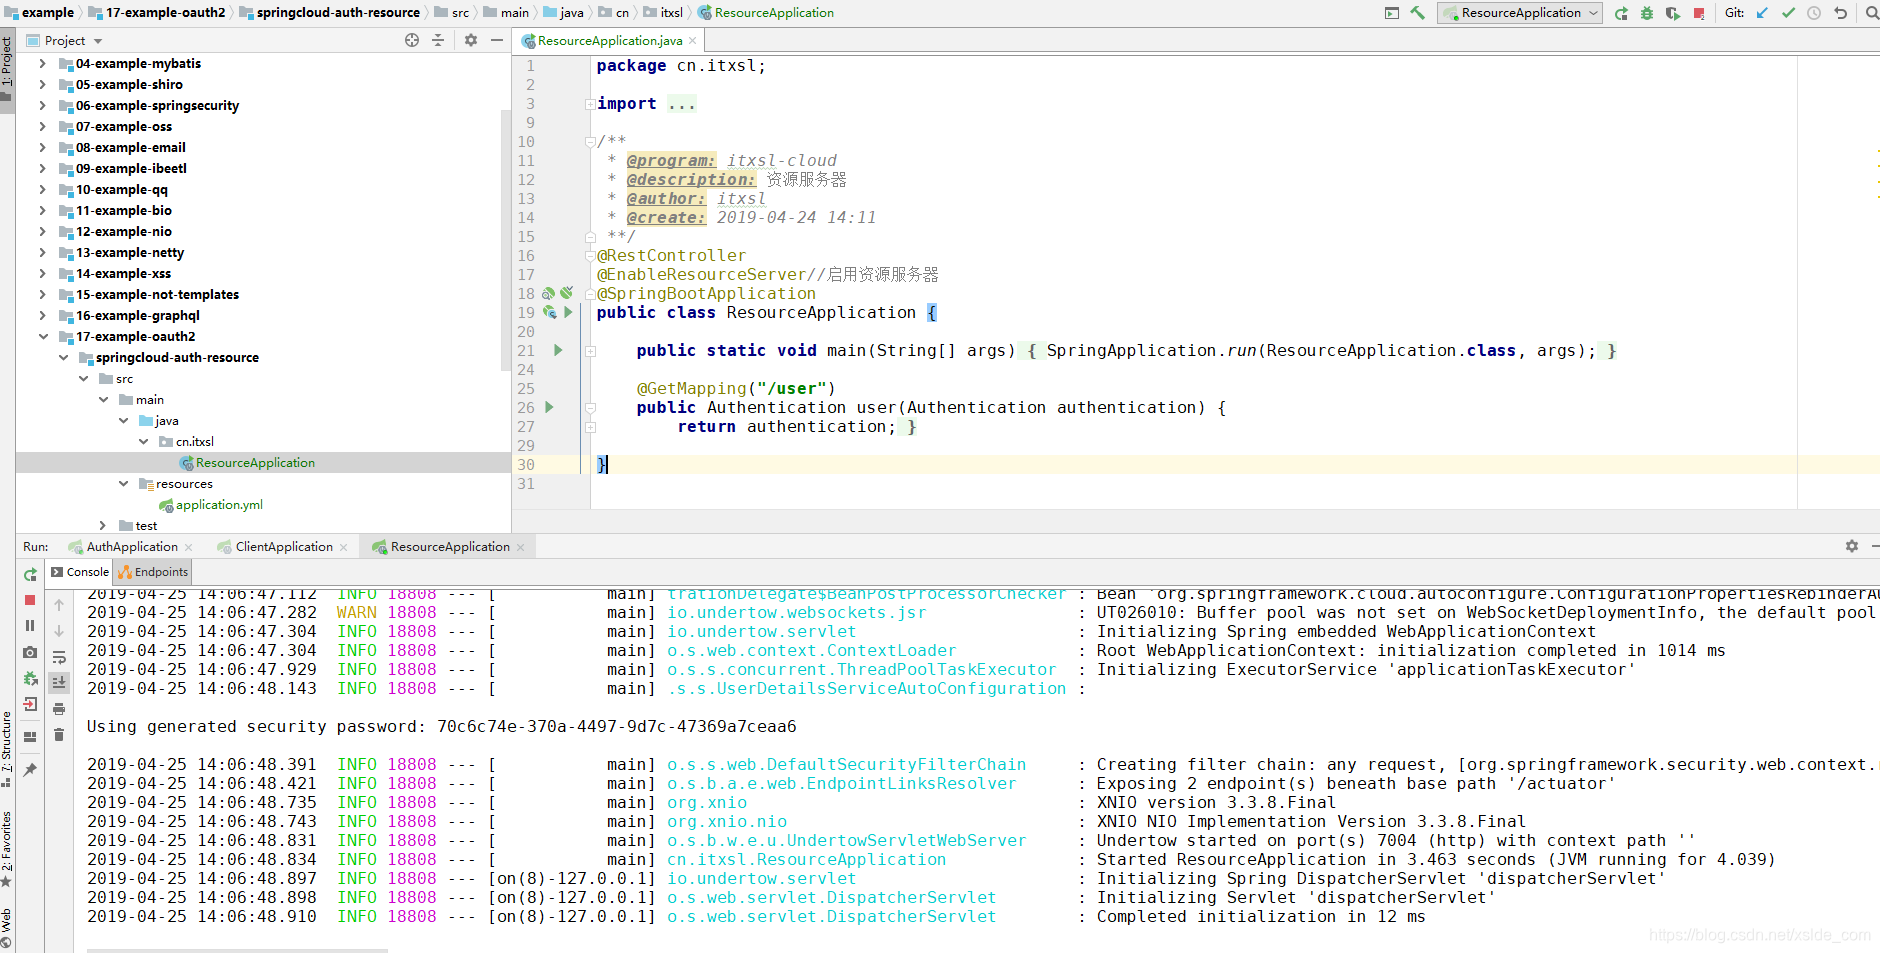
2.创建项目入口类及启用资源服务器:
package cn.itxsl;

import org.springframework.boot.SpringApplication;
import org.springframework.boot.autoconfigure.SpringBootApplication;
import org.springframework.security.core.Authentication;
import org.springframework.security.oauth2.config.annotation.web.configuration.EnableResourceServer;
import org.springframework.web.bind.annotation.GetMapping;
import org.springframework.web.bind.annotation.RestController;

/**
 * @program: itxsl-cloud
 * @description: 资源服务器
 * @author: itxsl
 * @create: 2019-04-24 14:11
 **/
@RestController
@EnableResourceServer//启用资源服务器
@SpringBootApplication
public class ResourceApplication {

    public static void main(String[] args) {
        SpringApplication.run(ResourceApplication.class, args);
    }

    @GetMapping("/user")
    public Authentication user(Authentication authentication) {
        return authentication;
    }

}
3.创建application.yml配置文件:
auth-server: http://127.0.0.1:7002/ # 认证服务器地址
server:
  port: 7004
security:
  oauth2:
    client:
      client-id: itxsl
      client-secret: itxsl
    resource:
      token-info-uri: ${auth-server}/oauth/check_token
      userInfoUri: http://localhost:7002/user
二.测试并启动资源服务器
1.启动资源服务器:
2.使用postman测试资源服务器:
获取用户信息:http://localhost:7004/user
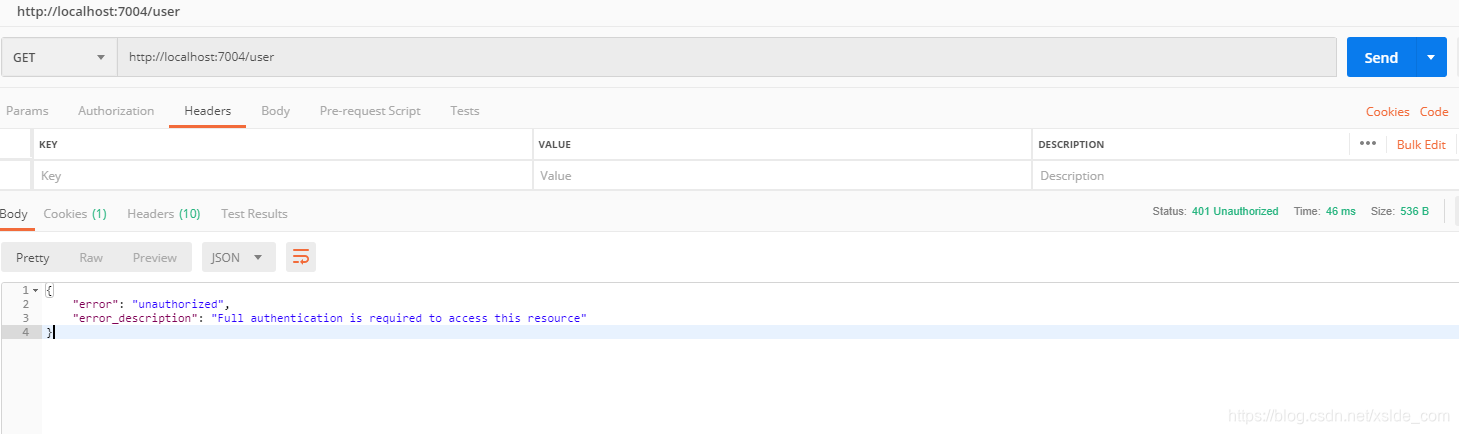
提示没有权限。
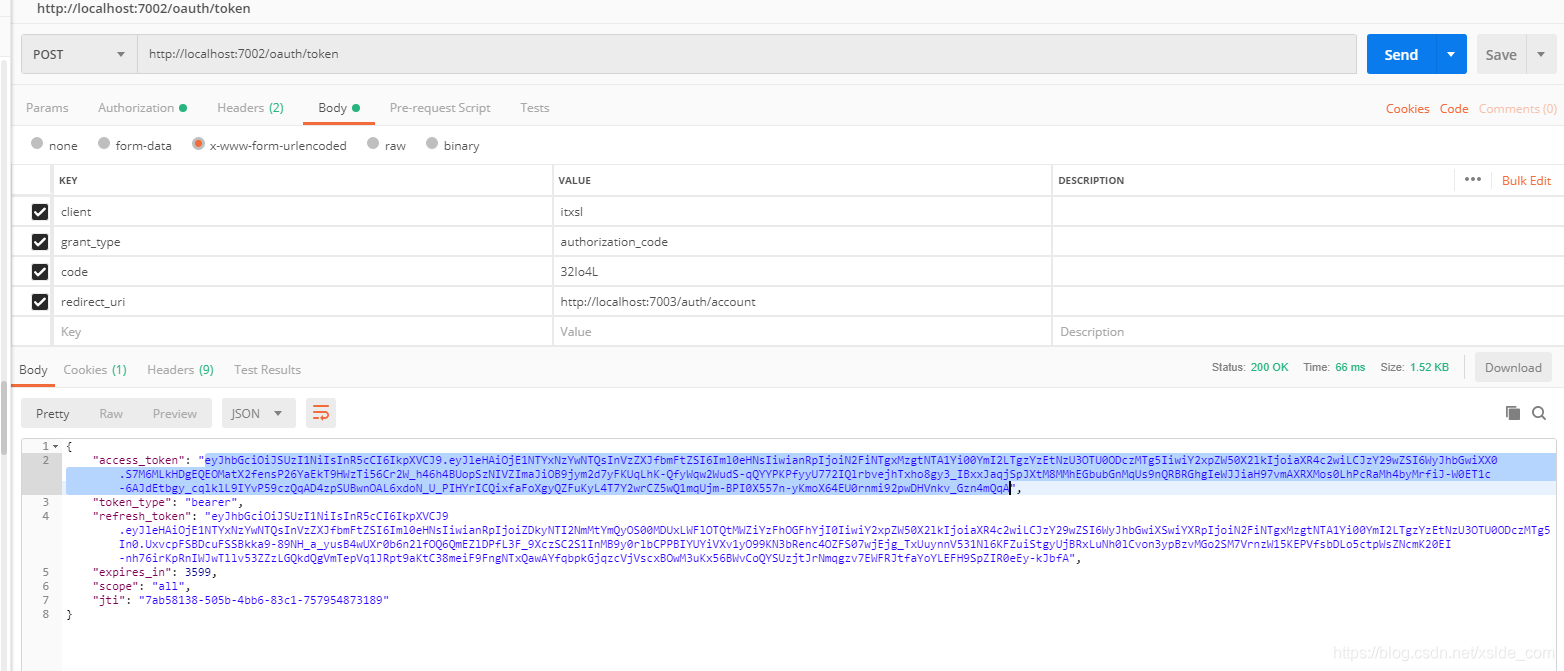
3.使用postman通过认证服务器获取access_token:
4.使用postman从资源服务器中获取用户信息:

到此资源服务器搭建成功!
源码地址: 源码